In this article we look at “Exposure”. We also tie together the three key Digital Camera Variables: ISO, Shutter Speed, and Aperture, and discuss how to set these up to get good exposures in Camera Manual Mode.
When these three variables are optimised and unified together, we get a nice clear picture with great contrast and highlights. We say that the photo is correctly “Exposed”.
It is essential that you have been through the following previous articles, before reading through this “How To Do Exposure” article.
Here are the links to this essential background reading:
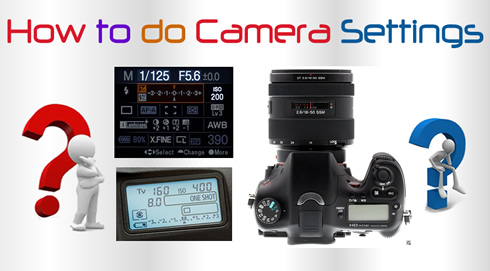
How To Do Camera Settings
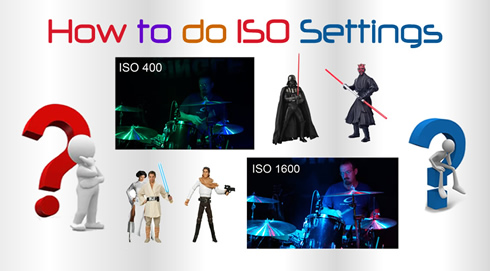
How To Do ISO Settings
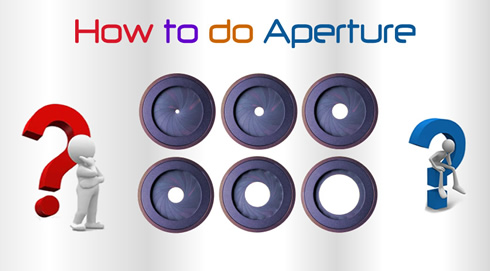
How To Do Aperture Settings
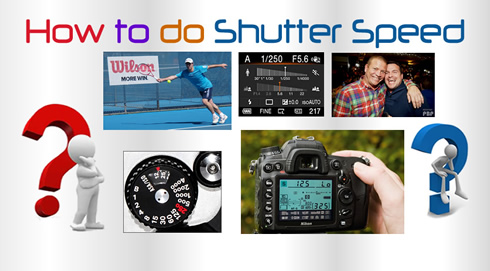
How To Do Shutter Speed
Let’s start off by quickly going through the definitions of “Exposure”, “Underexposure”, and “Overexposure”.
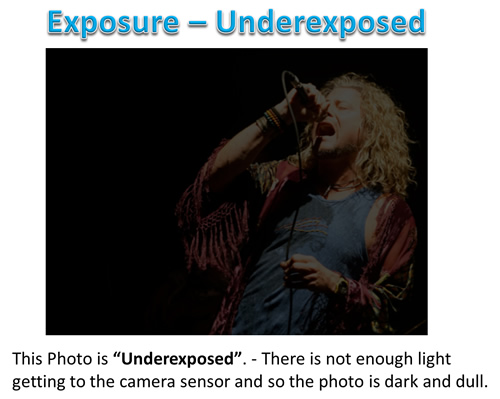
Underexposure in Photographs
Underexposure results in a dark and dull image because too little light was recorded by the digital sensor.
Underexposure often makes an image too dark for subjects to be seen clearly.
The amount of underexposure will determine how dark a photo is.
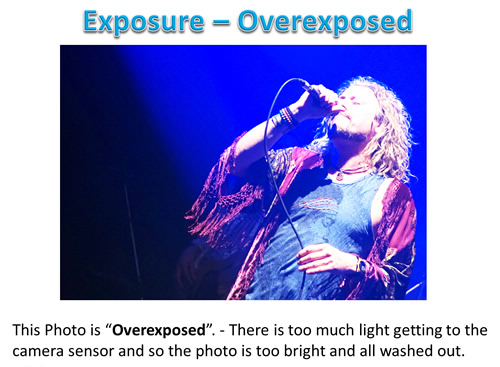
Overexposure in Photographs
Overexposure refers to a white-looking or washed-out image.
This is caused by having too much light reaching the digital sensor which makes the photo come out way too bright.
Correct Exposure
When we have correct exposure the tone in the image will range from white all the way though to black.
The picture will also contains all the tones in between black and white, resulting in crisp bright clear image.
Eg. We have a contrast in our image with a little dark and a little light, as well as a lot of inbetween.
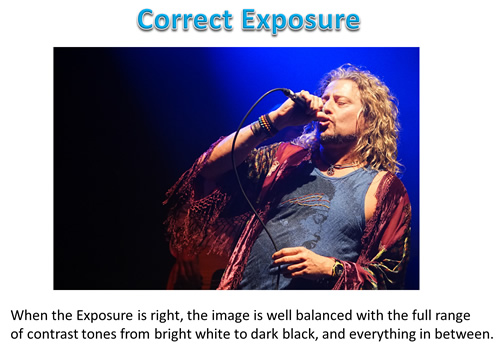
The example photos shown here are photos of “Simmeau” from the fabulous Australian Led Zeppelin tribute band: “Shed Zeppelin”.
For more information about Shed Zeppelin, check out their Facebook Page here:
Shed Zeppelin Band Facebook Page
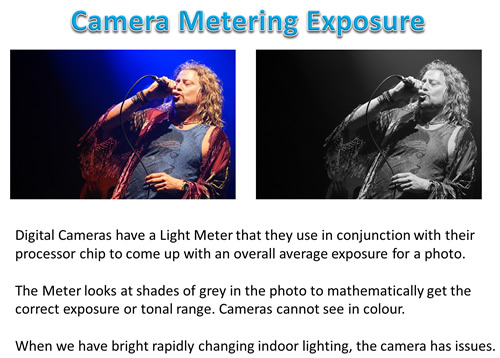
Camera Exposure
The camera uses an exposure meter which looks at shades of grey in the photo to mathematically get the correct exposure or tonal range.
(Basically Cameras see in Black and White, rather than in colour).
The light meter and processor decide what ISO, Shutter, and Aperture to use when the camera is in Auto Mode.
When we have bright rapidly changing indoor lighting, the camera has issues. It might expose for bright light, making the rest of the photo way too dark and underexposed.
We are often better off changing to manual mode and setting the camera variables manually ourselves.
There are some great videos all about Camera Light Metering in the Videos section near the end of this article.
Watching these Metering Videos will help you understand how cameras determine exposures, and what mistakes the camera can make when doing this under certain lighting situations.
Video About Exposure and Variables
The following is an excellent fifteen minute video about the Mathematics of Exposure.
Watch this video all the way though before reading the rest of this article.
Camera Variables and Exposure
Sometimes the camera’s auto mode metering does not give us the exposure we want.
Auto Modes usually work well outdoors in bright sunlight, when the sun is behind the camera.
But if it is overcast, or we move into the shade, or we are facing into the sun, or we go indoors, the exposure can often be Overexposed or Underexposed, and far from ideal.
In cases like this we need to shift our camera into Manual Mode, and Adjust some, or all, of the three key variables.
Manual Mode is basically a mathematical problem solving exercise, and it can be tricky to get all three variables at their optimum values.
When we get ISO, Aperture, and Shutter Speed all at just the right settings, we can get a really well exposed photo in full Manual Mode.
Sometimes we may have to adjust a fourth variable of “White Balance” as well; eg. Change over to incandescent lighting if we are taking a photo indoors at night time.
We need to know the effects of changing each of the variables: ISO, Aperture, and Shutter Speed.
Exposure is all about getting the right amount of light to reach the sensor, and so we often need to adjust the variable settings to get more or less light coming through.
For example, if we shoot a picture and which is too dark and underexposed, then we need more light.
However, if we shoot a picture which is too bright and washed out, we need to change things so that less light comes to the sensor.
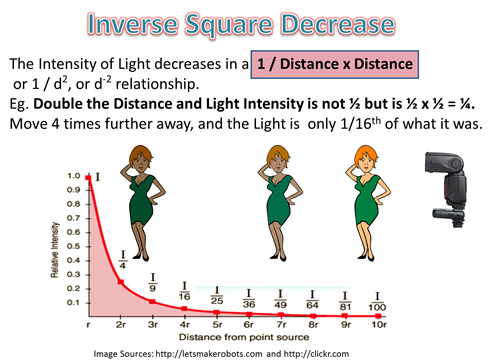
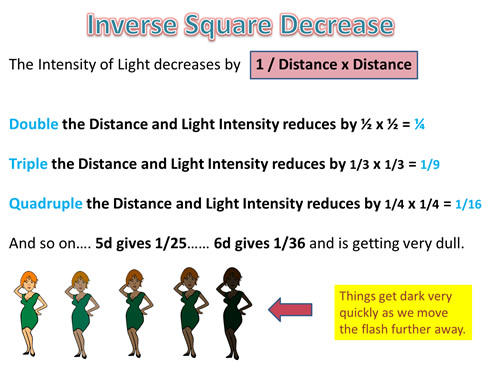
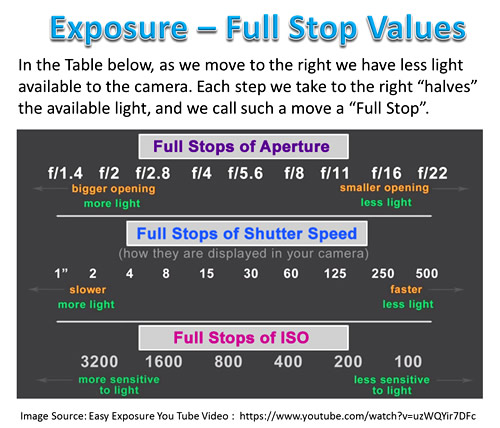
The following “Table of Full Stops” needs to be understood, so that we can make the necessary changes in the amount of light in a mathematical manner, and not just be randomly guessing at what might work.
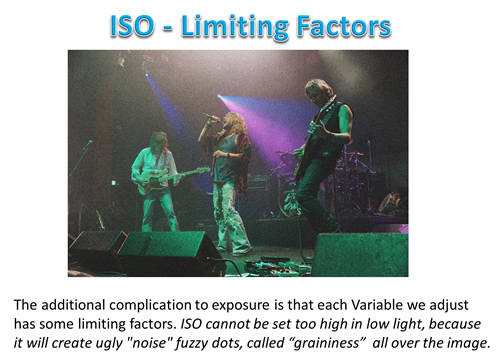
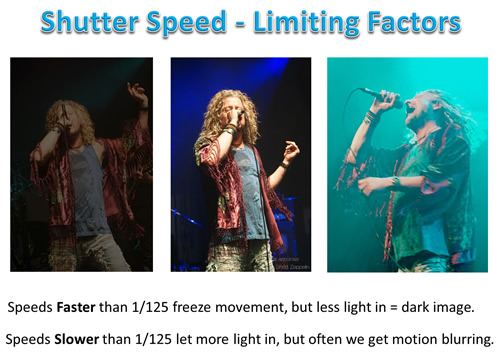
Limiting Factors
The additional complication is that each Variable has some limiting factors:
– ISO cannot be set too high in low light, because we may get ugly “noise” fuzzy dots all over the photo
– Shutter Speed cannot be set too slow in low light, because we will get blurring of moving objects, and/or camera shake blurring
– Aperture cannot be set too open at f2.8, or people slightly in the background may become out of focus.
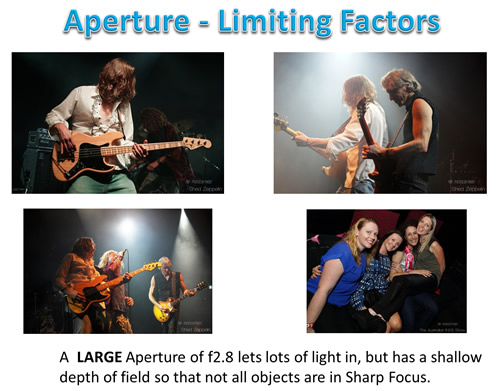
Aperture determines how much of a photo is clearly in focus.
Often we are forced to use f2.8 when taking band photos, just to get enough light for a good exposure. However this makes people and items in the background out of focus, but this is often not such a bad thing.
When taking a Group Photo, it is important that everyone in the picture is in focus, even though some people are nearby and others are far away. In this situation we need to use an Aperture of f4.0 to f5.6 so that we have enough depth to capture everybody clearly.
It is therefore a delicate operation to find the settings for each of these variables so that they will all work in unison to create a well exposed photo.
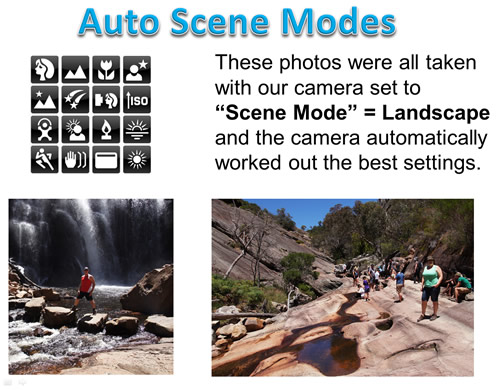
Scene Mode Exposure
For certain situations, we do not need to change to full Manual Mode to get good quality pictures.
Modern Digital Cameras have Preset “Scene” Modes which can be used for situations such as : Outdoor Portraits, Landscape, Sunsets, Action Sports, and several other common environments.
These Scene Modes, with their Preset values of ISO, Aperture, and Shutter Speed work extremely well, as long as the lighting conditions are what is typical for that particular Scene Mode.
Some typical Scene Modes, and their limitations are discussed in the next two sections.
Preset Scene Modes on Cameras
Modern Digital Cameras have one or more fully “Automatic” modes, as well as special preset or “Scene” modes.
These generally do a great job of setting up the Aperture, Speed, and ISO variable values for us.
All we have to do is “shoot” or “snap” the picture, and the results look fantastic.
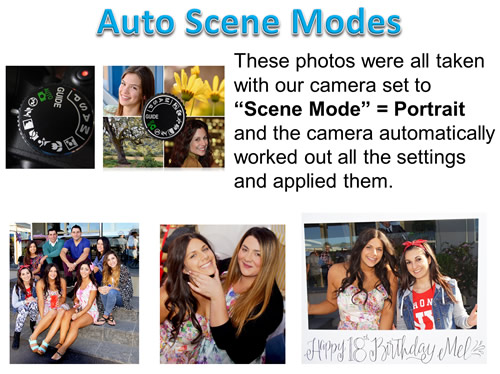
For example, if we set our camera to “Portrait” and take a picture of a person outdoors, it will turn out nicely with “bokei” (Background Blurring).
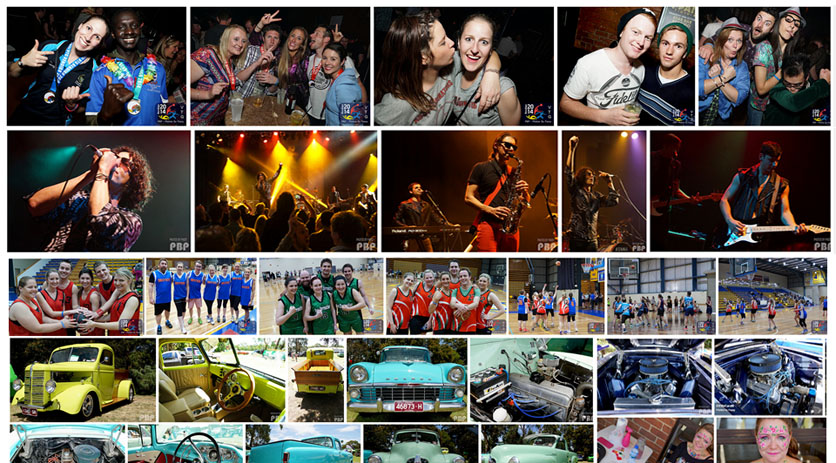
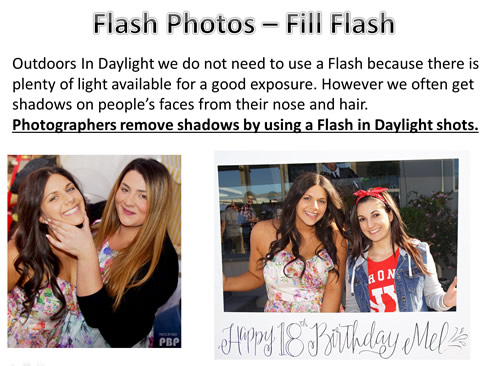
The Birthday Party pictures shown above were all taken using daylight portrait mode, which set our variables well, and also softened skin tones to make nice looking people photos.
However, if we set our camera to “Landscape”, the camera will make a nice bright picture where things both near and far from us are all in detailed focus.
Here is a great three minute video all about using Preset “Scene” Modes.
Auto and Scene Mode Limitations
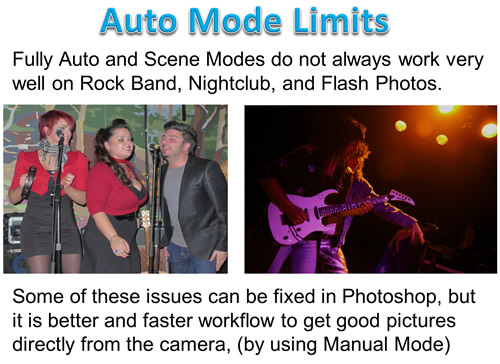
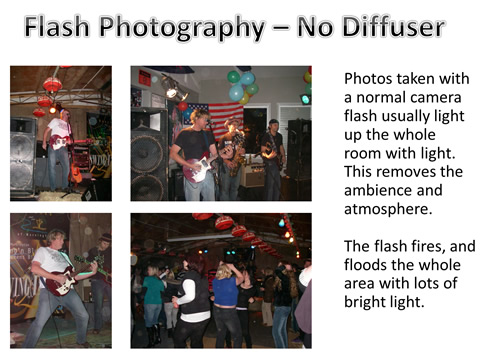
Problems arise when we venture outside of normal daylight conditions, and attempt taking indoor shots without Flash, or we take portrait or party pictures with flash.
These “low light” and “Flash” photos often do not turn out as nicely as we would like them to.
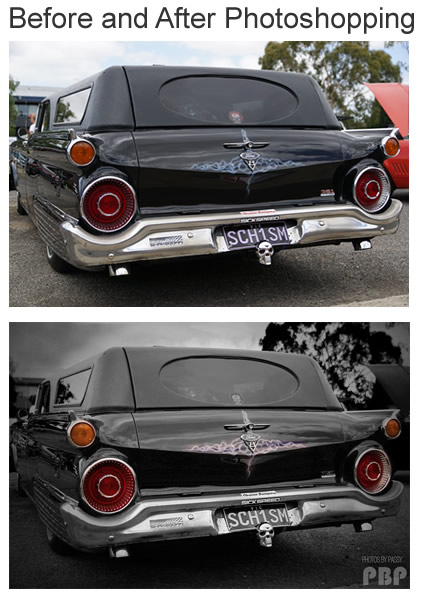
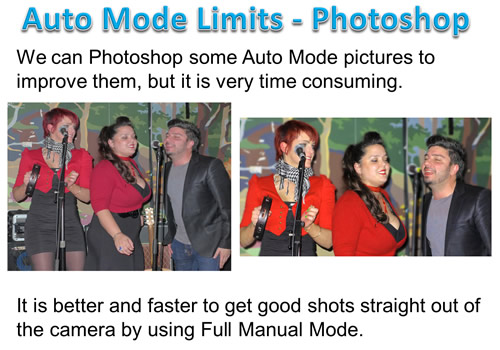
We can Photoshop some of these pictures to improve them, but it is very time consuming.
It is better and faster to get good shots straight out of the camera by using Full Manual Mode, which will be discussed shortly.
Special areas of difficulty are photographing Rock Bands, Indoor Sports events, and Night Clubs, where there is not full daylight, and people are moving around.
On some Sony cameras, using “Sports” mode will sometimes produce reasonable shots in these conditions, and Canon cameras have a “Television” mode which sometimes works.
However, the best results for “low light” photography can be obtained by setting your camera to full “Manual” mode, and adjusting the variables yourself – fast enough shutter speeds to freeze action, wide open apertures to let as much light in as possible, and high ISO sensitivity so the camera sensor will work like “night vision” to pick up as much light as possible.
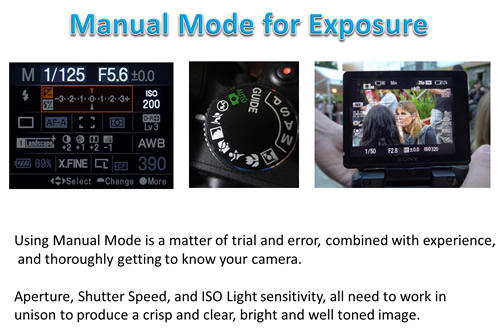
Manual Mode Exposure
Using Full Manual mode “M” is a matter of trial and error, combined with experience, and thoroughly getting to know your camera.
For example, for my Sony A77 camera, I know from experience that I cannot put the ISO higher than 1600 or there ugly noise dots and graininess begin to appear.
Even at ISO 1600 there can sometimes be a small amount of noise on the A77.
So rather than use ISO 1600 as a default for low light, I always check to see if I can slow down shutter speed, and use f2.8 Aperture, which might then allow me to shoot at ISO 1250 or ISO 800 which then gives negligible noise.
For Aperture, I know that if I am doing a Group Photo with some people further back or behind others, I have to use F4.0 to f5.6, or else the further away people will be out of focus.
For Shutter Speed, I know from experience that when photographing people or rock bands, that the minimum shutter speed for no blurring is 1/100. I have also discovered that the minimum shutter speed for action sports photos is 1/250 but it is much better to use 1/1000 if possible,
The point is that an experienced photographer is not blindly setting some variable and hoping for the best.
What they usually do is set one of the variables at a particular value, and then manipulate the other two to get the best exposure.
This is done by taking test shots, seeing what they look like, and then progressively making smaller and smaller adjustments until the resulting image looks good.
From my experience of taking lots of photos, I usually have an idea of what the approximate settings are for a given lighting situation, and then work on fine tuning these values to get the best possible exposure for the particular camera I am using – Sony A77, Sony A55, or Panasonic Lumix LX-7.
I know when I first started using Manual I had no idea of what to set things at, and I was totally frustrated.
So if this is your first experience when using Manual Mode do not be concerned. The path to mastery of exposure is usually not an easy one.
It is important not to give up, because being able to shoot in manual gets great photos in low light situations that people in Auto Mode will never be able to match.
Think of all those whited out Flash shots people take at parties, or those blurry noisey dark photos without the Flash.
Manual Mode is well worth learning so that you can be the person who gets the “Wow” factor photos, while others are floundering.
As I said, when I first tried Manual Mode I was totally lost as to how to begin to change the variable settings.
What I found though was that if I set the camera on auto and looked at the live view to see what settings the camera was choosing, I could then flick to manual and use these variable settings as my starting point.
There is only one way to master variables, and that is by going out and shooting a lot of photos and trying out different settings until you know the ones which give good results for your camera.
It is time consuming and frustrating at times, but it is well worth the effort in the end, when you have the great photos that nobody else can get!
What follows are some Exposure Settings examples. Read through these, and then watch all of the videos in the video section.
This will help you start getting your head around Manual Mode, and show you what effect changing each of the three variables has on the final photo.
After that it is all down to getting out and shooting lots of photos in Manual Mode and seeing the results. Then one day it should suddenly all start to “click”, and you will be able to problem solve exposure settings for difficult shooting conditions such as low light indoors without the use of flash.
Good Luck! It is a difficult path, but one well worth travelling.
Exposure Settings Examples
“A picture is worth a thousand words” so let’s take a look at some examples of variable adjustments made in Manual Mode.
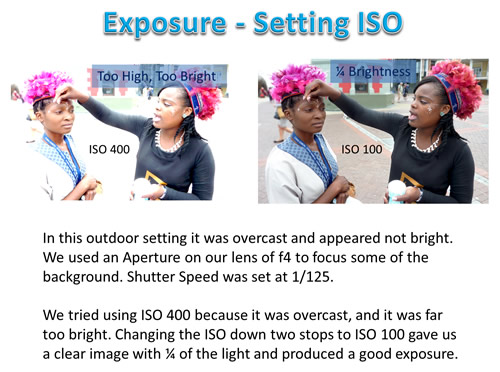
Our first example below involves ISO light sensitivity.
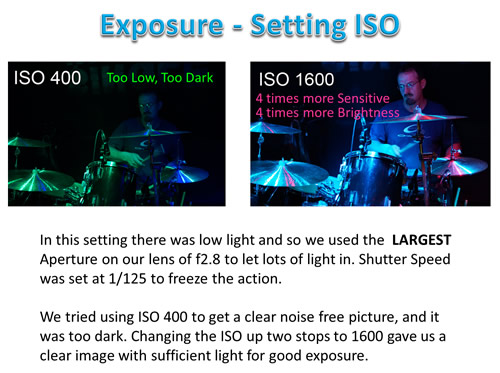
In this second ISO example, the original settings produced an overexposed picture.
We did not want to change the Aperture, and could have increased shutter speed or lowered the ISO.
The shutter speed was already fast enough to freeze the action, and so it was better to lower the ISO to get a clearer more detailed image.
Generally, if the shutter speed is freezing the action well on an Overexposure, leave it as it is, and Reduce the ISO.
Our third example involves Shutter Speed for Indoor Sports.
As discussed in our “Shutter Speed” article, using the Auto “Sports Scene” mode on digital cameras works great outdoors in bright sunlight, but often has severe limitations for Indoor Sports.
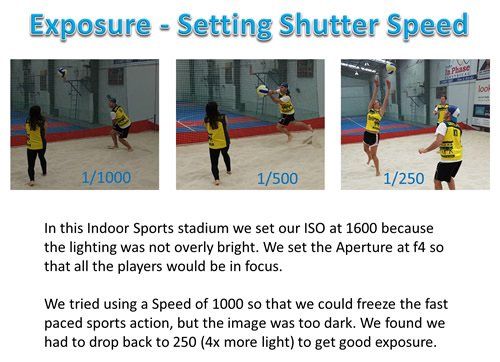
Note that we cannot shoot Sports Action without motion blurring at speeds less than 1/250, and we should aim to use speeds of 1/500, 1/1000, or even 1/2000 if possible.
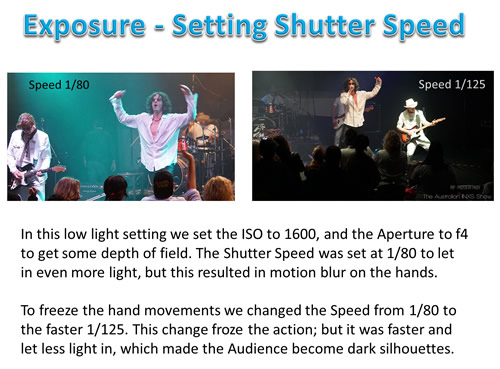
Another example of Shutter Speed involves Motion Blurring.
In the first photo below, we had a low shutter speed of 1/80 which gave plenty of light, but resulted in blurring of the singer’s moving hands. This blurring is a bit difficult to see in the small sized photo below, but it is there and it did make the photo unusable.
Moving to a higher speed of 1/125 stopped the blurring, but did create a darker picture. Sometimes we are faced with these types of compromises, and it is impossible for the camera we are using to get the penultimate perfect exposure. That’s Life – we can only strive to achieve perfection as much as humanly possible, and there are always some ultimate limitations.
Our final example is another one involving Aperture.
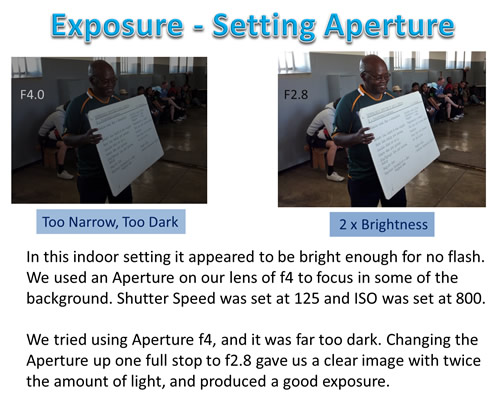
The original image was underexposed, and we could have increased the ISO up one stop from 800 to 1600, (and get twice as much light), but this might have also introduced a small amount of graininess.
We therefore made an Aperture adjustment instead, and were able to get 2 times more light by going down to the wider f2.8 value, which made some background blurring, but gave us sufficent light correct exposure.
By moving from f4 to f2.8 we changed the Aperture by “one full stop”.
Videos About Exposure
The following video is useful for Canon and Nikon Camera users and shows how to change the ISO, Aperture, and Shutter Speed settings.
The presenter goes through where all the dials and buttons are on the camera are to do this.
Watching this video made me realise how much easier my Sony A77 is to use, where I have a wheel on the front grip, and a wheel on the back to do this.
Here are some excellent videos about Aperture and Shutter Speed on Sony Alpha Cameras.
Sony Aperture Video
Sony Shutter Speed Video
This next fifteen minute video is about the effects the variable settings have on photos and gives plenty of practical examples.
It is essential viewing for learning about how to use your camera in Manual Mode, and get great exposure.
Here is Part 2 of the above video:
Here is a 10 minute Video about the three key variables: ISO, Shutter Speed, and Aperture.
The effects and side effects of altering these variables is also discussed.
The following is a fifteen minute video with practical examples which shows how to adjust camera variables for various lighting conditions.
Here are is a video lesson in two parts from NightClub Photography TV about setting camera variables.
And here is Part 2 of the above video.
In this next video the guy talks for 23 minutes about all of the variables and how they work.
It is worth watching after the other videos, but does not contain any practical examples.
Videos About Metering and Exposure
Cameras have Metering Modes for fine tuning the light reading. Here is a good five minute video about these Metering Modes.
This next twenty minute video is an excellent explanation of camera light metering with practical examples.
Related Items
How To Do Camera Settings
How To Do ISO Settings
How To Do Aperture Settings
How To Do Shutter Speed
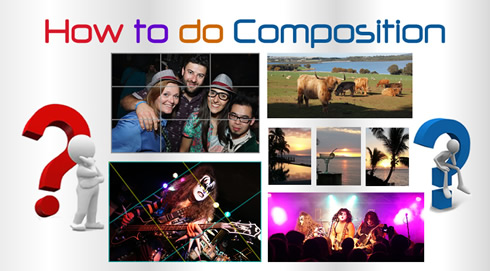
How To Do Photo Composition
Subscribe
If you enjoy visiting Photos By Passy, why not get a free subscription to the website.
You can then receive notifications of new items and updates directly to your email address.
Go to the subscribe area on the left hand sidebar, (or down the bottom of the page if using a mobile phone), fill in your email address and then click the “Subscribe” button.
Enjoy,
Passy