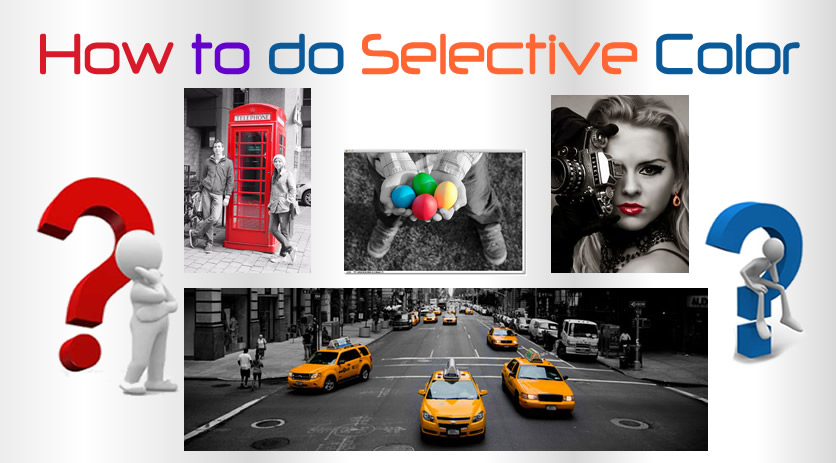
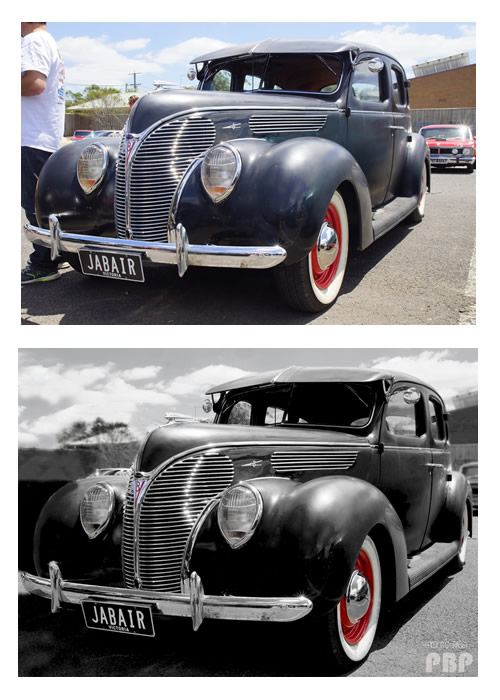
For people interested in the Technical side of Photography, here is the latest of our “How To” articles which is all about How To Do Selective Coloring Using Photoshop.
In this article we show you how can make a color photo into Black and White, and then select colors from the Original Photo to show through into the picture.
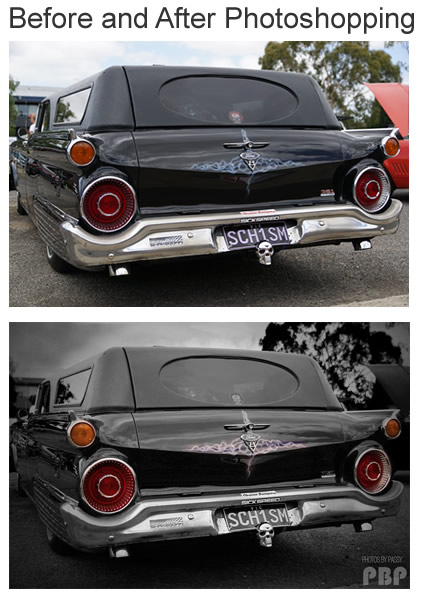
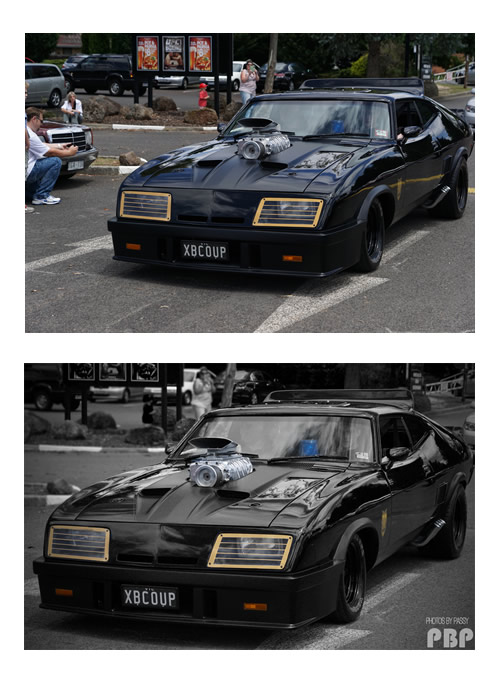
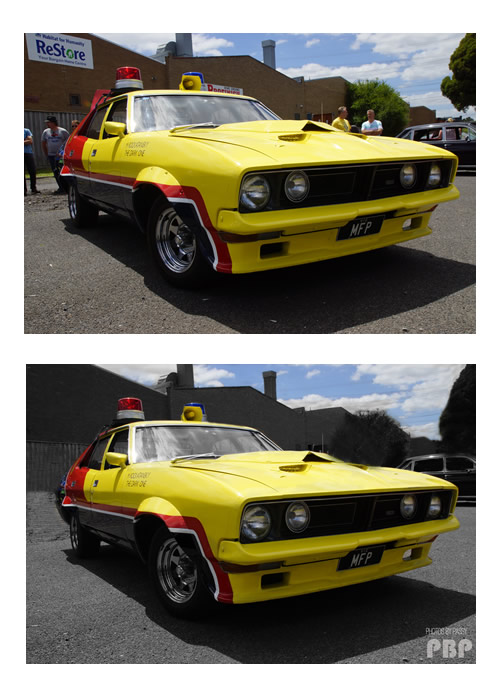
At Photos By Passy, we love using Photoshop Selective Coloring for Car Photos.
Here are some “Before and After” Examples of Selective Coloring.
Selective Coloring Methods
There are two methods for doing Selective Coloring:
Method 1- Make a Duplicate Layer and Selectively Desaturate the Photo
Method 2- Make a Black and White Adjustment Layer and then Paint a Mask onto it.
We have found that the second method is the much better way of doing this.
The following six minute YouTube Video goes through the steps of doing Selective Coloring in Photoshop.
Summary of Selective Coloring
Basically we mask out a Black and White Version of our image, and then paint it to allow color to show through.
– Make a Black and White Adjustment layer and use the sliders to make it look nice
– Set the brushes panel to a soft round brush where pressure affects the opacity
– Set the foreground color square to black and background color as white
– Paint with this black brush on the B&W mask layer to reveal color
– Because it is a “Pressure Brush”, with a mouse the more you stop and go back over it, the more color shows through
– If you make a mistake, simply change the brush foreground color to white, and paint back over the problem area to fill in the mask hole and put it back to B&W
Adding a Vignette
As well as Color Selection on our car pictures we also added an Oval Darkening “Vignette” around the outside to finish off.
This is very easy in Photoshop and simply involves being on the layer witth the original picture (not the B&W mask) and doing:
Filter > Lens Correction and then pick the “Custom” tab and use the Vignette Sliders.
The following video shows how to do this, as well as another method involing the Oval Marquee tool and Inverse Selecting.
(Note that the Filter > Lens Correction Method is shown in the second half of the video)
Selective Colouring Photo Album
Our Photoshop Students at the High School Day Job have done some very creative work with Selective Colouring using images from Google Images.
Use the link below to view a Photo Album of their work.
Some of them used Selective De-Coloring to make existing highlights stronger, and others used pattern based selective coloring.
(I actually learned some new ideas about Selective Colouring by watching what they were doing. Together we all do better!)
Click Here to View Photo Album
That’s it for this Photoshop Tutorial.
Use your own photos, or find some in Google Images, and play around with Selective Coloring in Photoshop.
Like Us On Facebook
If you enjoy like Photos By Passy, then you owe it to yourself to like our Facebook Page.
Click Here to Like our Facebook Page
Subscribe
If you enjoy visiting Photos By Passy, why not get a free subscription to the website.
You can then receive notifications of new items and updates directly to your email address.
Go to the subscribe area on the left hand sidebar, (or down the bottom of the page if using a mobile phone), fill in your email address and then click the “Subscribe” button.
Enjoy,
Passy
