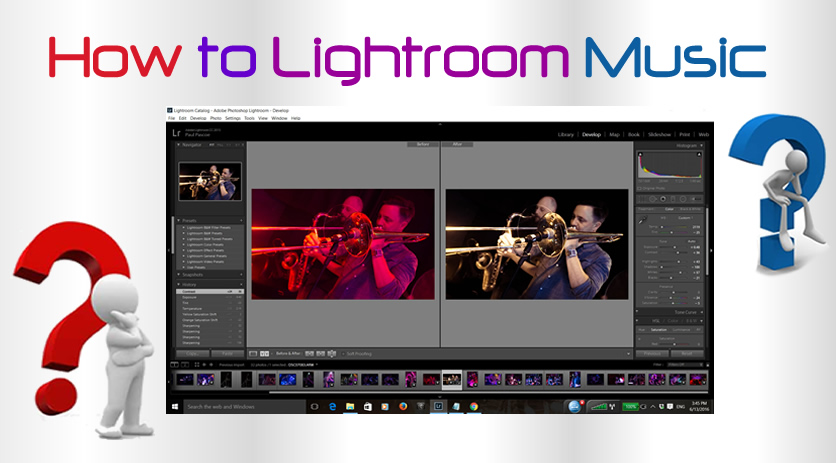
In this lesson we look at how to use Lightroom to process low light music photos which have bad lighting.
The power of Lightroom processing can be seen in the following “Before” and “After” Images:
(Click the image to see full size in a new tab)
Lightroom can be used on “JPG” images, but works a lot better when used on “Raw” format images straight from the camera.
Most modern DSLR cameras have a setting in their Menu System where you can set the camera to shoot both Raw and JPG.
Raw Images are often four or five times larger than JPGs so make sure you have a 16Gig or even a 32Gig fast SD memory card installed into your camera.
If you have not ever used Adobe Lightroom, then we recommend checking out our Introductory Lightroom lesson on Sunsets at the link below:
Introduction to Using Adobe Lightroom
This Sunsets lesson takes you through all of the main Lightroom Panels and shows you the typical general processing flow.
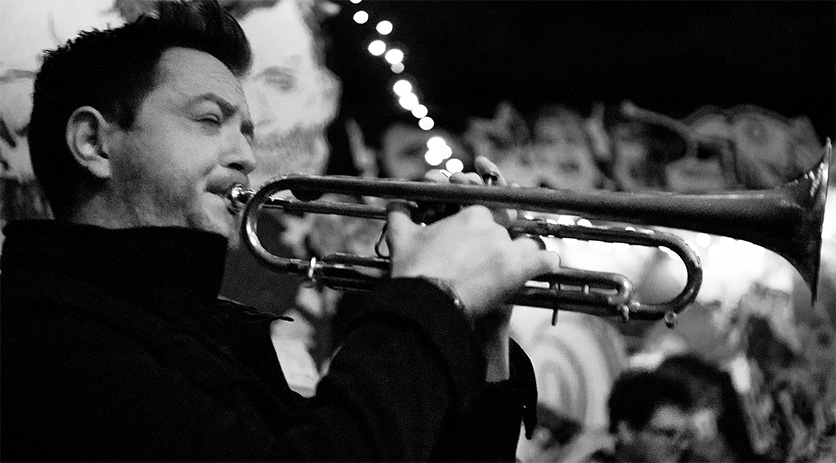
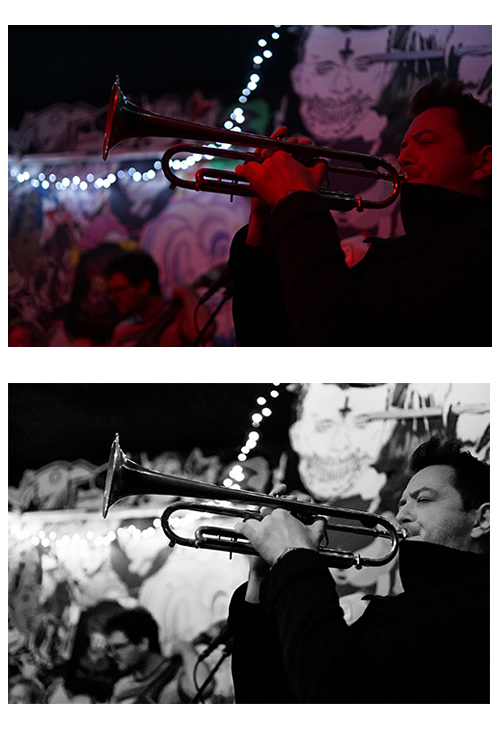
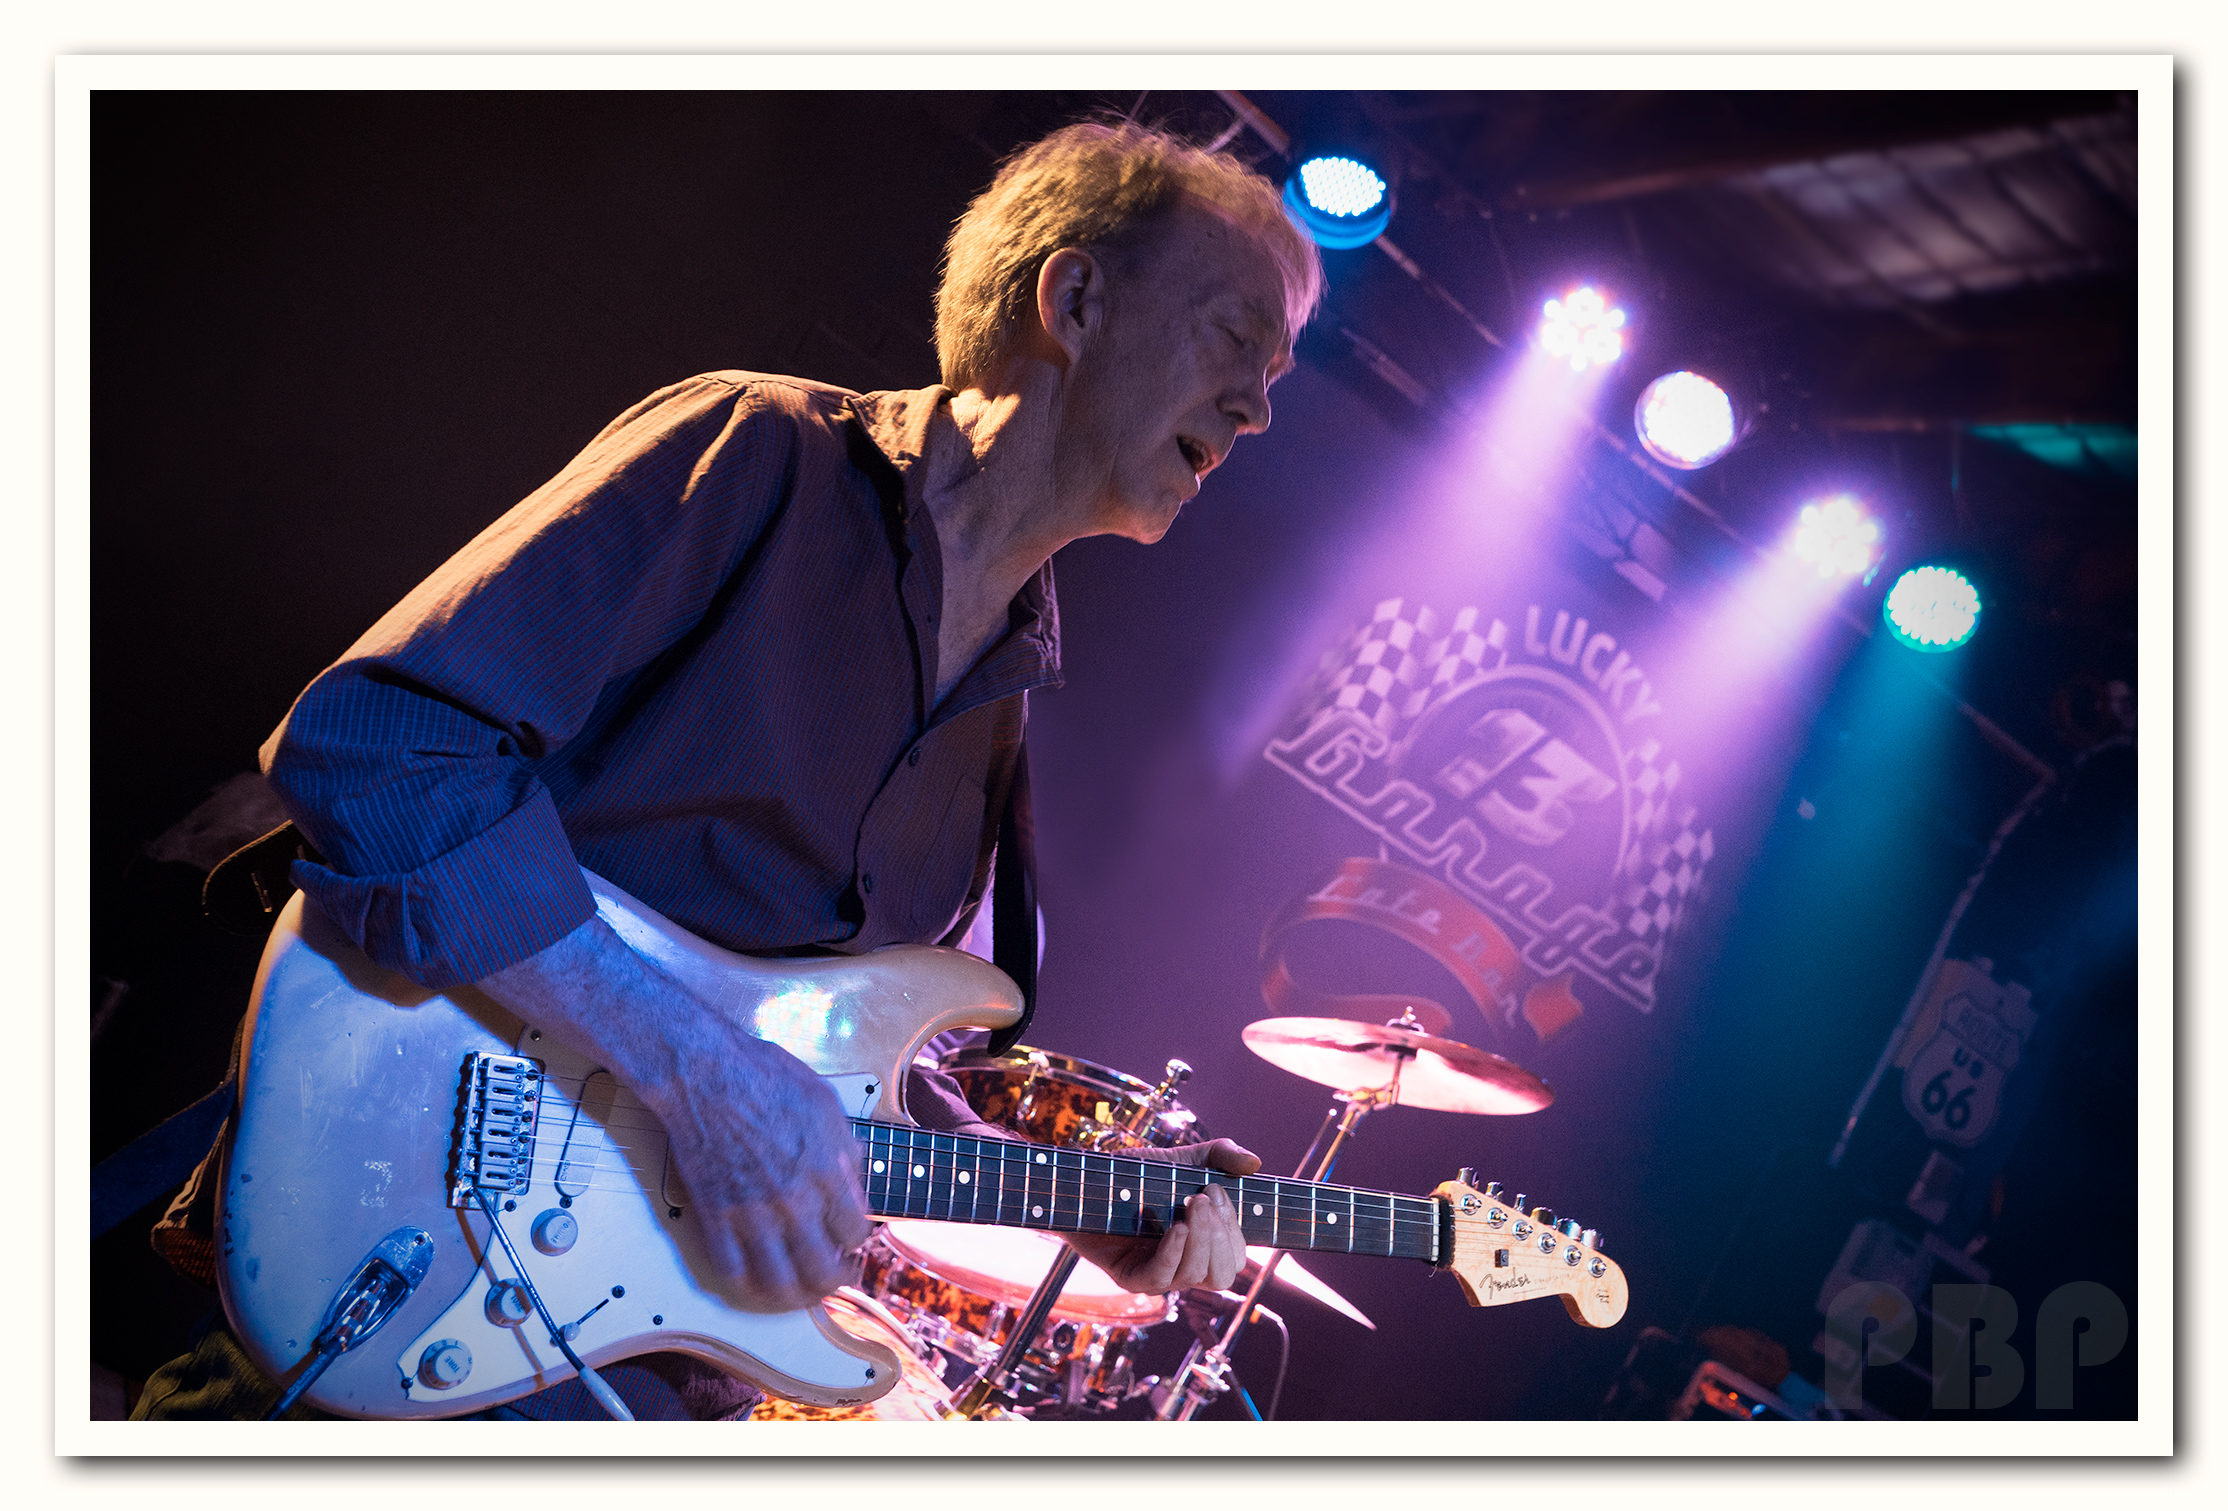
Often photos of musicians performing will be full of red, green, or blue light and as a result look either “Radiation Red”, “Shrek Green”, or “Avatar Blue” and will basically be unusable.
But if we have shot our pictures in “Raw + JPG” mode, then we can take the “Raw” format file into Adobe Lightroom and colour correct the image into a quite reasonable photo:
 (Click the image to see full size)
Not all photos can be fixed as well as this one, Lightroom gives the best results when the entire photo is colour cast with a single primary colour, and the photo is sharply in focus.
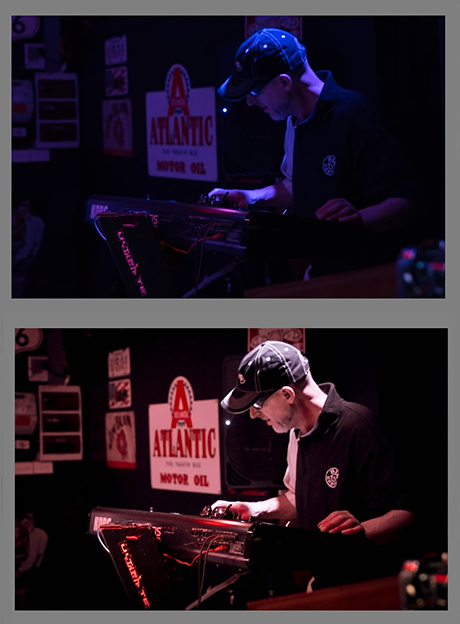
Here is an original “Blue” photo BEFORE being recoloured using Adobe Lightroom:
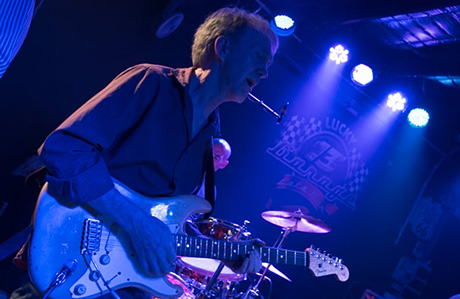
And here is the same photo after adjustments in Adobe Lightroom:
 (Click the image to see it full size)
The key to processing for the above two photos was to start the Lightroom workflow by going to the very bottom of Lightroom “Develop” Menu, to “Camera Calibration” and then use the RGB sliders to remove the dominant colour cast in such a way that the person’s skin becomes a natural looking colour.
From there we do all of the usual Lightroom adjustments such as Exposure, White Balance, and so on.
The following video explains in detail how this is done:
The main drawback to using Lightroom and Raw Files is the time it takes to get a photo looking good, compared to just taking a JPG file and doing some basic Photoshop adjustments.
At PBP we tend to only use Lightroom on photos that have good potential, but have been either heavily colour cast with one colour, or are extremely dull and need brightening up.
If we were preparing 30 or 40 photos for a Client, it would be madness to process all of them in Lightroom, because at up to 10 or 15 minutes per photo, it would be hours and hours of work.
Instead we would use the JPGs from the camera which are much quicker to process using Photoshop.
Where Lightroom is fantastic is when you have a great photo that is colour cast, or shots of band members in near darkness, and you really want to have that photo in the album. This is where you have a good chance of using Lightroom “to save the day” and recover that poor image into a great usable image.
Detailed Video About Lightroom
The following twenty minute video about using Lightroom for Music Photos shows some great techniques for image improvement.
It is a long but excellent video to watch to gain a lot of insight into using Lightroom for Music Photos.
The 20 minute video looks at fixing an unpleasantly coloured Guitarist Photo, and as we have stated, it is a long video but shows lots of useful things that music photographers can do to images taken in bad coloured lighting.
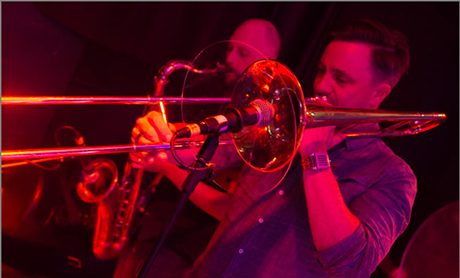
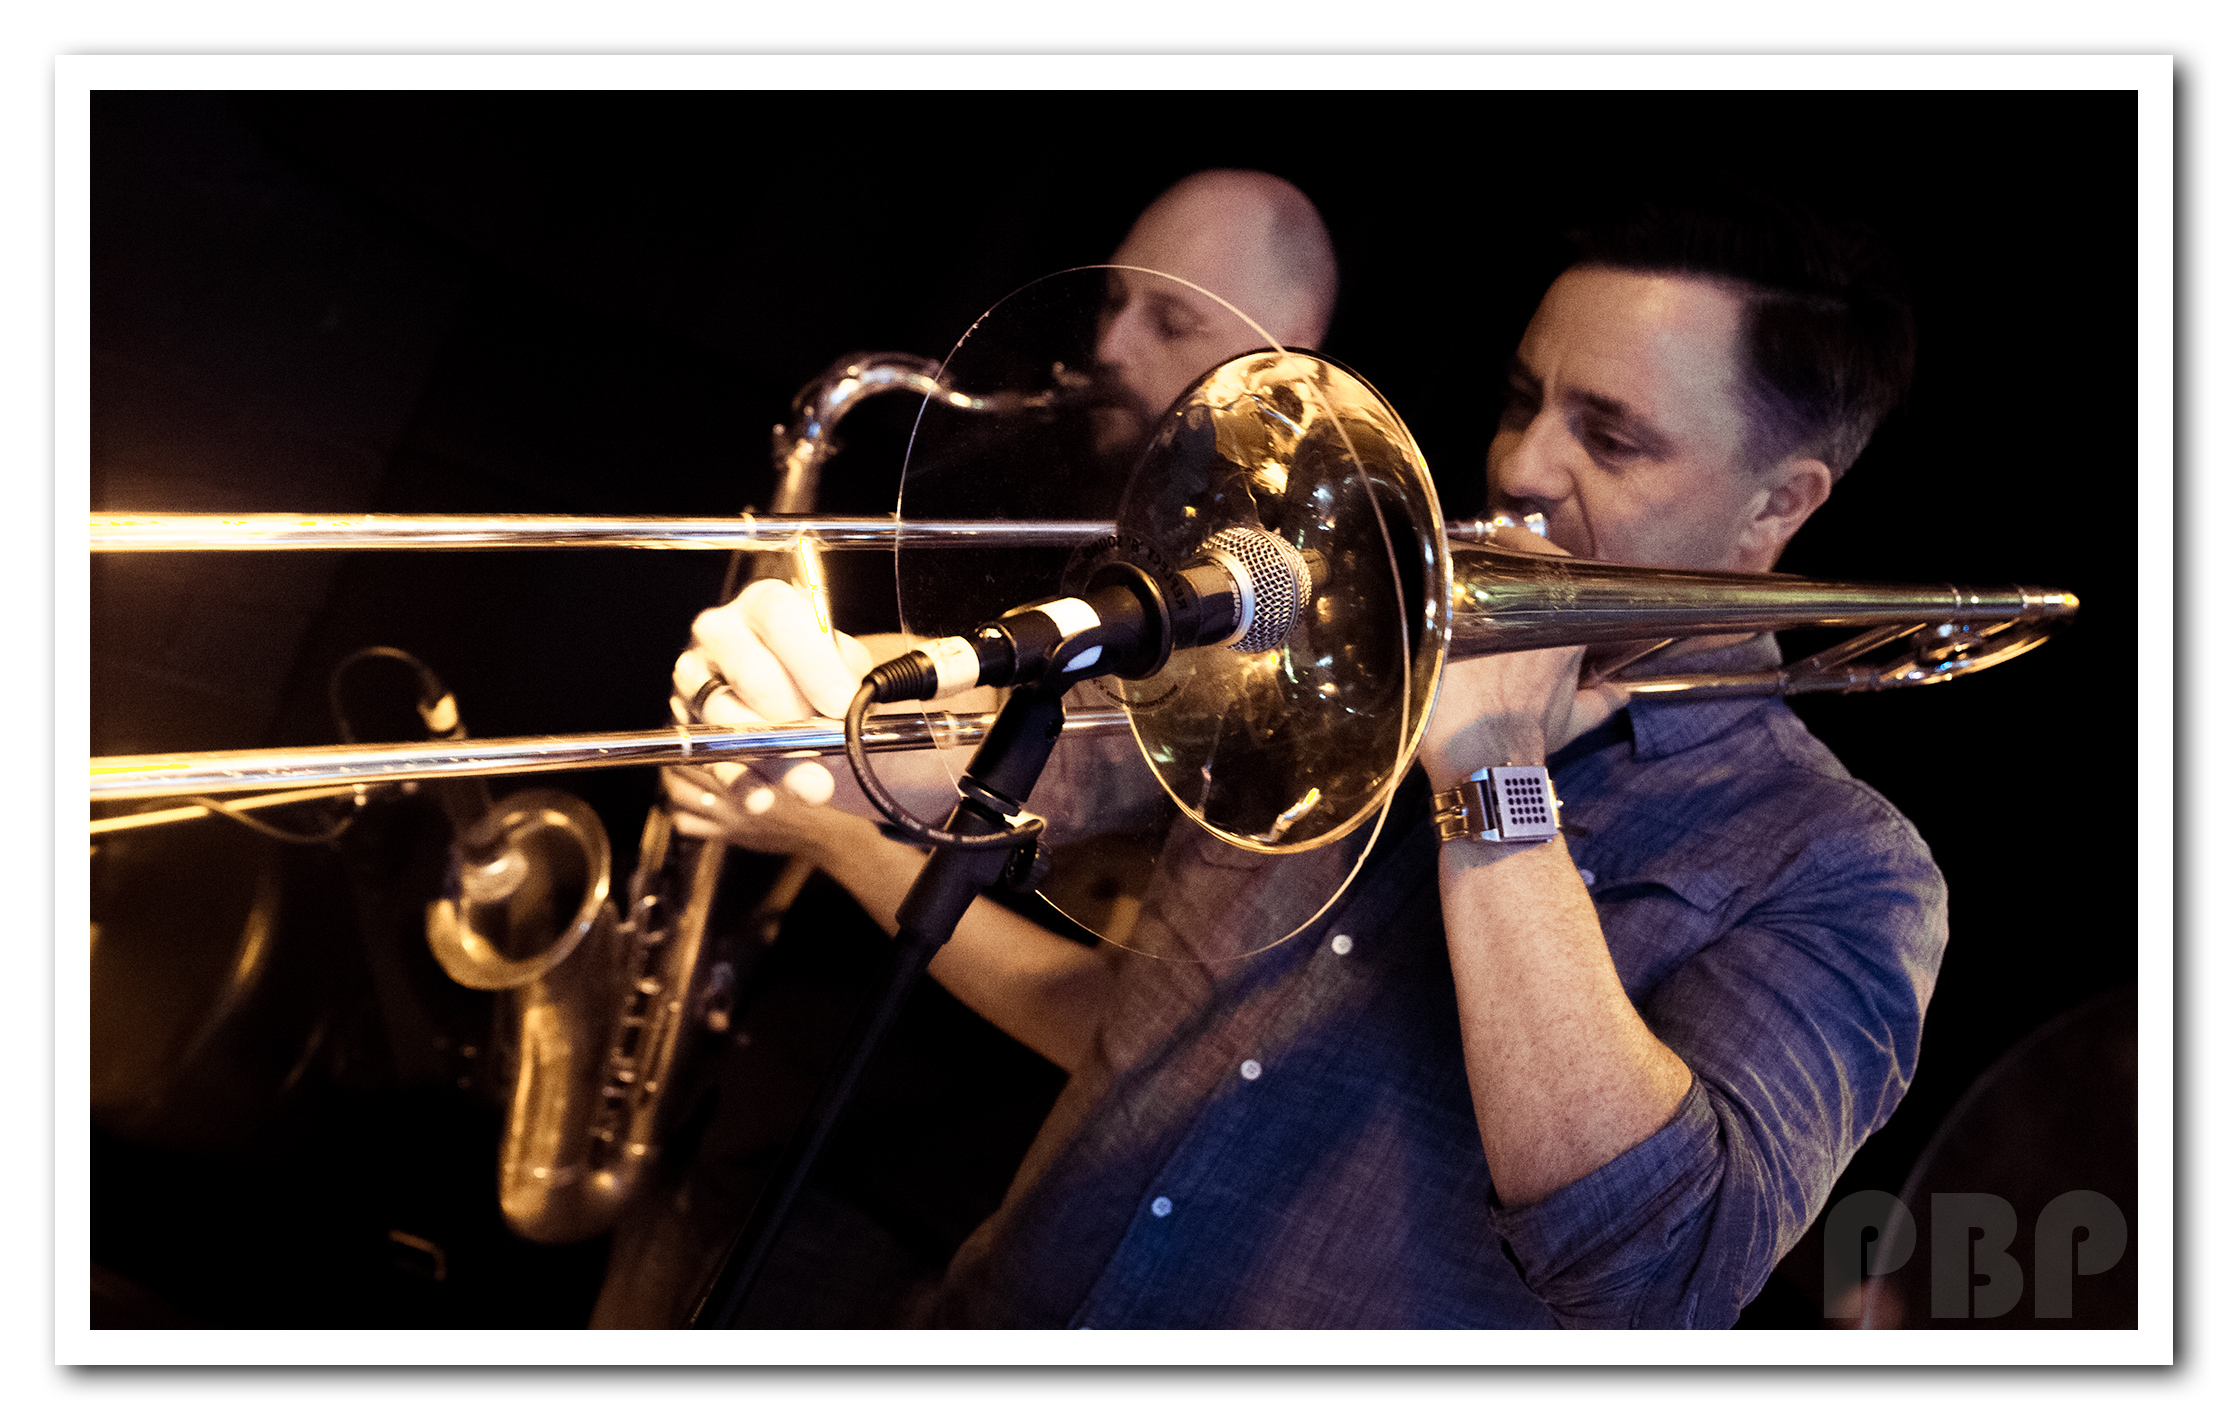
What is particularly interesting is the “Split Toning” which is done around the 7 minute point of the Video onwards.
With “Split Toning” we can set all of the bright highlights to one colour, such as yellow, and then set all of the shadows to a blue colour, and then colour mix them.
It worked nicely on the image he was adjusting.
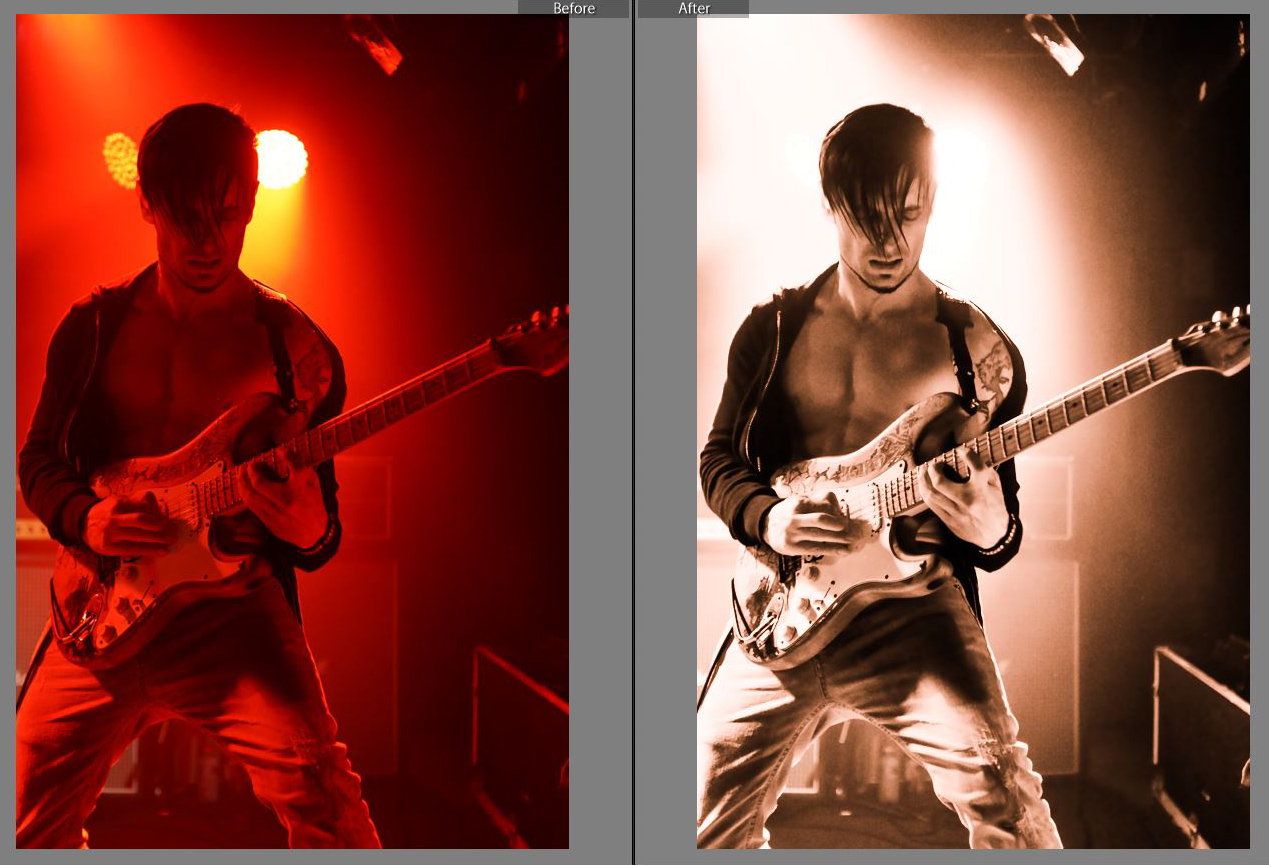
We have used “Split Toning” in the following Before and After Images:
Continuing with items of interest in the 20 minute video……..
Around the 9:20 mark, he shows how pressing the J key sets a mode where you can see where you are going to “Clip” on adjustments and lose detail.
We can then see where the photo is going to blow out and lose detail when we increase the Exposure slider.
Leaving the J key pressed and released, we can adjust “Highlights” and “Shadows” adjustments and see marked on the image where we are going to burn out and lose some detail from the image, but if it is background blacks or black hair where this is happening it is not a worry.
He then presses the J key again to turn this mode off, and we see the image again as normal, without any clipping highlighting on it.
In addition when choosing between adjusting vibrance and saturation, using vibrance is better because it does not affect the skin tones very much.
Remember that Saturation increases the intensity of ALL colours (including skin), but Vibrance only works on increasing colours that are dull and not yet saturated.
At the 12:40 point in the video it goes through how to use the RGB “Tone Curve” where you can adjust the colours in shadows and highlights, it does nice things to the background if you set it on medium contrast and work from there.
Around the 15:00 point he shows “Sharpening” and shows how to hold down the Alt key and mover the Masking slider so that only the person appears in the white outlines, and so only the person will be sharpened.
It works really well to set the “Masking” slider first with Alt held down, to basically select what you are going to sharpen, before you sharpen it.
Otherwise you will sharpen the background and sharpen ALL the noise that is in the image.
This is a great technique, because it avoids sharpening the lights and any noise grain that is in the background of the image.
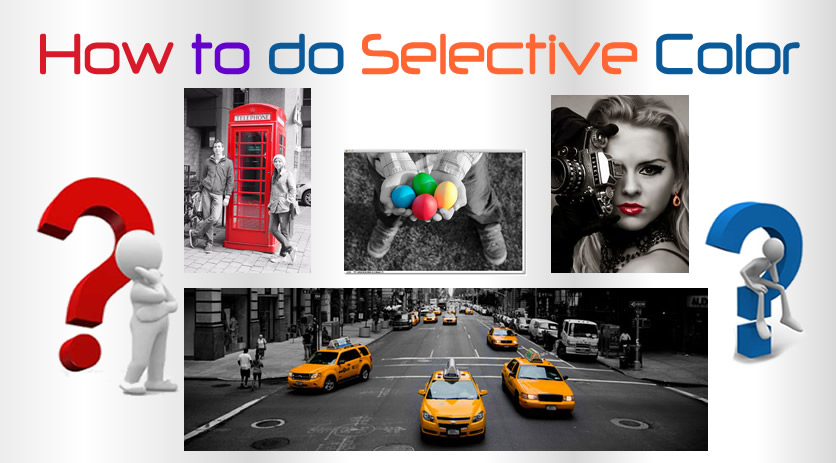
At the 17:25 point he shows how to do Selective Coloring, which looks great if you have for example a red guitar that had some red light on it.
Basically you go onto Brush, do new brush, and choose “Saturation” from the drop down list for the type of brush.
You then drop the saturation all the way down, wind the mouse (or use left and right square bracket keys) to make the brush really big, and paint over everything except the guitar, and everything will then desaturate and the guitar stay red.
But he did all of this selective colouring at the end, AFTER he had got the photo looking really good as a colour photo.
At the end, he clicked in the left hand column the plus sign on this menu called “Snapshot” and it saved all of his LR adjustments.
He had another snapshot of when he had edited it previously, and could then flick between the two saved snapshots to see how the two edits were different.
A Snapshot is a record of an image’s editing at a certain point in its processing.
Click on the “+” sign in the Snapshots Panel to create a Snapshot. After you click on the “+” sign, the New Snapshot Dialogue Box will appear. Here, name this version of the image.
We can take multiple Snapshots of the image at various points in our adjustments editing, and these edit setting versions of the image will appear in a dropdown list in the Snapshots Panel.
When we export this one image that has multiple snapshots, the only image that will be exported is whichever Snapshot was applied last. This is because the Snapshots Panel allows you to create different versions of the image, but only one of the Snapshots will be active and exported at a time.
There is a lesson about “Snapshots” and “Virtual Copies” at the link below:
Lightroom Snapshots and Virtual Copies Lesson
He also does some Spot Healing to remove small glowing amp ligt type spots, but it is not clear in the video which icon he clicked to do this, but it was actually right next to the Crop tool.
We do spot healing or clone duplication in Lightroom using the tool next to Crop in the basic menu.
The following YouTube video demonstrates Spot Healing very quickly and clearly:
YouTube Video on Lightroom Spot Healing
The long 20 minute video is by far the best Music Photos Lightroom Tutorial we have managed to find on the web thus far.
However we did find some other useful videos and these are compiled and described in the following section.
Lightroom Video Tutorials
This first video is very interesting because the starting photo is a typical small low light venue photo with an ugly white tiles ceiling.
However the ceiling background is replaced with darkness, and a light is made to shine in from the side instead.
This video shows how to use Lightroom in conjunction with Photoshop to do this.
The “burning” of the white celing into darkness is done in Photoshop, as well as the fake lighting, but the rest is done in Lightroom.
He starts doing the fake lighting using Photoshop around the 11 minute 35 seconds point of the video.
The following video is the “Removing Radiation Red” tutorial that we referred to at the start of this lesson.
In this video, horrible Red Light is removed using mainly the “Camera Calibration” function in Lightroom 3 (which still works the same way in Lightroom 5 and Lightroom CC).
It is a nice short four minute video, and the colour correction which occurs is amazing.
This technique also works well on “Shrek Green” and “Avatar Blue” images as well.
But we need to have a dominance of one colour, and a sharply focussed raw image without any bright exposure blowouts to get good results.
In this next video, it is Lightroom 5 but looks the same as Lightroom CC, and the guy processes an over exposed ISO 6400 photo of a guitarist on stage in bright white light.
Interestingly, one of the first things he does is correct for the high ISO noise, by going to the right hand side Detail panel and sharpening and Luminance noise reducing the photo.
I thought you usually do these things last in the work flow, but he does them first, which is interesting.
His finished picture is better than the starting one, but he has not done anywhere near the level of refinements we have seen in other videos.
In this next video there is a concert photo that is quite good quality already, but just a few tweaks in lightroom really make the image “pop” with warm colour and vibrance.
The actual photo editing in Lightroom starts around the 1:27 mark.
This next video uses Lightroom and then “ON1 Photo 10” which is a Plug In for Lightroom and Photoshop that costs about $110 and can be purchased here:
Here at PBP we have not ever used it, but it looks like an enhanced Lightroom, where various additional adjustable Filters like “Sunshine” are available.
From ON1 Photo 10, we can output our files as a PSD and take them into Photoshop.
The original starting Photo is quite good to begin with, so the point of the video is to make some refinements.
Lightroom Black and Whites
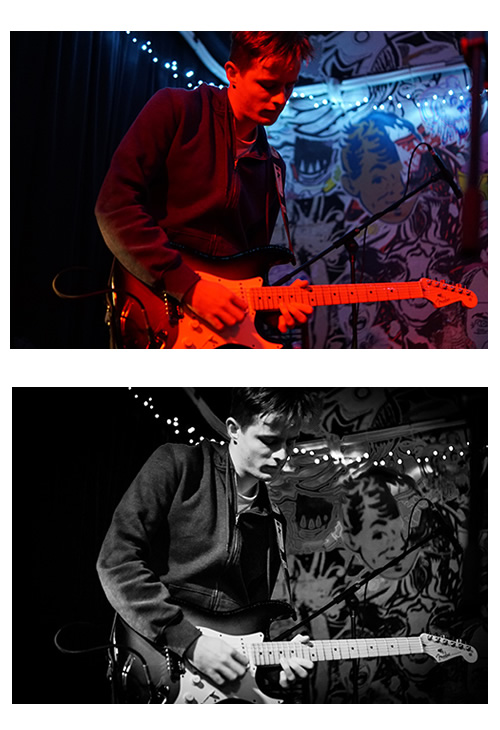
Sometimes we may have a red photo that we think we can adjust into natural skin tones colour, but things just do not work out.
This was the case with the following Red JPG image, and so we used Lightroom to create a great Sepia old style brown image.
 (Click Image to see it Full Size )
We might have another very red photo, that we decide to make high contrast black and white, rather than colour.
Here is a RAW image that we captured. immediately followed by the high contrast Black and White that we made in Lightroom:
The following video shows how to make a high contrast black and white photo very quickly, from a very average colour photo with a lot of smoke machine haze in it at the beginning.
To find out more about making Black and White images using Lightroom, check out our previous lesson at the link below:
Lightroom Black and White Photos Lesson
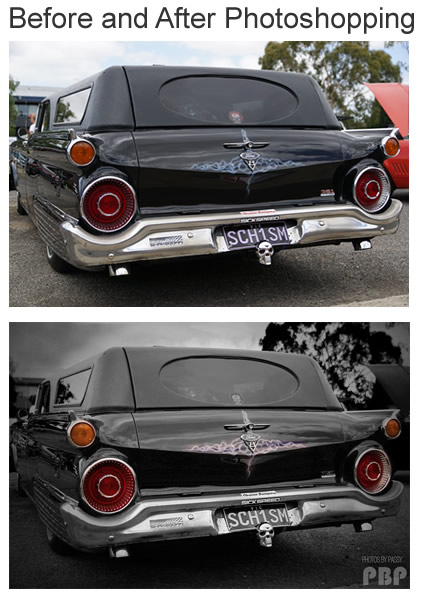
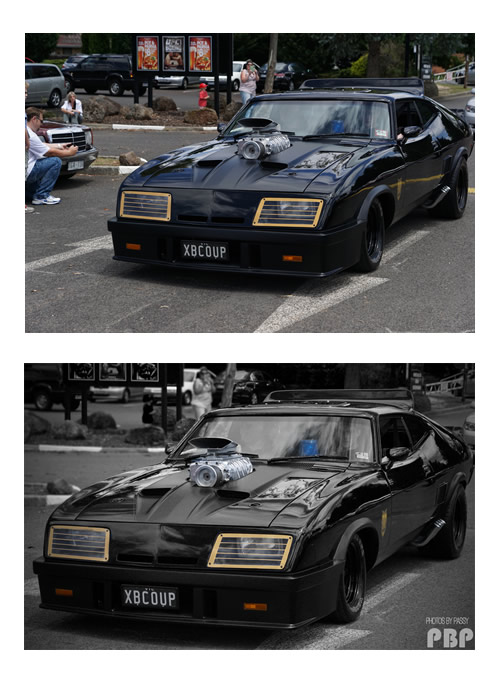
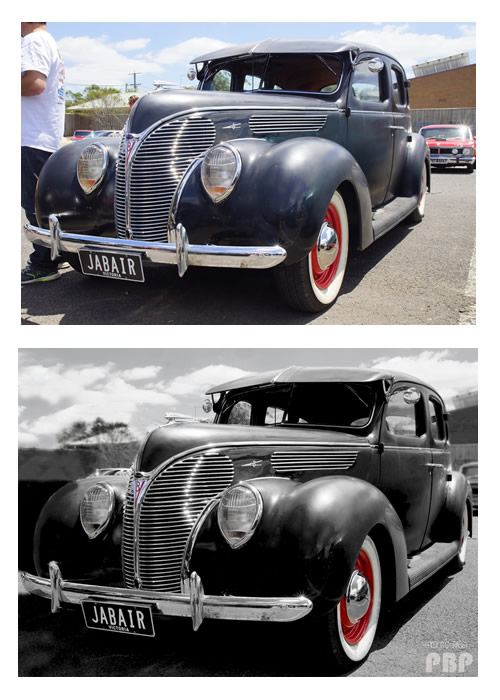
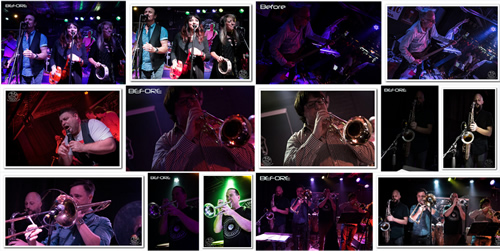
Gallery of Before and Afters
The following Flickr Gallery contains a set of Before and After images where we have used Lightroom to repair a previously discarded image.
In most cases the inferior quality “Before” image is labelled, and then immediately followed by the repaired image which is not labeled, but is sitting in a White Drop Shadow Photo Frame.
Gallery of Lightroom Before and After Images
Video about Music Photos
This is a bit Off Topic, but while looking for Lightroom Videos, we found this interesting video about shooting a band, changing lenses and using fish eye lens to great effect:
We hope you have found this Adobe Lightroom lesson useful and it helps you save some great music shots from the discards folder.
Just remember to shoot in Raw + JPG mode, because Raw images always respond better to treatment in Adobe Lightroom.
Enjoy,
Passy