Often when we film video there is not time or room to setup a tripod or monopod for our camera, and so the resultant footage is often wobbly and shakey.
This can easily be fixed afterwards in Adobe Premiere using the “Warp Stabilizer” effect.
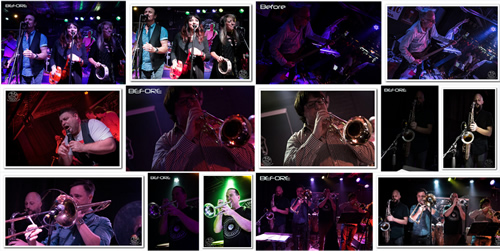
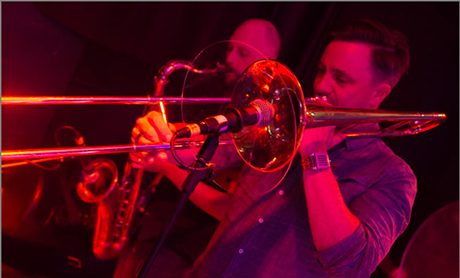
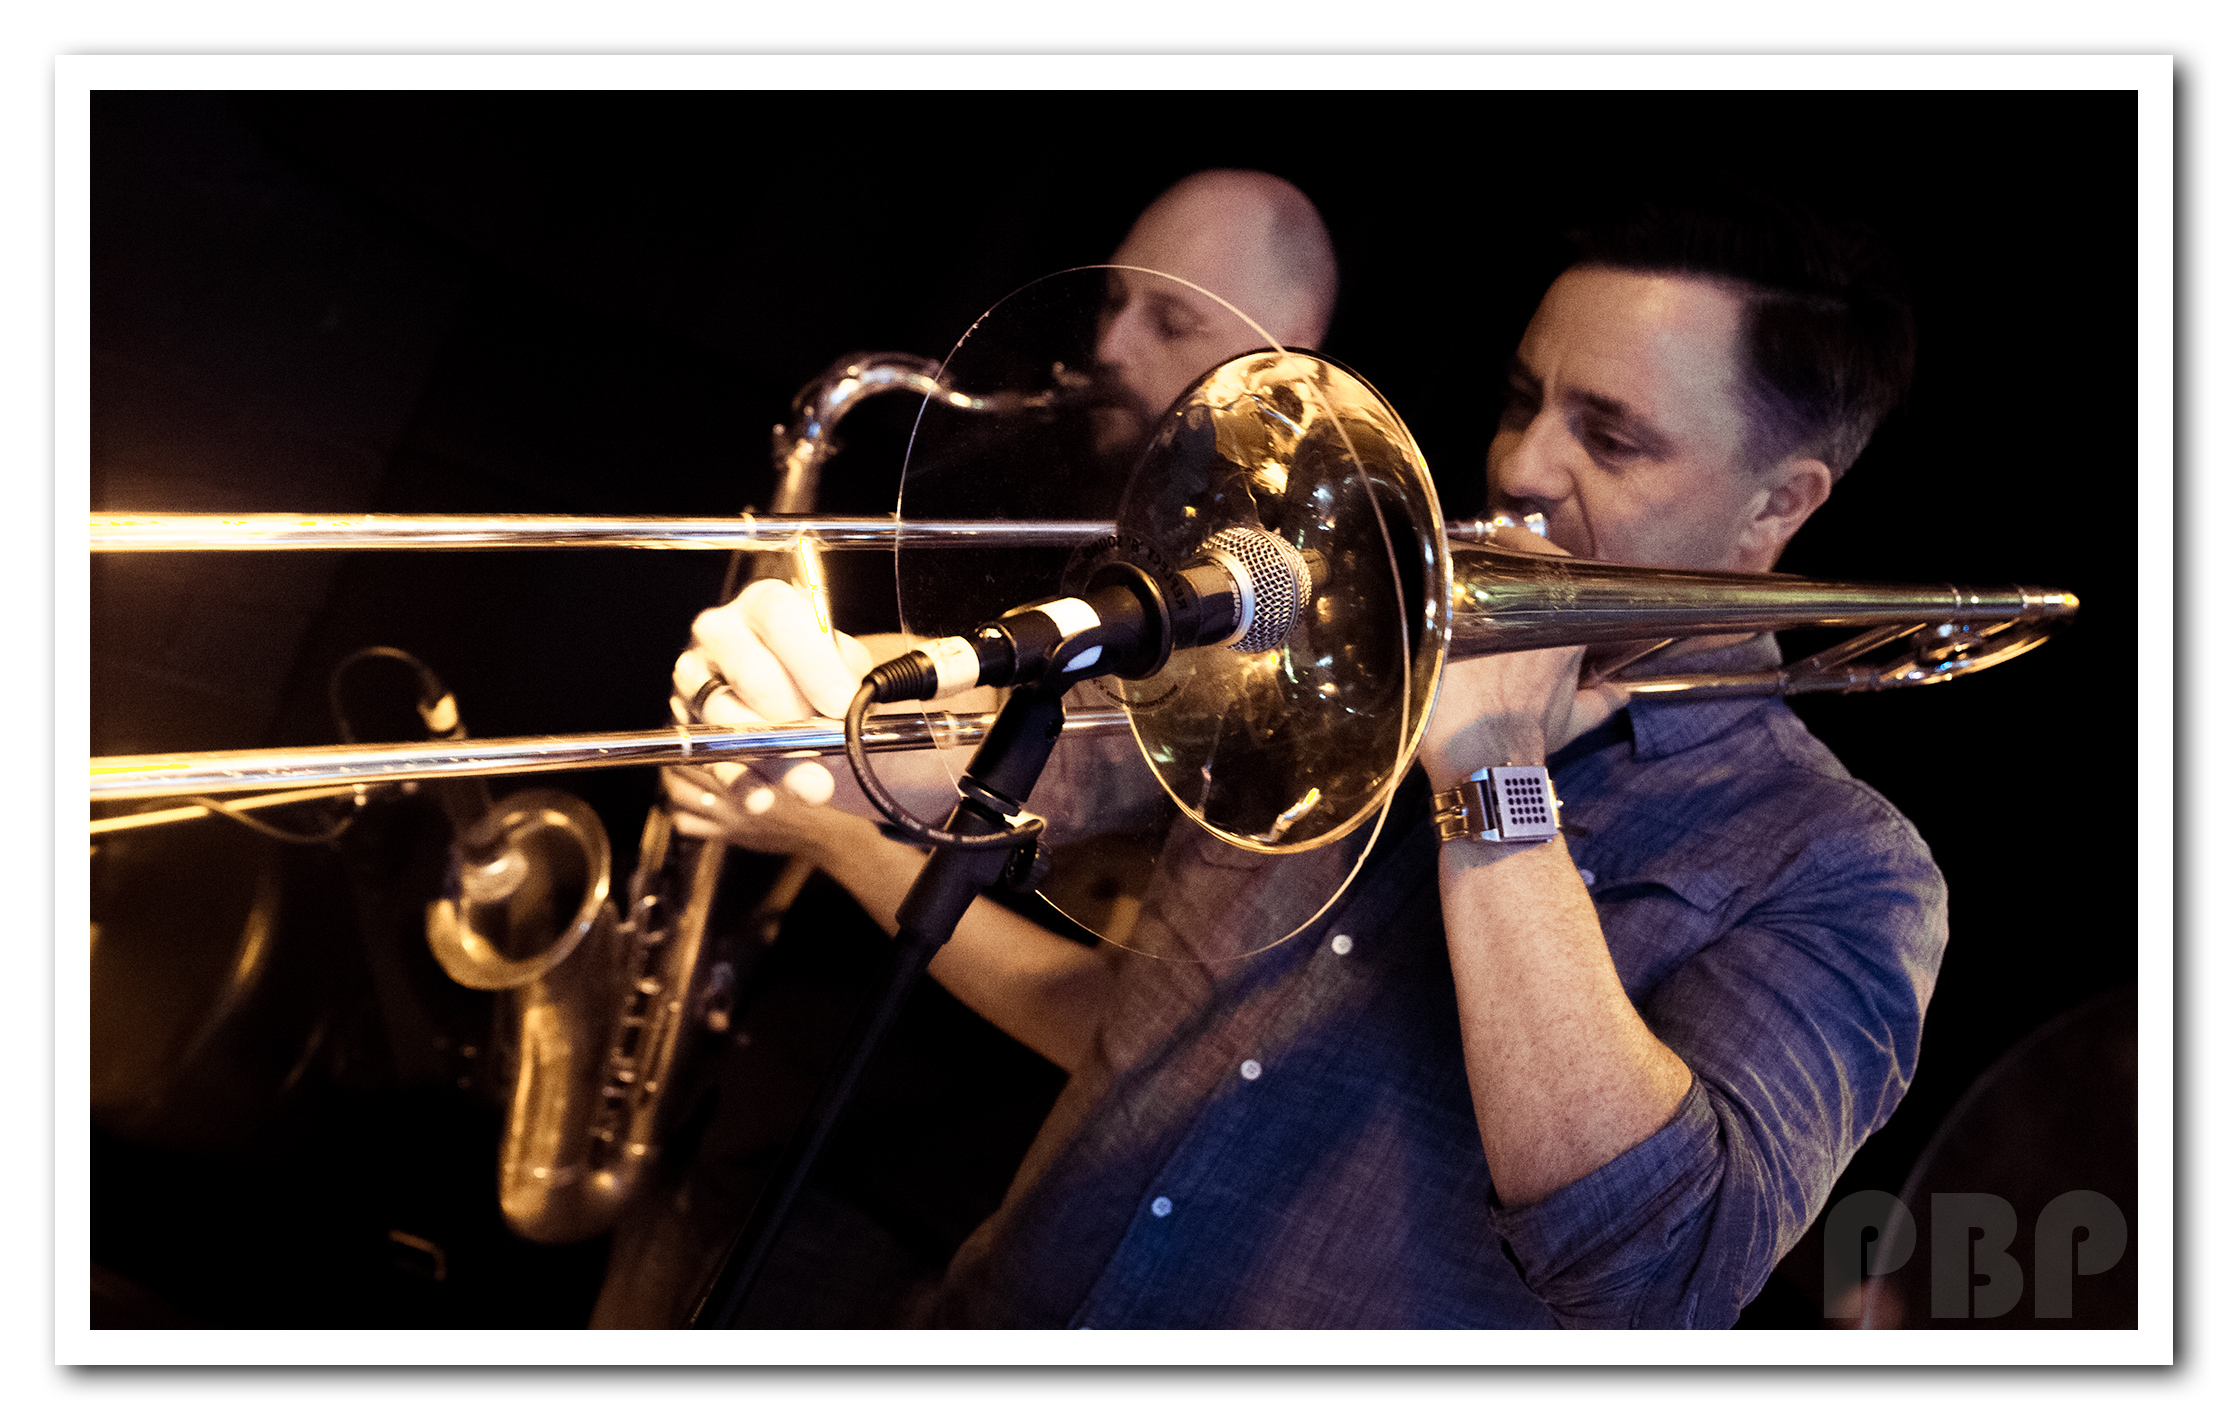
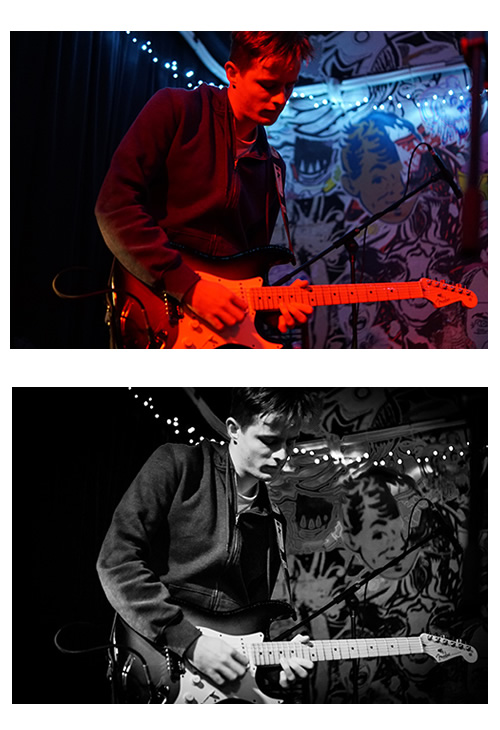
Here is some music video footage that shows how the “Warp Stabilizer” can be applied to obtain stable and steady results.
In this “How To” Lesson we comprehensively show how to use the Warp Stabilizer in Adobe Premiere.
Warp Stabilizer Default Settings
The Warp Stabilizer can be found in the Video Effects Menu in Adobe Premiere, inside the “Distort” folder. You simply click on the Warp Stabiliser effect and drag it down onto your video clip in the Timeline, and it starts work on the clip straight away.
BUT …. If you have other active clips on the timeline above the clip you want to stabilise then it will not activate and work. What needs to be done is click on the eye icon for each of these above clips, and turn the eye off while you are stabilising.
After the “Warp Stabilizer” effect is added, analysis of the clip begins immediately in the background. As analysis begins, the first of two banners displays in the Project panel indicating that analysis is occurring. When analysis is complete, the second banner displays a message that stabilization is occurring.
The Warp Stabilizing effect processing when first added runs for a long time, eg. it can take 5 to 7 minutes to stabilise just 1 minute of video.
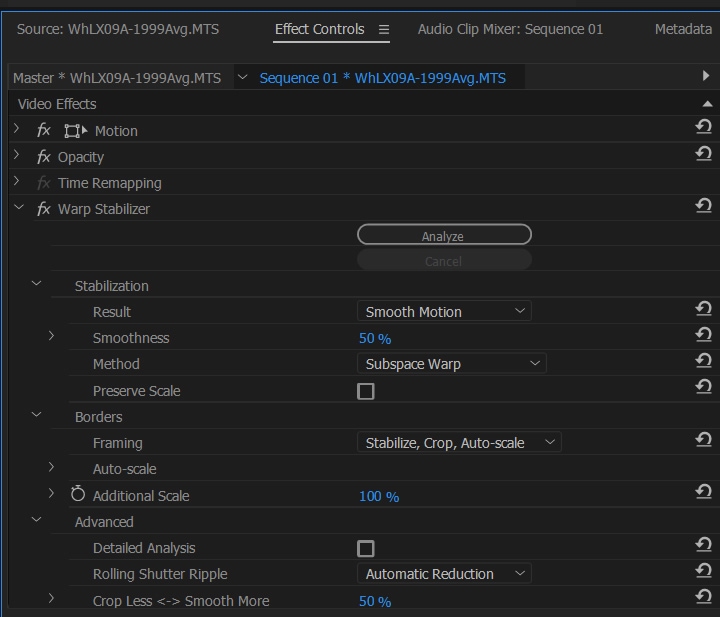
The default settings for Warp Stabilization are as follows:
(Click Image to View Full Size)
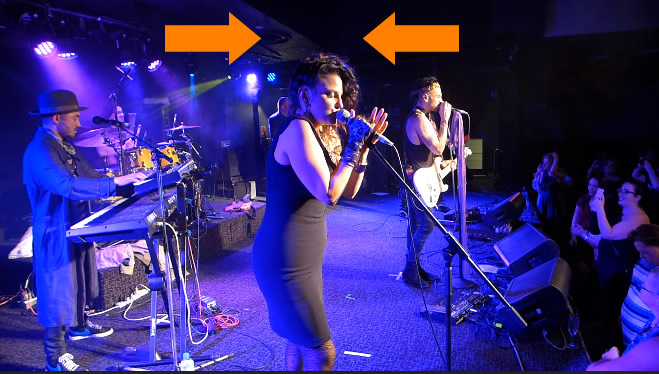
The stabilization process zooms and crops the footage, and so you need to have some “headroom” above people in a clip, or else it can crop and chop their heads off….which does not look good!
(Click Image to View Full Size)
The stabilized clip can still end up a bit wonky, as the process zooms in and out on background lights and background straight line geometries, so it is always best to shoot the original clip as steadily as possible (leaving space around people and the edges). Eg. It is best not to fully rely on the warp stabilizer fixing everything later in Adobe Premiere.
Later in this lesson we look in detail at ways to try and remove jelly blobbing from stabilized clips.
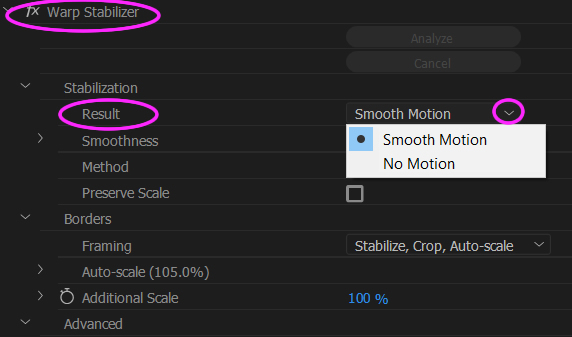
Warp Parameters – Result
We can set this value to either “Smooth Motion” or “No Motion”.
(Click Image to View Full Size)
The default value is “Smooth Motion”.
The “No Motion” setting will replicate a Tripod shot.
We can try “No Motion” on a clip that has still objects, (like a close up of somebody standing fairly still singing at a microphone) if we were also filming just standing still and taking the video (and not walking along with the camera), but have some shaking because we had zoomed in a lot.
We have found that for some short clips that using the “No Motion” setting for doing the Stabilisation can produce excellent results, but other times it will go along okay for a while, but then we suddenly get a big jerky jelly blob.
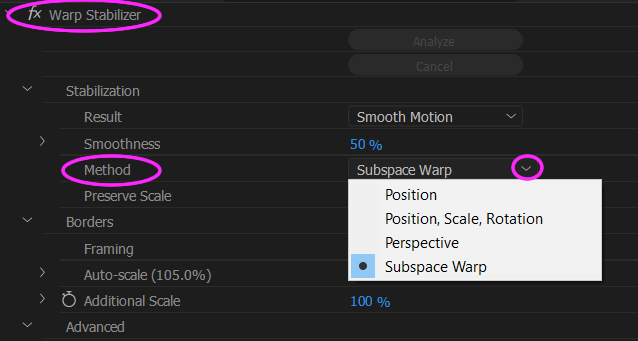
Warp Parameters – Method and Smoothness
We can select four different types of “Method” :
“Position”, “Position, Scale, Rotation”, “Perspective” and “Subspace Warp”.
(Click Image to View Full Size)
“Subspace Warp” is the most intensive, and the others down to “Position” become more and more basic in the corrections that they apply.
The “Perspective” type of stabilization corner-pins the entire frame. If there are not enough areas to track, Warp Stabilizer chooses the previous type (Position, Scale, Rotation). Watch for distortion along the corners when using this method.
Perspective can be used to stabilize in car driving footage as well as bush walking footage. Basically try it out on the clip and see if it works better than the default Subspace warp.
Apart from changing the method, which will trigger Premiere to redo the Stabilization, we can also change the Smoothness. Eg. If we have a wobbly and jelly type effects from Subspace Warp, we can drop the smoothness level down from the default 50% to say 20%, and Premiere will then automatically re-analyse and restabilize the clip.
Warp Parameters – Framing
We can set four different “Framing Options”
By default Framing is set to “Stabilize, Crop, and Auto Scale”.

(Click Image to View Full Size)
If we set Framing to “Stabilize Only”, then we will see a whole lot of black cropping edges of different sizes randomly appearing on the clip, because the Stabilizing it is not zooming in and rescaling to compensate for the cropping. The resulting stabilized clip will be totally unusable, but this can be a way of seeing how much correction work Premiere needs to do on our clip, before going back to the default “Stabilize, Crop, Autoscale” setting.
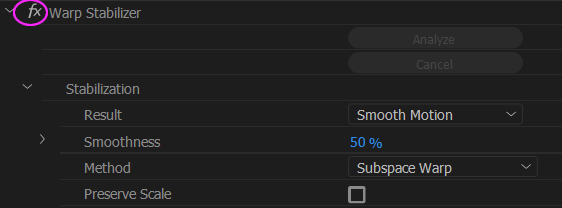
We can also click on and off the fx icon (located up the top left corner next to “Warp Stabilizer” text) to turn the stabilize on and off. We can play our clip with fx on and off and see the effects of the stabilisation that we have applied.
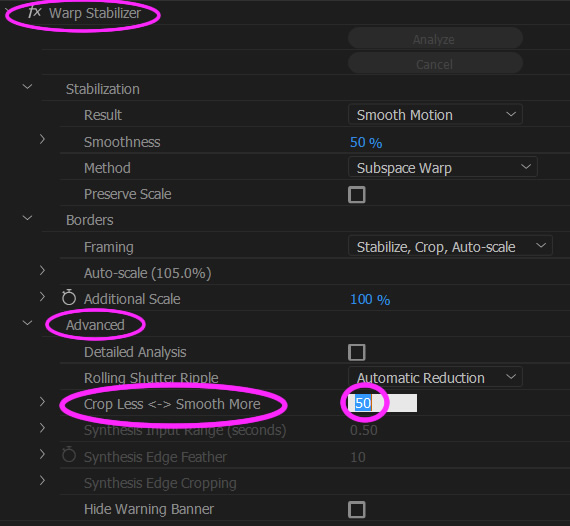
Warp Parameters – Advanced Menu
On this menu we mainly adjust the “Crop Less – Smooth More” percentage and the “Detailed Analysis”.
(Click Image to View Full Size)
If we lower the CL-SM percentage, then we get less Cropping, which will lower the amount of Stabilizing, or we can increase the Percentage which will do more cropping and zooming and make the clip smoother but can introduce more of the blobby jelly effect, especially on background objects like stage lights in the clip.
Later in this How To lesson we will discuss more about how to adjust all of the Warp Parameters one by one.
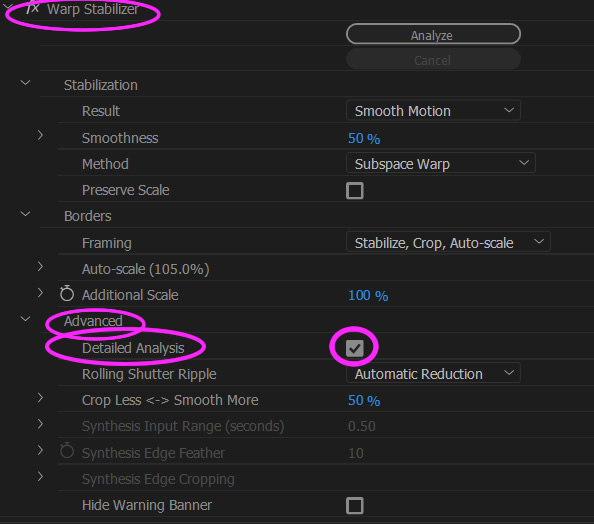
In the Advanced Options we can also tick the “Detailed Analysis” option which makes the whole stabilize process run a lot longer, but is supposed to go through all of the frames analysis in much greater detail.
(Click Image to View Full Size)
We have not had much luck with using “Detailed Analysis” and found that it simply made any blobbly jelly effects become more jerky and worse than they were in the original stabilize.
Turn Stabilize On and Off
We can click on and off the fx icon (located up the top left corner next to “Warp Stabilizer” text) to turn the stabilize on and off. We can play our clip with fx on and off and see the effects of the stabilisation that we have applied.
(Click Image to View Full Size)
If we change any Stabilizer settings, Premiere automatically starts the stabilization process. So we can change and try out different options one after each other. We can press cancel at any time to cancel the stabilizing. Adobe says the we can work on other parts of our Project while Stabilizing is running, but we have found that it is best to let the Stabilize run and not do anything else till it finishes.
Length of Video Clip
The warp stabiliser can run for a very long time of you are stabilising a few minutes of video. So make sure that you always cut down the clip to the final length that you want, before stabilising.
Stabilize First
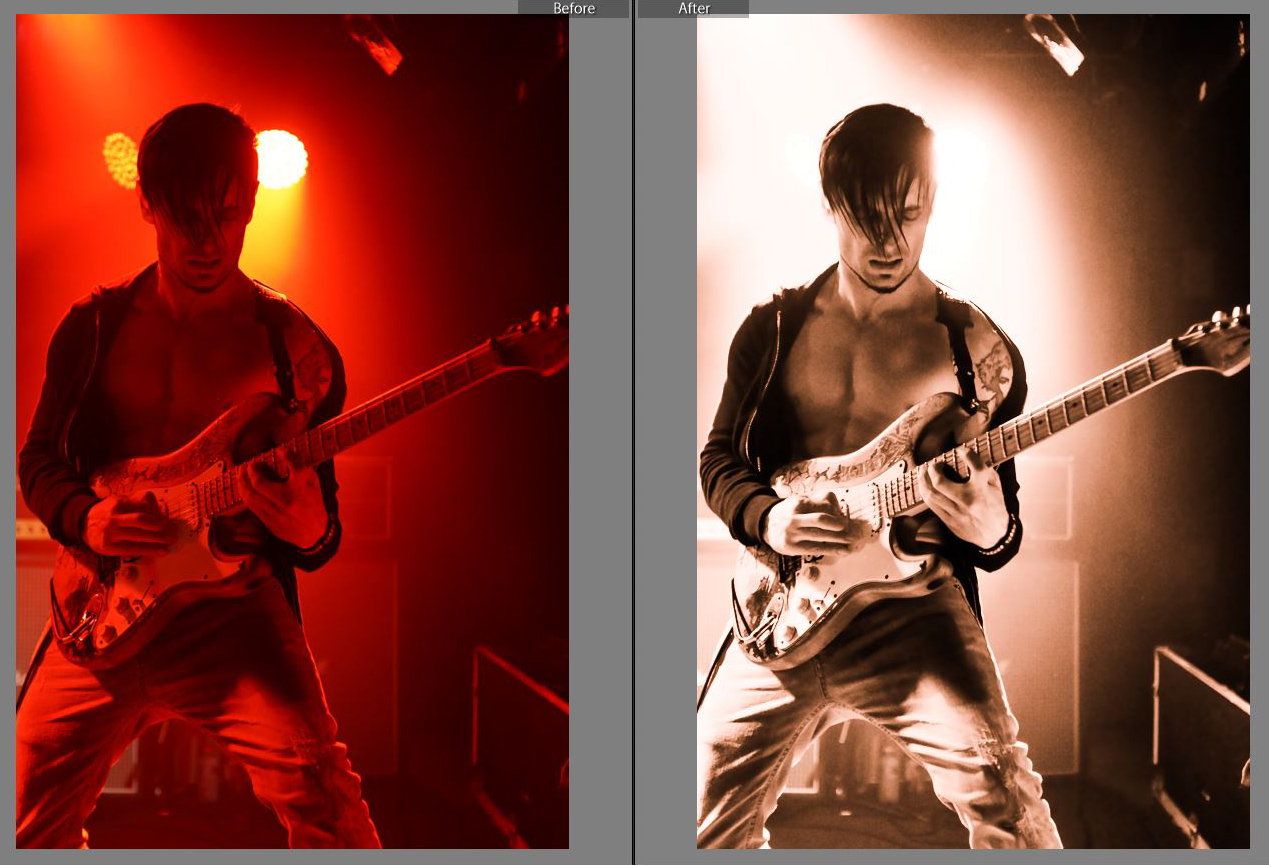
Stabilize First, and then apply any effects like brightness, contrast, sharpening, gamma level. Always apply sharpening last. After applying these video effects, there will probably be a red mark on your clip in the timeline, press the enter key to “render” the clip (line will turn green) and then play it to see what it looks like.
Export Settings
It is best to check the “Maximum Render Quality” option under both “Sequence Settings” and “Export Settings”.
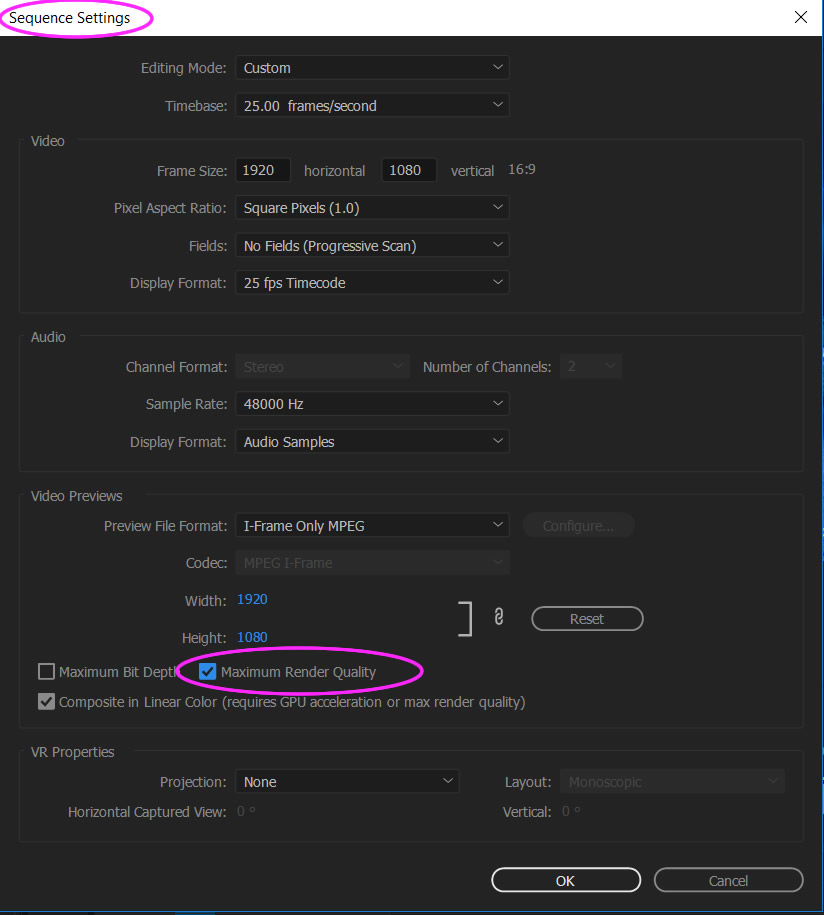
(Click Image to View Full Size)
However, Adobe warns that we can only set Maximum Render Quality in Sequence Settings if we have a powerful computer with lots of memory, and so we usually leave it turned off.
We do however have Maximum Render Quality ticked whenever we Export to render out our final clip, even on our low performance laptop.
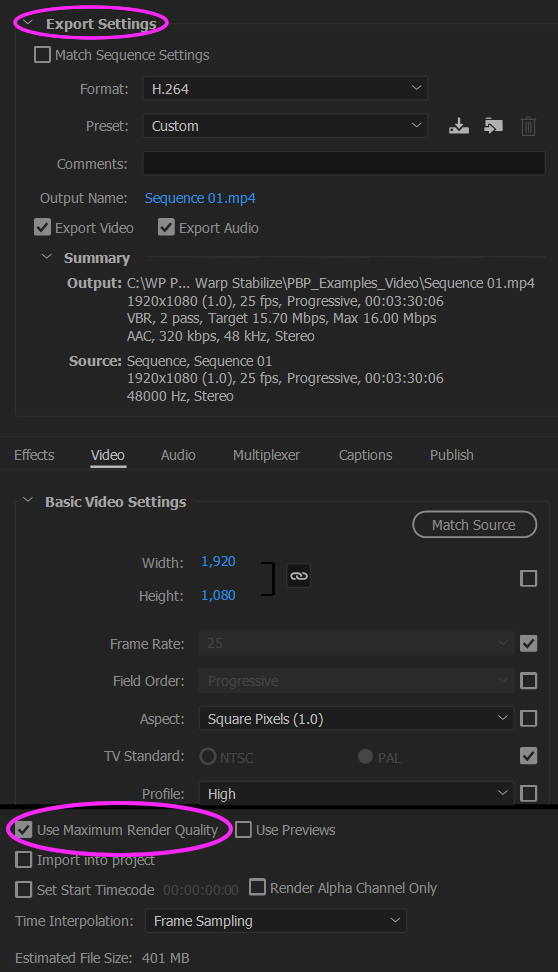
(Click Image to View Full Size)
Stabilization on Nature Videos
The following is a video we made with a very basic compact camera while on a Bush Walk:
On this Sherbrooke Forest Waterfall video the stabilisation worked wonders, and removed all shakiness and made our video look like it was professionally shot using a tripod.
We did this on the laptop using Adobe premiere CS6, but we imagine everything is the same in Premiere CC.
Settings we used were: (Adobe CS6 chose these for us)
Stabilisation Result: Smooth Motion
Smoothness: 50%
Smoothness Method: Subspace Warp
Borders Framing: Stabilise,Crop,Auto-Scale
Auto-scale Maximum Scale: 150%
Auto-scale Action Safe margin: 0%
Additional Scale: 100%
Advanced Detailed Analysis: Unticked
Advanced Rolling Shutter Ripple: Automatic Reduction
Advanced Crop Less <-> Smooth More: 50%
These settings worked fine on all of our Nature Video shots, and so we did not change any of them.
Fixing Jelly Distortion Problems
The big drawback to Warp Stabilizing is the introduction of the jelly effect into the background of video clips.
We have found this can be really bad for video filmed indoors.
The worst problems we have ever had can be seen in the following video.
Eg. Watch the roof beams in the ceiling to see the jelly wobble wavey distortion side effects of stabilizing.
If the stabilized clip has a wobbly jelly look from all the zooming in, cropping, and resizing, that Stabilizing has done, then the following article from http://whoismatt.com/bestwarpstabilizersettings/ recommends to try do the following five “fixit” methods.
By default, Warp Stabilizer chooses “Smooth Motion” – 50%, with a method of “SubSpace Warp.” The video borders framing setting will show “Stabilize, Crop, Auto-scale”. If the clip ends up distorted and looking like wobbling Jelly, then try the following methods to clean it up.
Do the fixes below in the order they are numbered, and stop once you have a fix.
Eg. If method one (Detailed Analysis) does not work, then try method 2 and then the next method in the list below until you are satisfied with your clip.
1. Detailed Analysis
1. Click the “Advanced” arrow and check the “Detailed Analysis” box. Have premiere re-analyze the footage (which will take much longer than before), but sometimes this will work as a quick fix.

If this has not fixed things, then try Method 2.
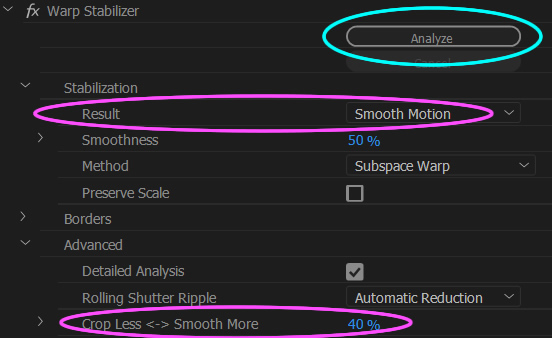
2. Crop Less <-> Smooth More
Click the “Advanced” arrow and adjust the “Crop Less <-> Smooth More” percentage from “50% down to 5%” going in steps of 10.
(Note this option is only available when using “Result = Smooth Motion” and is greyed out for “Result = No Motion”.
Eg. Start by changing it to 40%, click on “ANALYZE” and let it stabilize. Then check the footage to see if it has improved.
(Click Image to View Full Size)
Each time we lower this percentage the video will become a bit more shaky, but it should progressively contain less jelly wobble in the clip.
It is helpful to use this Method 2 if we have just a slight amount of shakeyness (perhaps due to handholding the camera), and we want to smooth this out.
If this has not worked then try Method 3.
3. Reduce Smoothness
Click the “Stabilization” arrow and drop the “Smoothness” right down from 50% to only 5%.
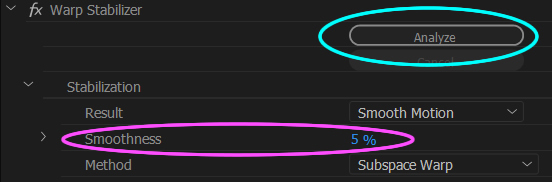
(Click Image to View Full Size)
This reduces the smoothing that Warp Stabilizer will attempt to apply to the clip.
This will result in a slightly more shakey shot, however clips often do not need much smoothing at all.
Method 3 should cut out a lot of the Distortion and Jelly Wobble effect.
(Remember it is always best to try and get the original shot as steady as possible, even if this means using a cheap lightweight monopod on your DSLR camera while filming the shot.
If this has not worked then try Method 4.
4. Rolling Shutter Ripple
Click the “Advanced” arrow and change “Rolling Shutter Ripple” from “Automatic Reduction” to “Enhanced Reduction.”
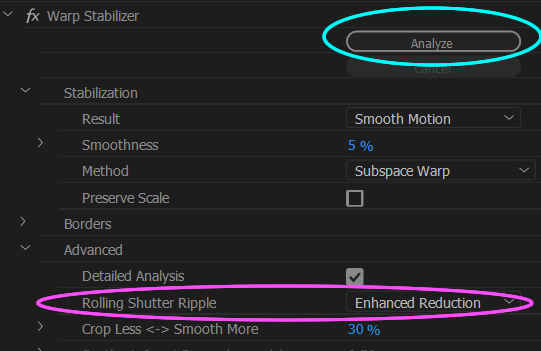
(Click Image to View Full Size)
This setting is usually only helpful when dealing with Rolling Shutter introduced by the CMOS sensors used in DSLRS and other popular digital cameras, but it doesn’t hurt to try using it. “Rolling Shutter” is a jelly-like wobbling or blurring stuttering effect in recorded video when the camera is handheld or moves a lot, especially during panning across a scene.
Always try to limit panning if possible and pan as slow as possible when filming video.
If this has not worked then try Method 5.
5. Position Method Synthesize Edges
Click the “Stabilization” arrow and change “Method” to “Position.” Then click “Borders” and change “Framing” to “Stabilize, Synthesize Edges.”
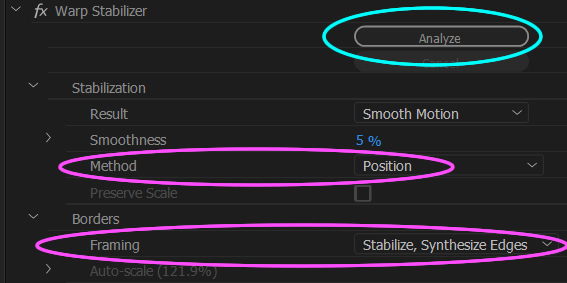
(Click Image to View Full Size)
With this setting, Warp Stabilizer will actually create new edges for your footage from existing pixels. As long as it isn’t being forced to make up too much information it usually does this very well. The tradeoff is that almost always you will have to render your stabilized clips (by pressing the enter key) before viewing them because of the enhanced processor power required. Try using Synthesize Edges while changing the Smoothness percentage. This usually fixes the Jello/distortion in clips when nothing else will.
Other Approaches
We can also try these approaches to doing Warp Stabilization.
1. Start with method as “Subspace Warp” at 50% and if there is weird zooming or jelly wobble, then try redoing it at only 10%. If there are still problems, leave it at 10% but switch the method to “Position, Scale, Rotation.
2. Start with the Default settings, and then try up the Smoothness from 50% to 70%. This worked okay on a still object for which the video footage was a little shaky due to zooming in.
3. If we get wobbly resizing that makes writing or objects go Jelly wavey and change size, (that looks like we are filming underwater) we can drop the smoothness down to 20% or even down to 5%.
Even as low as 5% smoothness will still get rid of a lot of shaking, but will not introduce nearly so much warping and wavey size changing distortion of objects.
Further Reading and Examples
This first article includes examples of the best settings to use to stabilise in car driving footage as well as drone footage:
Making the Most of Adobe’s Warp Stabilizer
There is another version of the above How To Guide, that includes settings screen shots at this link:
Comprehensive Guide to Warp Stabilizer
Adobe has a written document all about Warp Stabilization at the following link:
Adobe Dcoumentation on Warp Stabilizer
Videos About Stabilizing
This is a three minute demo video of the Warp Stabilizer, showing how you may have to also apply cropping.
The following three minute video shows the basics of the Warp Stabilizer, and then uses an example clip to apply many diferent combinations of settings and find out which one works best.
Here is a great seven minute video about how to shoot your clips with warp stabilization in mind: Tips and Do’s and Do Not’s.
This is another great video about how to shoot hand held, mimic slider effects, and then stabilize it all afterwards using Premiere.
This video shows the wavey Jello effect and how to fix it using Stablization.
Finally we have a 2 minute Adobe TV Video about Warp Stabilization on the following web page.
Adobe TV 2 minute Stabilizing Video
So that’s our comprehensive guide to Warp Stabilizing completed.
The most important things to remember are:
– Always film footage as steady as possible, by using a Monopod, or even a Tripod.
– Limit panning shots, but if we have to pan then do it very slowly to avoid rolling shutter stuttering effect
– Use Sony cameras that have inbuilt image stabilisation (and are also totally awesome cameras anyway)!
Enjoy,
Paul at PBP Photos By Passy