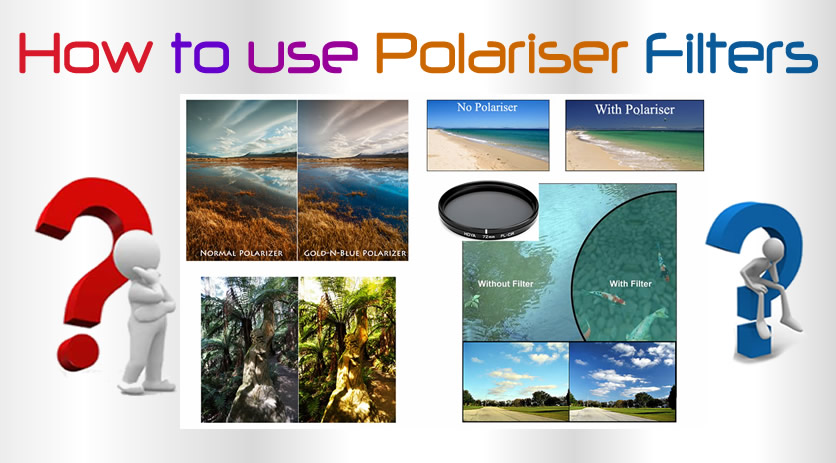
Polarising filters are great for fixing problems with bright light conditions.
Examples include taking photos in Forests, photos at the beach, as well as indoor photos, where bright sunlight is streaming through windows into the room.
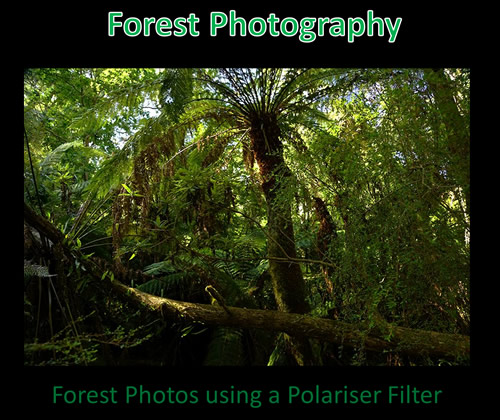
In this lesson we focus on techniques that can be used to get much improved photographs in rain forests when the sun is shining.
We also cover using Polarising Filters for indoor photos, and a brief mention of Beach Photo applications.
Forest Photography
Let’s face it, most times we go hiking, it is nice if there is sunshine, although strictly speaking it is best to take forest photos of plants, streams, and waterfalls when it is overcast.
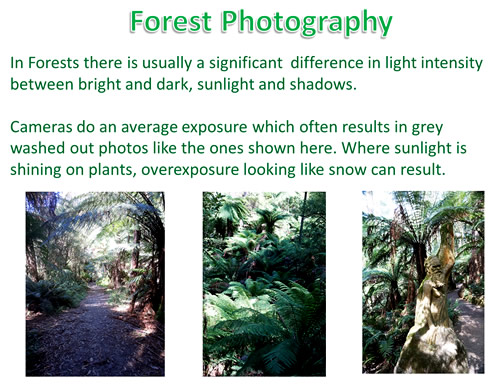
If we just put our camera into auto mode in the Forest, it struggles with exposure and color correctness.
This results in grey washed out photos, with foilage being a strange aqua green, rather than its natural colour.
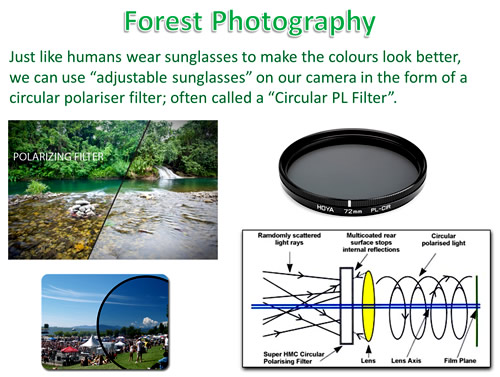
On a sunny day hiking, we would normally wear sunglasses, which makes the sky a more intense blue, as well as making plants greener and improving contrast.
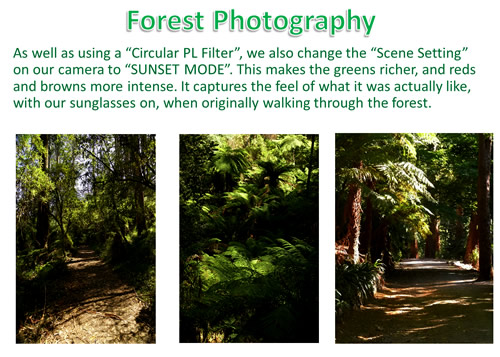
To get this same effect for our photos, and stop harsh sunlight from washing out our images, we can use a “Circular PL” polariser filter.
This simply screws onto the front of a DSLR Camera, and is also rotatable. Rotation of the filter adjusts the degree of polarisation or sunglasses effect.
It is best to use good quality Japanese made Hoya brand filters, and we find these filters work extremely well.
Note that a Polarising Filter works best when the sun is shining from your left or right hand sides.
If you use a Polariser Filter facing directly into the sun, or with your back to the sun, it will often have minimal to zero effect.
As well as a Polarising Filter, we have found that good results can be obtained by also setting our camera into “Sunset” mode.
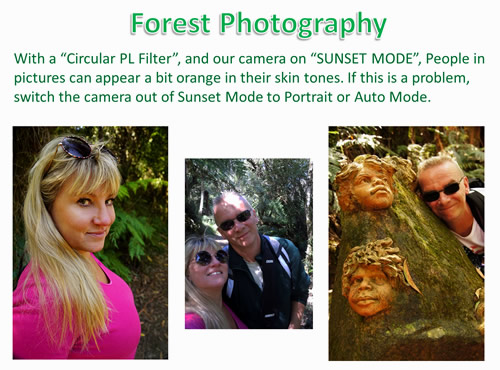
One downside of using Sunset Mode is that people’s skin colour can become very orange in colour.
For the portrait on the left in the image above, sunset mode warmed up the skin tones, and made the pink top intense in colour. Overall this was a good effect.
However in the photo on the far right, the skin tones do not look good with the orange glow caused by Sunset mode.
The photo in the middle has sunset mode turned off, and the people look more natural. However the scenery in the background is grey with a strange aqua green hue in the ferns and tree leaves.
Polariser with Sunset Mode Examples
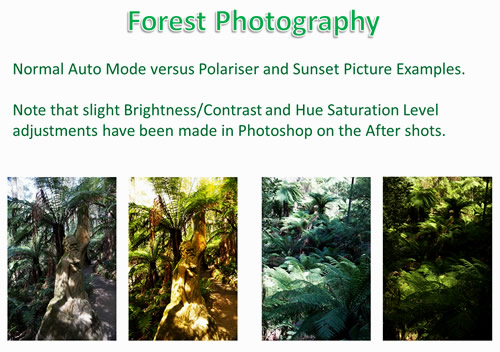
The following pictures show Auto Mode versus Sunset Mode with Polariser Filter.
We think you will agree that the right hand side Sunset Mode pictures look far better than the Auto Mode photos.
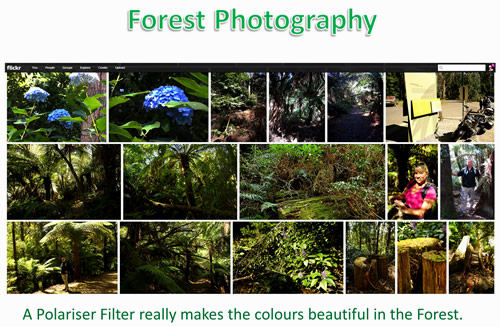
Using a Polariser Filter really makes the colours “pop” and look beautiful in the Forest.
Polarising and Indoor Photography
Natural light is the best medium for photos, as it is naturally diffused, and does not have the harshness produced by light from a Flash.
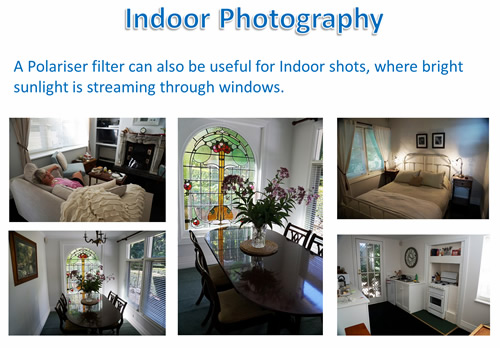
However, we get the same dramatic range in brightness as we do in the forest. Eg. Light near the windows will be washed out with white overexposure, and shadow areas will be dull and grainy.
Using a Polariser filter smoothes all of this out, with the added benefit that we can see scenery that is outside while looking through the windows.
One side effect of using a Polariser for Indoor Shots, is that we can get areas that are “light blue” in colour.
In the bedroom shot above, the blue looks okay. But the blue reflection on the dining room table is not so good, and probably should be photoshopped out.
Polarisers and Beach Photography
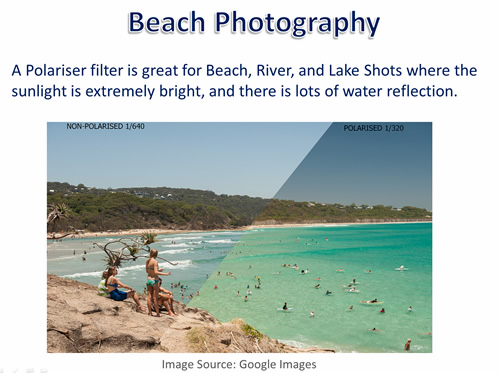
At the beach we wear sunglasses to cut down the glare from bright sunlight reflecting off the water and white sand.
Beach photos also benefit greatly when our camera “wears sunglasses” in the form of a Polariser Filter.
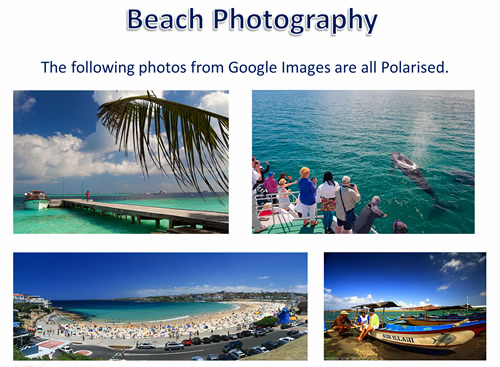
Like with Forest Photos, Polarised beach Photos will turn out with intense colour, and beautiful blues and greens and “see-through” water.
There is the downside of people’s skin colour tones being a bit orange and non-realistic, but this is a small price to pay compared to the overall beauty of the entire image.
We have not had a chance to try our Polariser Filter out at the beach yet, but when we do, we will update this lesson with some “Before” and “After” images to demonstrate how well it enhances sea scape images.
Polarising Filters Videos
Here are a couple of Videos which show how to use a Polariser Filter, and the improvements in color which can be achieved.
Like Us On Facebook
If you enjoy our Free Photography Lessons Photos By Passy, then you owe it to yourself to like our Facebook Page.
Click Here to Like our Facebook Page
Subscribe
If you enjoy visiting Photos By Passy, why not get a free subscription to the website.
You can then receive notifications of new items and updates directly to your email address.
Go to the subscribe area on the left hand sidebar, (or down the bottom of the page if using a mobile phone), fill in your email address and then click the “Subscribe” button.
Enjoy,
Passy
