In this lesson we look at what needs to be done to make a good Live Music Promo for a band.
If you think that making a Promo Video for a Band is a quick and easy way to generate better income than still shots, then think again!
Drawing on our experiences working with a number of bands, we have found that making a Live Promo is a lot harder than you would think. There are a surprising number of challenges that arise when making a Music Promo Video.
One significant challenge is that you as the Video Maker, and the Band as the Performing Artists, need to make sure everyone is on the same page for the duration of the project.
We have already examined this challenge in a previous lesson which can be found at the link below:
How to Get on the Same Page as Your Client
In this current lesson we are going to look at some other challenges we have found when making Live Music Promo Videos.
The purpose of this lesson is not to criticise any of the bands we have done video work for, but rather to share some of our experiences from the learning curve we have travelled along while making Live Music Promo Videos.
Our primary objective is to share what has happened along our journey, and help people who are thinking about making a Live Music Promo Video.
The Promoter
It becomes very easy to forget about who the final end product is being made for.
The video is being made for a Promoter or Venue Owner to View.
This person is someone who is going to have a quick look at the Promo to answer these basic questions about the Band they are considering offering paid employment to:
1) Do they present professionally?
2) Do they sound okay?
3) Are they playing popular songs?
4) Is there a crowd there paying an admission price and having a good time?
5) Is alcohol being consumed by patrons and venue profit being generated?
6) What events does the band look suitable for: Pub Gigs, Corporate Functions, Charity Events, Outdoor Festivals, etc.
Promoters want to hear a few popular hit songs played well.
Promoters are not going to be fussed if there is audience background noise in the sound track. In fact it adds to the authenticity of the video.
Promoters are not going to check the video second by second to see that a cymbal got hit, but they did not hear a cymbal in the audio track.
They are not going to be critically judging video quality and technical perfection to see if they would employ the videographer for a job.
By having a quick look at a live audio promo video, the Promoter can quickly see what the band are really like in a live situation.
They can see that the band is the “real deal” and not just a set of nice Promo Photographs and studio recorded Sound Cloud samples.
The Promo Video is an authentic live performance, and not just a bunch of glossy marketing.
For the Band it seems it’s often very hard to envisage these video product requirements….
but they need to step away and put themselves in the shoes of a Promoter:
someone who just needs a quick confirmation that this band is suitable to give some work to.
We believe the following “Beach Boys Show” video (not made by PBP) is a great example of what a Band Promo Video should be:
(Near the very end of this lesson there are some more example videos).
The Band / Client
Often the Band does not understand that a Promo Video needs to be made OF them, and not FOR them.
The band looks at the process and thinks this is a great opportunity for them to Produce, Direct, and Star in their own great glorified rock star video of what they think are plenty of their best songs.
The band will want to have their whole set filmed, and want to include obscure songs that are their personal favorites, and often have no idea in their mind at all about the needs of the Promoter.
The Promoter is usually a busy person who only has time to watch a short 1 to 3 minute Promo, containing 3 or 4 recognisable songs.
They do not have time to sit back and watch an epic fanfare of obscure melodies that are the band’s personal faves.
We have found this to be one of the biggest challenges: Many Bands do not understand or want to follow the Design Brief of a Short Promo Video.
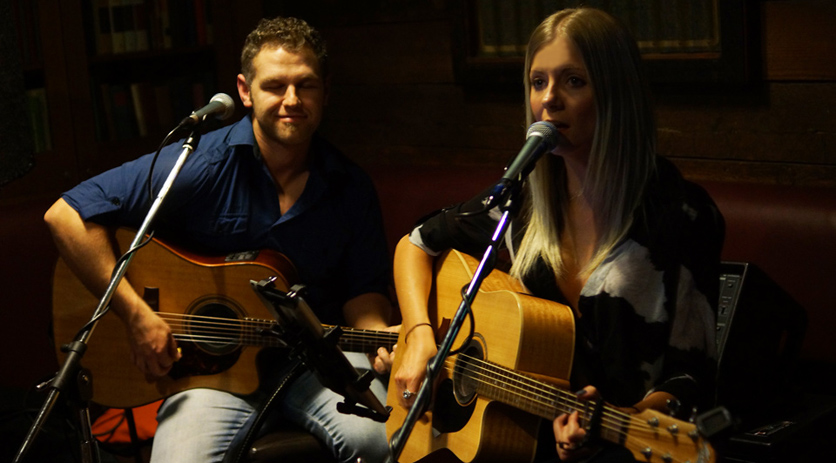
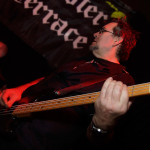
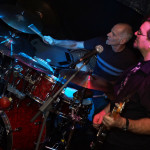
Band Stage Craft
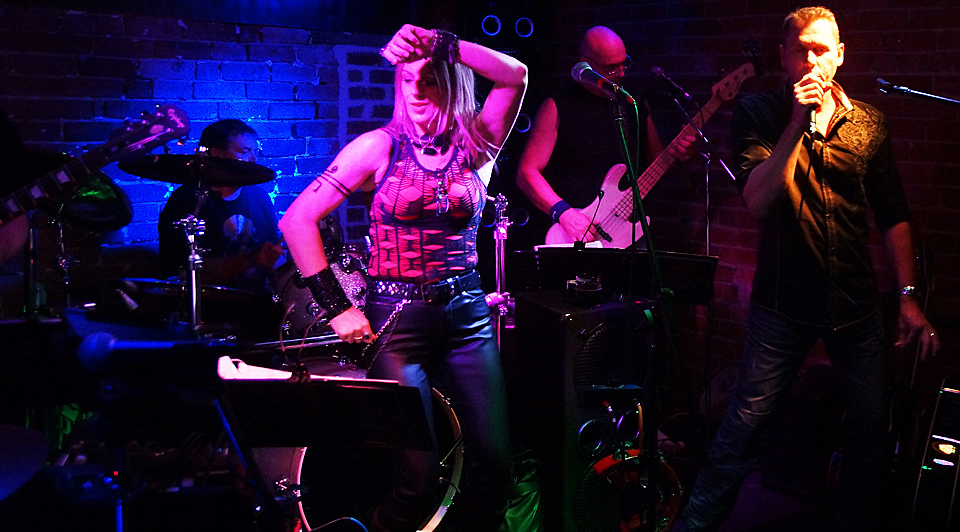
Another issue we have found while making Live Music Videos is that Band Members can exhibit very poor stage craft which totally ruins whole sections of video footage.
By this we mean people moving mic stands around during the video, drinking from cans of beer, having casual conversations during songs, turning their backs to the crowd during songs to twiddle knobs on amplifiers, fiddling around with ipads, and so on and so on.
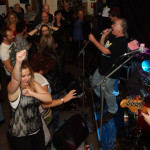
There also needs to be some sections that are filmed where there is audience connection and involvement, eg. typically the hands clapping sing along type event during one or two of the target filmed songs.
A really significant problem has been that Band Members often seem to be reluctant to engage with the camera and put on a show for the video footage.
It is usually something totally new for them, and is probably quite fair enough that they do not know what to do when the camera is on them.
To counteract these problems we have developed an online Document all about Stage Craft that we insist Bands read through thoroughly prior to the show.
You can check out this document at the following link:
Tips for Getting a Great Live Performance Video
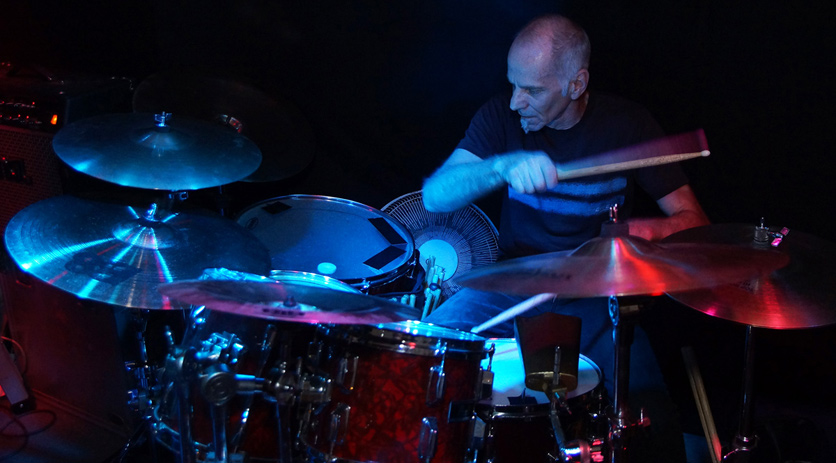
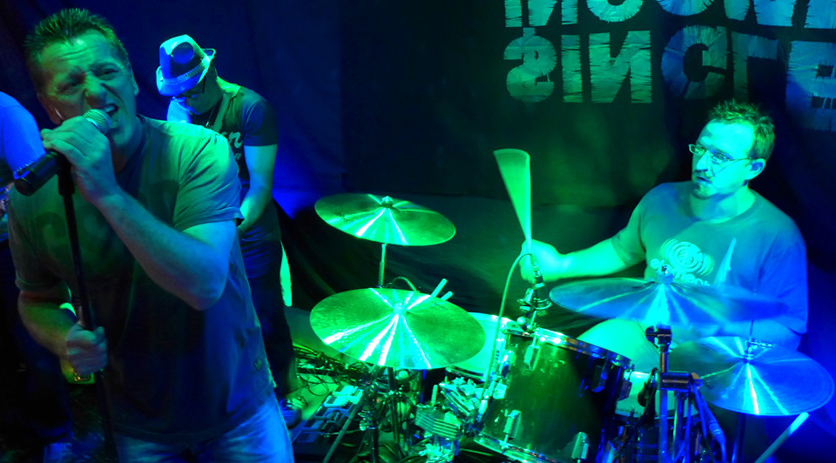
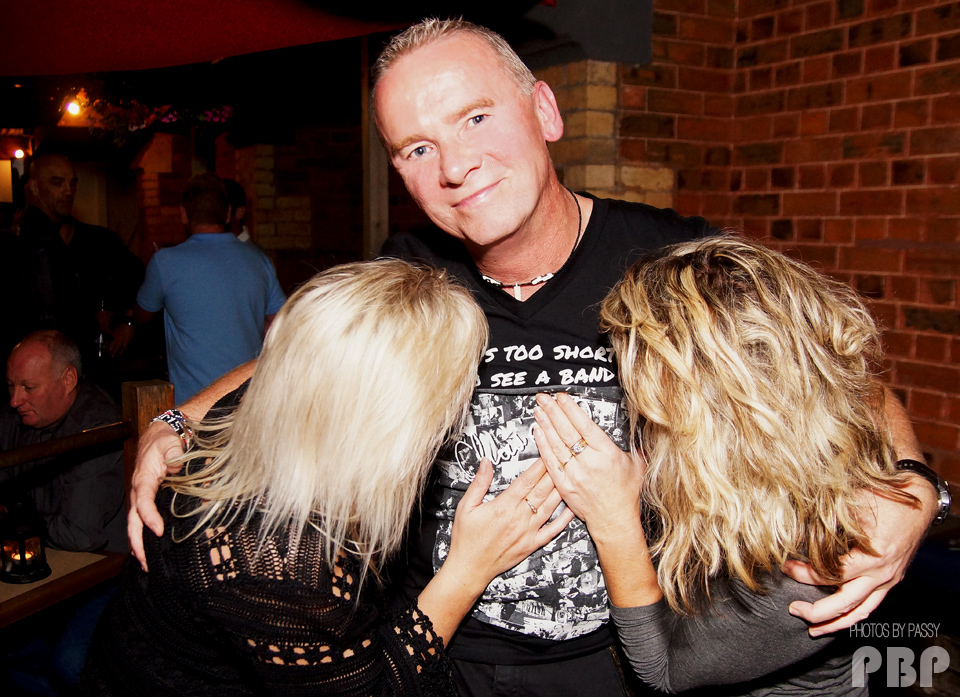
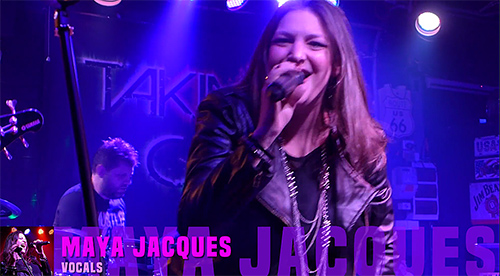
Great Stage Craft and camera interaction makes all the difference as you can see in this still shot from one of our Promo Videos:
The Videographer
The Band’s needs and the Videographer’s needs must be clearly understood at the outset.
To achieve this it is essential to use a CHECKLIST throughout the entire Production from Conception through to Online Product Delivery.
The Main parts of the checklist need to be as follows:
1) Establishing all Client Needs Before Starting the Project
2) Making Clients Aware of Product Limitations
3) Supplying a List of Videographer Needs to the Client
4) Agreement on Delivery and Distribution of Final Products
The “Photos By Passy Video Check List” ended up being 13 pages long, and it can be viewed at the link below:
Photos By Passy Video Project Checklist
We also recommend that you take the time to thoroughly go through our previous lesson on “Getting on the Same Page as Your Client”:
How to Get on the Same Page as Your Client
Limiting the number of filmed songs is the Videographer’s first task prior to the gig/performance.
As discussed previously the Band will probably want the whole 2 to 3 hour show filmed, which is totally not feasible.
The Band needs to be asked to supply a set list with 6 to 8 songs targeted for filming.
There also needs to be a one song gap between each targeted song to ensure all cameras have enough time to write to SD cards, and be reset.
This one song gap requirement is often a challenge for the Band, especially if they have pre-programmed sequencing or effects in their set.
After filming, and going through the Gigabytes of Video from all the cameras, selecting the “Best” 3 or 4 songs is the Videographer’s next big job.
Factors to consider when making this selection are which songs sound best, which ones have the best footage, which ones have great audience involvement, which ones have great stage craft and camera interaction, and so on.
Usually when you now present the Band with the short list of 3 or 4 songs, the Band will immediately want to know in detail why all of the other targetted songs did not make the cut.
This is fair enough, when you play in a band and only hear yourself and a bit of on stage foldback, you have no idea what the Band actually sounds like.
Some of those other songs could have been absolute rocking masterpieces, and so why were they dropped?
What we have found has to be done is to make a quick rough “lowlights” video of the rejected songs that showcases all of the issues in them. This video needs to be set to “Private” and the hidden link given to the Band so they can view these rejected songs.
An accompanying email detailing all of the issues also needs to be sent to the Band contact person.
(Pain in the neck extra work, but it needs to be done).
The alternative would be to get together with the band in person and go through all of the footage with them.
This is usually not do-able due to day job commitments and geographic dispersion of band members.
It is also probably more time consuming to you as the Videographer, and remember every hour spent on the job lowers your hourly pay rate and is time away from your normal life.
From the confirmed short list, the Videographer now makes Version 1 of the Promo.
The first challenge that usually arises now involve the Band being overly critical and concerned about the slightest musical mistakes and/or the most tiny non-synchronisation of moving sound and image.
On balance a small section actually looks and sounds great, but from the Band’s viewpoint it is an absolute catastrophe of epic proportions and must be immediately removed.
These are the type of microscopic items that a Promoter would not be overly concerned with, if indeed they even noticed at all that they were there.
Because the Band is the paying customer you will probably have to remove the sections, even if it tragically subtracts some great footage from the Project.
The next thing a Band will usually do is want to change the footage proportions in the Promo, eg. they will typically want 90% or more of them, and 10% or even 0% of the Audience.
This is a disaster for the Promo Video’s effectiveness. The Promoter must see clearly that there is a crowd there having a great time, and so this footage cannot be removed.
The next thing that the Band might complain about is the Live Audio, and the fact that crowd noise can be heard in the soundtrack.
They will despair and wish that the audio can be replaced with studio recordings or clean and sterile studio remixed desk feeds.
Well if you take out the Live Authentic Sound, then we are basically back to the package of Promo Photos and Studio Sound Cloud Samples!
Basically we might as well forget about having a Live Music Video done at all!
Technically of course it is possible with a skilled band to take a Studio Track and use it for 80% of the Soundtrack and then mix in about 10% to 20% live sound. This does create a “Live” sounding video. We have only ever done this on one project, and it worked out well because the sound in the small venue where we filmed was boomy and full of echo and noise.
However in the majority of cases a Studio + Live Mix is not an authentic representation of the Band as a live performing act.
The next typical obstacle is for the Videographer to fight very hard to have the Promo total duration be only 1 to 3 minutes long.
Often a Band will NOT want to align with having a Promo that is a maximum of 3 minutes in duration.
They will typically want longer segments of the songs that are included, and then want to add extra songs to the current end of the Promo.
Very soon the Promo will become 4 to 5 minutes in duration or even longer.
As the Videographer you must be determined at all times to make a SHORT Promo that satisfies the needs of the Promoter.
However often you will be stifled by the Band wanting to make their own rock star extended highlights video that has way too much content. This extended content is also often the wrong type of content.
So what do you do at the end of the day as the Videographer?
As the Band is paying you for the work, you often have to go against what is really needed and make an off-topic long duration video.
Filming a Live Promo
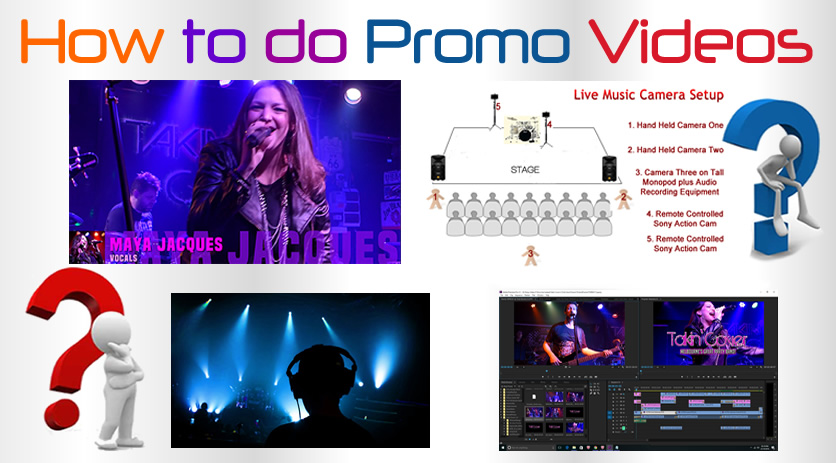
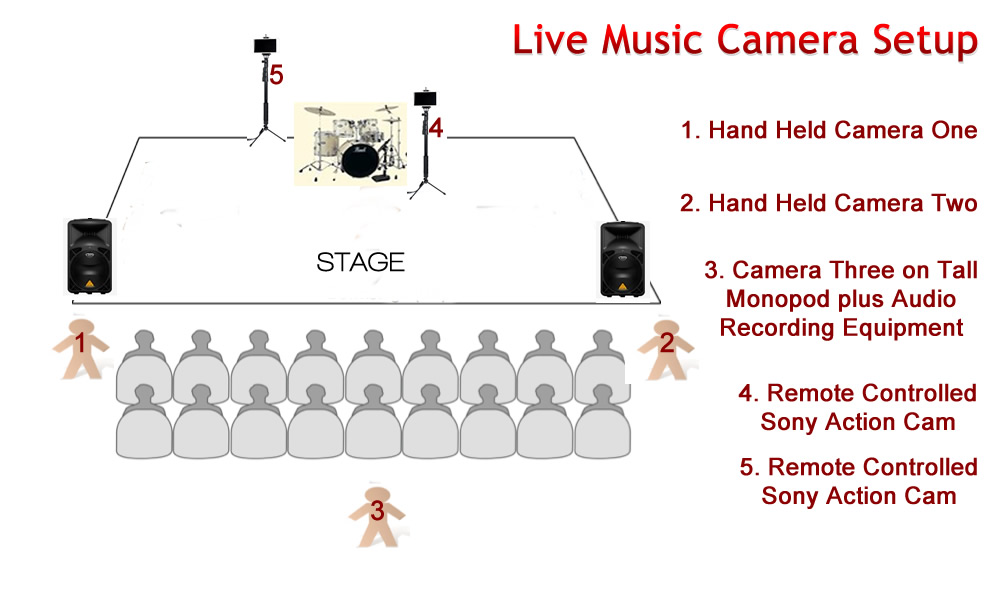
You need to set up one camera for a wide angle shot, a few rows back in the middle of the crowd, to have the crowd in the foreground.
This is the position that you also do the sound recording from, using stereo microphones set at a wide angle of 120 degrees.
This wide angle camera needs to be on a very tall Monopod. Tall Monopods are not easy to find, but Benro makes a good one that is about 190cm high.
You then need to have at least one other camera roaming around and filming close ups from the area in front of the stage.
This is so that you can have a wide angle long shot and then “cut in” to a close up, and then back out again.
Make sure that the wide angle camera records whole songs, so that you always have some wide angle footage to fall back on if none of your other close up camera shots are any good during a section of a song.
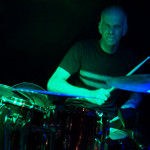
Currently at Photos By Passy we are using a five camera setup as shown in the following diagram:
(Click Image to View Full Size)
Cameras 1 and 2 are hand held and rove around the front of the stage filming close ups, and crowd interaction (while making sure not to film each other at all).
The footage needs to have space above people’s heads to that it can be image stabilised later in Adobe Premiere without decapitating anyone!
The Camera 1 and 2 footage also needs to contain as little zooming in and out as possible.
The operators of Cameras 1 and 2 also wear a Sony wrist band remote control to turn on and off the two stage mounted Sony Action cams.
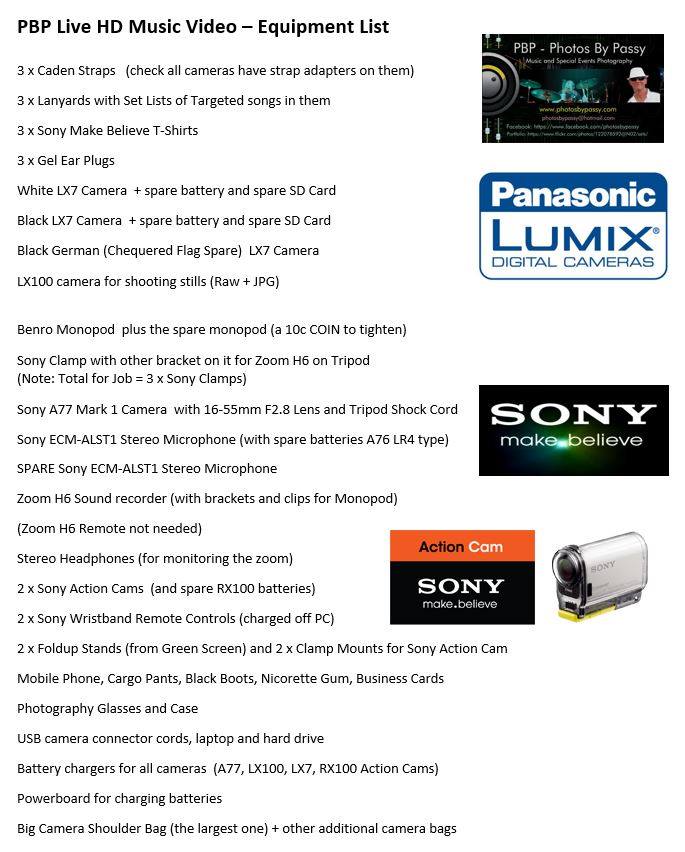
Here is our current full Equipment List for a live video job:
(Click Image to View Full Size)
Editing the Promo
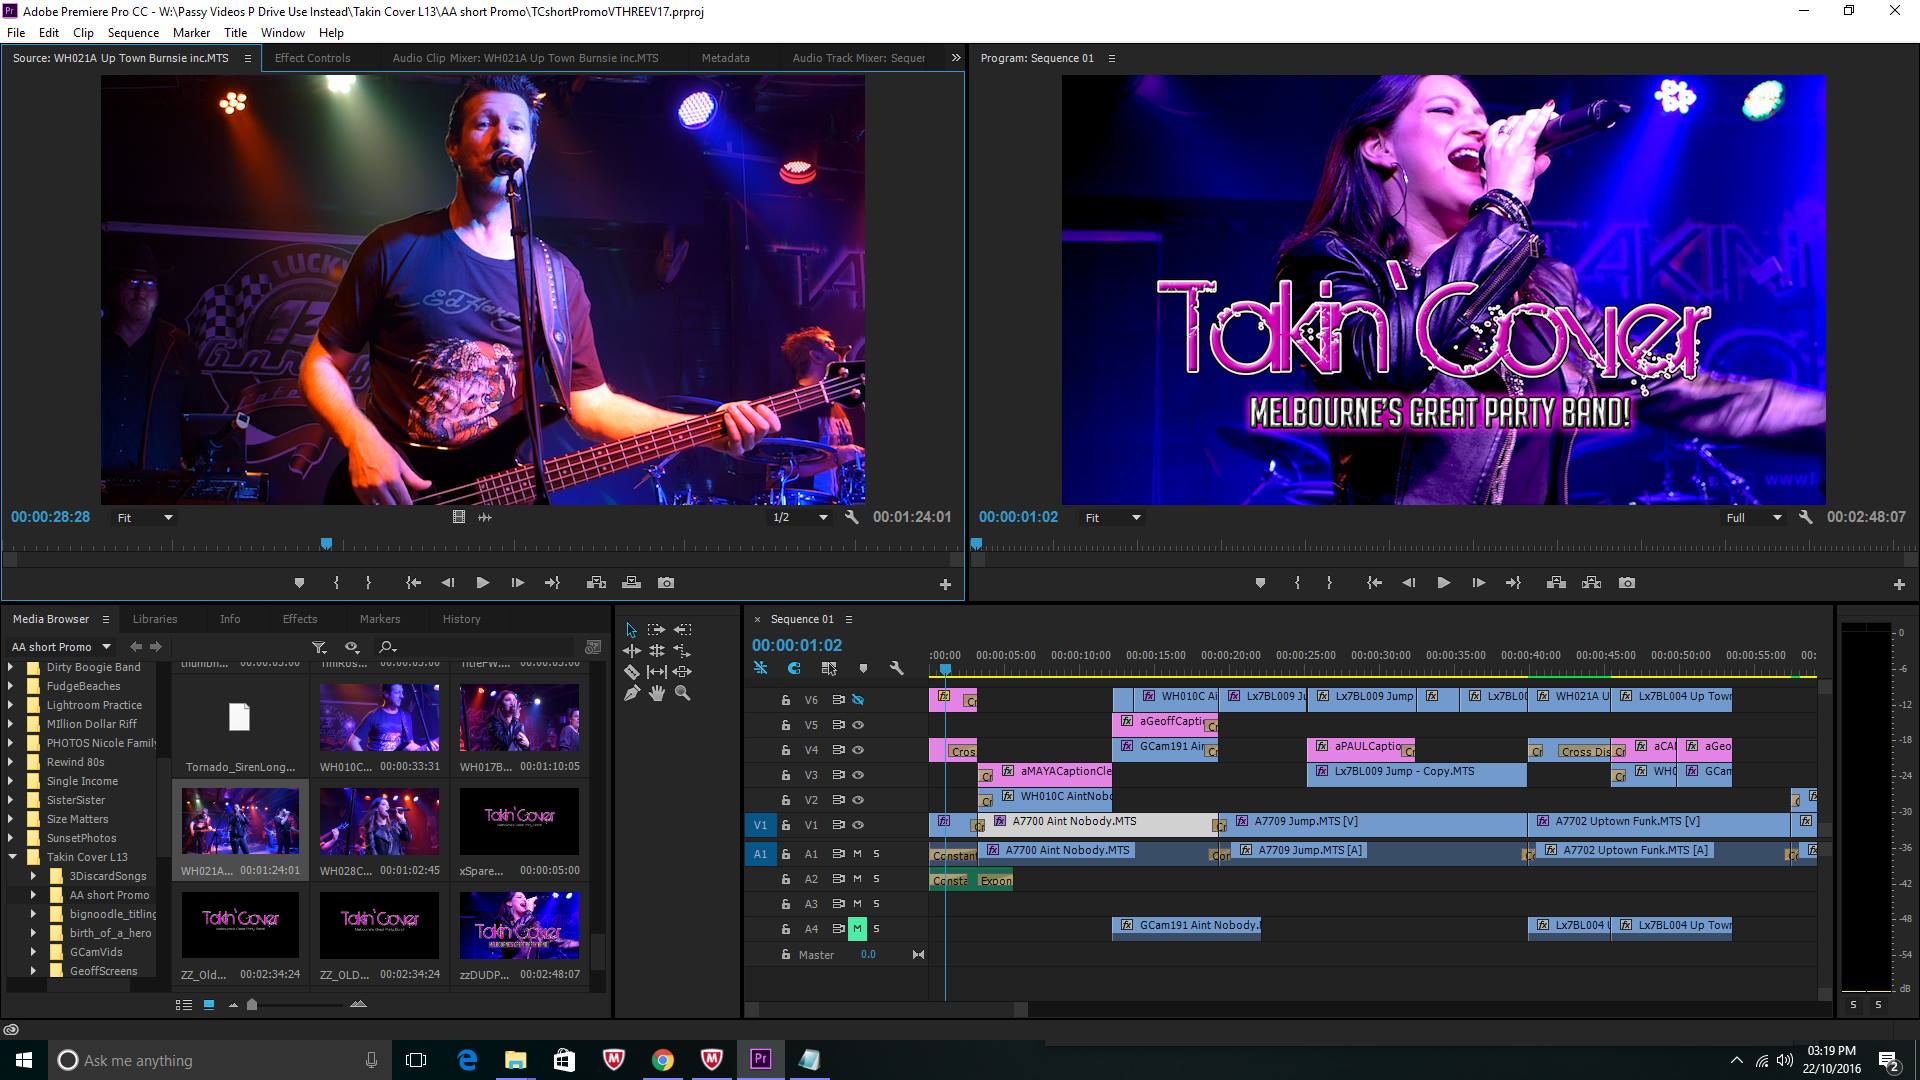
(Click Image to View Full Size)
You would think that editing the Promo would be fairly straight forward, pick the best footage from the best of the target songs that the band nominated for filming, and then put this together into snippets (probably choruses) for 3 or 4 songs with a total video duation of around two and a half minutes.
Well it would be that simple until the band gets involved at the review of the first version of the video, with often 20 or more questions about the video and the content that has been included.
The only way to keep track of all of these items is to get them in writing via email from the Band and start an “Action Items Log”.
A portion of a typical Action Items Log is shown below.
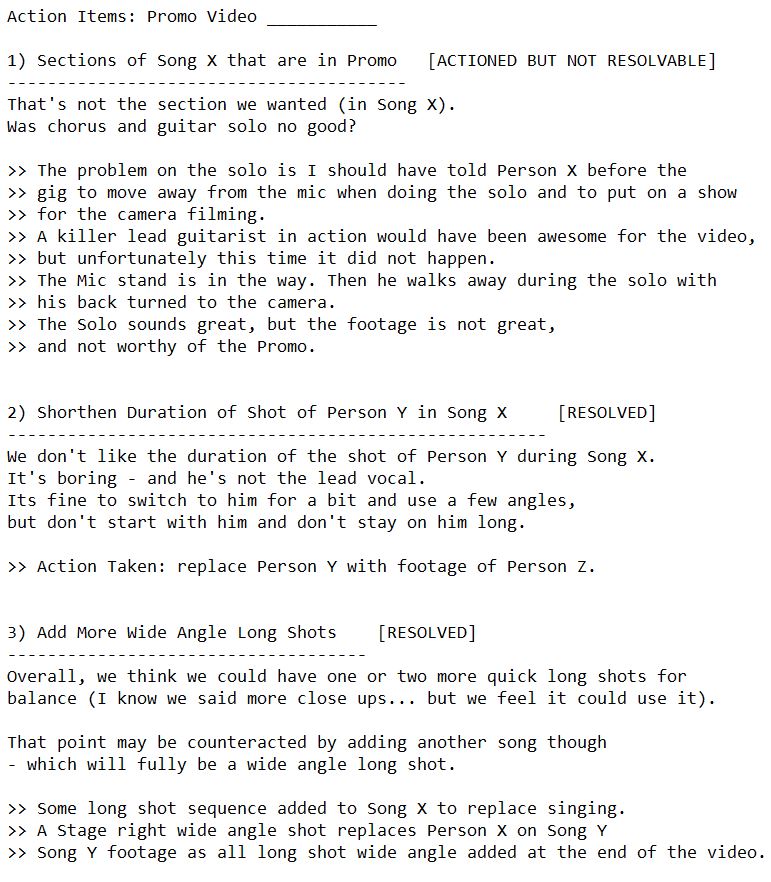
(Click Image to View Full Size)
These example issues are fairly typical, and pretty soon a nice tight 1 or 2 minute Promo is blown out into a 3 to 5 minute Highlights Video.
The Band takes over Producing, Directing, and Starring in their own epic mini movie.
And this is where being the Videographer and Editor of a Promo Video becomes very frustrating.
It is difficult and time consuming to make all these changes, and as you do this the end product moves further and further away from being a short and sharp Promo Video suitable for its primary audience of Promoters and Venue Operators.
But the Band as the paying customer is of course always right.
Further Reading
The following articles on the Internet contain some useful material.
How to Shoot a Live Music Performance
Sample Promo Videos
First up are a couple of Promo Videos that we have made at PBP.
They are reasonably good but not quite as good in selected content as we would have liked them to be.
Here are some YouTube Promo videos done by other people.
Ramble Tamble Credence Promo (Short)
A very professionally produced video that showcases the band superbly.
Australian Queen Show Promo
This is a great tight one minute Promo that gets the message across nicely and the audio track is authentic of their live sound.
Full Swing Band
The Interview at the start is a great idea, but a litle bit too long. The rest of the video is well edited and presents the band well.
Diamonds Cover Band
This is a very professionally made Promo, but with its pristine studio recorded audio, and super clean shots, it does not really show the band in an authentic live situation.
Shine Covers Band
This promo is good but too long in duration and very busy at times with a lot of fast cuts. It has a great collection of very well edited shots that market the band as a major showcase act. However it is apparent that the sound is not live and at times it sounds very sanitised.
Final Thoughts / Solutions
The purpose of this article has not been to “Trash Talk” any of the bands we have done video work for, but rather to share some of our experiences with any people who are thinking about being involved with the making of a Live Music Promo Video.
On these types of projects we have often found it extremely difficult to get everyone on the same page and work to a sensible brief for the Short Promo.
This has now happened on a number of occasions where we have worked with various performers.
For these reasons we will not be actively marketing Promo Videos as part of our regular product line at PBP Photos By Passy.
We are happy to make a live video OF a Band, but we intend to move away from making Live Videos FOR Bands.
But rather than just present all of these challenges, it would be nice to have some solutions.
The main solution we see it is to have a small set of great standard Promo Videos that we can show to prospective clients.
They then need to choose which of these sample videos they like best, and the aim is to make a video very similar to that one.
Then we need to make sure that the client fully understands and agrees to the design brief for the project:
1) Promo Video is short and sharp – 1 to 3 minutes total duration
2) Band presents professionally with great Stage Craft and band members interact with the camera
3) Band sounds okay and it is clearly noticeable that the audio tracks are recorded totally live
4) Band is playing immediately recognisable sections of 3 or 4 popular songs
5) A crowd is clearly visible and they appear to be having a great time
6) Alcohol is being consumed by patrons and venue profit is being generated
7) The band looks suitable for: Pub Gigs, Corporate Functions, Charity Events, Outdoor Festivals, etc.
Finally it is fundamental that the Band understands that a Promo Video is being made OF the Band, and not FOR the Band.
The Band will not get to Produce or Direct their own self indulgent rock star video of epic proportions, instead they will need to stay true to the up-front agreed Design Brief.
So in future if we get a Music Client who seems have the right attitude and is willing to work to the above seven point design brief, then we will definitely be able to help them out with a great Live Promo Video!
Enjoy,
Passy