Different light sources produce light with slightly different colour tints, but our eyes do a great job correcting these variations.
Humans do not see a shift in colour as we move from a sunny garden into a shaded area, or go into a room and turn a light on.
Generally wherever we are, a piece of plain white paper always looks white.
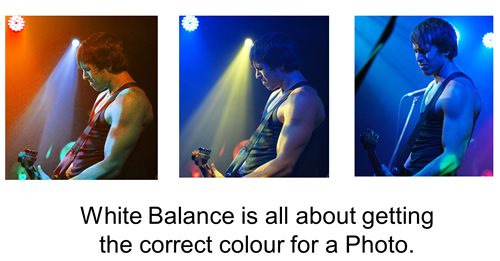
However Digital Cameras DO detect light source differences, and sometimes create pictures with incorrect looking colours in them.
We need to know how to perform “white balance” adjustments, so that we can obtain pictures with realistic colours in them.
Here is a great five minute introductory video about White Balance.
White Balance is very mathematical in nature. There is a Scale of Colour Temperature, and a range of camera settings to be matched up with positions on this scale.
There is also the notion of positive and negative amounts, where we add in more of the opposite colour, to counteract a particular colour tint, hue, or cast in the photo.
White Balance Problems
If we do not set the White balance correctly, we get photos with unpleasant colouring in them.
Here is an example of a Photo with Incorrect White Balance.
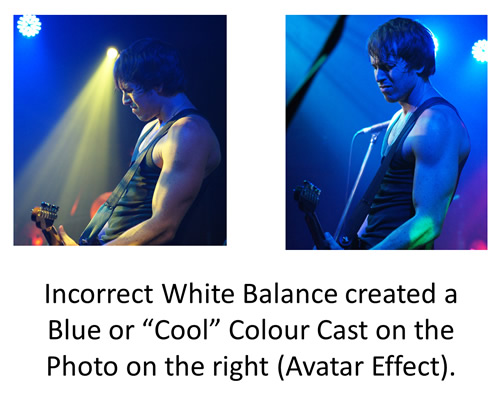
In the above picture on the right, the White balance was set Too Low, and so the Camera removed orange and yellow light, and also added in extra Blue Colour to help compensate, resulting in an unpleasant blue “colour cast” throughout the photo.
Here is another example of a Photo with Incorrect White Balance.

In the above picture on the right, the White balance was set Too High, and so the Camera removed blue light, and also added in extra red and orange colours to help compensate, resulting in an unpleasant red-orange “colour cast” throughout the photo.
We will look at some more White Balance Problems later on, but first we need to learn more about White Balance and “Colour Temperature”.
Colour Temperature
Each light source (Candles, Light Bulbs, Flourescents, Daylight, Shade, etc) has its own individual color, or “color temperature”, which varies from red to blue.
Candles, sunsets and tungsten bulbs give off light that’s close to red (hence the ‘warm’ yellow/orange look they create in digital photos).
But clear blue skies, shade, and twilight all give off a ‘cool’ blue light.
Colour temperature is recorded in Kelvin, “K”, the unit of absolute temperature.
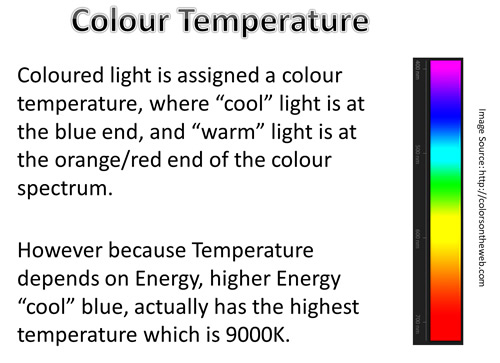
Image by Photos By Passy – For Educational Use Only
Cool colors like blue and violet generally have color temperatures over 7000K, while warmer colors like red and orange are around the 2000K mark.
Cameras have “Auto White Balance” or “AWB” which works for most conditions, but may give blue looking pictures in shade, and very yellow or orange pictures in indoor lighting.
Flourescent lights often create a Green color cast in photos.

Image by Photos By Passy – For Educational Use Only
Adjusting White Balance
White Balance is the process of making objects which appear white with our eyes, actually turn out white in a Digital Photo.
If the white colour is correct, then the other colours should all appear natural as well.

Image by Photos By Passy – For Educational Use Only
Auto White Balance “AWB” often only works well in a limited range of Colour Temperatures, ranging from Bright Indoor Lighting (3000K) to Average Midday Sunlight (5200K).
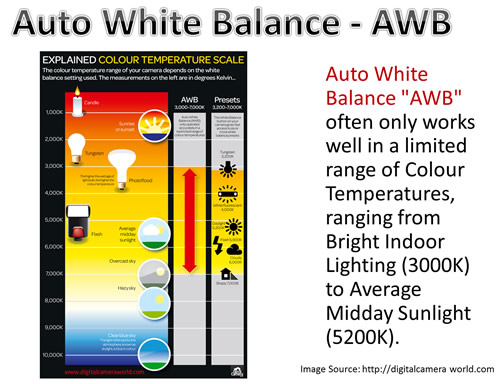
Image by Photos By Passy – For Educational Use Only
Here is a full size version of the diagram shown above: the double red arrow shows the range in which Auto White Balance “AWB” works effectively.

The important thing to realise is that AWB only covers a sub range of the colour spectrum, and AWB does not work well in all lighting conditions.
Outside of this “AWB” Range, we will see colour casts of Orange for Low Temperatures and Blue for High Temperatures.
If colours are not looking natural, it is necessary to move your camera off “AWB” and onto a preset that is suitable for the light you are shooting in.
When you set your camera’s white balance manually like this, you can choose from a number of pre-set color temperature options like Tungsten, Daylight, Cloudy and Shade, or even customize your own setting.
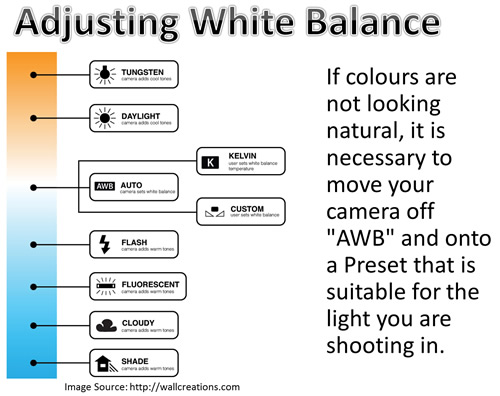
Image by Photos By Passy – For Educational Use Only
There is usually a WB button, or a submenu on a Camera, where you can go in and choose a the specific WB Preset that you need.
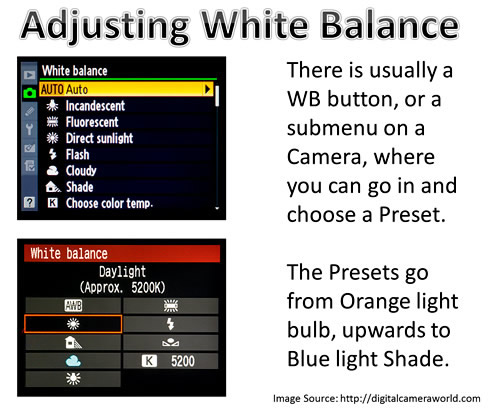
Image by Photos By Passy – For Educational Use Only
White Balance Examples
Here are some examples which show how Preset White Balance settings affect the colours in a photo.
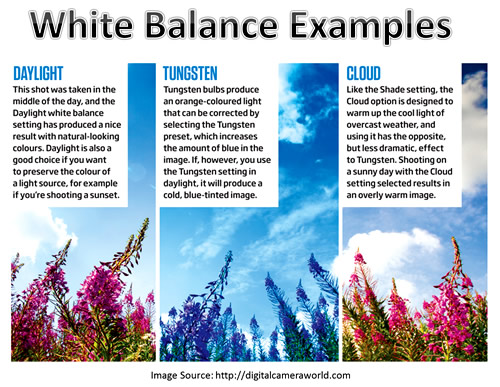
Image by Photos By Passy – For Educational Use Only
In these Photos the actual lighting conditions were those of full daylight.
We can see in the WB Presets, what they are actually doing to the colour.
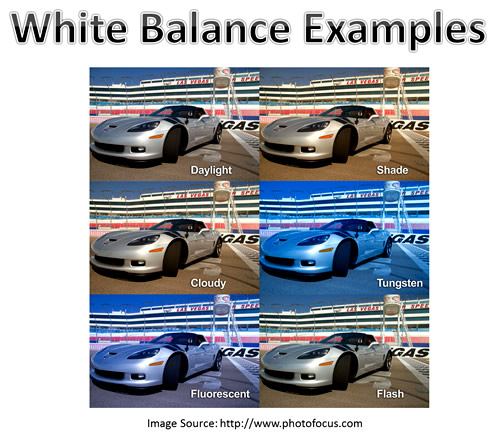
Image by Photos By Passy – For Educational Use Only
Correcting White Balance
If your Photo is too blue on the camera LCD, then INCREASE WB, or Increase Temperature.
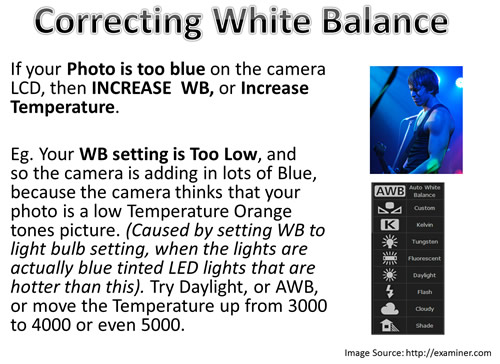
Image by Photos By Passy – For Educational Use Only
If your Photo is too orange or red on the camera LCD, then DECREASE WB, or Decrease Temperature.
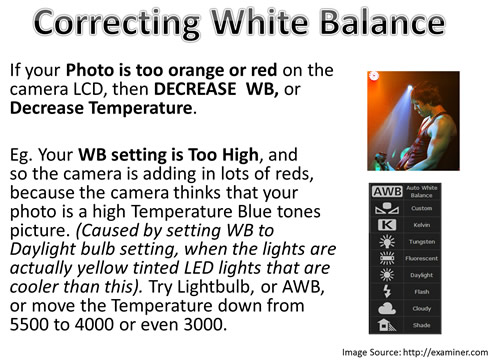
Image by Photos By Passy – For Educational Use Only
Sometimes the White Balance is actually correct, but there will still be colour tints and casts in the photo.
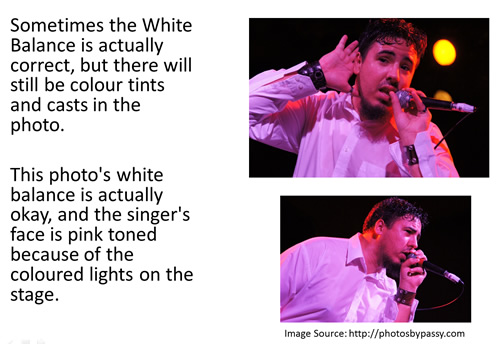
Image by Photos By Passy – For Educational Use Only
Sometimes having the incorrect White Balance is actually a good thing.
If we are taking a photo in low light, using a setting of AWB or Daylight can be better than using the Light Bulb setting.

Image by Photos By Passy – For Educational Use Only
Custom White Balance
For wedding photography, the white colour of the dress, and having natural colours is vitally important.
Wedding Photographers use standard white and grey sheets of cardboard to set their White Balance exactly.
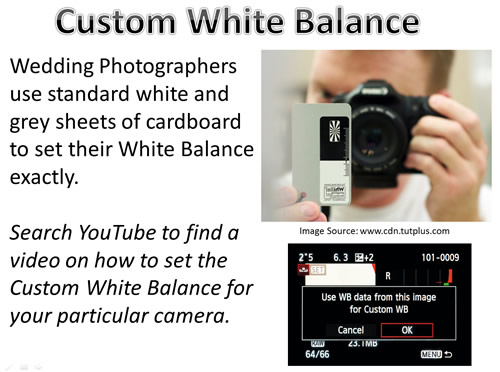
Image by Photos By Passy – For Educational Use Only
The idea is to take a photo of the card and use your camera’s custom white balance to set a WB to use for the given lighting conditions.
Here is a simple two minute video on how to do this.
If you don’t have a standard black/grey/white board or cards to photograph, then an approximation is to find an item which is white or light grey and use that.
Eg. When shooting a band, you could try and custom white balance using the band’s song list which you could find somewhere on the stage written on white paper.
Here is a Gary Fong Video on how to custom white balance on a Sony camera using one of his Grey Domes:
Adjusting White Balance in Post Processing
If we take a picture in “Raw format” with somebody holding the white balance card, then later on in post processing in a program like Adobe Lightroom, we can adjust a whole group of photos to have the correct white balance.
The following video shows how to do this.
Videos About White Balance
Here is a great 10 minute video all about white balance, which has real life examples being done by the Photographer.
It also shows how to do Custom White Balance.
Here is another 11 minute video all about white balance.
References and Further Reading
The following articles contain useful information about White Balance:
Cambridge In Colour White Balance Tutorial
Digital Camera World White Balance Articles Index
Subscribe
If you enjoy visiting Photos By Passy, why not get a free subscription to the website.
You can then receive notifications of new items and updates directly to your email address.
Go to the subscribe area on the left hand sidebar, (or down the bottom of the page if using a mobile phone), fill in your email address and then click the “Subscribe” button.
Enjoy,
Passy