Category Archives: Birthday Parties

Free Collage Makers

Late last year Instagram introduced the free collage maker “Instagram Layout” which has resparked interest in making Photo Collages and sharing them on Social Media.

However, if you are at School or Work where Instagram is blocked by the Network Security, then you need to use one of the many other free web based Collage Applications instead.

In this article we look at some Free Photo Collage makers that can be used on a laptop or desktop computing device that runs Windows.

We used Google Chrome as our laptop browser while making our Photo Collages with these free online Internet/Cloud Applications.

These apps are easy to use and produce quite satisfactory results.

Once you have made your collage, the apps allow you to save it onto your computer as a JPG file and/or share it online to Social Media.

At the end of the article we have included some web lists of Collage Applications for Apple Mac and Mobile Phones.


Fotor Collage Maker

FotorCollageTwo500k

This free collage maker requires no online registration, and is very simple to use.

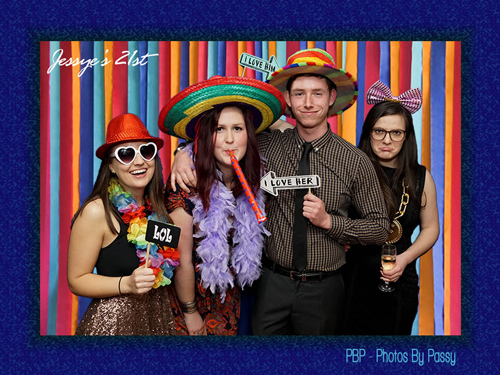
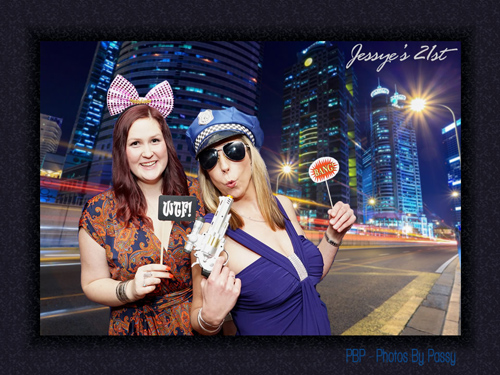
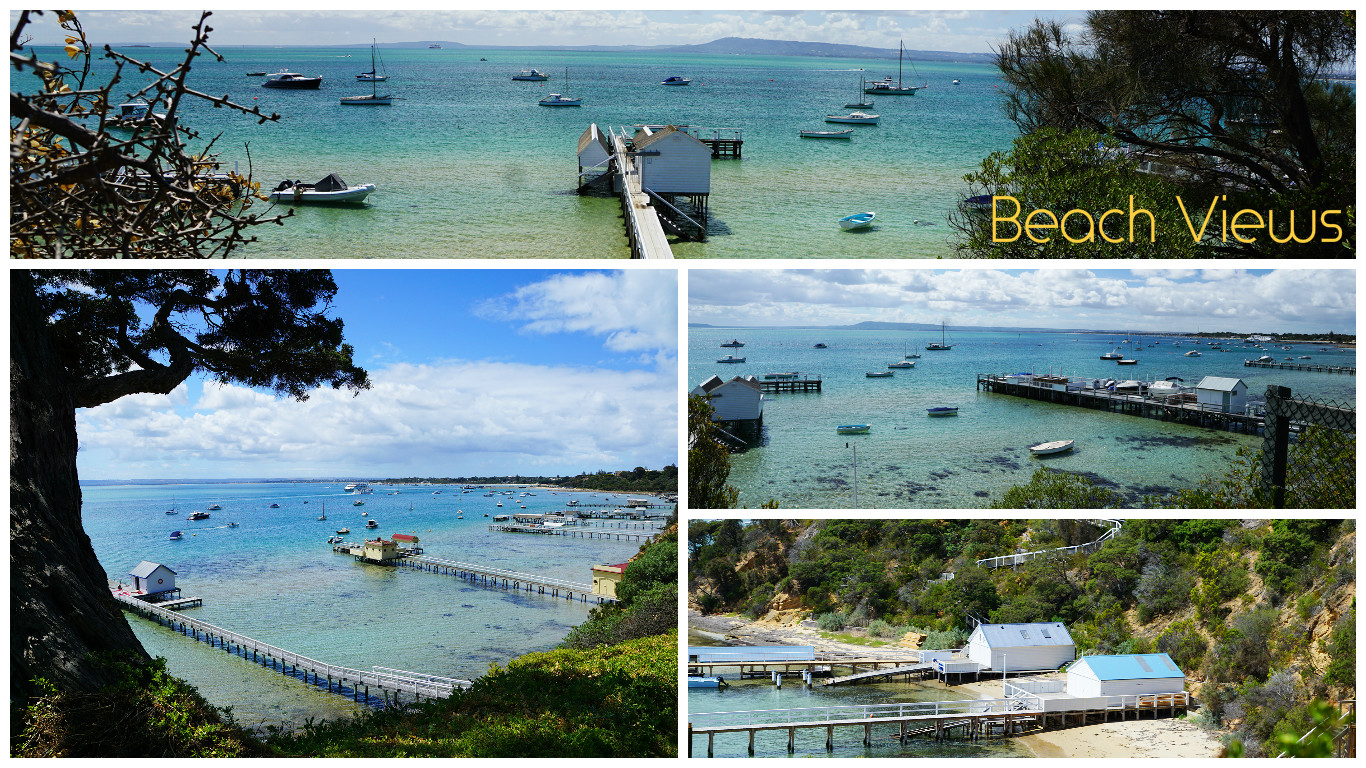
Note that the above example collage probably would have been better made with yellow borders for this article’s white page background. There is actually a white border frame that goes all the way around the outside of the collage, but it cannot be seen against the white page is it sitting on.

It loads up in edit mode and you can start work straight away.

First you choose a layout design, and then you can upload photos from your computer and move them around just like making a Facebook Header.

Text can be added, and the text editing tools and fonts available are a good selection of styles and designs.

Finally, you can save the collage to your computer or share it online.

Defualt collage size is 1366×768 which results in a fairly large 500k file, but sizes can be changed to suit different phone screen sizes.

Several Design features for borders and backgrounds are not available unless you upgrade to the paid premium version, but the free version has all of the basic features that you need.

The link to the Fotor Free Collage maker is as follows:

Fotor Collage Maker Website


Pic Monkey Collage Maker

PicMonkeyCollageTwo1000wide

This maker has a great two minute video on the home page which shows you what is available and how to use the application.

Like Fotor Collage there is no email registration and you can go straight into making a Collage from the home page.

The first step is to open up all the photos you want to use from your computer. Note that you can hold down the Ctrl key and select multiple photos to import all at once.

Then comes the drawback…… a lot of the good layout designs are “Royal” ones marked with a crown which means they are only available in the Paid Version.

So we tried a create your own layout, but it only lets you add photos horizontally in a one row horizontal strip that is locked at 2000 x 469 in size. HOWEVER when you save the Collage to your computer you can adjust this size to whatever you like.

You cannot add a second row, but the single row layout is good for what it is, as in our example above.

There are multiple row preset collages that are free, but it seems like these presets are not modifiable in any way.

Once you have made your Collage you need to save it and then proceed to the “Edit” button where text and effects can be added. A warning is given that once you proceed to this step you cannot go back and modify the collage at all.

To get a color dipper for the text, it is necessary to go to the color intensity vertical bar at the far right and click which then brings up the dropper symbol.

The filters are good and nicely enhance a completed collage, although several of them are not available in the free version: you can try them and see they look great, but you cannot apply and save them.

You can then save the the final collage image, at various sizes, to your computer as a Jpeg file.

What we liked most about this Collage maker was the easily adjustable rounded rectangles and the backgrounds available to put the text onto. The filters are also good.

Pic Monkey Photo Collage Website


Photo Collage

PhotoCollagePSone550wide

This is free with no sign up just like the other internet collage makers.

This one is very much do it yourself, where you load in your photos and resize and rearrange them onto the work area with total control.

The downside is that the text fonts and colors are very limited, and once you have set the text color and font once, you cannot go back and change it; all you can do is resize it.

When you save it to your computer, it goes to the downloads folder which is also a bit of a pain, as you then need to copy it manually to another folder.

It does not seem like you can change from having a plain white border dividers, and the photos came out a bit washed out once they were imported and collaged.

This meant that we needed to take our saved Jpeg file into Adobe Photoshop and tweak the Brightness, Contrast, Sharpness, and Saturation, to get our collage looking bright and crisp.

But if you want total control of the layout to make a customised white bordered collage, then this one is a simple and great tool to do it.

Photo Collage can be accessed at the following link:

Photo Collage Website


Be Funky Collage Maker

BeFunkyCollageThree

This is like the other Collage Makers and is free with no sign up, and has a great layout that is very easy to use.

If you change collage designs though, you lose photos, and then might change again and have empty gaps.

These are easily refilled by going back to the Upload symbol icon and dragging photos back in.

The default size for a collage is 2400 x 1333 pixels but this can be changed in settings.

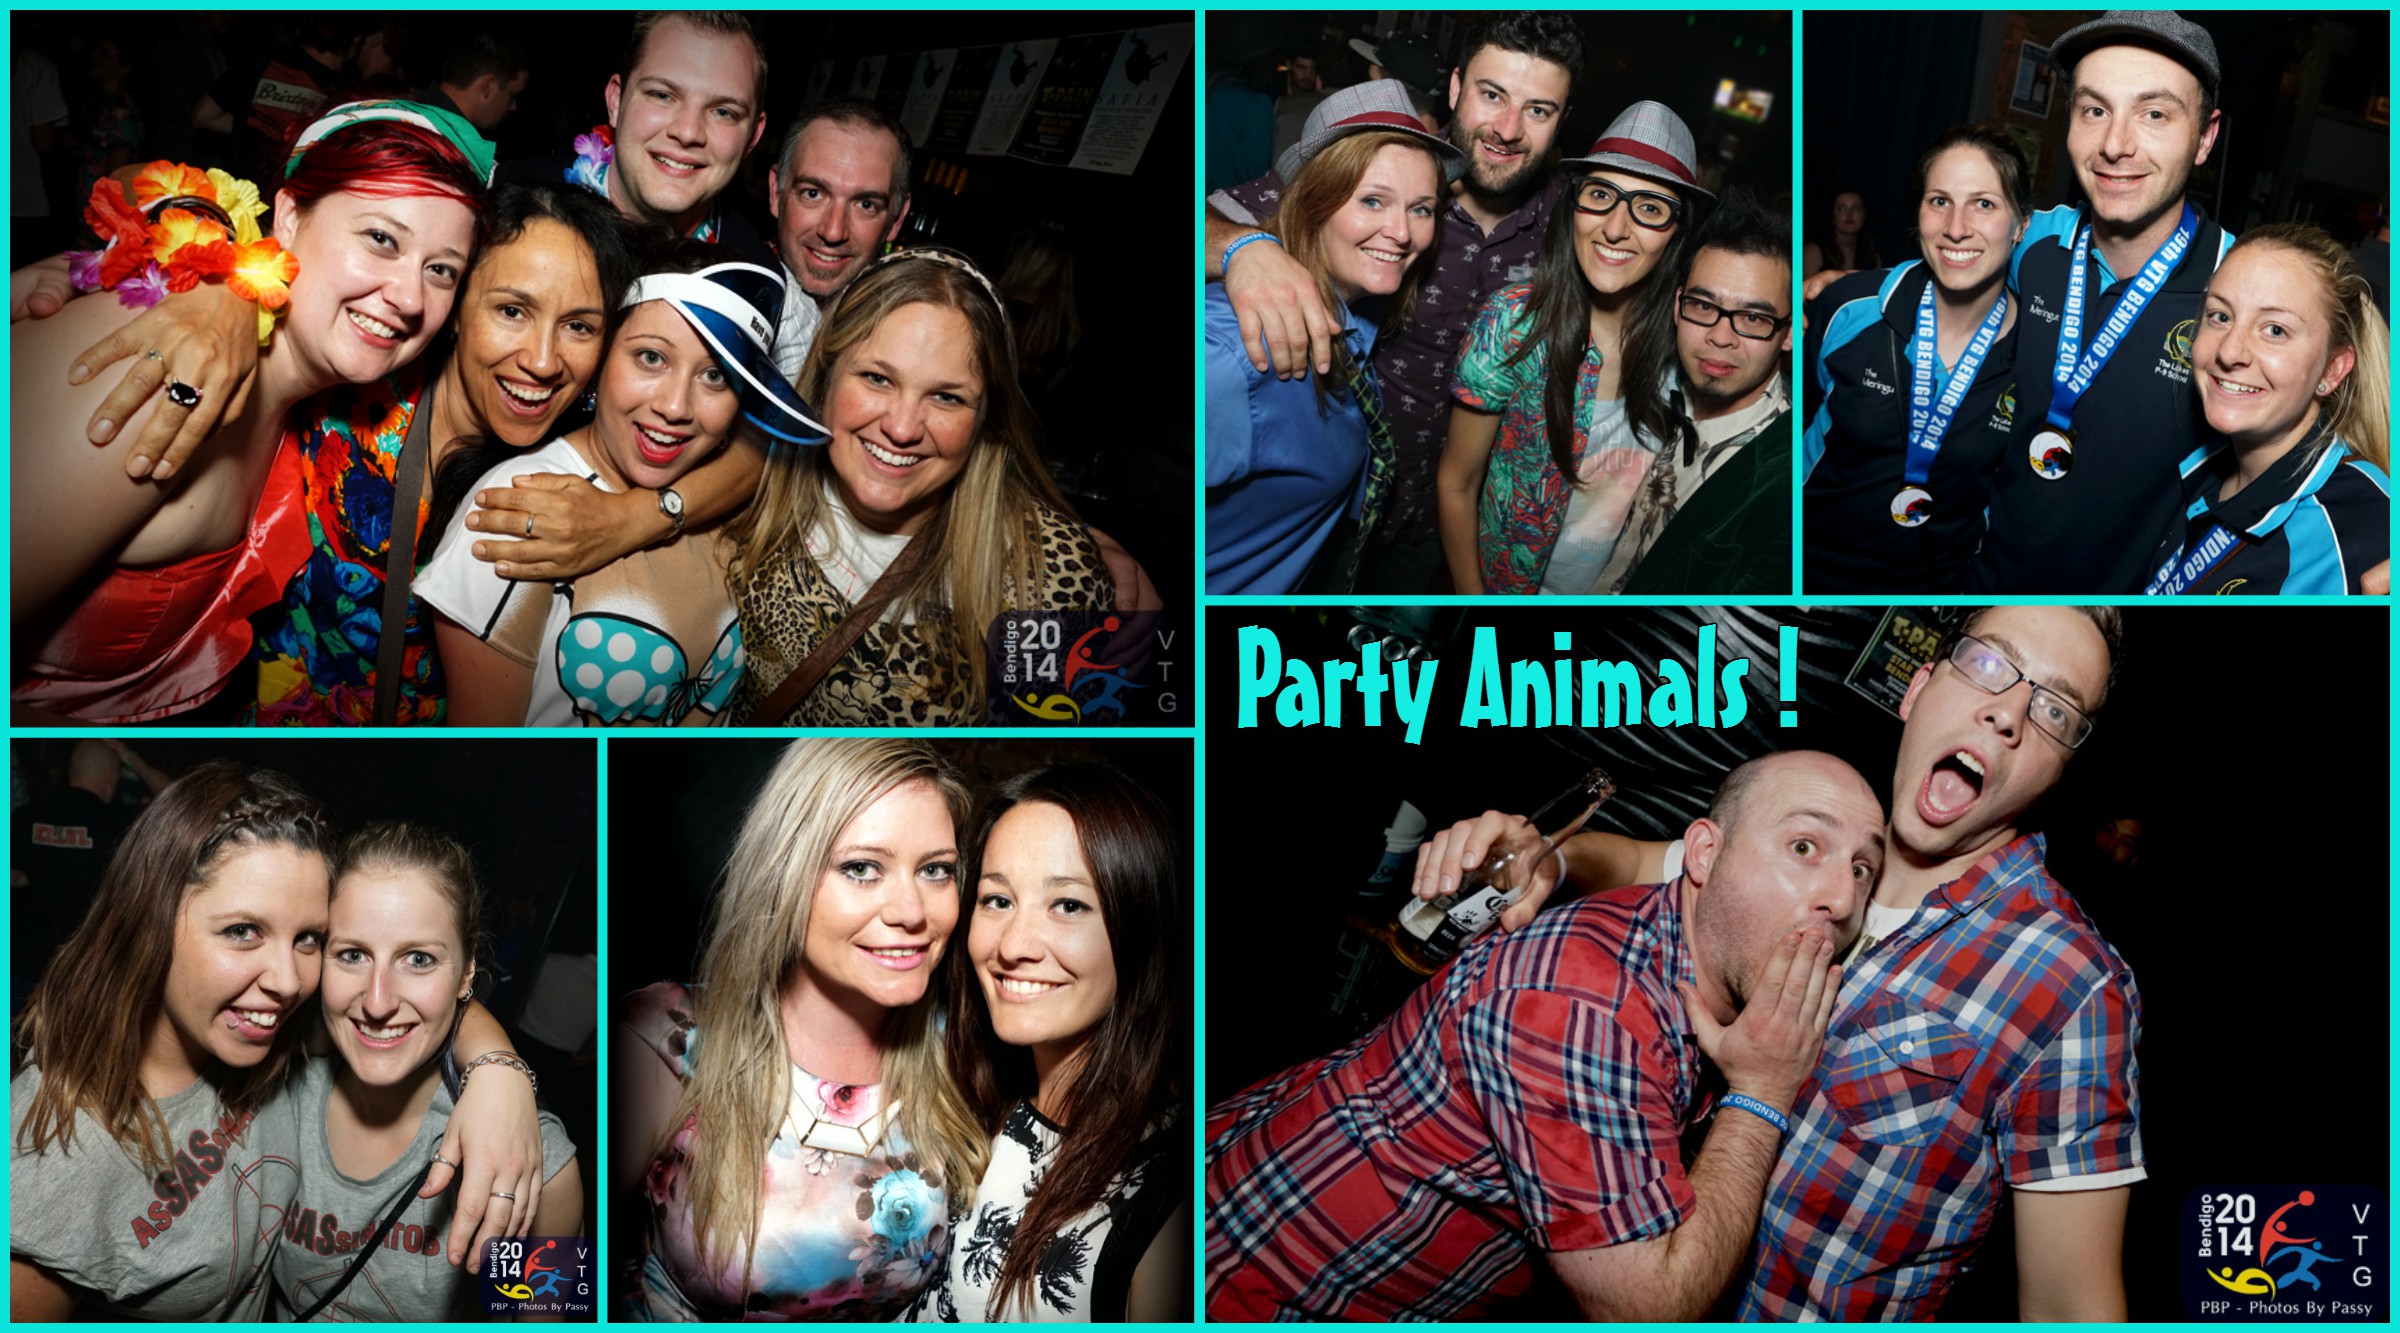
One particularly great feature in this application is that you can click and edit an individual photo in the collage and change its colour, sharpness, etc and even add a vignette around it and then return to the Collage.

There is a strange looking double bubble icon symbol in the top right hand corner of a photo when you click it in the collage maker, and clicking this takes you into basic photo edit mode. If you then click the “Open Image in Editor” button you get taken into the full photo editor.

Being able to apply vignetting (a dark oval shape shadow around the edges of a photo) to the people shots in this collage was really helpful.

The text fonts seem to be all the normal ones from Windows, but several of them like Bauhaus93 do not seem to work, and just produce some type of times new roman default font instead.

Another nice feature of this collage maker is that you can mouse over borders and resize them in a collage.

The Collage Maker also suggests an initial layout to use based on the Photos that you have uploaded to use.

Overall this is a great collage maker for a collage of people shots.

Be Funky Collage Maker can be accessed at the following link:

Be Funky Collage Maker Website


Other Photo Collage Applications

A Quick search of the web found the following Free Photo Collage Apps; there are literally hundreds of them out there.

Several of these are for Mac/OS, iPhone, and Android.

Fifteen Free Collage Makers

Twenty Five Free Collage Makers For Windows

Thirteen Free Photo Collage Makers

Ten Free Photo Collage Makers

Ten Free Collage Makers for Android

Ten Free Collage Makers for iPhone

Photo Collages the next old again new again thing for grouping together your happy snaps.

Enjoy,
Paul at Photos By Passy


If you found this article useful, then make sure you give our
“PBP Photos By Passy” Facebook Page a Like.

Photos By Passy Facebook Page

How To Photo Booth

“Photo Booth” has become more popular recently, and is a great way to get fun photos at formal events such as Weddings, 21st Birthday Parties, Engagemnent Parties, and so on.

In the olden days, and for some events, there is an actual closed curtained off Booth where the photos can be taken, but this is expensive to set up and takes up a lot of space at a party or venue.

Photos can also be immediately Printed out and glued into a Guest Book, and a message written next to them.

Other times, Photos are just taken out in the open, or in front of a Curtain or Backdrop of some kind.

Before the photos are taken, people “Dress Up” in either Cardboard Disguises held on sticks, along with Speech Bubbles; and/or in cheap fancy dress props.


Cardboard Props Only Photo Booth

Photos by Passy How To Photo Booth 01

Shown above is a photo of this type of Cardboard Props only “Photo Booth”.

The Cardboard Props and Speech Bubbles can be purchased Online, but often need to be assembled.

Attaching the flat cardboard props to the sticks can be best done using a hot glue gun, but if you do not have one, just use normal glue and meshed gaffa tape.

If we are printing out props from PDFs from the Internet, then we need to make the speech bubbles text reasonably large.

Eg. Enlarge the images on a colour photocopier first.

We then cut out a photocopied image roughly, and then glue it onto either the foam bottom of a meat tray, or the hard plastic cover of an old display book.

Once it is glued onto the backing, we then cut it out properly and attach it to the stick.

A great place to buy some pre-made Photo Booth props which are a good size are “TYPO” paper products shops in major shopping centres.

Photos by Passy How To Photo Booth 02


Curtain Background Photo Booth

Photos by Passy How To Photo Booth 03

In this type of Photo Booth we have people pose in front of a backdrop, such as a blue curtain as shown in the picture above.

Also note the use of a Blackboard Speech bubble. These can be purchased, or made out of plywood, and they are great for people to add their own Personal Messages.

For our curtain setup we purchased a premade blue curtain with large ring holes already in it, and we hang it on an aluminium tent poles frame lent up against a wall.

The frame is actually part of a cabin tent we own, and has adjustable leg height. We also run Gaffa tape along the pole insertion joins so they cannot pop undone.

Photos by Passy How To Photo Booth 04

It needs to be steadied with Gaffa Tape, and/or sand bags placed at the base around the legs.

Note that around 3 meters of wall space is required for the curtain, even though it is only around 2.5 meters wide.

For backgrounds it is important to use a non-reflective cloth background. If you use a plastic stick up background, or a Poster you have made, there is a significant risk that there will be falsh reflection off it which is impossible to remove in Photoshop later on.


Photo Booth Dress Up Props

Photos by Passy How To Photo Booth 05

These can be purchased at $2 Shops, Op Shops, Party Shops, and eBay. It takes a bit of shopping around to find the right ones.

The more colour the better, and Mexican Hats, Police Hats, and giant Fake Gold Rapper Bling are great items to have in your kit.

Hawaiian Flower dress ups are also very cheap on eBay and make for good fun.

For our Booth, we also obtained some toy guns and giant Mexican Gringo Moustaches at a Party Costume Shop.

A Fold up table and some boxes are also needed at the Party to put the props into. Shoe Boxes are good for storing props, because the removable lids can be used to display props in as well as the shoe box.

Something which is very important is to have the host of the Party give you a Money Deposit for the Props in case any go missing, as will sometimes be the case.

It is not so much the dollar value of the stolen props which is annoying, but the inconvenience and personal time running around to a number of shops to find replacements.

A good idea is to have some spare props in reserve at home, in case items go missing, and you have another function to do in the near future.


Chroma Key Photo Booth

Photos by Passy How To Photo Booth 06

Chroma Keying involves filming or taking pictures with a special bright Green or Blue cloth background which is non reflective.

The idea is to get a consistent background color that is not likely to be found in any skin tones, so Green and Blue are best.

Green is probably the best, because people do not wear any green clothing usually, and so the background can be easily removed in Adobe Photoshop or Adobe Fireworks using the Magic Wand tool.

Our approach is not exactly professional, as we use a Blue Curtain, with fold/creases in it which is not professionally lit up, and not a uniform color because of the darker curtain folds.

The reason for us doing this is mainly Economy, as well as dual purpose functionality, where we can also use the blue curtain as a background for “Photo Frame” pictures like this one.

Photos by Passy How To Photo Booth 07

Note that it helps not to have people directly up against the curtain. Try and get them to stand around one meter or so forward of the curtain which minimises getting any blue glow onto them around their edges and hair.


The following video shows how to do Chroma Key background removal with a smooth green backdrop.

This video also demonstrates the use of “Photokey 5” Software for removing the Green background, and then inserting a different background.

“Photokey 5” software looks like it does a good job, but the same thing can be done with the Magic Wand and Eraser Tools in Adobe Photoshop or Adobe Fireworks.


For our Background Removal, and Replacement, we use Adobe Fireworks, simply because we find it quicker and easier to use than Photoshop.

However, if you want to do the same thing in Photoshop, then here is a great three minute video (with some annoying dub step background music) on how to do this.


Removal of Blue Background Curtain

Photos by Passy How To Photo Booth 08

This is the original picture taken with the Blue Curtain Backdrop as it was straight out of the Camera.

We took this picture into Adobe Fireworks, and removed the background curtain and surrounds using the Magic Wand and the Eraser Tool, to create the following .PNG file clear background picture.

Photos by Passy How To Photo Booth 09

The next step was to create a new layer in Fireworks, and then File > Import onto this layer, a new background image, (in this case some Party Streamers).

We then made a separate Photo Frame in Fireworks, using the Criss Cross Gradient with a Texture added into it. This frame was then imported as a new layer into our composite picture.

Flattening all the layers, and saving it as a JPG file then resulted in this as our final Photo Booth Image:

Photos by Passy How To Photo Booth 10


Problems With Blue Items

Photos by Passy How To Photo Booth 11

Removing the Blue Background from the original of this image was a problem because of the Blue Police Cap, as well as the Blue hue in the dress.

The trick here was to first use the eraser tool to carefully rub out around the cap and the dress, so that the Magic wand would not be able to reach them and remove any of their blue colour.

Photos by Passy How To Photo Booth 12

We were then able to use the Magic Wand to remove the remaining blue and grey in the background, and add in the night city background which we purchased from “123RF” to make the completed picture shown previously.


Background Images

Photos by Passy How To Photo Booth 13

It is quite cheap to buy some medium sized stock images from companies such as “123RF”, “Dreamstime”, “Getty Images”, or “Istock”, and use these as your Background Images.

If you just grab some backgrounds from Google Images, there is always the risk that you should have paid for them, and there will be a resulting infringing on Copyright.

A person has taken the time to make the Background image, and so it is only fair that they should be paid something for it.

So if you are posting Photo Booth pictures to the web which contain background images, you should purchase these background images to make sure everything is legal.


Photo Booth Sample Pictures

To see a full Album of Photo Booth Pictures we did for a 21st Party, Click the following link:

Photo Booth Pictures Album


Videos About Chroma Keying

The following eleven ninute Video is all about Green Screen Tips and Setup.


For pictures taken using an unlit Green or Blue Curtain backdrop, Photoshop can be used to remove the Green or Blue background colour.

The way we did this for our photos was to use the Magic Wand to get rid of most of the blue, and then zoom in and use the Eraser tool to remove the dark parts in the curtain folds and so on.

HOWEVER:

If you want to be a perfectionist on the removal of the background colour, (and deal with background green or blue being behind the edges of long hair), then watch the following twenty minute video on how to do this in Photoshop.


The following video shows how to cheaply light a green screen with shop flourescents at placed at 45 degrees on the left and right.


And while we are looking at cutting setup costs, here is a Video on how to make an ultra cheap Green Screen using Green Poster Paper:


Rather than replacing the Green background image, we can change its color in Photoshop.

This is an interesting way to create a bit of variety in a set of Photo Booth pictures, and one we will definitely try out sometime.

Here is a video showing how to change the green color of the background to other colors using Hue and Saturation:


Hire Us for Photo Booth

Photos By Passy would be delighted to do a Photo Booth for you at your Party, Wedding, or Function.

We supply all the props and can make some great fun chroma keyed images for you to post on social media and anywhere else online.

Get in touch using the “Contact” link on our website.


Subscribe

If you enjoy visiting Photos By Passy, why not get a free subscription to the website.

You can then receive notifications of new items and updates directly to your email address.

Go to the subscribe area on the left hand sidebar, (or down the bottom of the page if using a mobile phone), fill in your email address and then click the “Subscribe” button.

Enjoy,
Passy

Rozzie’s Karaoke Party

This was a great fun party for Rozzie Vox’s Birthday with lots of singing and plenty of laughs.

A brilliant Karaoke system searchable on ipad provided over 6000 songs to choose from…. Totally Awesome!

I had hoped to do some “Photo Booth” shots at this Party, but people I asked were not interested in using the Props on Sticks which were available.

Next time I need to set up Photo Booth Props, in a specific area before the Party starts, and then assertively get people to have a “Photo Booth” Dress-Up picture taken as they arrive at the Party.

I have a Party coming up in the near future, where they have requested Photo Booth type pictures and I plan to get some good pictures at this event.

The plan is to use real dress up Props, as well as simple Props on sticks, and ask people to dress up, but if they do not want to do that, just say to them, “Okay, here grab some stick props and let’s do it”!

We will see how it goes, and it will be 100% up to me to make sure it goes well!

A full Flickr Gallery of Photos can be viewed here:

Flickr Photo Gallery of Rozzie’s Karaoke Party


EQUIPMENT:

Sony Alpha A-77 Mk II Camera
Sony 16-50mm F2.8 Kit Lens

Sony HVL-F43M Flash
Gary Fong Gamma Blade Diffuser

This shoot was a fairly straight forward “Party People” affair, with an emphasis on getting plenty of Family shots, as well as action Karaoke shots.

This meant that I had to shoot plently of pictures. Just as well I did, because intoxicated Karaoke singers pull some horrific faces while trying to get the words out!

It was not uncommon to have eight pictures of a group of people singing, and only get one or two usable shots from the eight.

Of course I got up and sang some songs, but unfortunately there was nobody I knew there that I could trust with the camera equipment to take a photo of yours truly.

Another lesson learned: Always talk to everyone at the Party while mingling, and see if anyone there knows how to use a DSLR Camera!


Subscribe

If you enjoy visiting Photos By Passy, why not get a free subscription to the website.

You can then receive notifications of new items and updates directly to your email address.

Go to the subscribe area on the left hand sidebar, (or down the bottom of the page if using a mobile phone), fill in your email address and then click the “Subscribe” button.

Enjoy,
Passy

Aarons 30th Birthday

This was a great fun 80’s Theme Fancy Dress Party at a really nice venue called “Smiles” in Warranwood.

Plenty of colourful costumes and fun times made this a great photoshoot.

A full Flickr Gallery of Photos can be viewed here:

Flickr Photo Gallery of Aaron’s 30th Birthday


EQUIPMENT:

Sony Alpha A-77 Camera
Tamron 17-50mm F2.8

Sony HVL-F43M Flash
Gary Fong Gamma Blade Diffuser

This shoot was reasonably straight forward, and was done entirely with Flash.

The only issue was that some of the background walls were a light grey colour, which did cause a lot of light reflection when the flash went off.

The venue also contained two huge mirrrors, and so people had to be positioned so that the mirrors would not pick up any of the flash in them.

The Sony A77 revelled in these conditions, as Sony photos love bright colours and capture them beautifully.

The Flash unit was set to Manual, and a width of 50mm used for most shots, and the power varied and shots repeated if they were too dull. This was especially the case on larger group shots which were shot at an aperture of F5.0 to get everyone in focus.

The camera was also set to full Manual Mode, “M” with ISO set at 1000, shutter speed at 1/125, and Aperture varied from 2.8 to 5.0 depending on how many people were in the Group.

Overall a great fun shoot, and the resulting photos really pleased the Client.


Subscribe

If you enjoy visiting Photos By Passy, why not get a free subscription to the website.

You can then receive notifications of new items and updates directly to your email address.

Go to the subscribe area on the left hand sidebar, (or down the bottom of the page if using a mobile phone), fill in your email address and then click the “Subscribe” button.

Enjoy,
Passy

Robyn’s Birthday

This was a photoshoot of a private party in a very crowded room. The space was like the upstairs room in a restaurant, with all of the tables and chairs cleared out, and people packed in.

The people attending were dressed up for the event with some good colour, which really helped brighten up the resulting photographs.

A full Flickr Gallery of Photos can be viewed here:

Flickr Photo Gallery of Robyn’s Birthday Party


EQUIPMENT:

Sony Alpha A-77 Camera
Tamron 17-50mm F2.8
Sony HVL-F43M Flash
Gary Fong Gamma Blade Diffuser

The party was a tightly crowded environment, and I was very happy with how the Gary Fong Gamma Blade Diffuser worked on the Flash at such close proximity.

The general approach taken was to shoot with the Flash set at 50mm width in full manual mode. The flash power was set fairly high to get brighter than normal pictures which could then be toned down later in Photoshop.

All pictures were shot at ISO 1000 and a shutter speed of around 1/100. Aperture was varied from F2.8 up into the 4’s and 5.6 for the larger group shots. The A-77 camera was set to full manual “M” mode.

This approach worked well, and with some exposure adjusting and air brush type retouching in Photoshop; the final photos came up well.

A very experienced professional photographer at a Melbourne newspaper even commented on how good they were, so we were definitely on the right track on this shoot.


Subscribe

If you enjoy visiting Photos By Passy, why not get a free subscription to the website.

You can then receive notifications of new items and updates directly to your email address.

Go to the subscribe area on the left hand sidebar, (or down the bottom of the page if using a mobile phone), fill in your email address and then click the “Subscribe” button.

Enjoy,
Passy