Camera Raw is basically a simplified version of Adobe Lightroom and comes free as part of Adobe Photoshop.
In this Lesson we show you how to Open Images in Adobe Camera Raw, directly inside Photoshop, rather than using Adobe Bridge or Mini Bridge.
“Camera Raw” is similar to “Adobe Lightroom” and can be used to adjust highlights, shadows, vibrance, saturation, clarity, and white balance.
“Camera Raw” is great for adjusting images that have too much brightness, or shadows or shade in them. It is also great for adding special effects type filters to images.
This “How To” lesson specifically covers Camera Raw 7.0 from CS6.
The newer CC version has even more features, such as the Radial Filter, and the Dehaze effect for fixing washed out bright skies.
IMPORTANT: DO NOT EVER PRESS THE ESC KEY IN CAMERA RAW, IT CLOSES YOUR IMAGE WITHOUT SAVING IT!
Fixing Dull Images
The following image was taken on a cloudy morning and is quite dull as there was no sun shining.
(Click to view the Image Full Size in a new Tab)
Using Camera Raw adjustments we were able to transform the image into the following:
(Click to view the Image Full Size in a new Tab)
The details of how we made the required adjustments are contained in the PDF Lesson document that can be found at the following link:
How to Use Camera Raw – Detailed Instructions
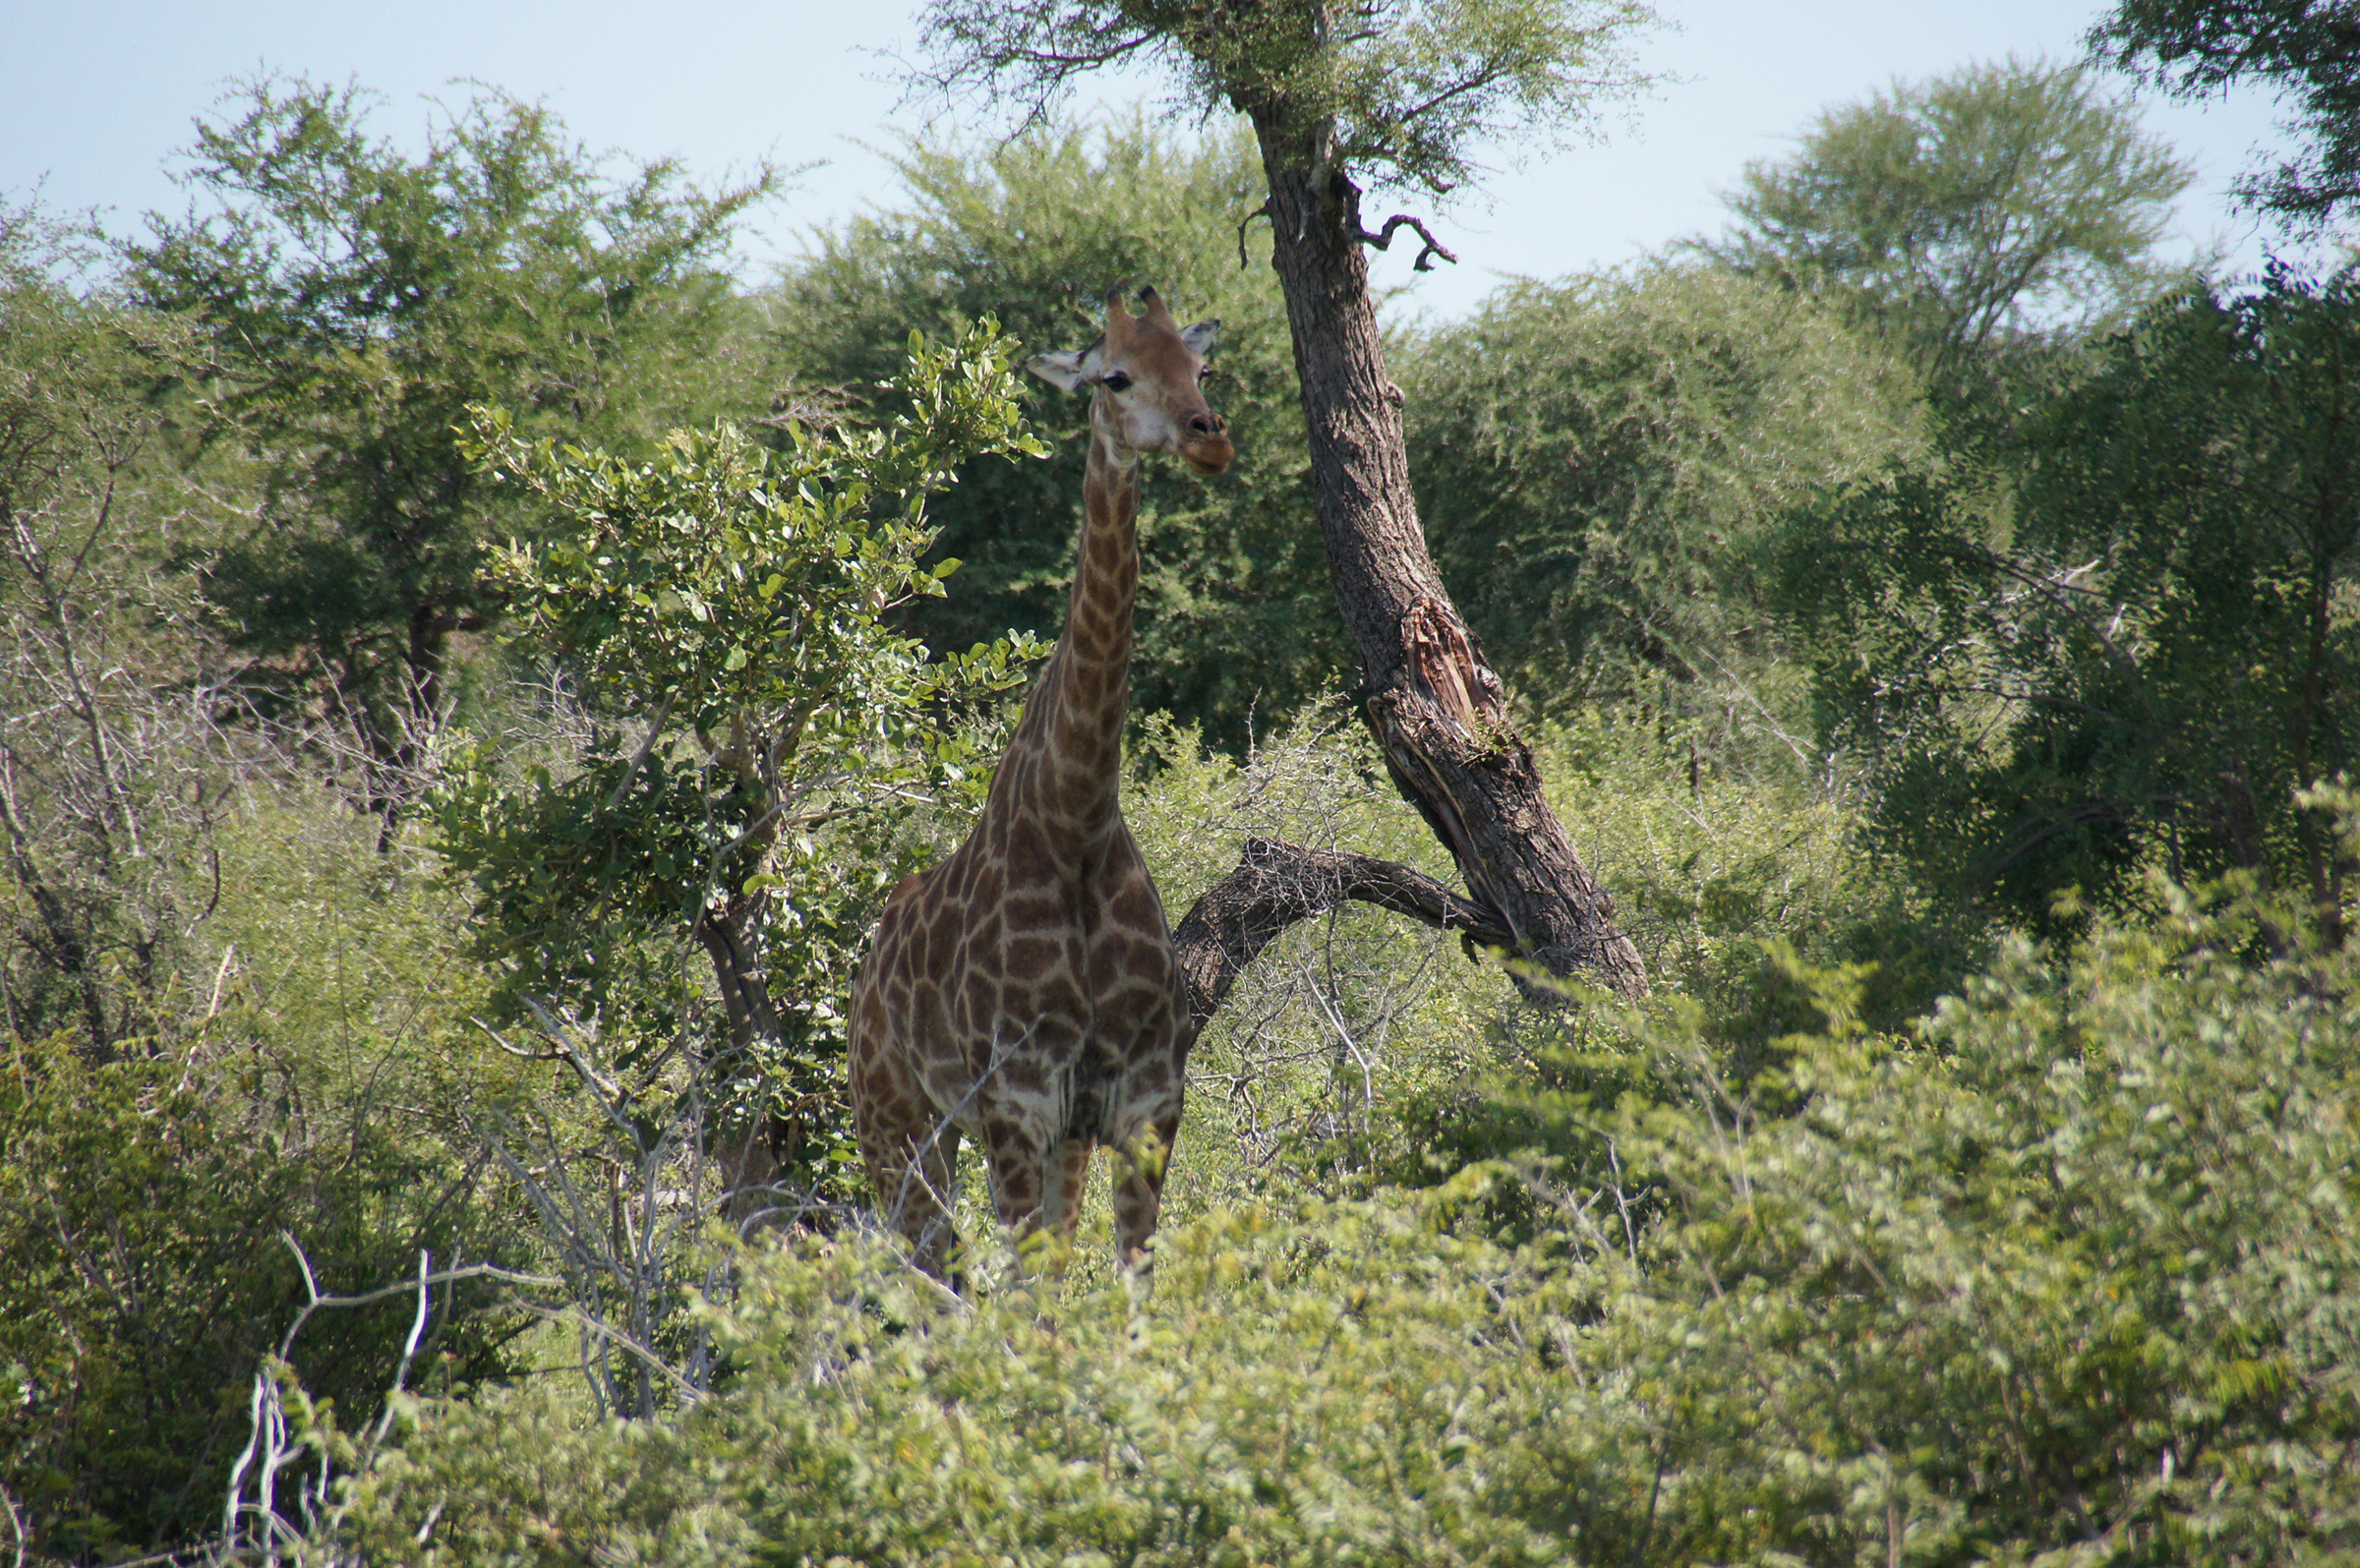
Fixing Over Exposed Images
The following photo of a Giraffe in Africa was taken on a very hot dusty day, and is all washed out with very little colour or clarity.
(Click to view the Image Full Size in a new Tab)
Using Adobe Camera Raw we were able to dramatically transform the image into something a lot brighter and colourful.

(Click to view the Image Full Size in a new Tab)
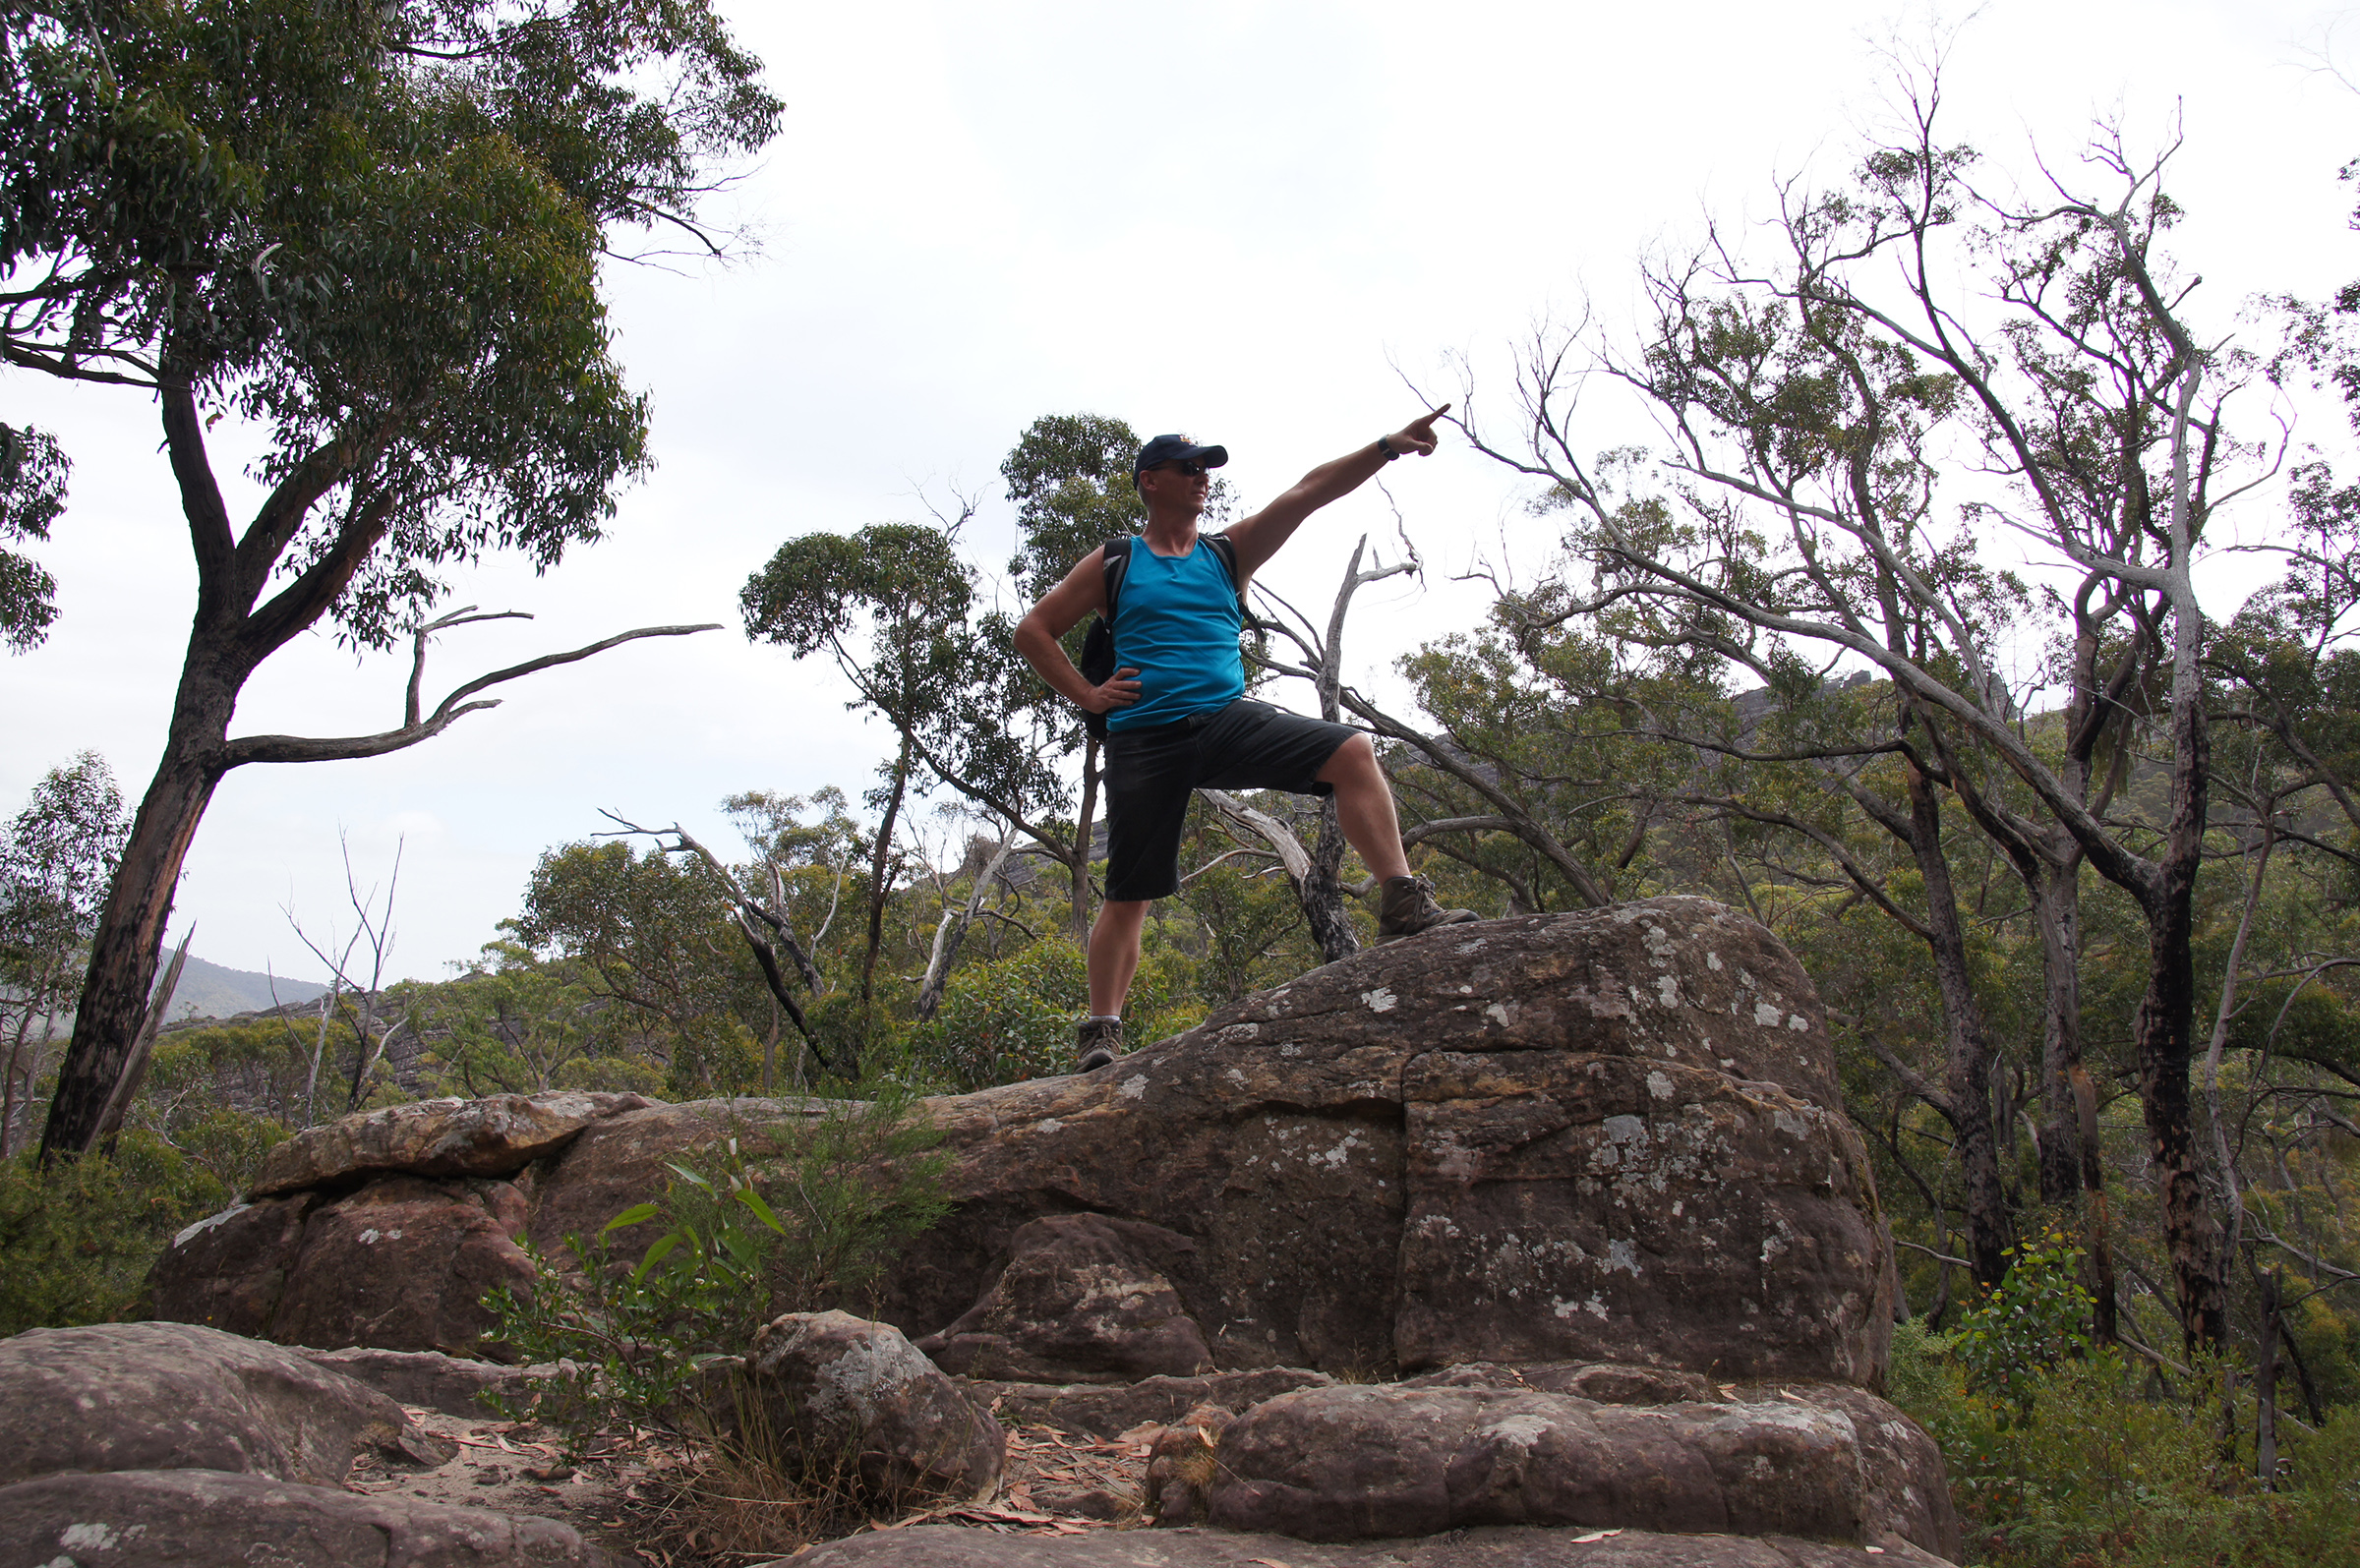
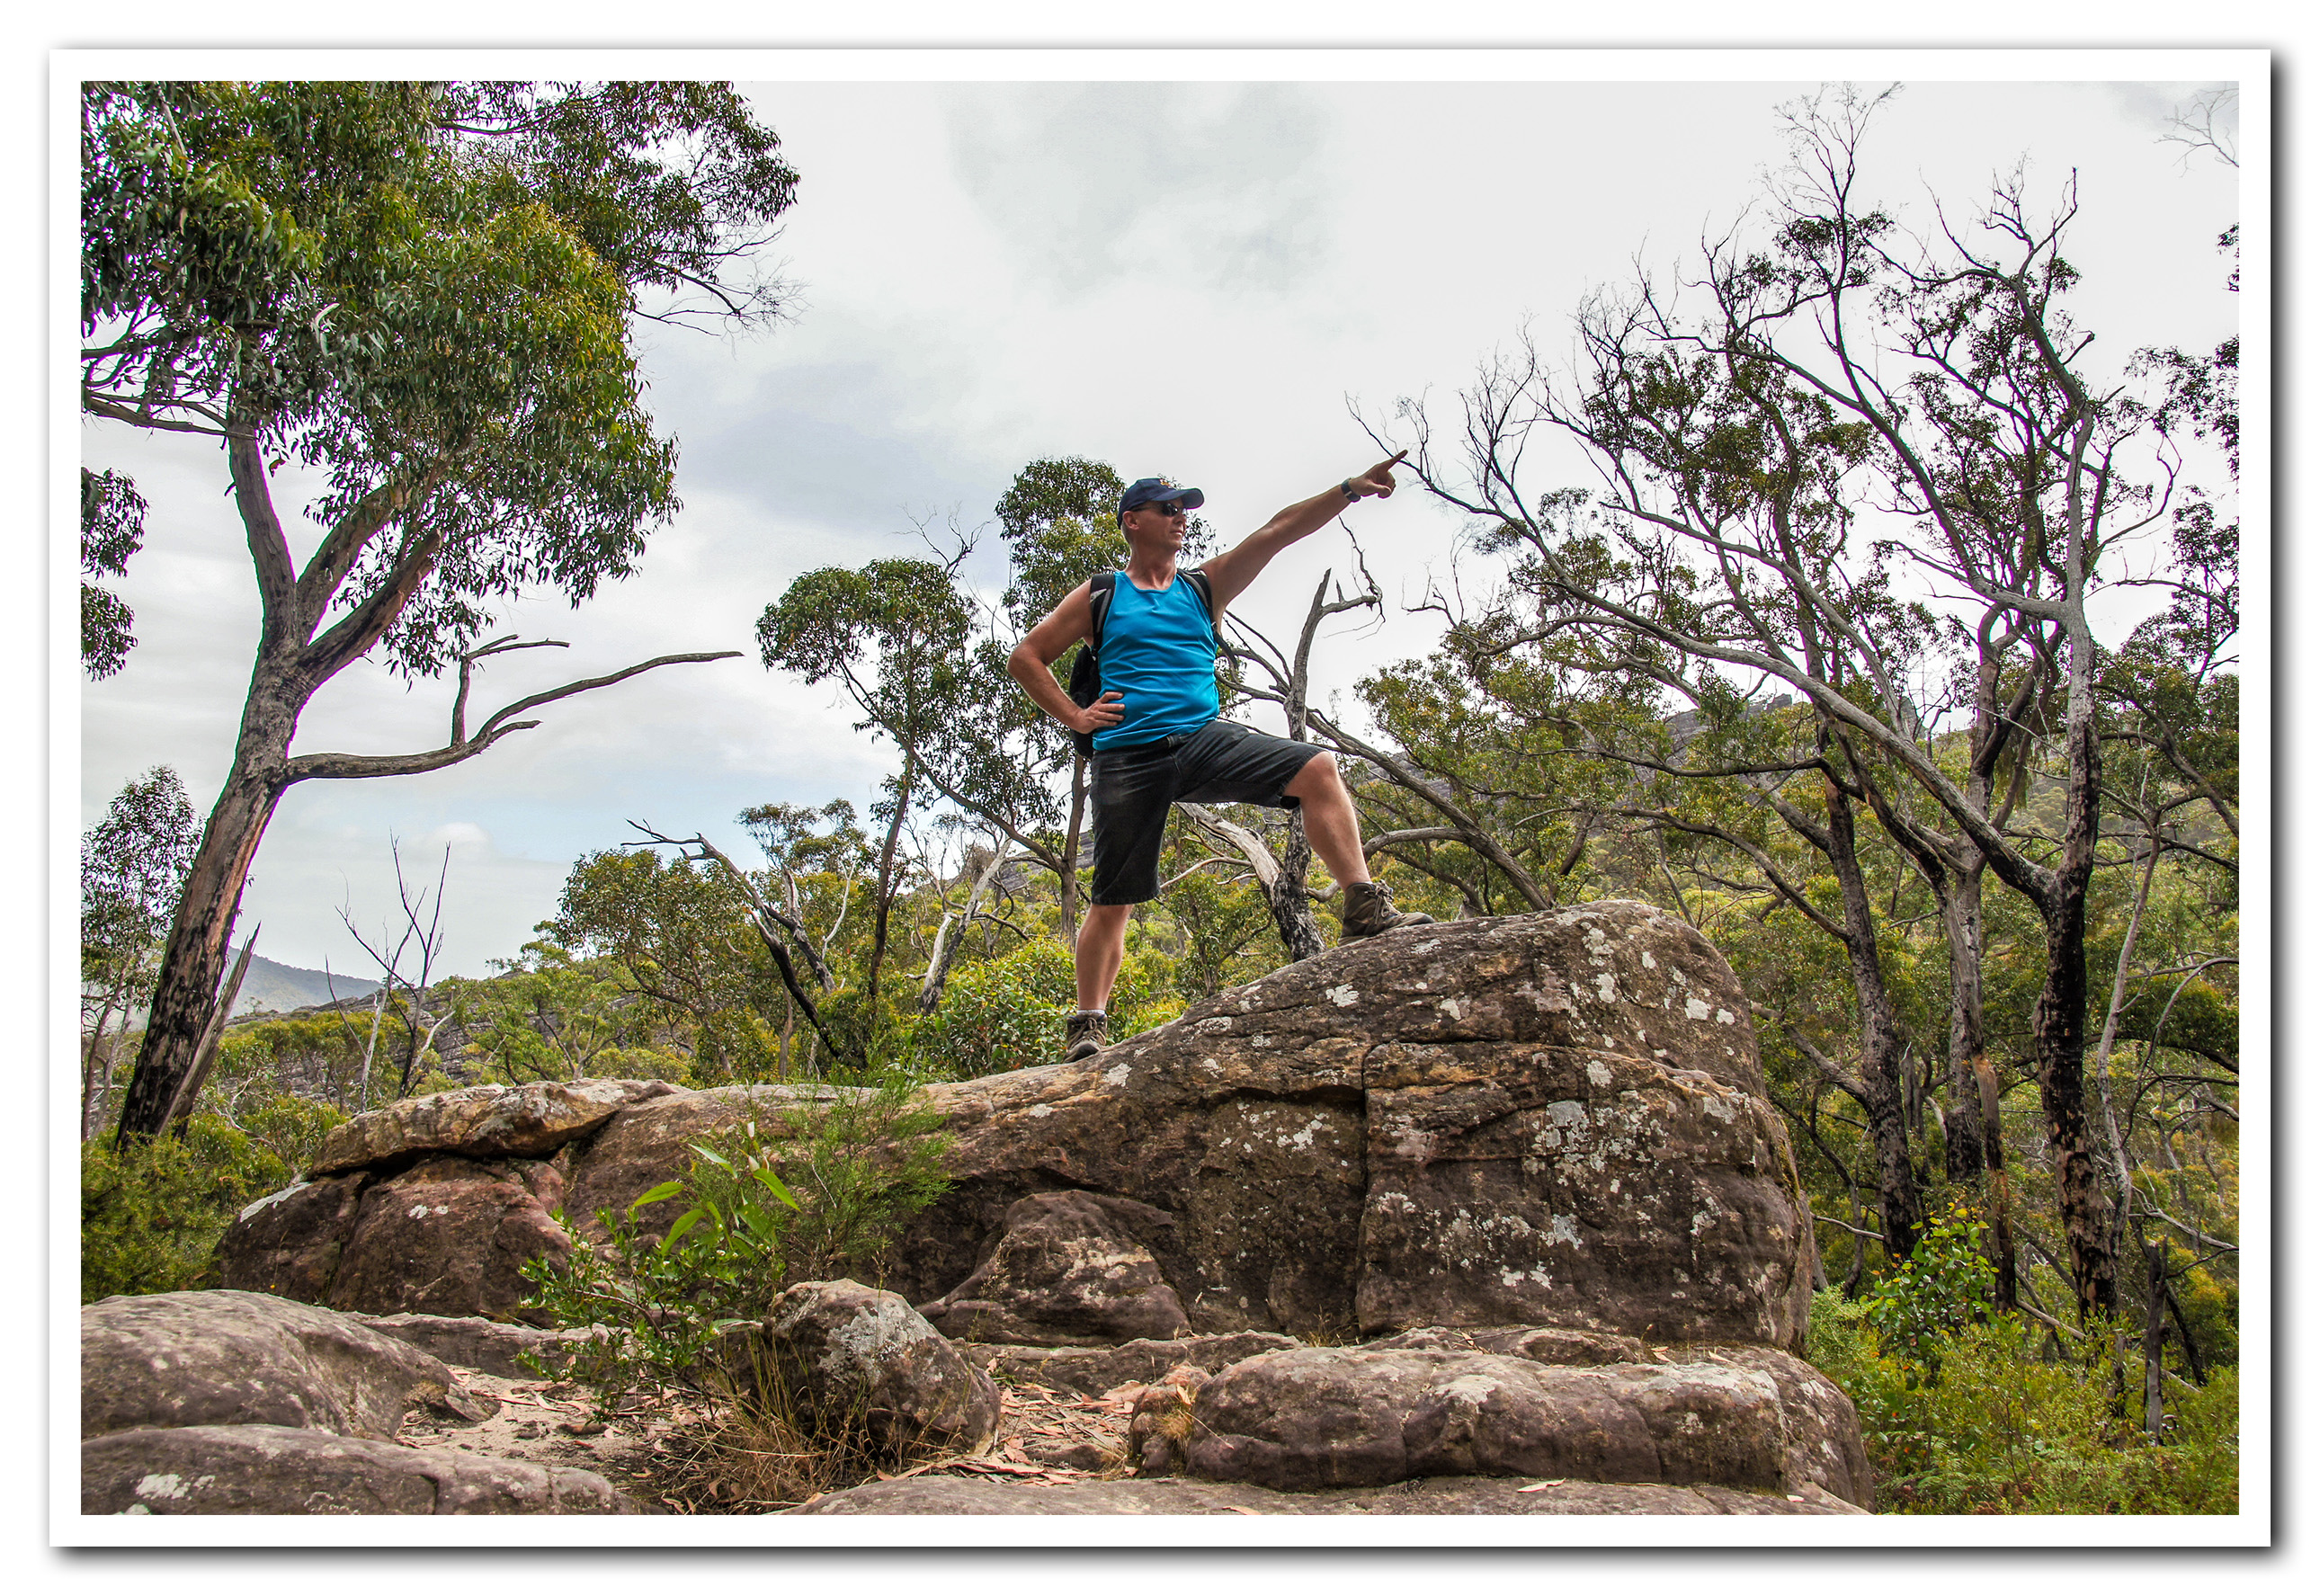
The next image was taken early in the morning and due to the dramatic difference between the sun and the shade the camera has had difficulty calculating the correct automatic exposure.
(Click to view the Image Full Size in a new Tab)
Here is the same image after processing in Camera Raw:

(Click to view the Image Full Size in a new Tab)
The details of how we made the required adjustments are contained in the PDF Lesson document that can be found at the following link:
How to Use Camera Raw – Detailed Instructions
Adding Shadows to Images
In the following before and after examples, there are patches of bright grass alongside the cars.
Using the Graduated Filter in Camera Raw we can cover the grass in shade, which will de-emphasize the grass and make the car stand out better.
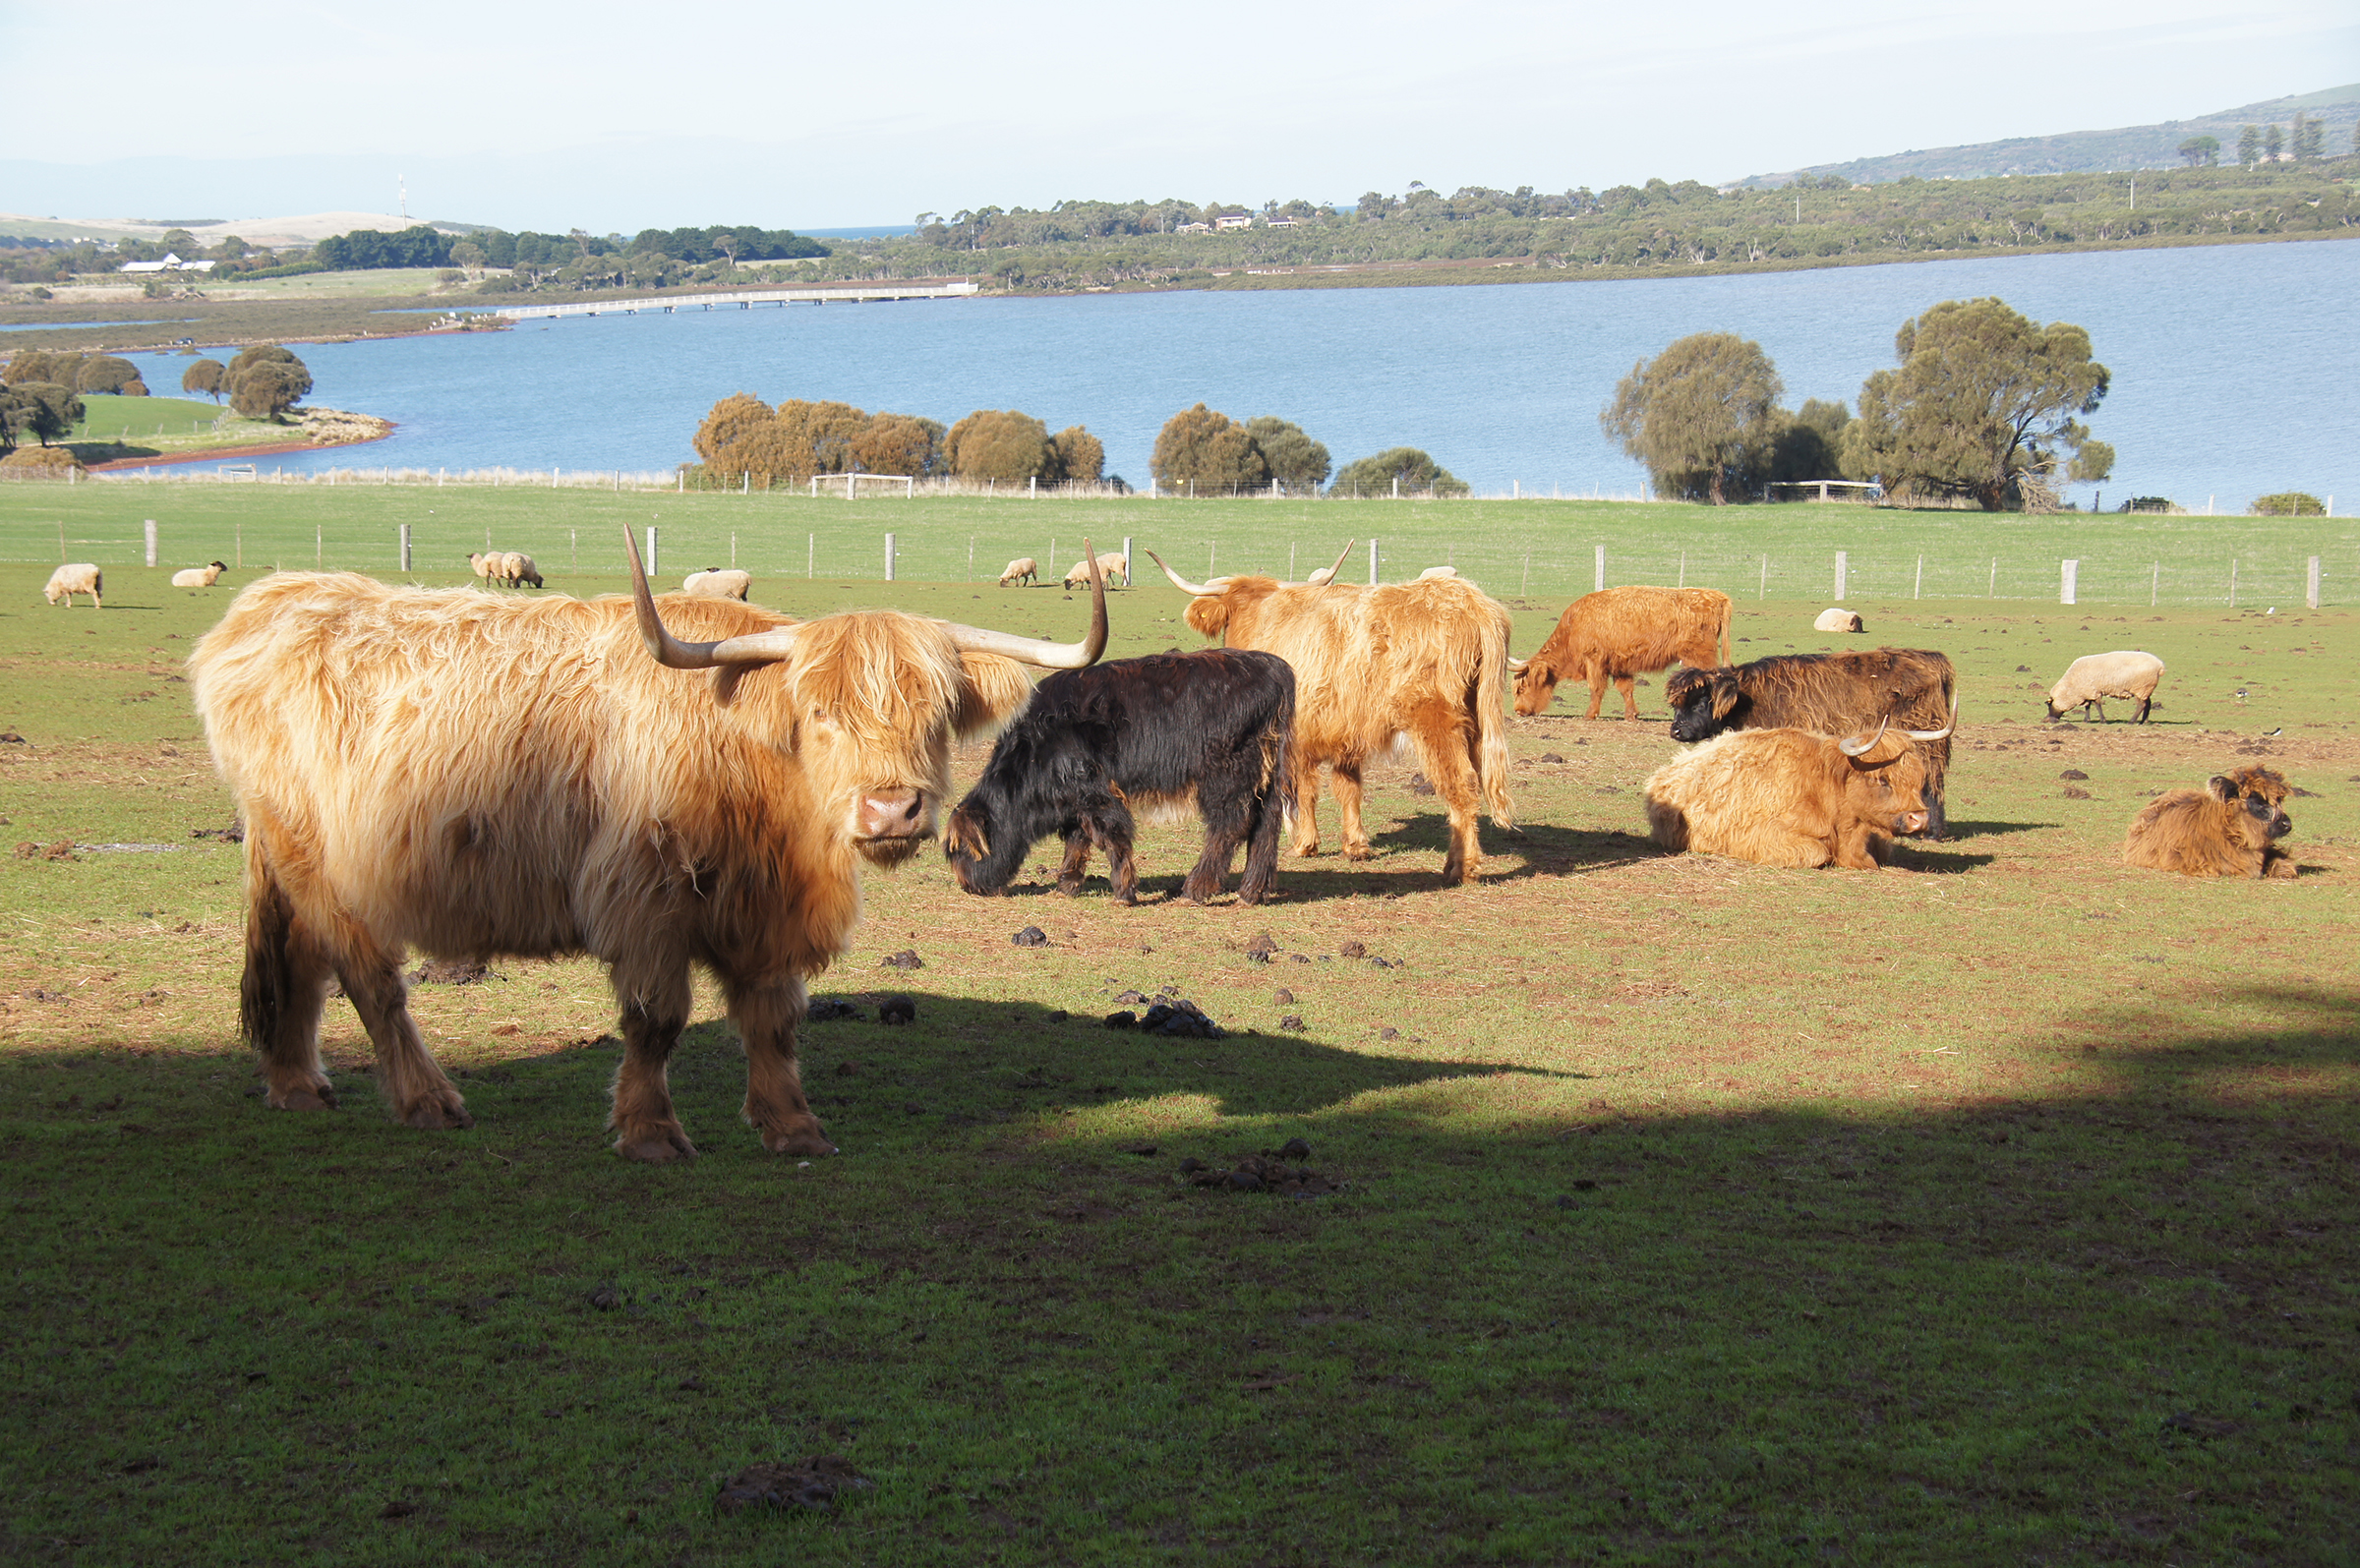
Here is a before image with bright sunlit grass alongside the car:

(Click to view the Image Full Size in a new Tab)
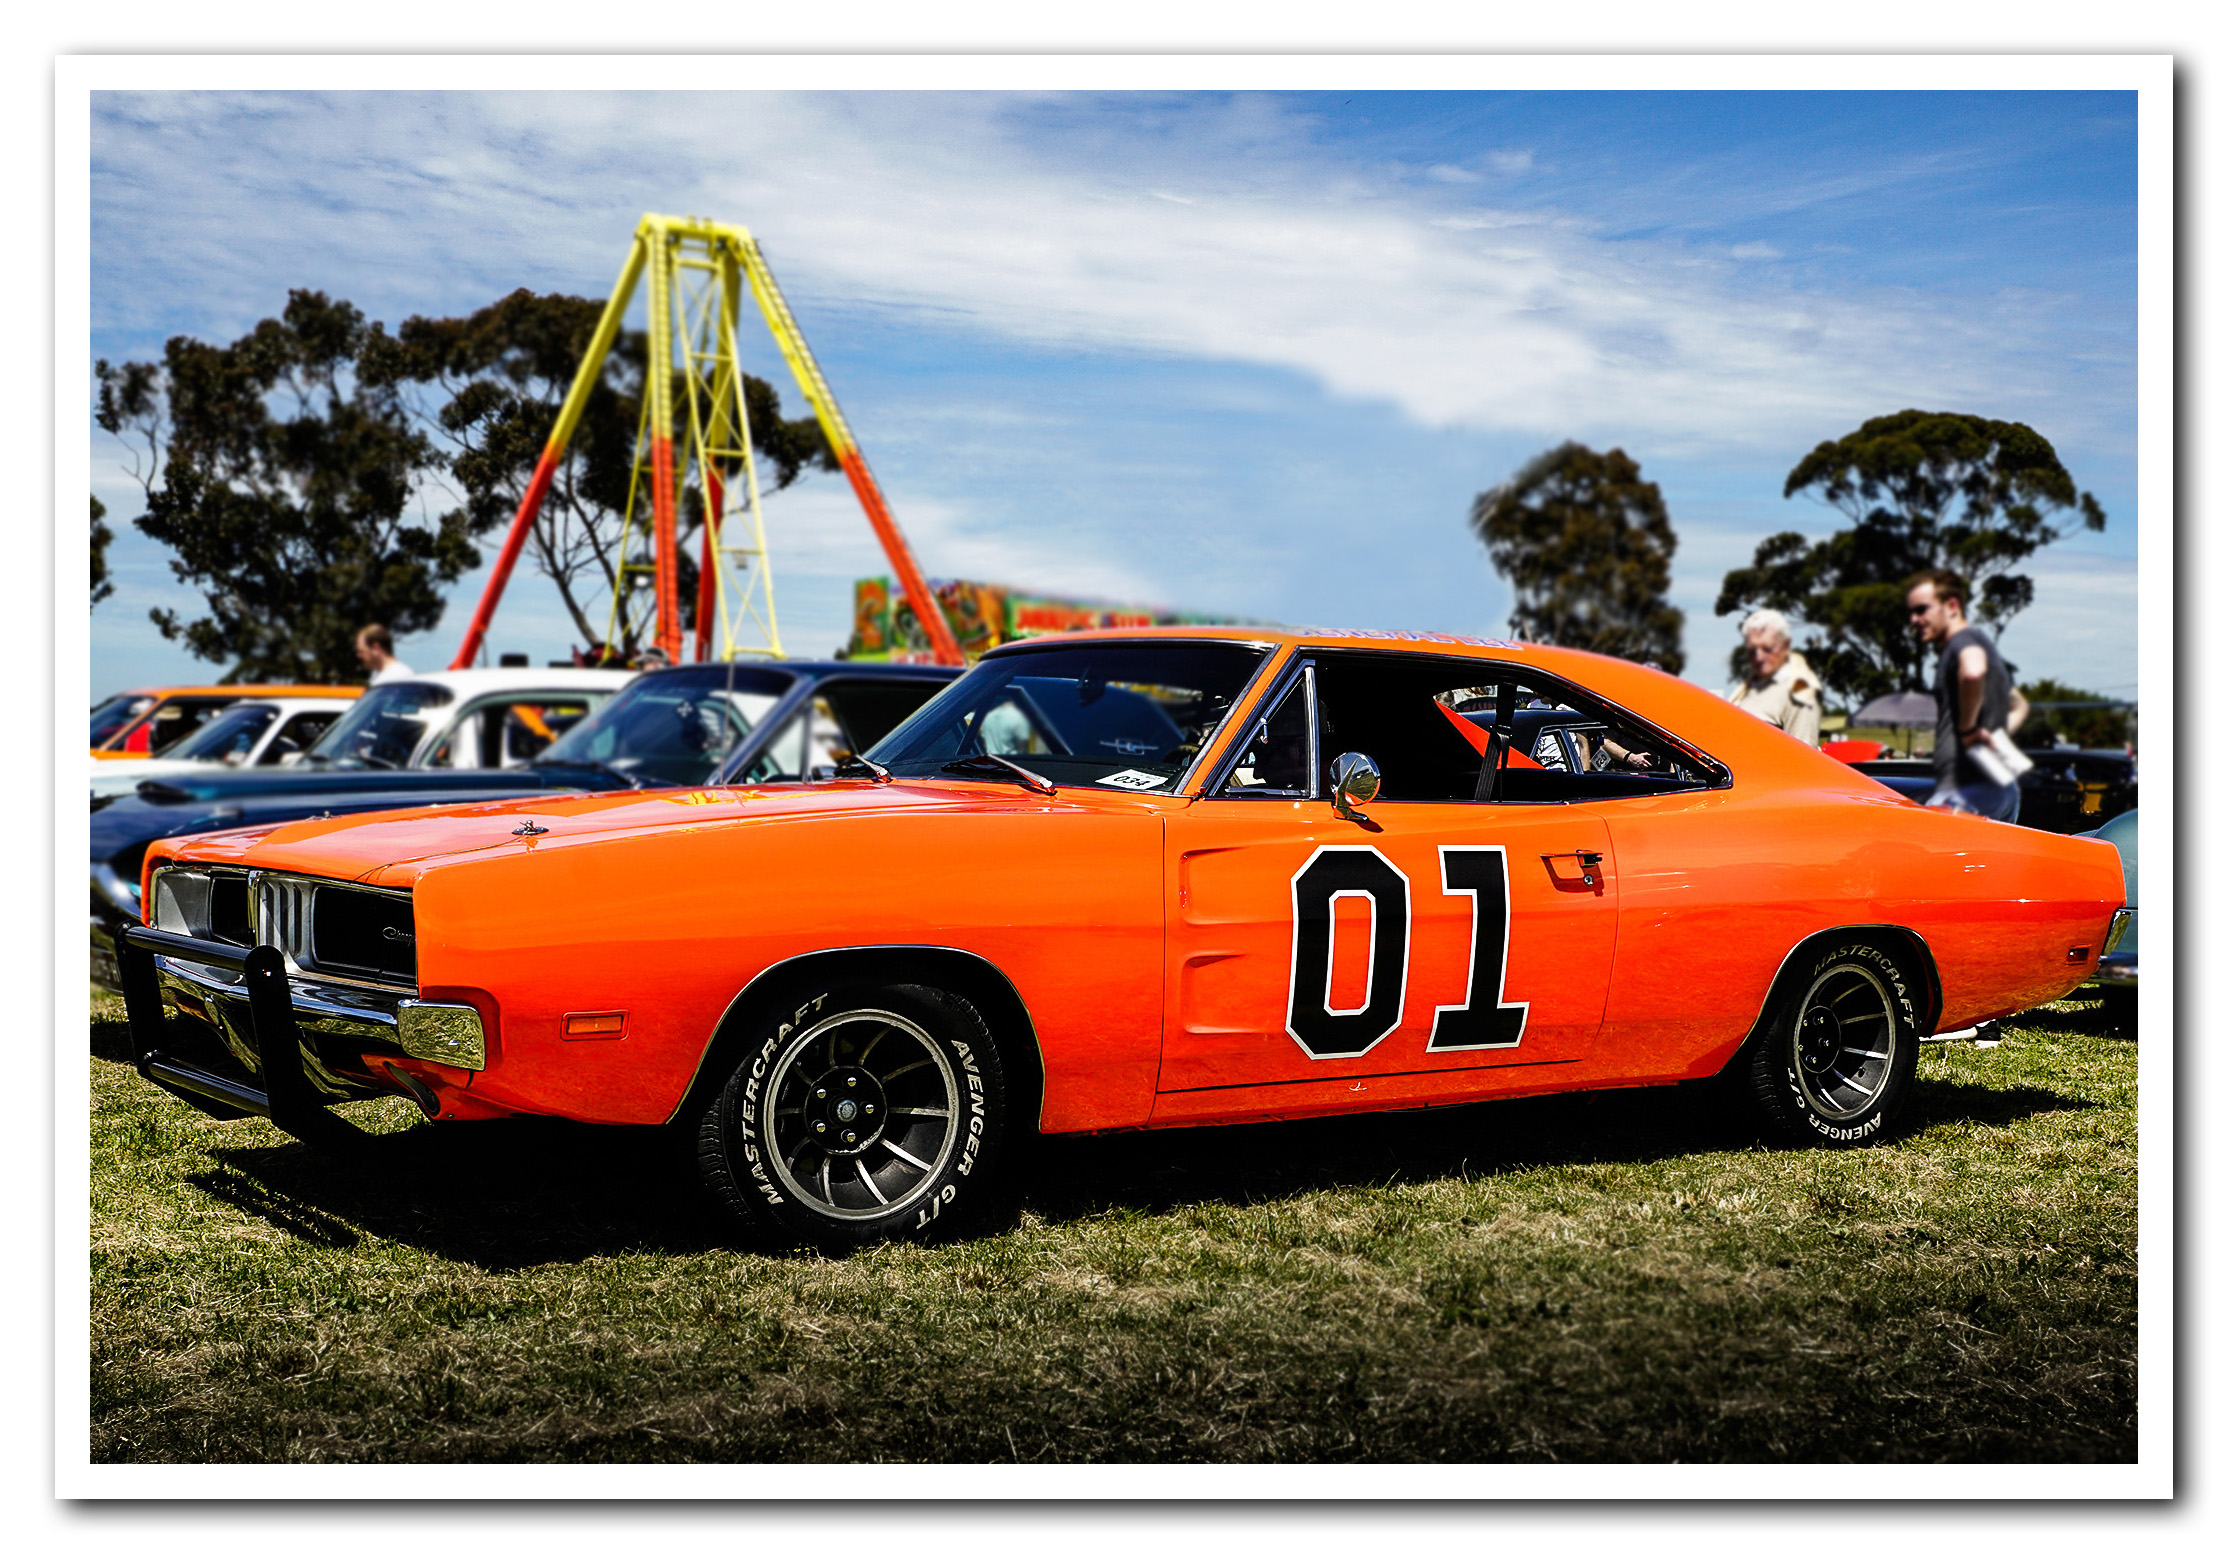
Here is the same car after we have placed a graduated filter over the grass:

(Click to view the Image Full Size in a new Tab)
In this next example we have added in the shadow, but then used the adjustment brush to bring the wheels out of the shade, as well as changing the clarity and saturation and then doing some blurring tool work in Photoshop.
Here is the Before image of the car:

(Click to view the Image Full Size in a new Tab)
And here is the After Image of the same car following processing in Camera Raw and Photoshop:
(Click to view the Image Full Size in a new Tab)
Saving and Using Presets
Here is the original image of a Blue Dodge Challenger at a Car Show:
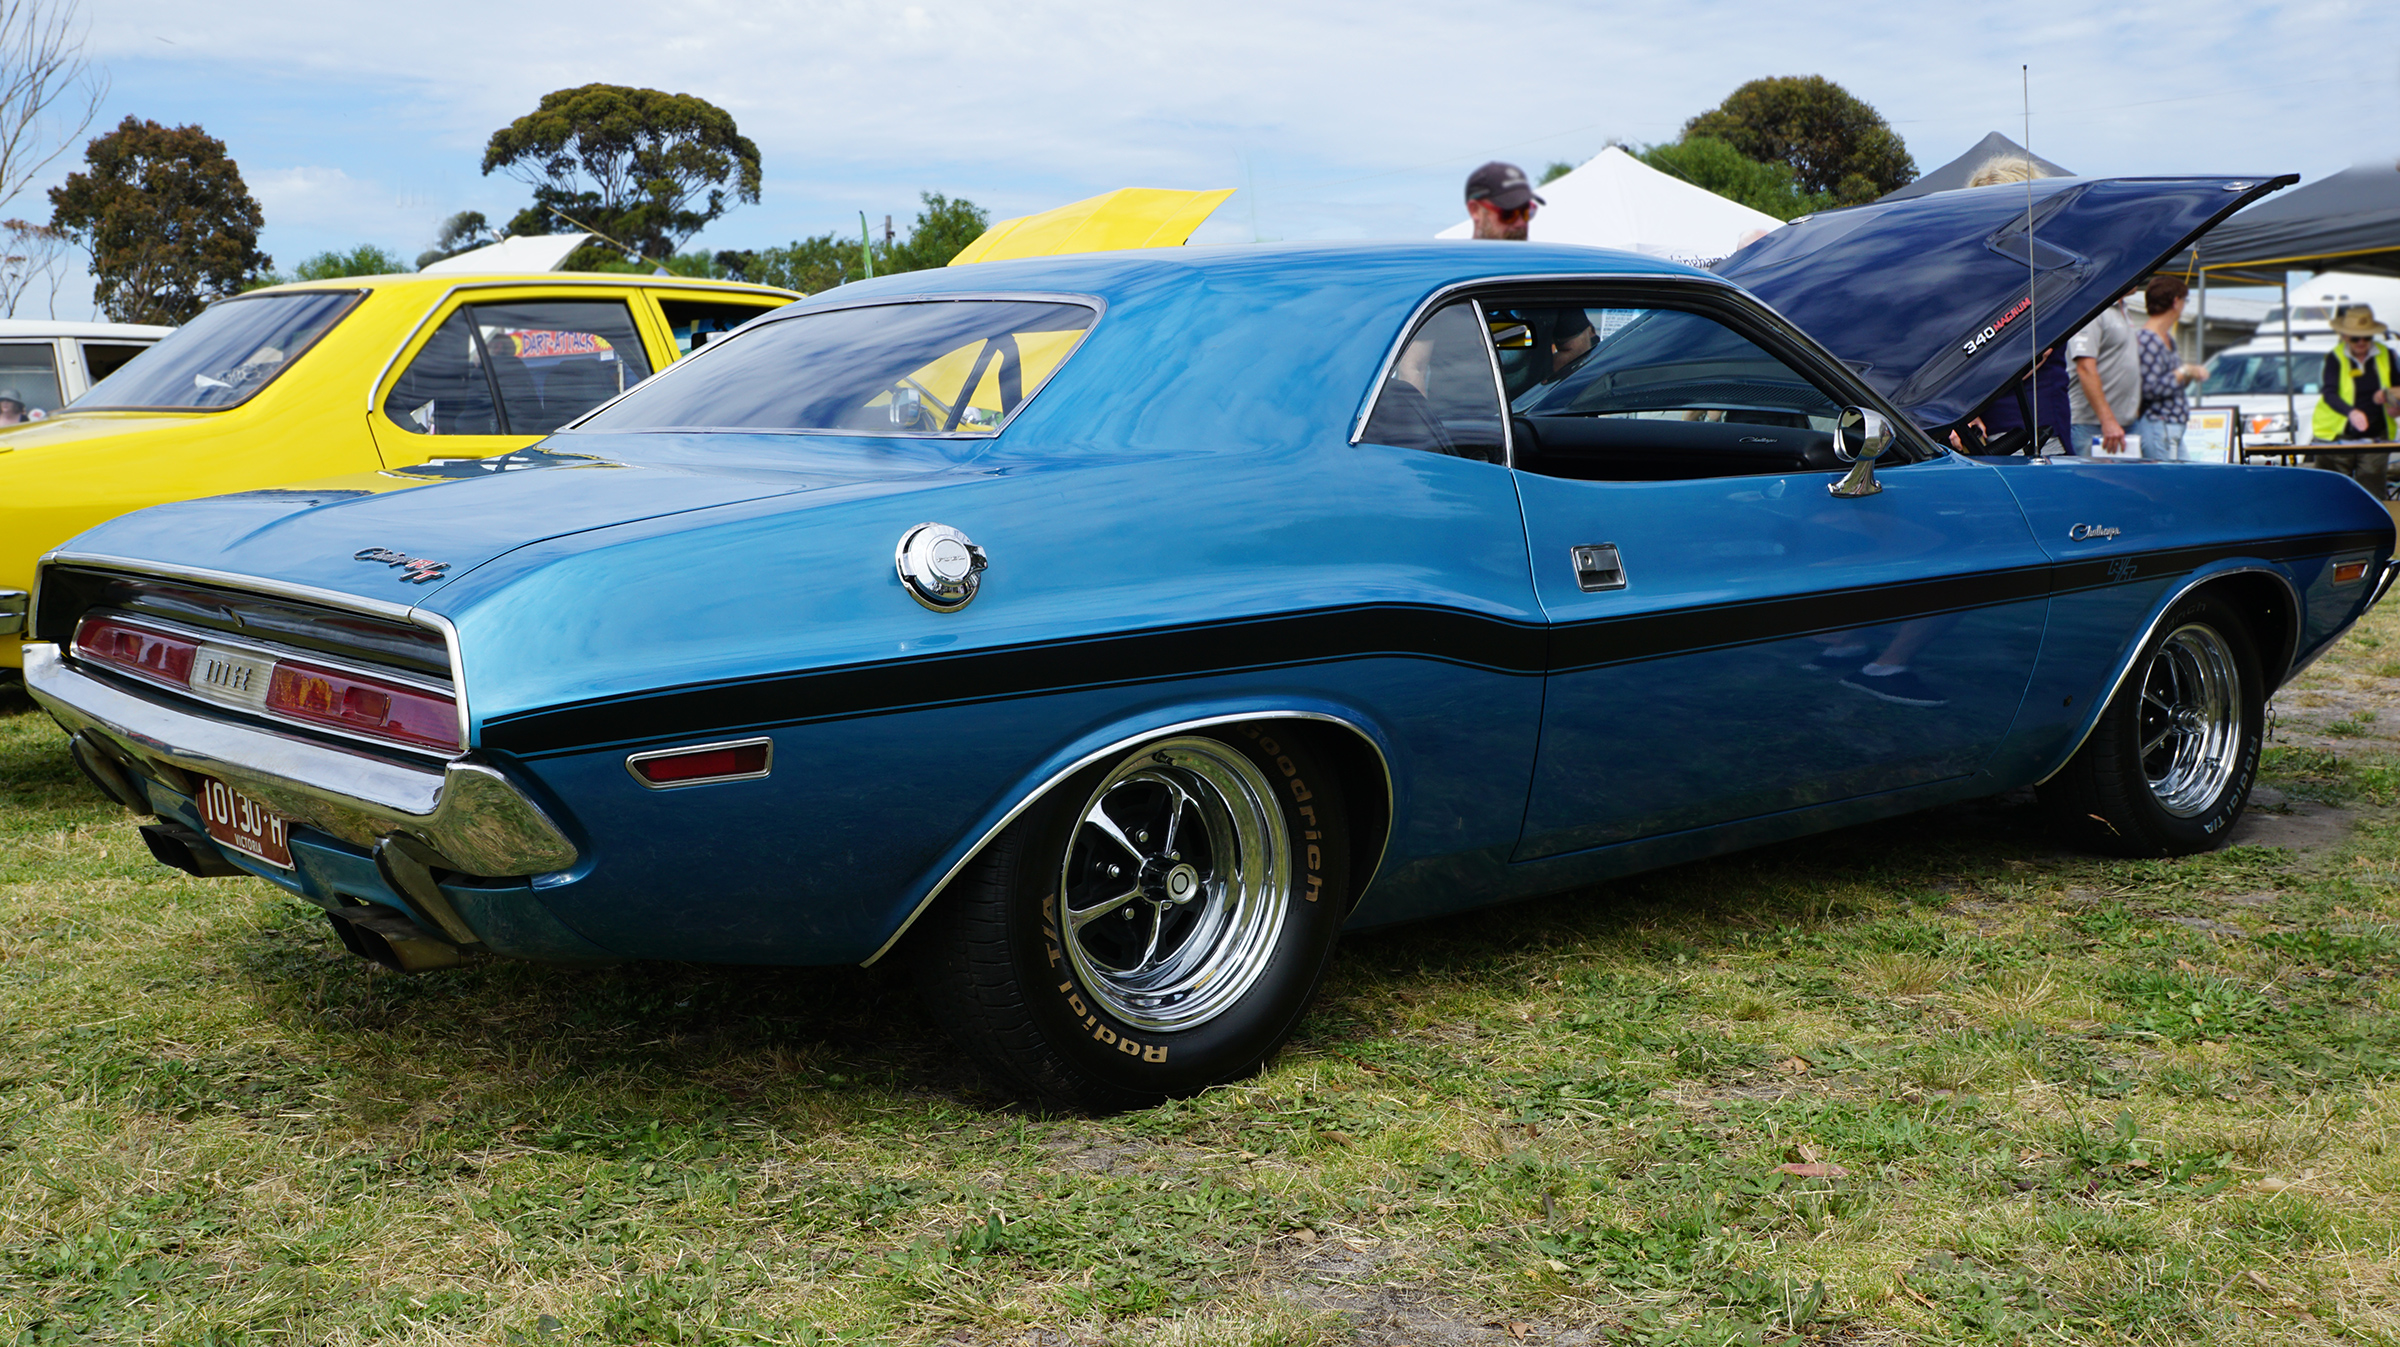
(Click to view the Image Full Size in a new Tab)
Using Camera Raw we created a set of adjustments to change the above image into an old retro style photo like this:
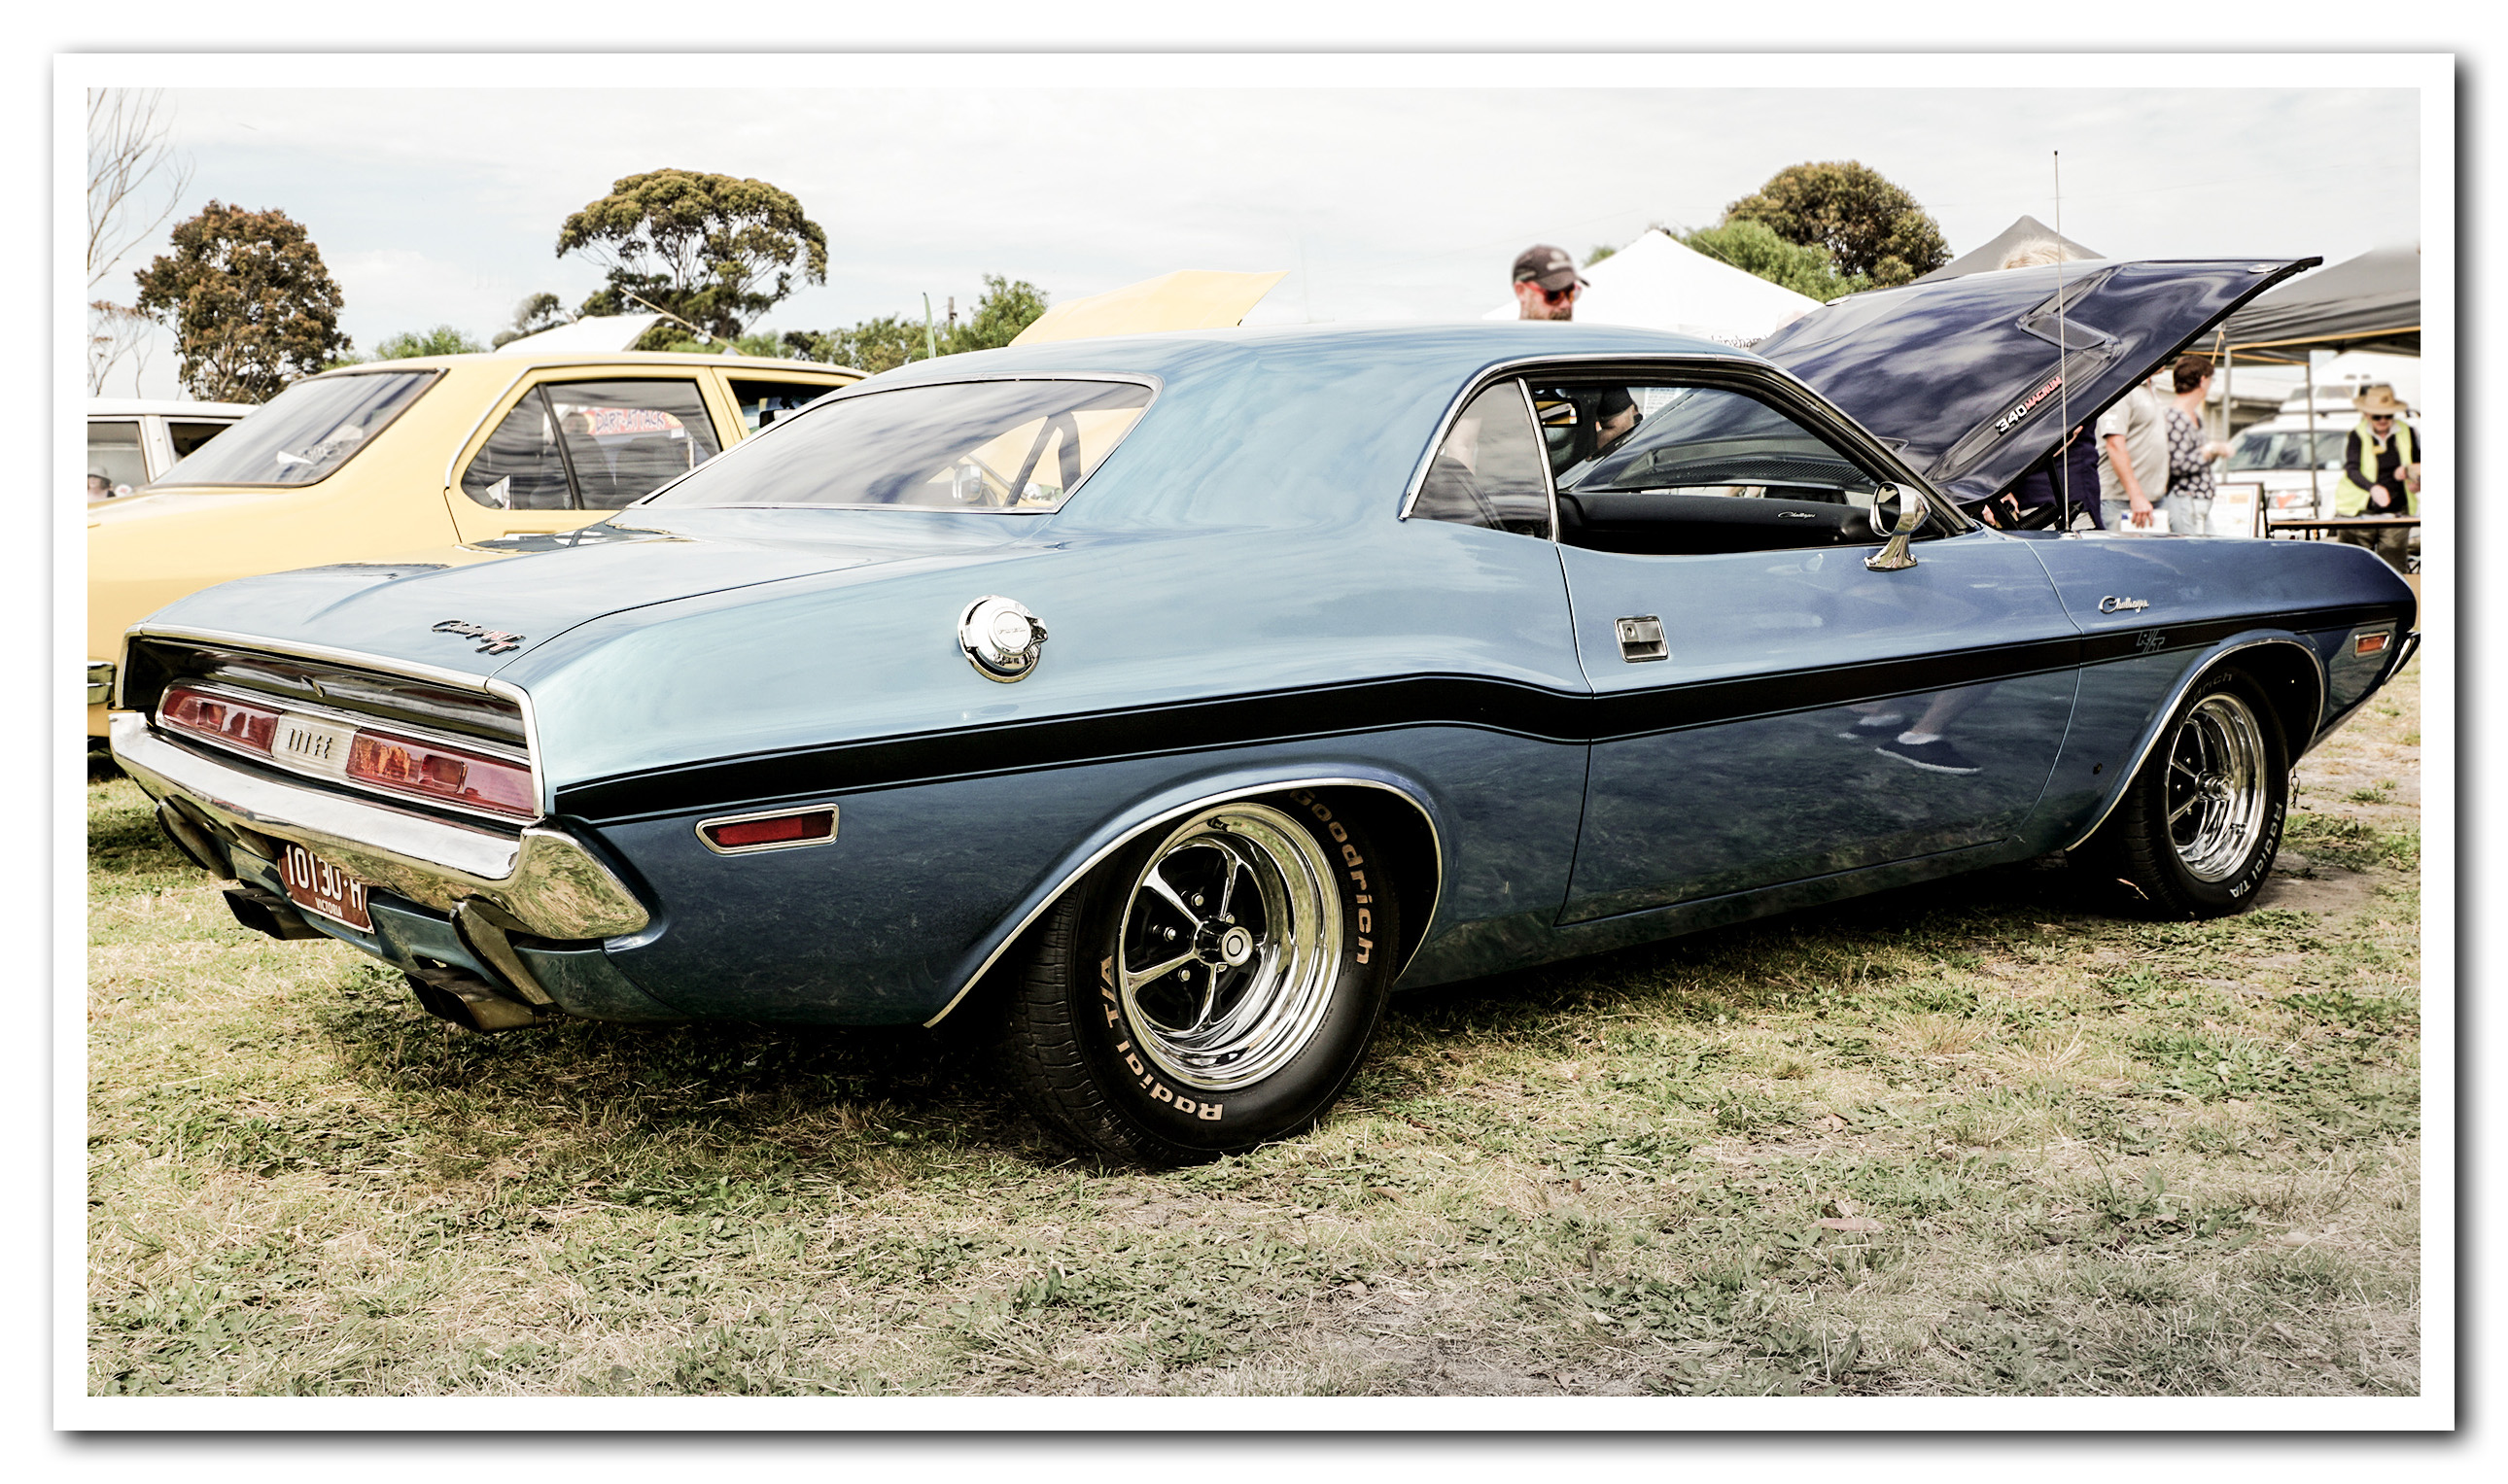
(Click to view the Image Full Size in a new Tab)
These are the settings that we used:
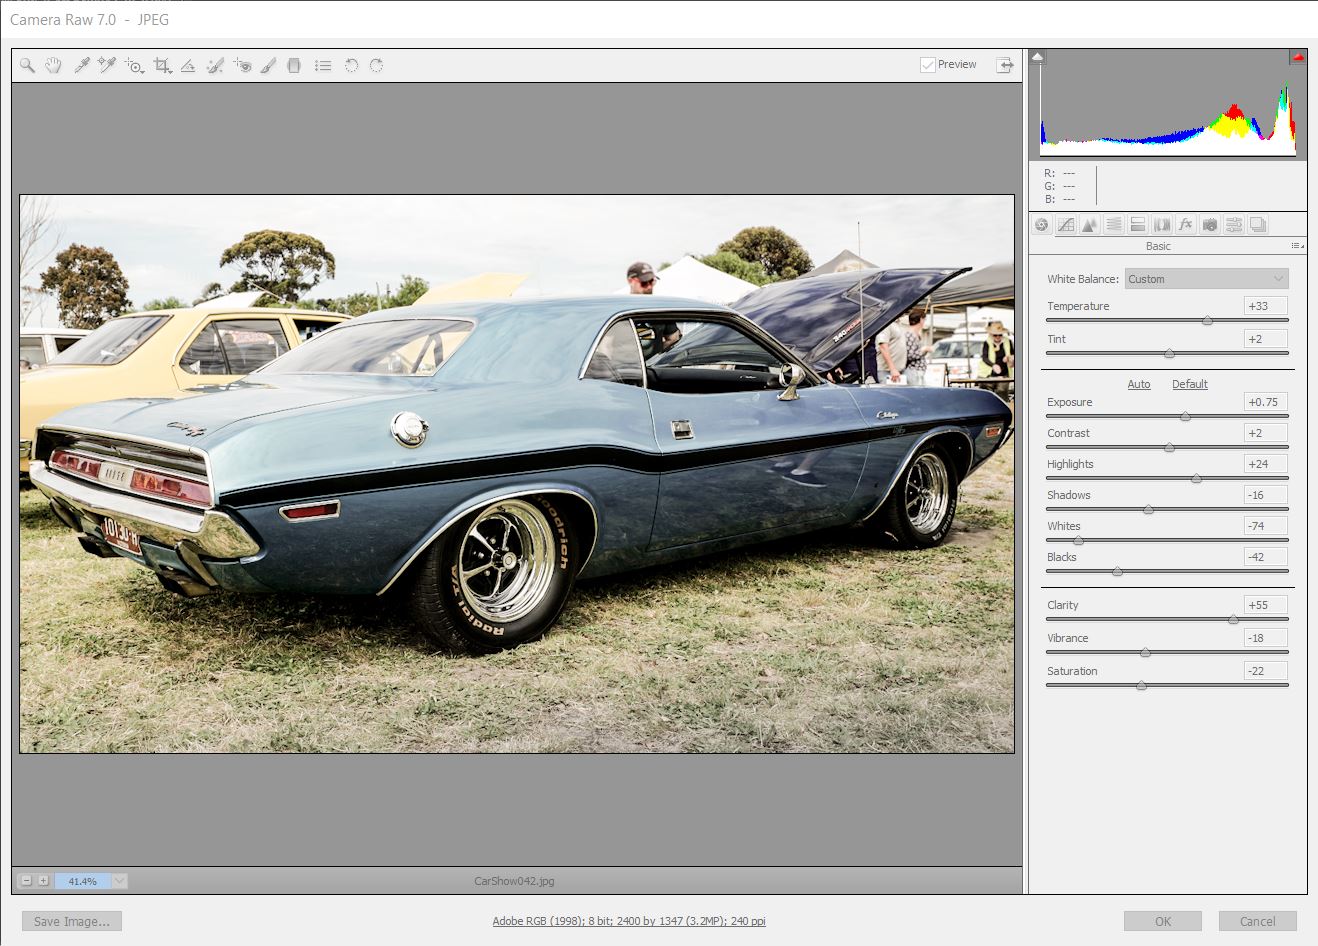
(Click to view the Image Full Size in a new Tab)
Because we have several other car pictures that we would like to apply the same effects to, it would be ideal to save these settings into the Camera Raw Presets Library.
This is easily done, as shown in the following seven minute YouTube video:
Once we have saved a Preset for our Retro Car Photo look, it is then easy to bring it up and apply it as a starting point on other photos.
Here is the starting photo:
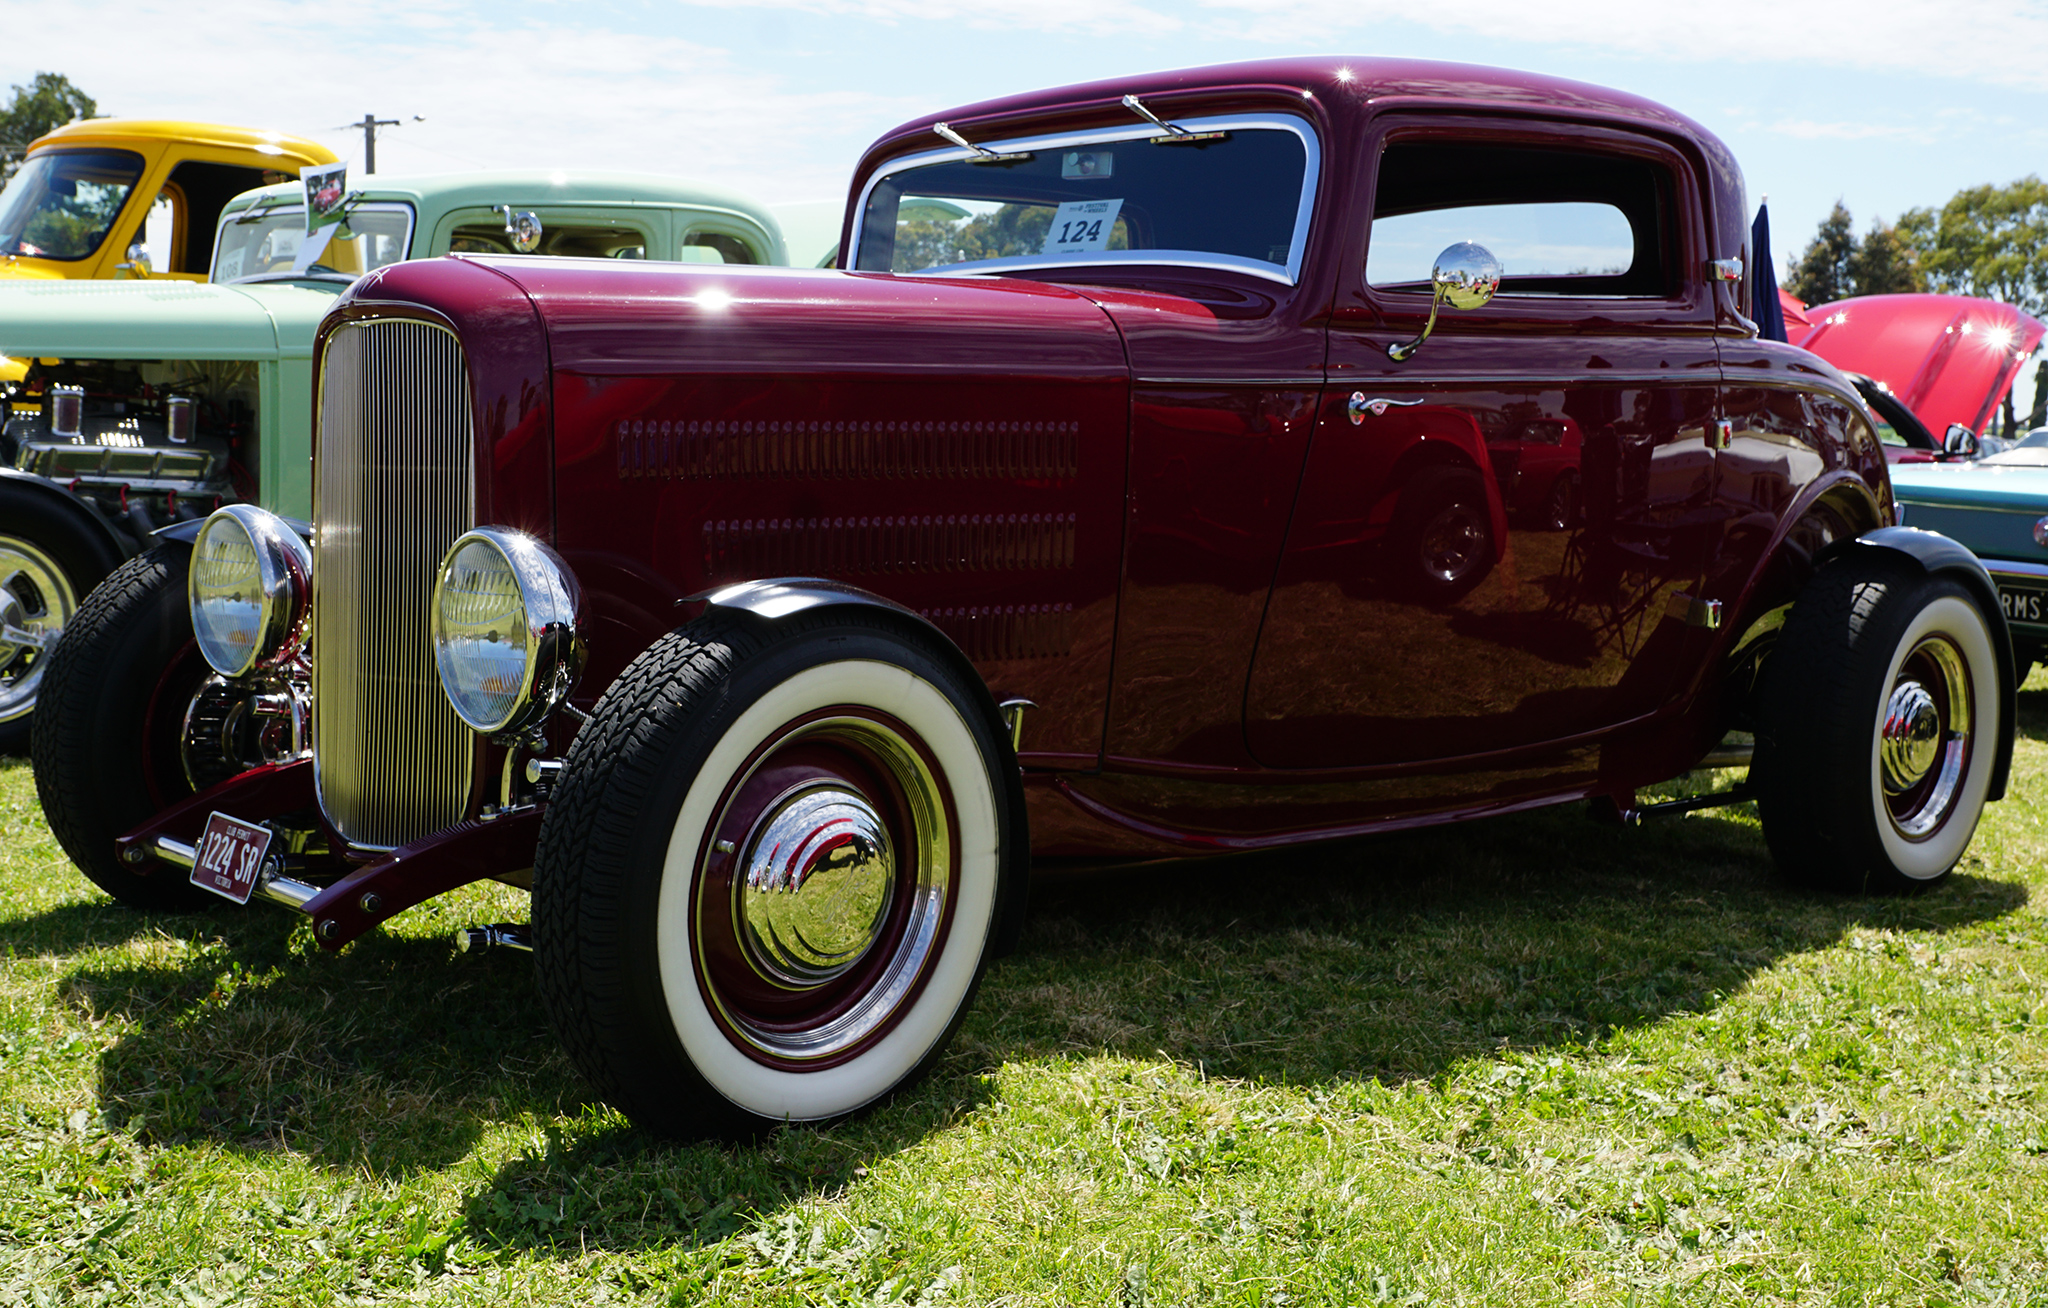
(Click to view the Image Full Size in a new Tab)
and here is the same image after applying our retro look Preset and some simple cropping:
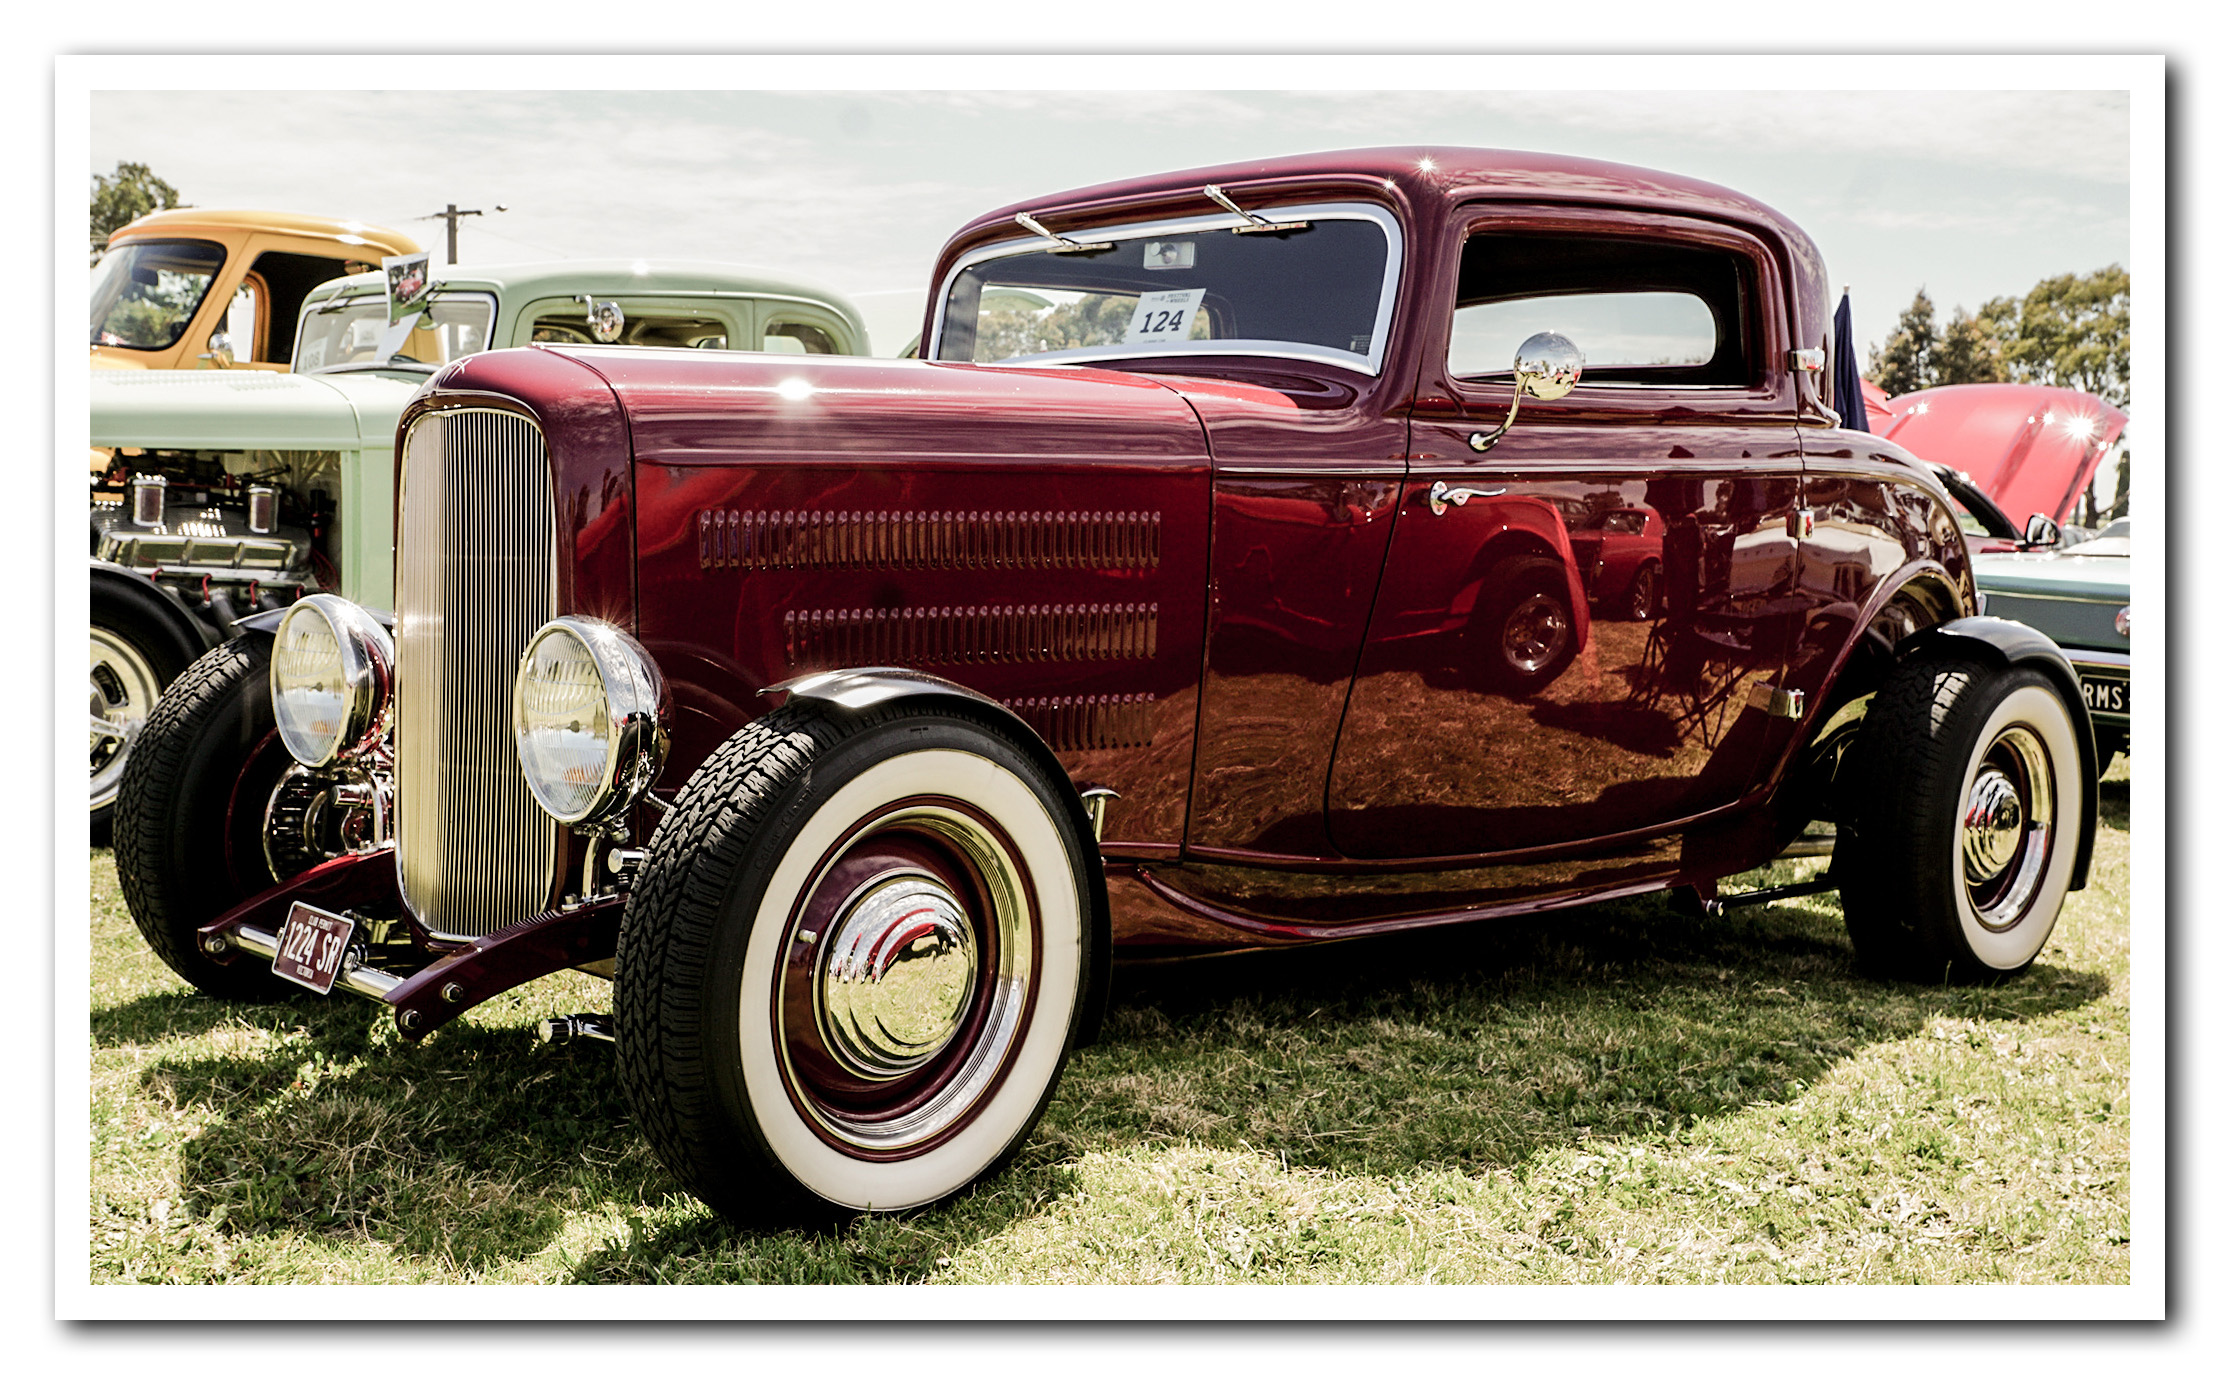
(Click to view the Image Full Size in a new Tab)
Special Effects
Camera Raw Presets and tweaking them allows us to create our own set of filters that can create Glow and HDR type special effects.
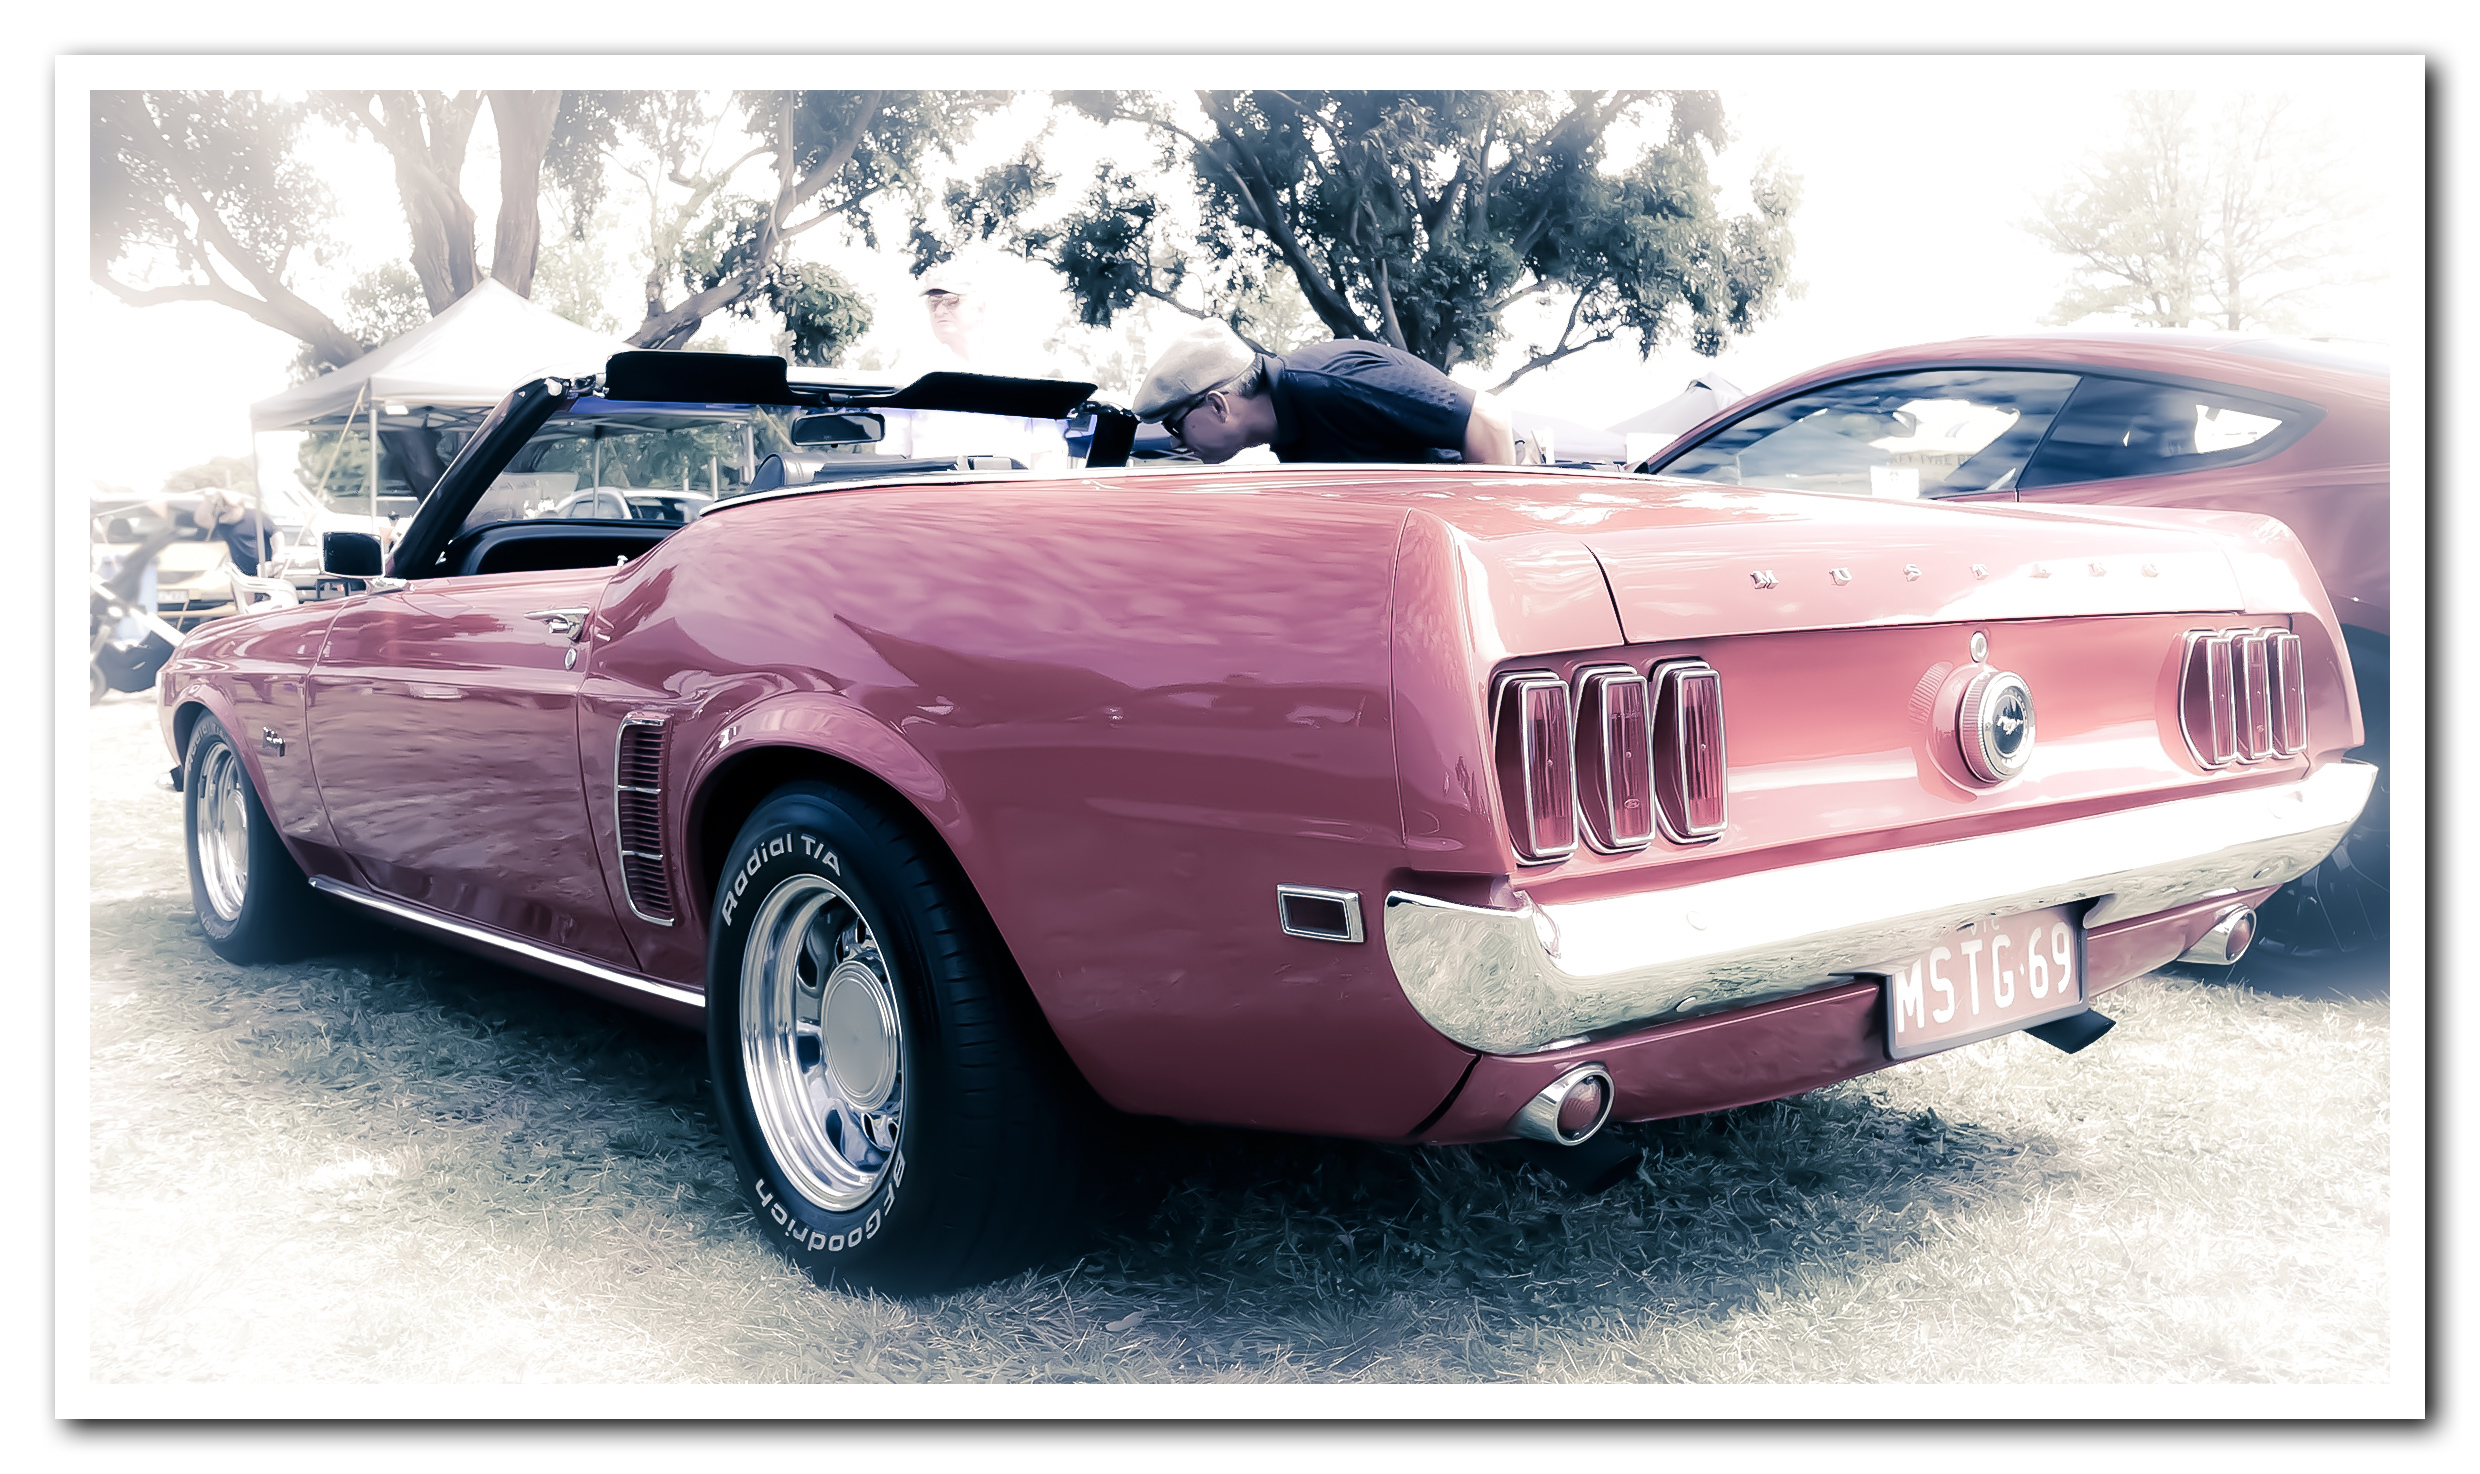
Here is a starting Photo of a fabulous Ford Mustang:

(Click to view the Image Full Size in a new Tab)
And here is the same photo as a HDR type image after processing in Camera Raw (mainly pumping the “Clarity” all the way up).
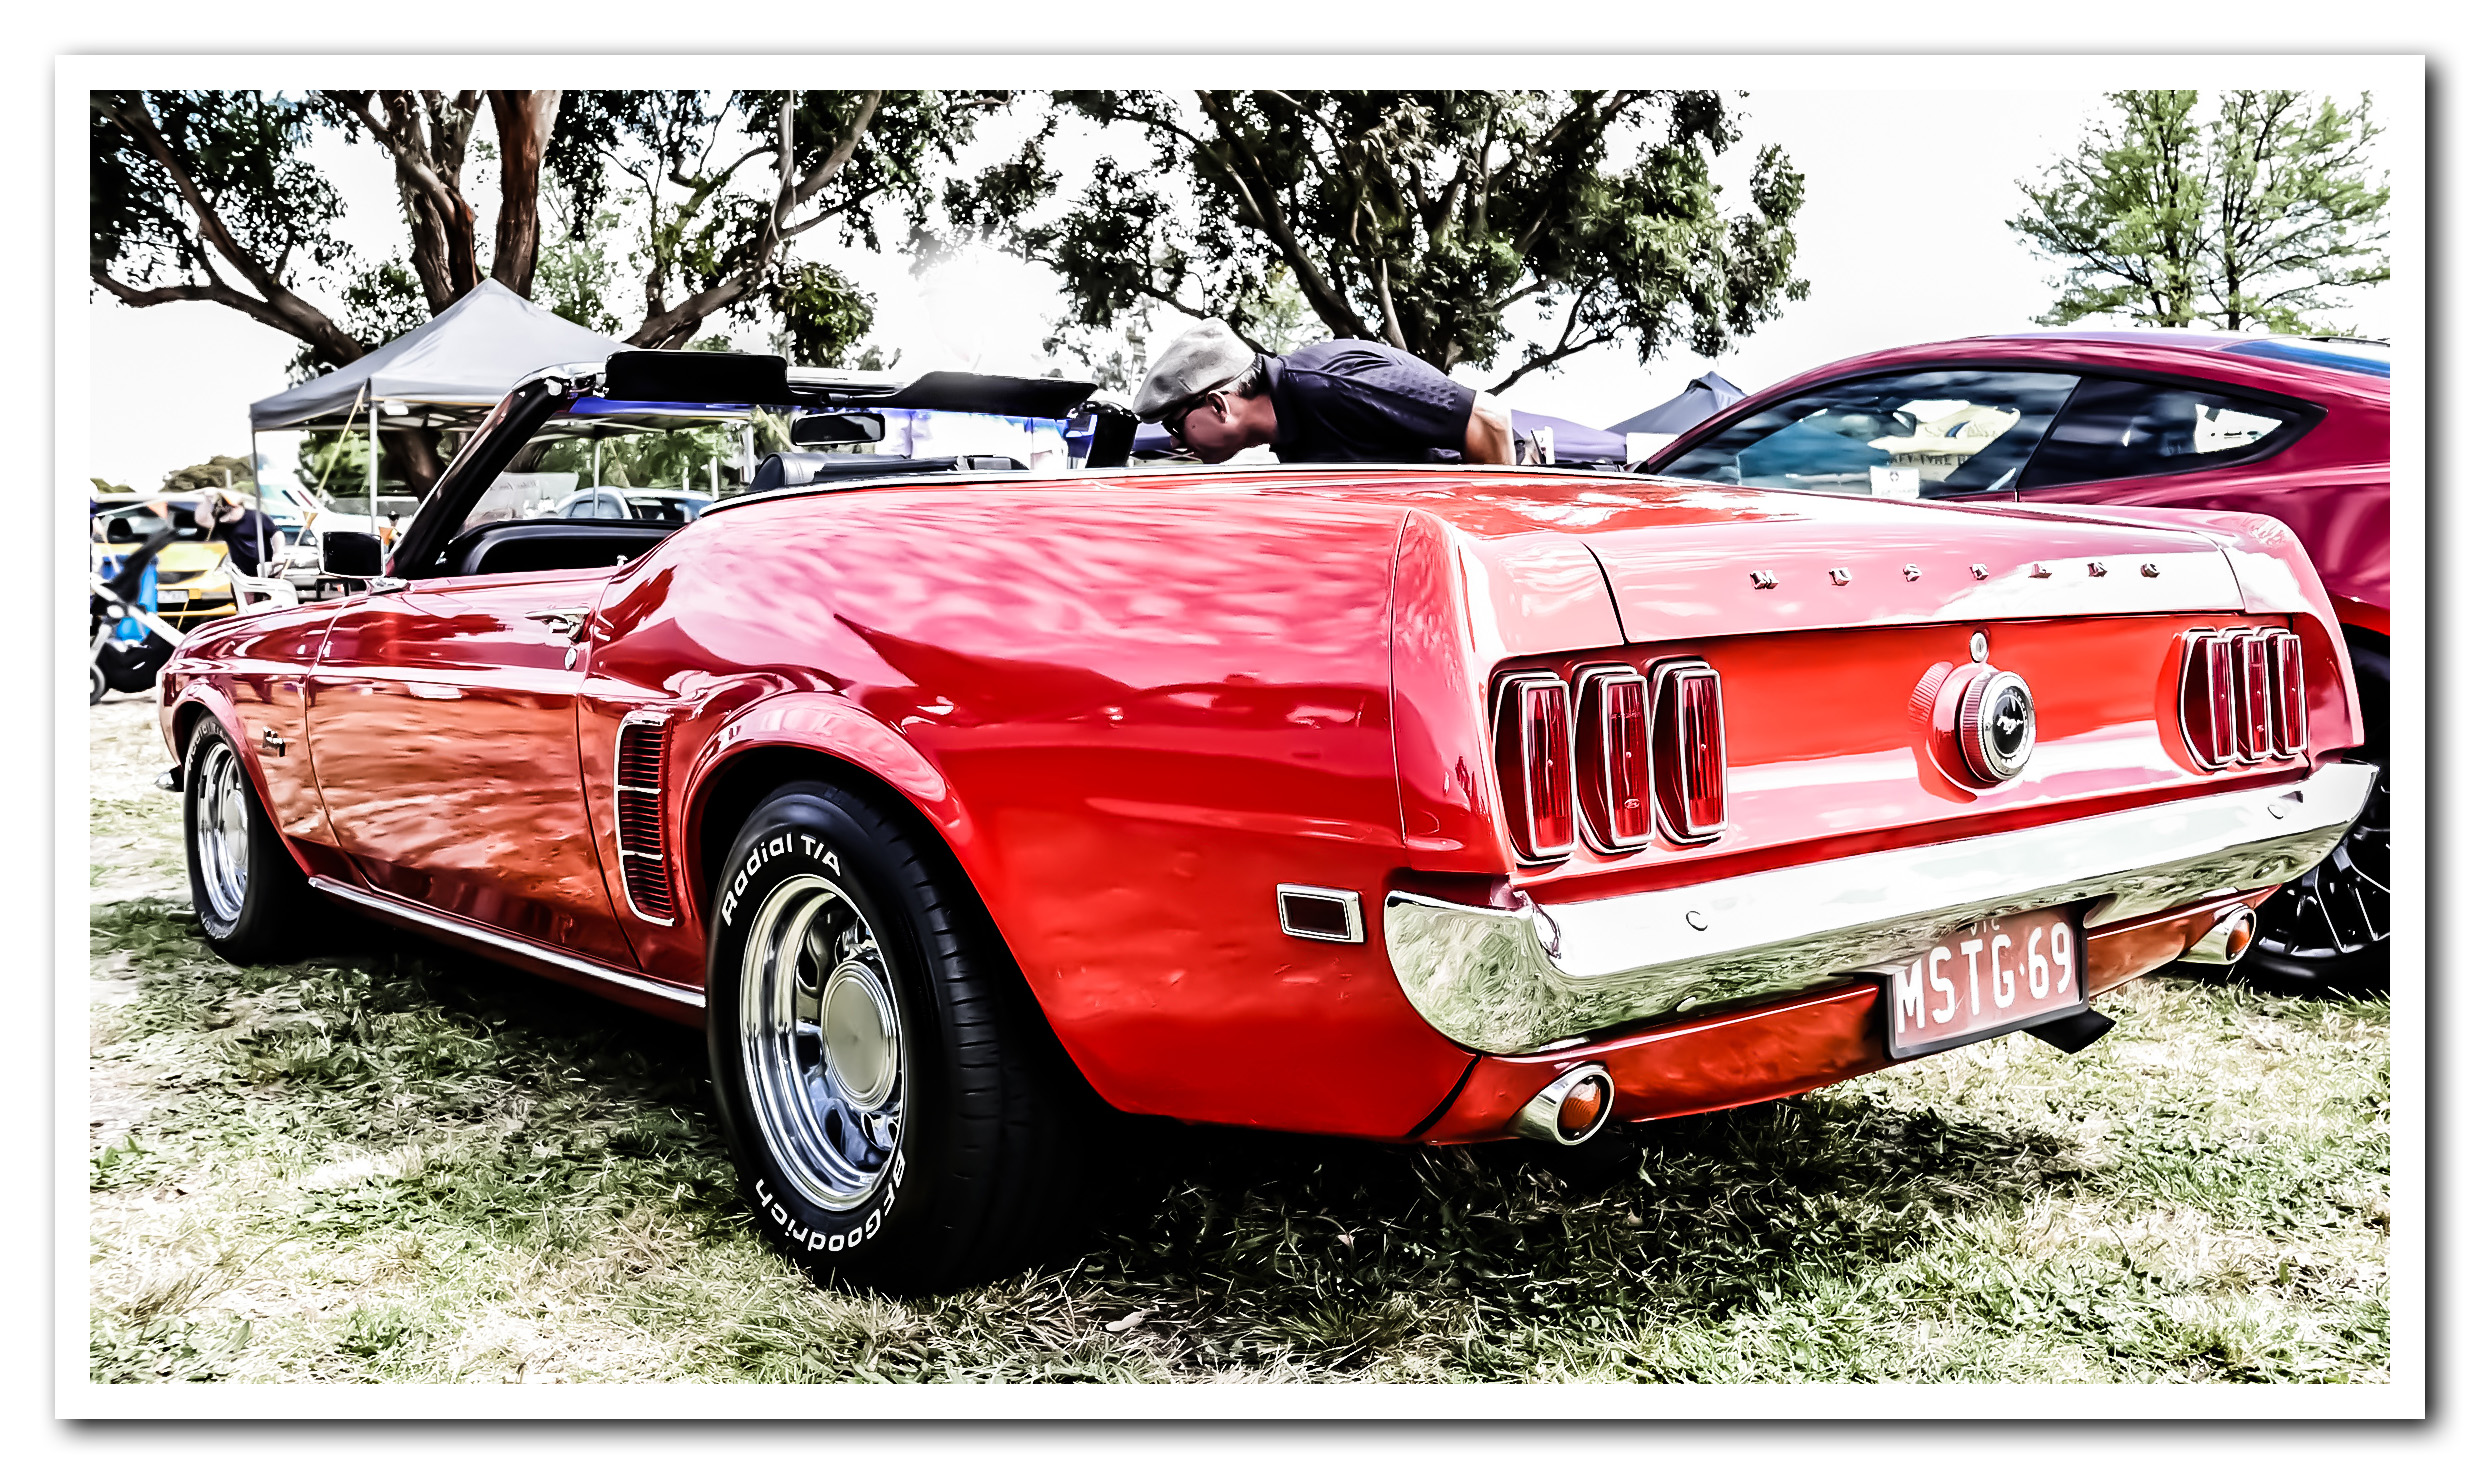
(Click to view the Image Full Size in a new Tab)
Or we can add a different set of adjustments to create that “Dream Car” look:
(Click to view the Image Full Size in a new Tab)
Adjusting People Pictures
Camera Raw can also be used for making subtle adjustments to People Pictures.
For example here is a Before Image:
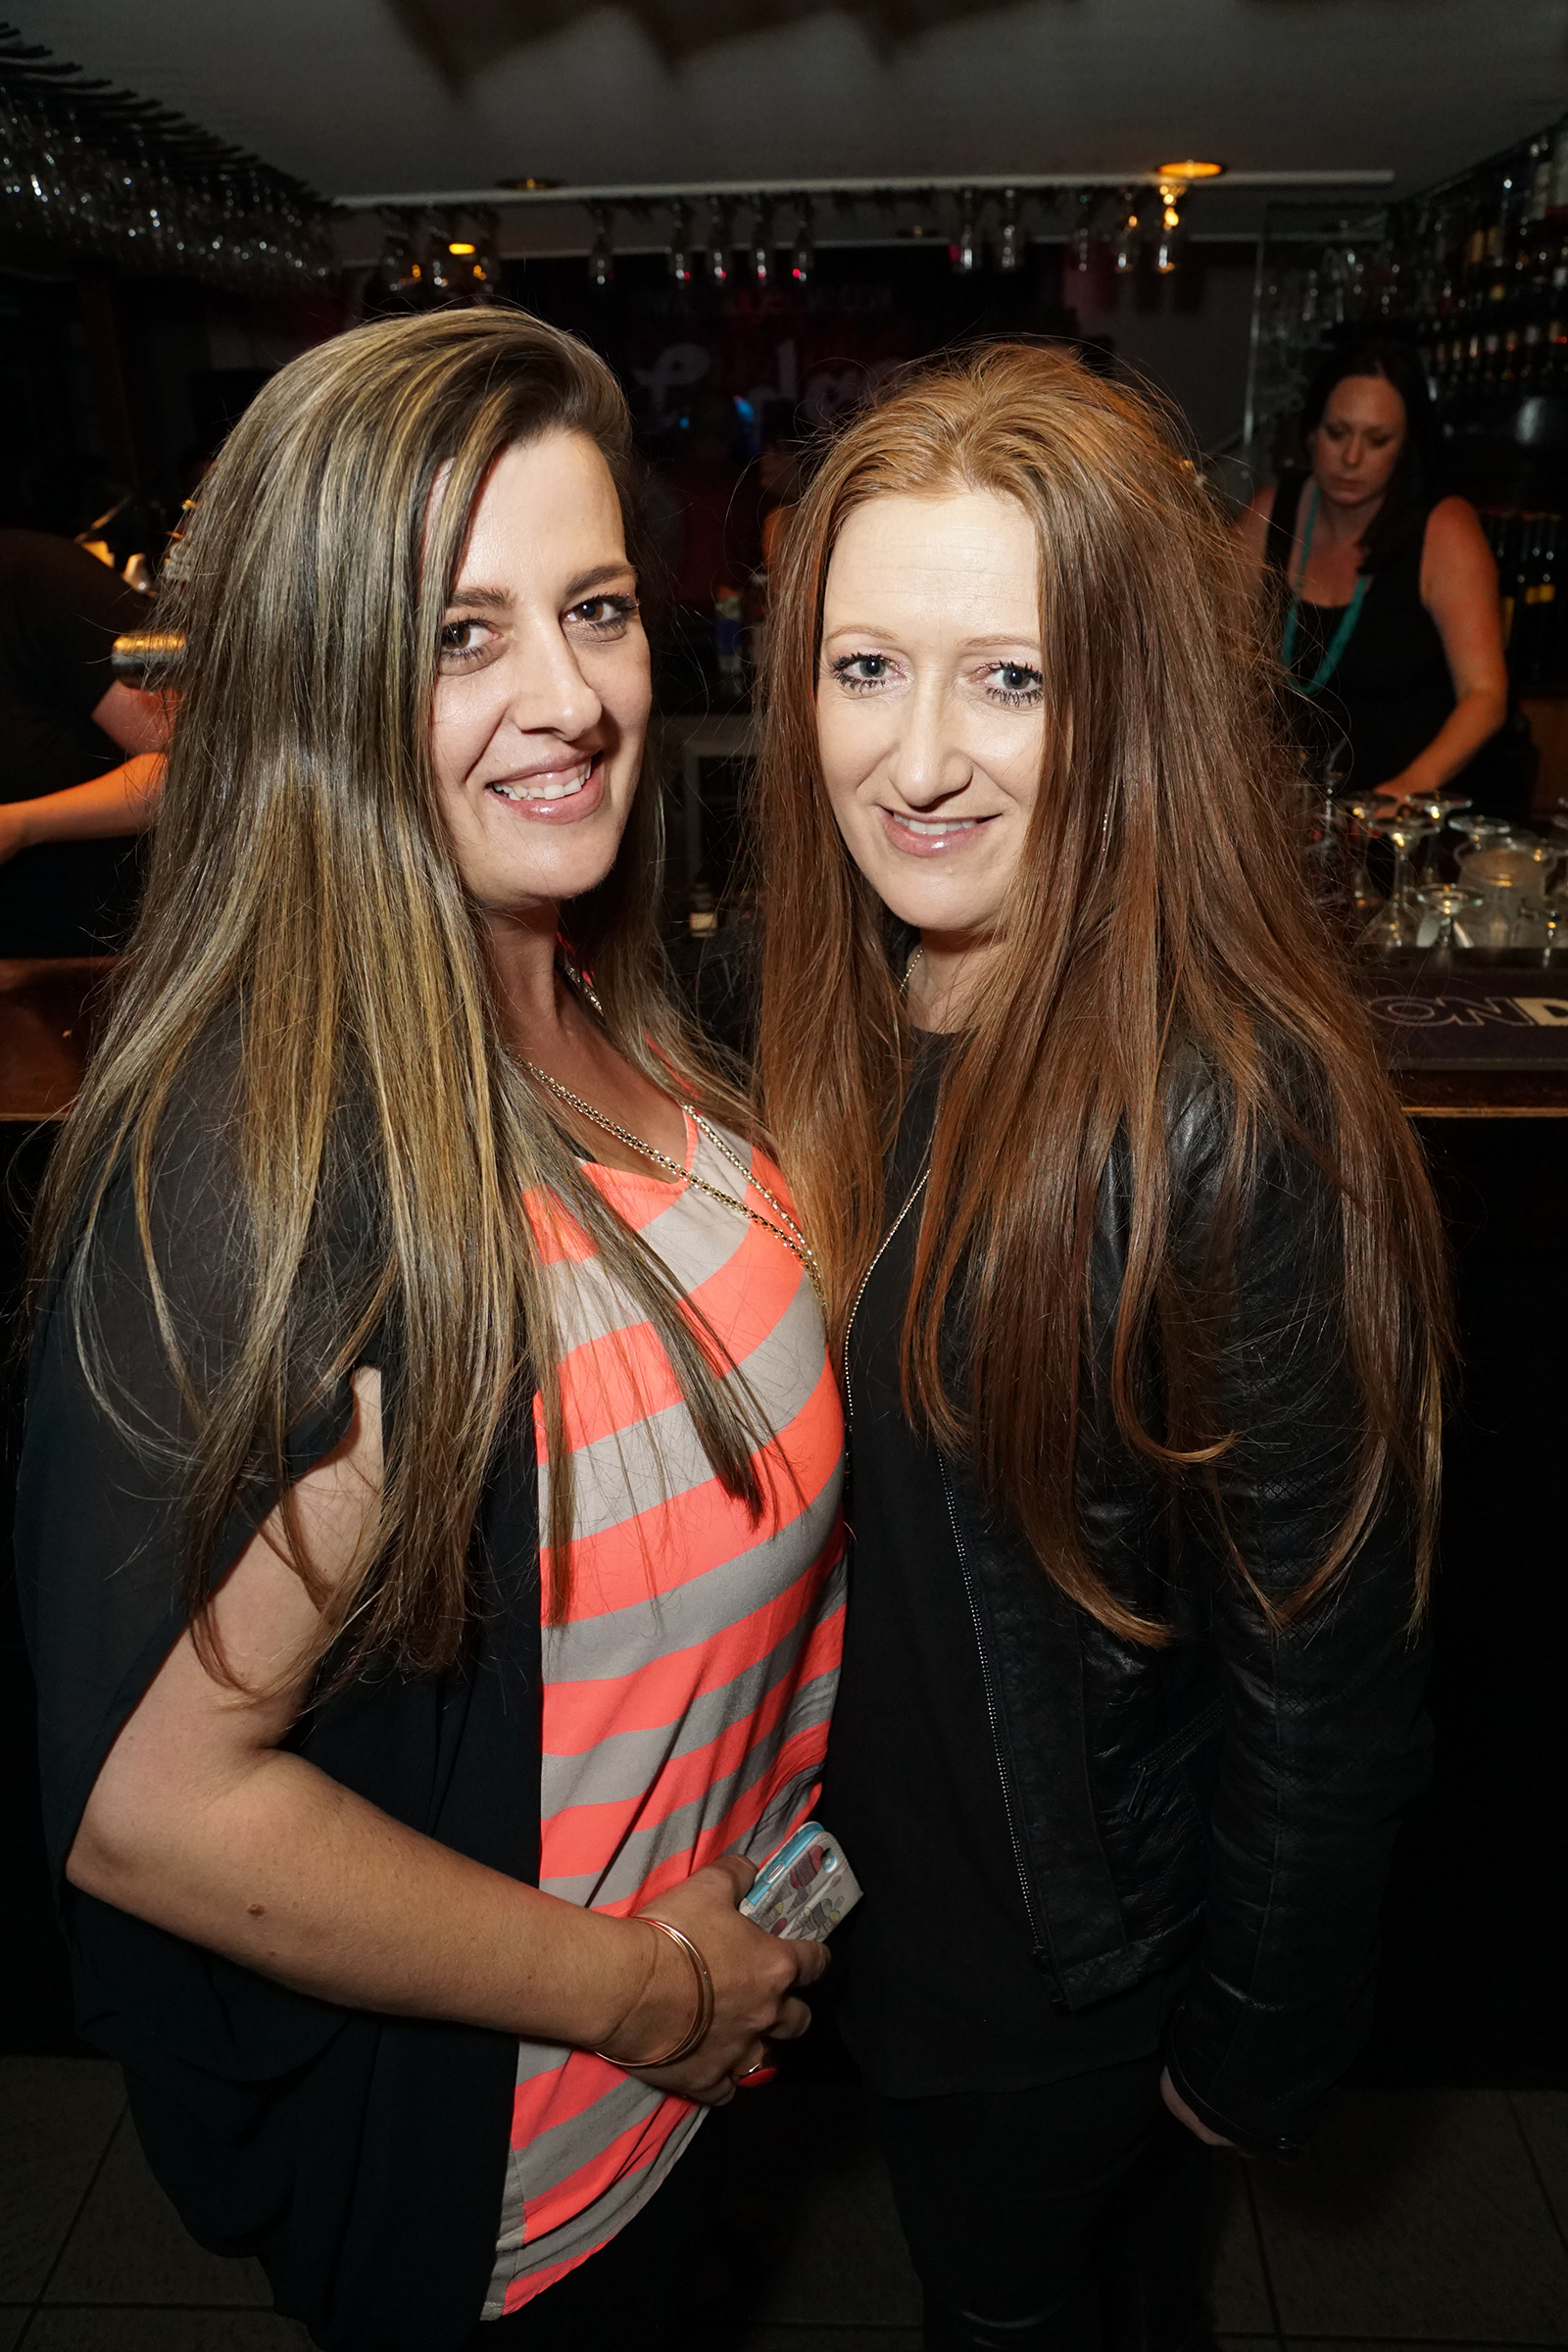
(Click to view the Image Full Size in a new Tab)
and here is the After Image:
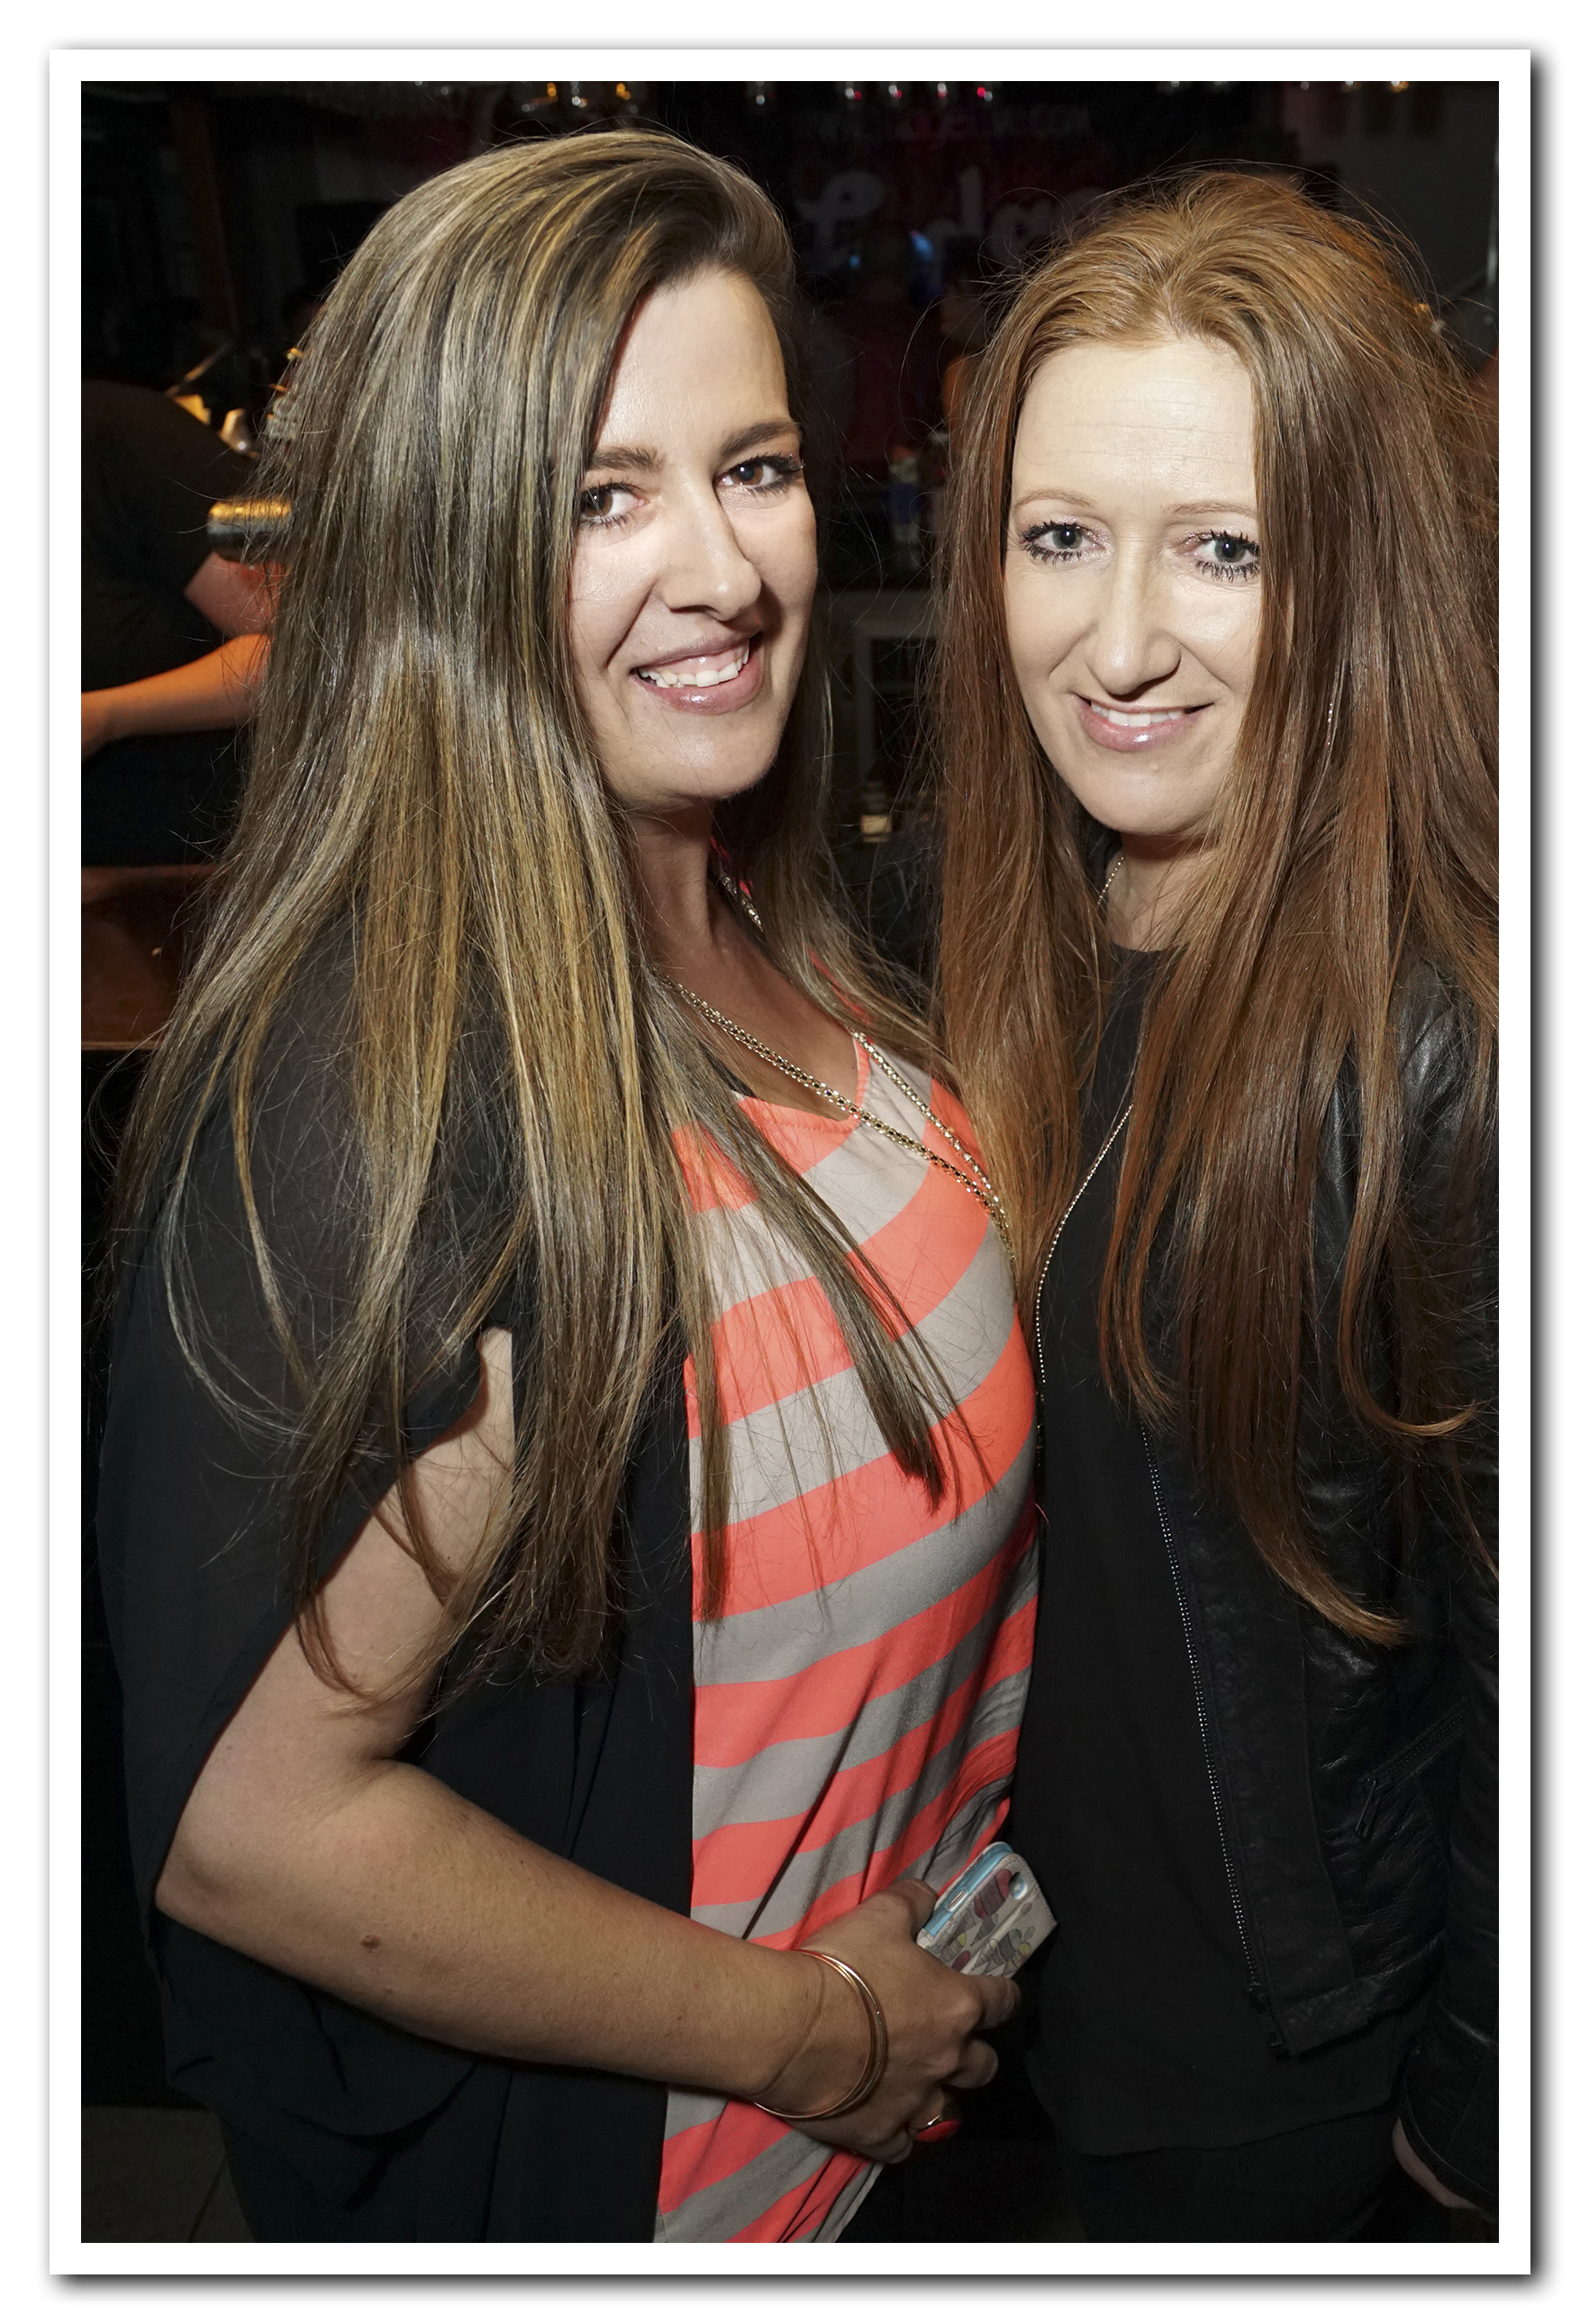
(Click to view the Image Full Size in a new Tab)
The difference between the Before and After images is very slight: the idea is to lighten up the eyes a little, and make the hair a little bit lighter.
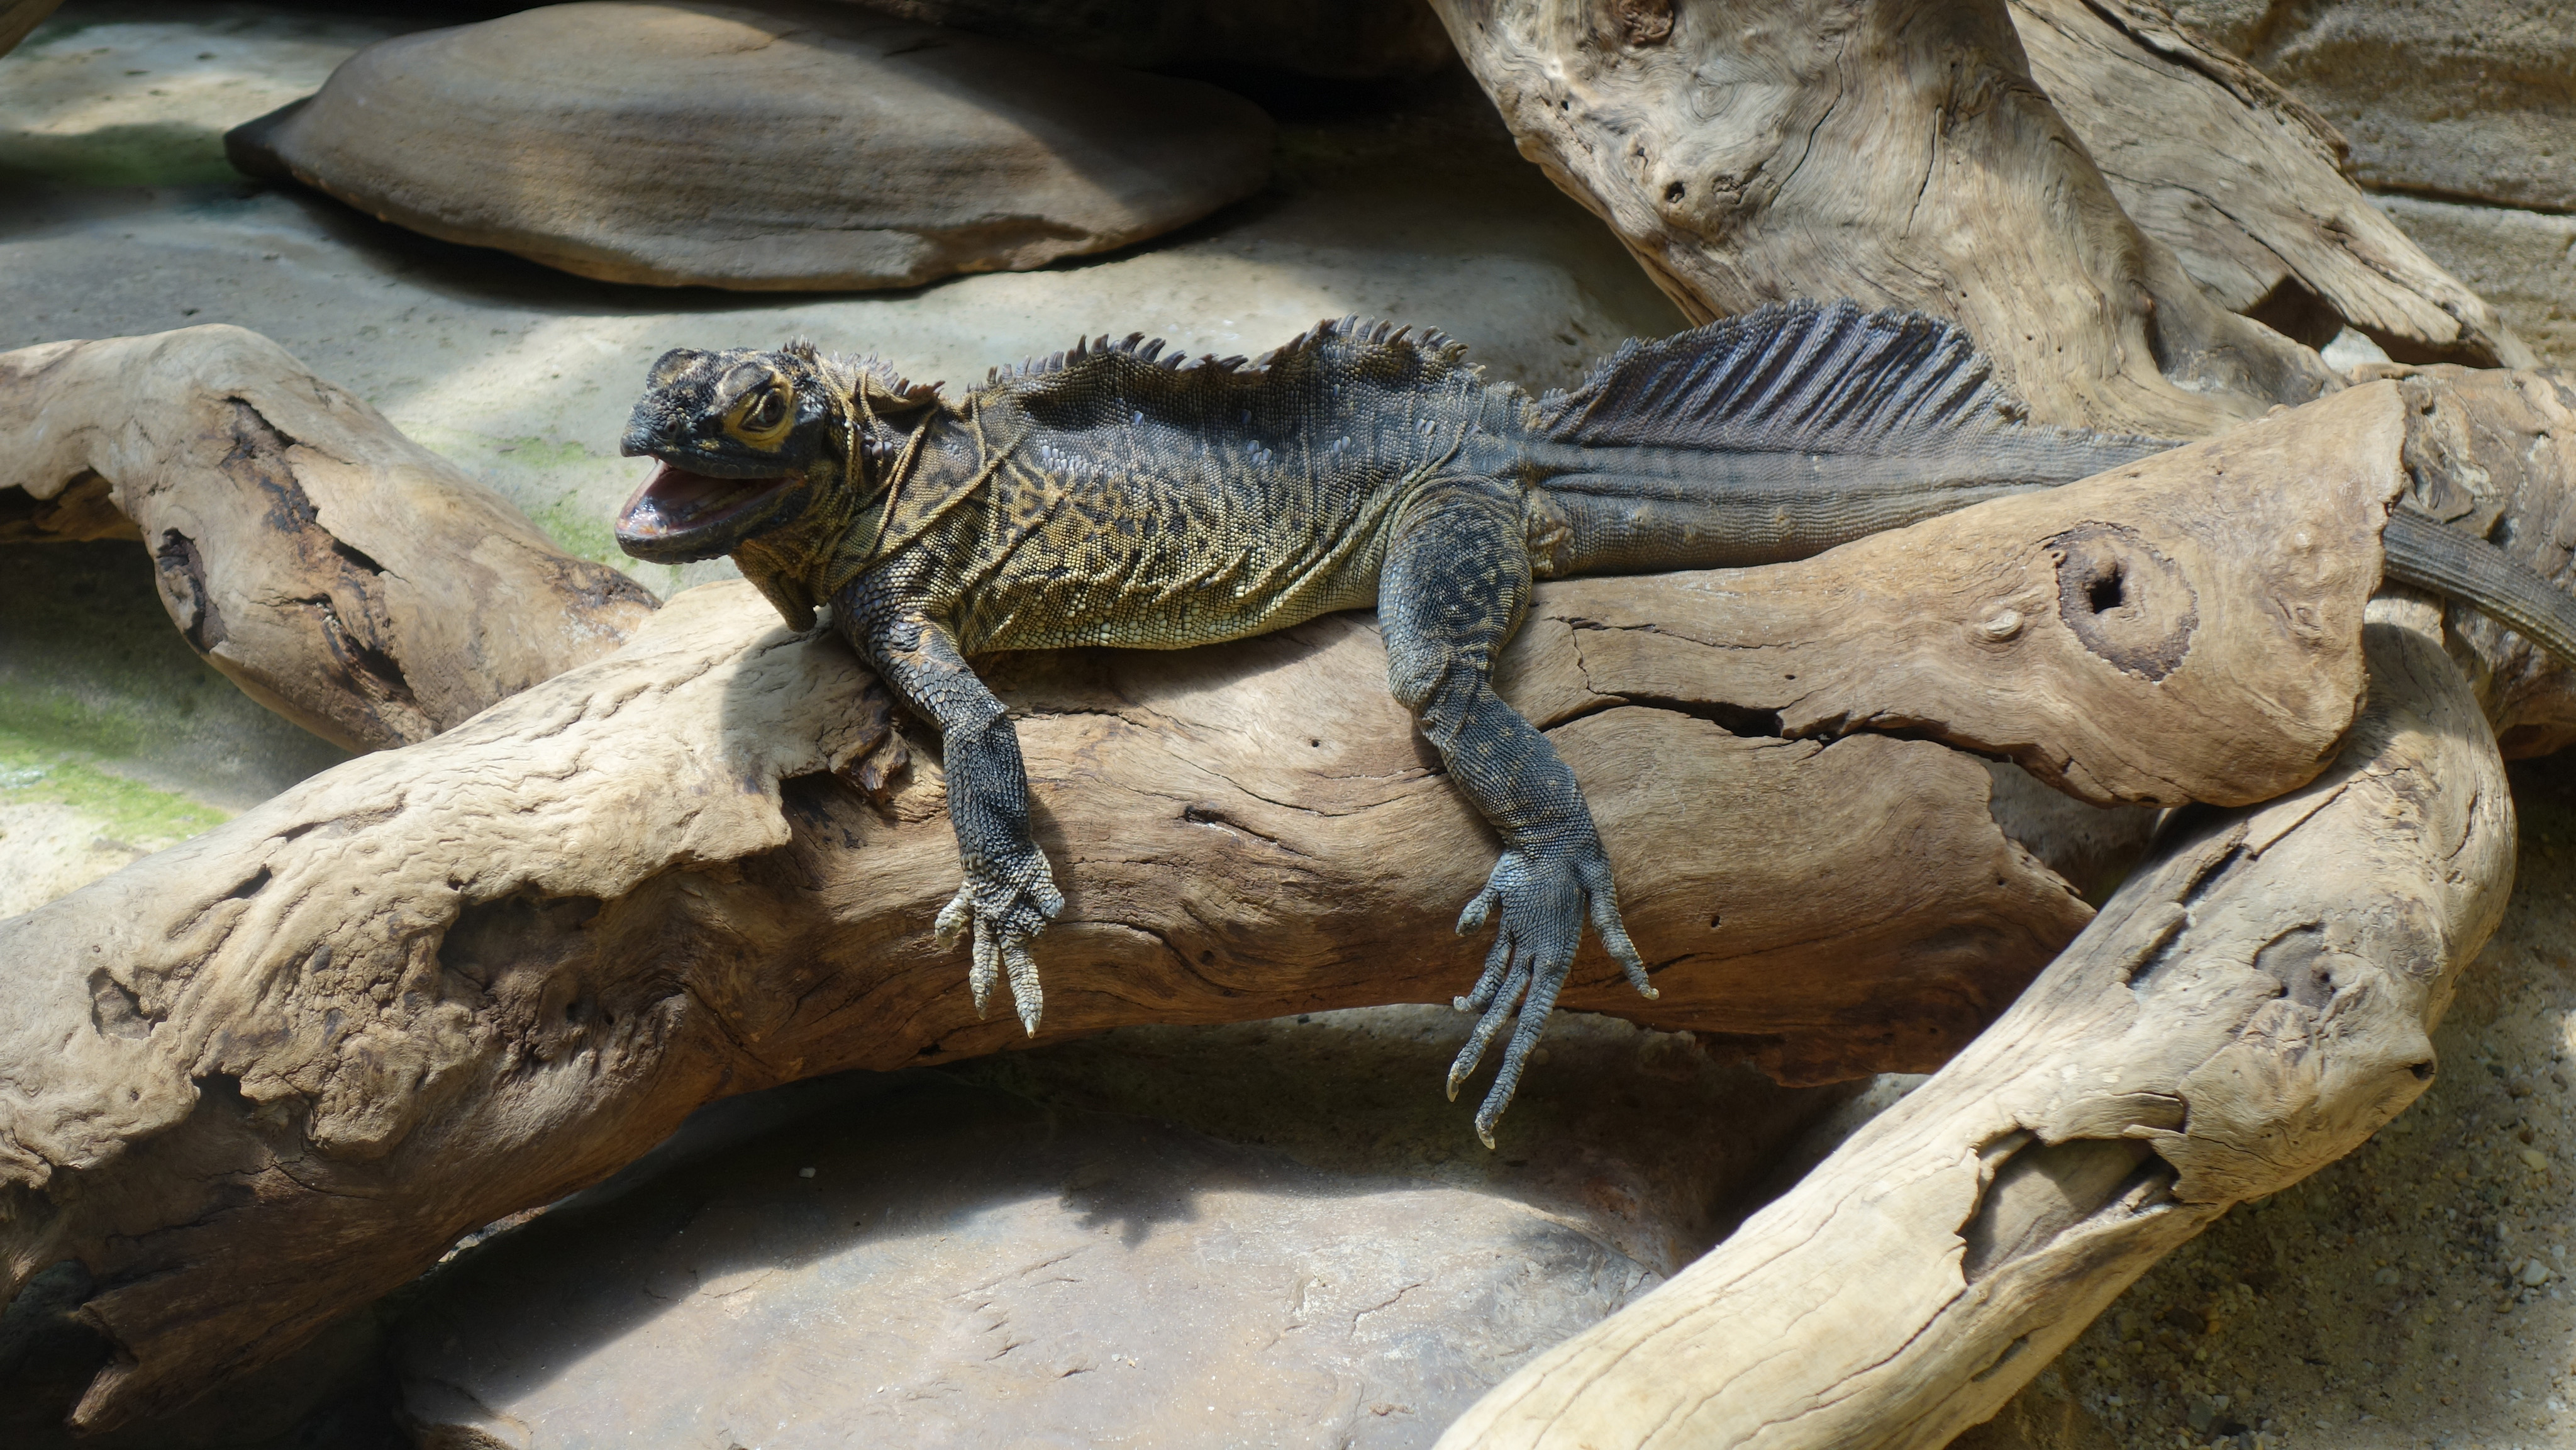
Photos Through Glass
When we take a photo through glass, there is often reflection and over exposure as in this example:
(Click to view the Image Full Size in a new Tab)
There is also a problem in the above image that the Lizard’s head is in shadow and not showing up clearly.
Here is the same image after some adjustments in Camera Raw:

(Click to view the Image Full Size in a new Tab)
Full Camera Raw Tutorial
We have created a full Tutorial on Camera Raw which can be accessed in the PDF document below:
How to Use Camera Raw – Detailed Instructions
It is a 7.7MB document and so may take a little while to download on some connections.
There is also a Resources Folder of Start Images that can be accessed at this link:
Click Here to Download Practice Images
Camera Raw Videos
As well as the free Photos By Passy Tutorial, here is a selection of the best YouTube videos we found on using Adobe Camera Raw.
First up is an official Adobe 7 minute video about using Camera Raw on a dark and gloomy image, and really bringing the light and colours up to create something quite spectacular:
The following 12 minute video from Lynda.com is good, except near the end where the quality of the image they are working on becomes quite grainy. Goes through fixing Exposure, Highlights, and Shadows, on the Basic Panel really well in the first part of the video:
The lady who made this next video has a very American voice, but her 30 minute video does give a very comprehensive overview of all the adjustments that can be made in Camera Raw, particularly for Landscape Photos:
This 15 minute video is okay and shows how to touch up a dark sand dunes image using Camera Raw:
Five minute video specifically on the Basic Panel Clarity, Vibrance, and Saturation:
Great 10 minute video all about the Targeted Adjustment Tool:
Video showing the basics of using a Graduated Filter:
Video showing how to apply Multiple Angled Graduated Filters:
Video showing the Clone / Heal Brush in Camera Raw:
The Clone Tool (paint brush with spots around it) is also called “The Spot Removal Tool” and here is a video about using the Tool to remove Spots.
In this 5 minute tutorial, Camera Raw is actually accessed using the Filter Menu in Photoshop, but this only works in the latest Photoshop CC. In earlier versions of Photoshop we have to use File > Open As on the original image.
Camera Raw Presets and Snapshots seven minute video:
Camera Raw is an extremely useful tool for pre-processing photos before taking them into Photoshop.
It is very similar to Adobe Lightroom, and handy to use if you do not have access to the Lightroom App.
For more Great Tutorials about Photography, Videography, Cameras, and Adobe Products, check out our “How To” page at the following Link:
Photos By Passy How To Tutorials
Enjoy,
Passy