Free Collage Makers

Late last year Instagram introduced the free collage maker “Instagram Layout” which has resparked interest in making Photo Collages and sharing them on Social Media.

However, if you are at School or Work where Instagram is blocked by the Network Security, then you need to use one of the many other free web based Collage Applications instead.

In this article we look at some Free Photo Collage makers that can be used on a laptop or desktop computing device that runs Windows.

We used Google Chrome as our laptop browser while making our Photo Collages with these free online Internet/Cloud Applications.

These apps are easy to use and produce quite satisfactory results.

Once you have made your collage, the apps allow you to save it onto your computer as a JPG file and/or share it online to Social Media.

At the end of the article we have included some web lists of Collage Applications for Apple Mac and Mobile Phones.


Fotor Collage Maker

FotorCollageTwo500k

This free collage maker requires no online registration, and is very simple to use.

Note that the above example collage probably would have been better made with yellow borders for this article’s white page background. There is actually a white border frame that goes all the way around the outside of the collage, but it cannot be seen against the white page is it sitting on.

It loads up in edit mode and you can start work straight away.

First you choose a layout design, and then you can upload photos from your computer and move them around just like making a Facebook Header.

Text can be added, and the text editing tools and fonts available are a good selection of styles and designs.

Finally, you can save the collage to your computer or share it online.

Defualt collage size is 1366×768 which results in a fairly large 500k file, but sizes can be changed to suit different phone screen sizes.

Several Design features for borders and backgrounds are not available unless you upgrade to the paid premium version, but the free version has all of the basic features that you need.

The link to the Fotor Free Collage maker is as follows:

Fotor Collage Maker Website


Pic Monkey Collage Maker

PicMonkeyCollageTwo1000wide

This maker has a great two minute video on the home page which shows you what is available and how to use the application.

Like Fotor Collage there is no email registration and you can go straight into making a Collage from the home page.

The first step is to open up all the photos you want to use from your computer. Note that you can hold down the Ctrl key and select multiple photos to import all at once.

Then comes the drawback…… a lot of the good layout designs are “Royal” ones marked with a crown which means they are only available in the Paid Version.

So we tried a create your own layout, but it only lets you add photos horizontally in a one row horizontal strip that is locked at 2000 x 469 in size. HOWEVER when you save the Collage to your computer you can adjust this size to whatever you like.

You cannot add a second row, but the single row layout is good for what it is, as in our example above.

There are multiple row preset collages that are free, but it seems like these presets are not modifiable in any way.

Once you have made your Collage you need to save it and then proceed to the “Edit” button where text and effects can be added. A warning is given that once you proceed to this step you cannot go back and modify the collage at all.

To get a color dipper for the text, it is necessary to go to the color intensity vertical bar at the far right and click which then brings up the dropper symbol.

The filters are good and nicely enhance a completed collage, although several of them are not available in the free version: you can try them and see they look great, but you cannot apply and save them.

You can then save the the final collage image, at various sizes, to your computer as a Jpeg file.

What we liked most about this Collage maker was the easily adjustable rounded rectangles and the backgrounds available to put the text onto. The filters are also good.

Pic Monkey Photo Collage Website


Photo Collage

PhotoCollagePSone550wide

This is free with no sign up just like the other internet collage makers.

This one is very much do it yourself, where you load in your photos and resize and rearrange them onto the work area with total control.

The downside is that the text fonts and colors are very limited, and once you have set the text color and font once, you cannot go back and change it; all you can do is resize it.

When you save it to your computer, it goes to the downloads folder which is also a bit of a pain, as you then need to copy it manually to another folder.

It does not seem like you can change from having a plain white border dividers, and the photos came out a bit washed out once they were imported and collaged.

This meant that we needed to take our saved Jpeg file into Adobe Photoshop and tweak the Brightness, Contrast, Sharpness, and Saturation, to get our collage looking bright and crisp.

But if you want total control of the layout to make a customised white bordered collage, then this one is a simple and great tool to do it.

Photo Collage can be accessed at the following link:

Photo Collage Website


Be Funky Collage Maker

BeFunkyCollageThree

This is like the other Collage Makers and is free with no sign up, and has a great layout that is very easy to use.

If you change collage designs though, you lose photos, and then might change again and have empty gaps.

These are easily refilled by going back to the Upload symbol icon and dragging photos back in.

The default size for a collage is 2400 x 1333 pixels but this can be changed in settings.

One particularly great feature in this application is that you can click and edit an individual photo in the collage and change its colour, sharpness, etc and even add a vignette around it and then return to the Collage.

There is a strange looking double bubble icon symbol in the top right hand corner of a photo when you click it in the collage maker, and clicking this takes you into basic photo edit mode. If you then click the “Open Image in Editor” button you get taken into the full photo editor.

Being able to apply vignetting (a dark oval shape shadow around the edges of a photo) to the people shots in this collage was really helpful.

The text fonts seem to be all the normal ones from Windows, but several of them like Bauhaus93 do not seem to work, and just produce some type of times new roman default font instead.

Another nice feature of this collage maker is that you can mouse over borders and resize them in a collage.

The Collage Maker also suggests an initial layout to use based on the Photos that you have uploaded to use.

Overall this is a great collage maker for a collage of people shots.

Be Funky Collage Maker can be accessed at the following link:

Be Funky Collage Maker Website


Other Photo Collage Applications

A Quick search of the web found the following Free Photo Collage Apps; there are literally hundreds of them out there.

Several of these are for Mac/OS, iPhone, and Android.

Fifteen Free Collage Makers

Twenty Five Free Collage Makers For Windows

Thirteen Free Photo Collage Makers

Ten Free Photo Collage Makers

Ten Free Collage Makers for Android

Ten Free Collage Makers for iPhone

Photo Collages the next old again new again thing for grouping together your happy snaps.

Enjoy,
Paul at Photos By Passy


If you found this article useful, then make sure you give our
“PBP Photos By Passy” Facebook Page a Like.
Photos By Passy Facebook Page

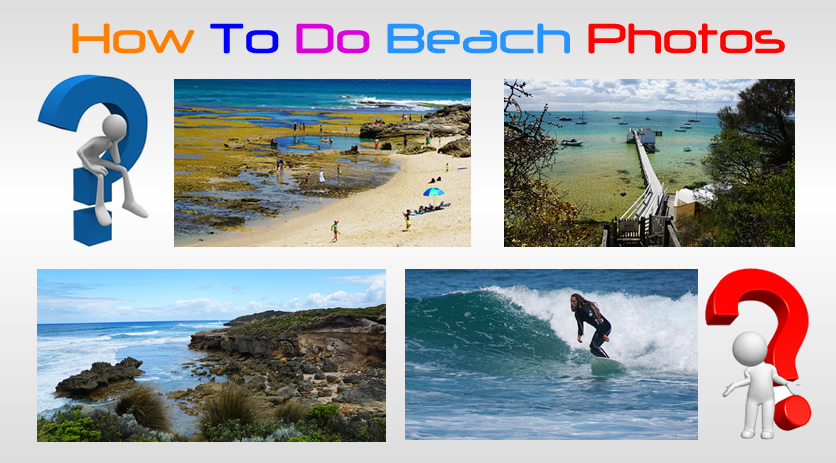
How To Do Beach Photos

I am still a beginner when it comes to Beach Photography, but I thought I would share with you what I have learned so far.

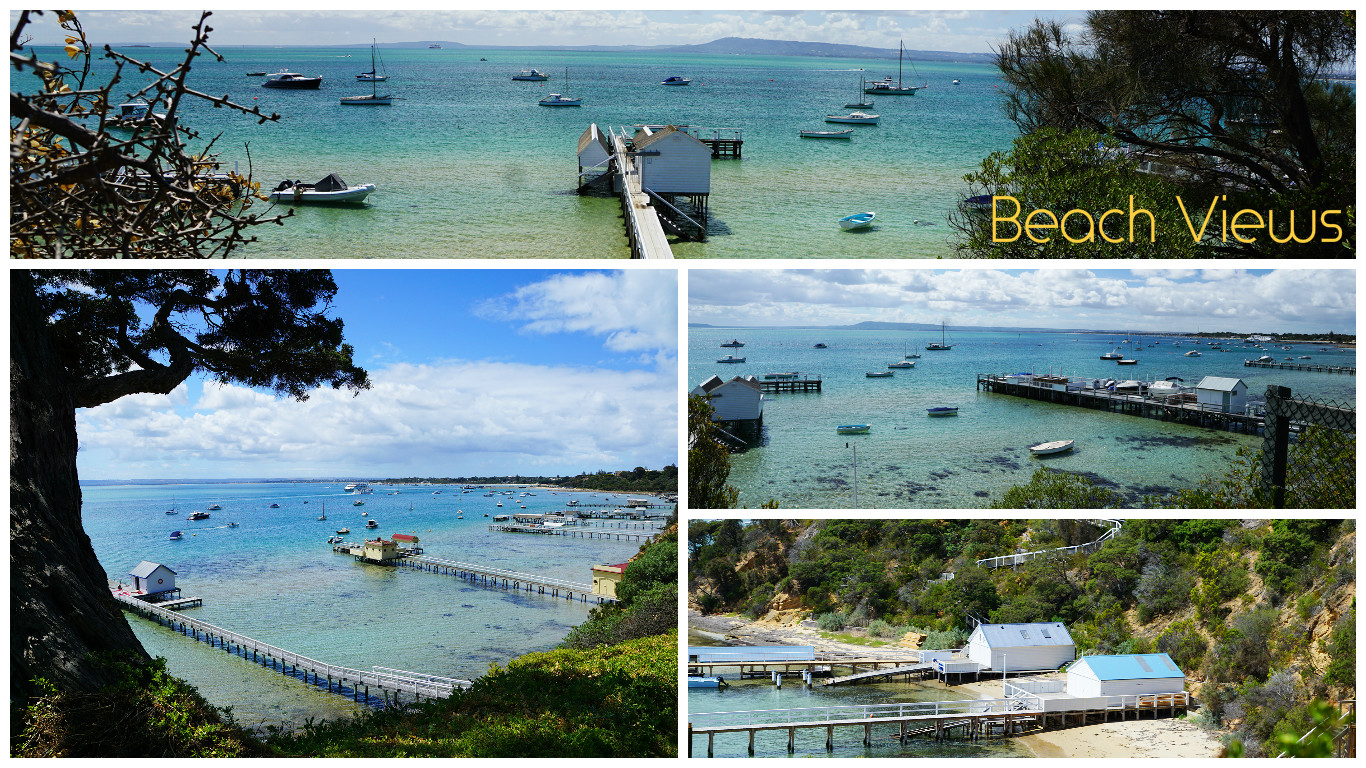
The Beach is a great place, but often we take photos that end up as vast open vistas dominated by water and sky that are very big and boring.

There is also lots of sunlight and glare, and so in sunny conditions an adjustable Polariser Filter is essential.

See our previous article on Polariser Filters at the following link:

How to use Polariser Filters


Camera Settings

To get as much detail as possible it is important to use a very narrow aperture of f16, f22, or higher, and a low ISO like 100, 200 or 400.

Shutter speed of 1/50 or higher should freeze any wave action, but as per some of the linked items at the end of this article, very slow shutter speeds and a tripod can be deliberately used to create blurred milky effects on the waves.

If it is very sunny and the water is sparkling, then it might be a good idea to use a high shutter speed like 1/500 or 1/1000 to freeze wave motion, and also not allow the water sparkles to over expose into complete whiteness.

If your camera has a Landscape Scene setting, (usually the Mountains Icon), then use this and it should give the right type of settings for everything to be in focus.

Panorama Photos at the beach also look great, but I have not tried this out on my camera yet, as I did not have a tripod with me on my recent beach trips.

It is definitely something I need to work on, as Panaorama can substitute for not having dedicated 12mm, 14mm, etc wide angle lenses.

At the moment I am mainly using a Sony 18 to 50mm Zoom lens, and you can see when it is wide at 18mm, that a fisheye type curvature of the horizon occurs.

No doubt proper wide angle lenses would perform a lot better, but these are not available within most people’s photography budget, including mine!


Beach Photo Composition

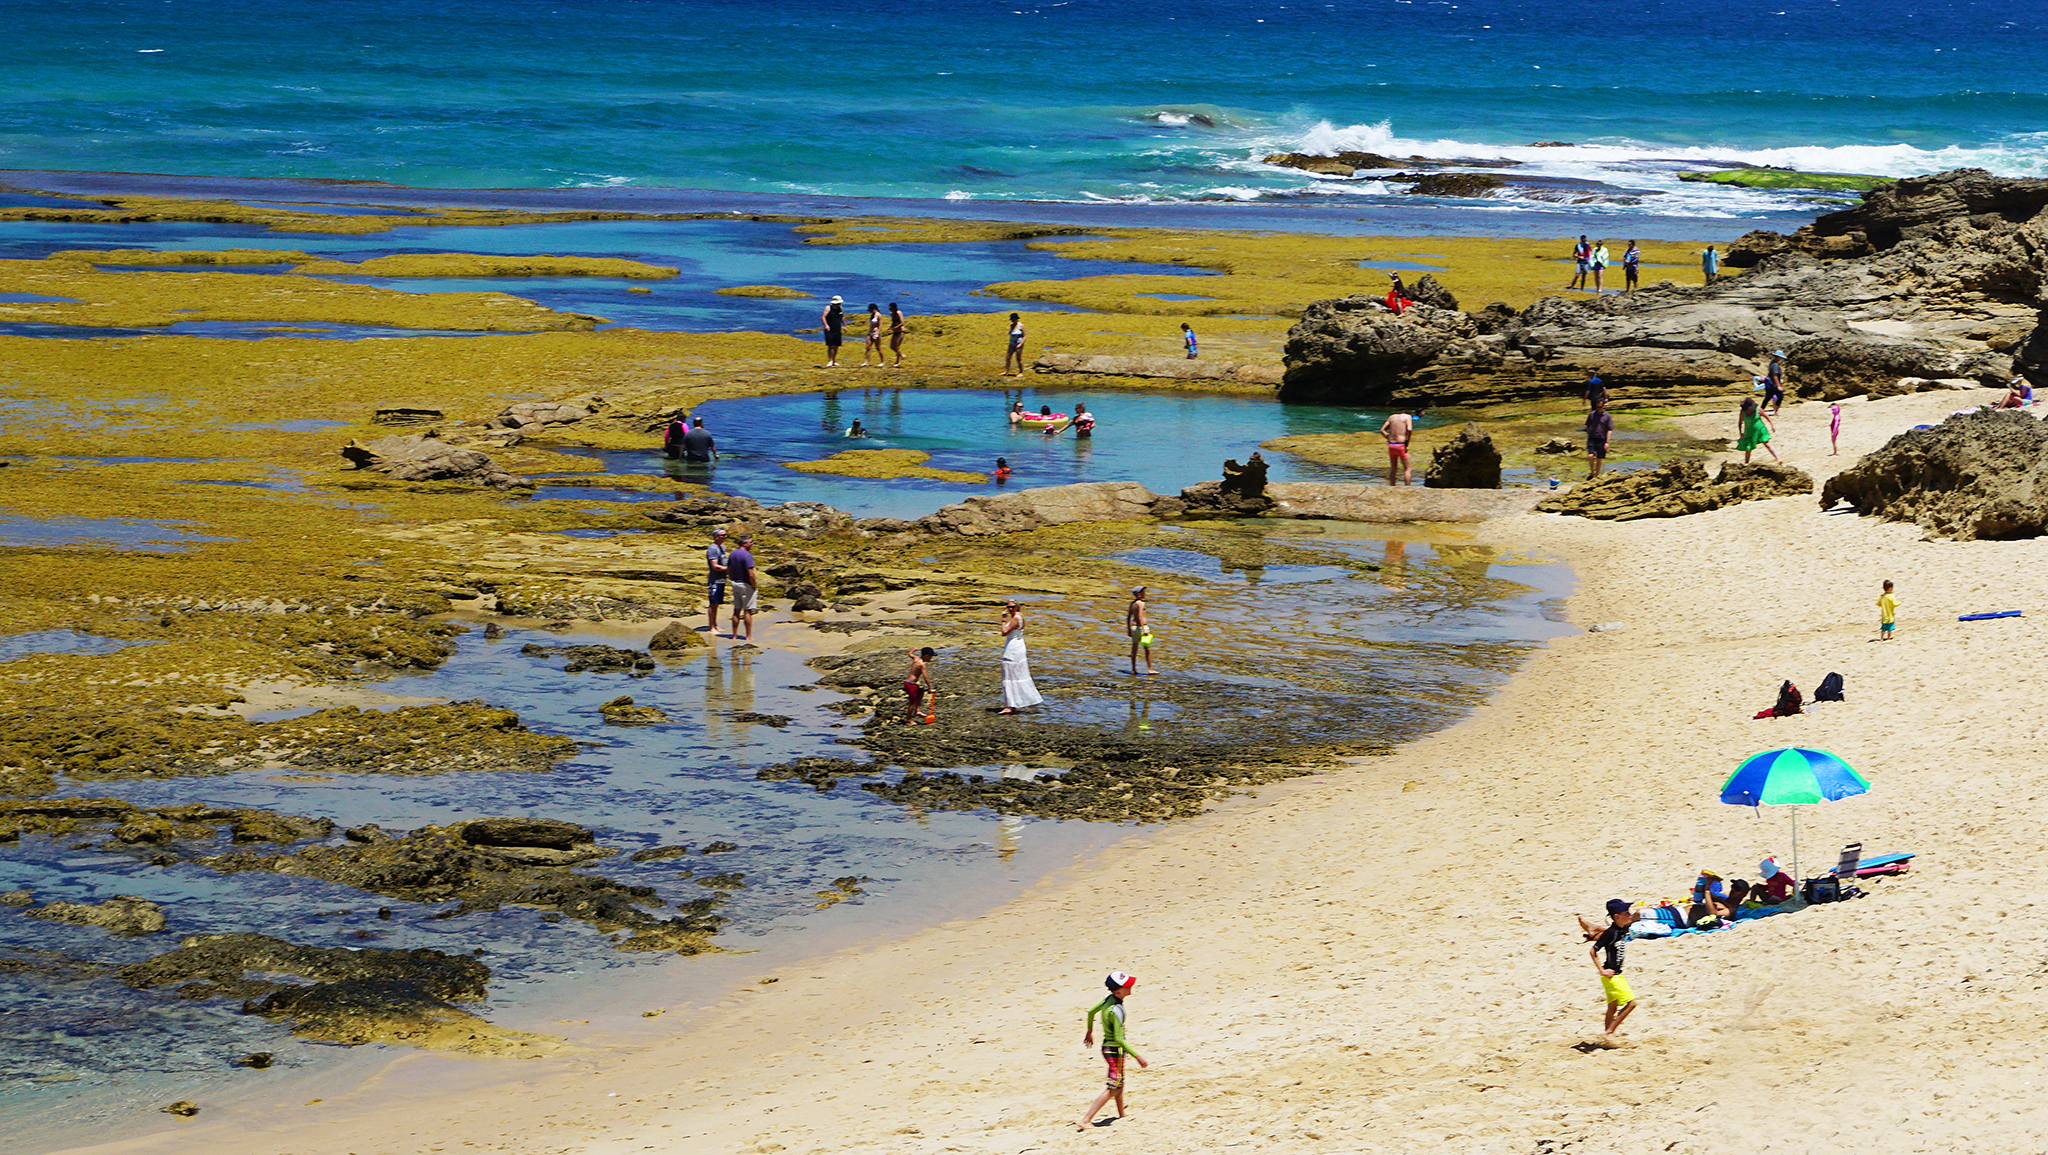
PenBeach029

First of all use the “Thirds Rule”. In the photo above you can see we have placed the people and the rock pool in the middle third of the image.

It is also very effective to have some foreground detail in the photo, or frame the image using trees and bushes which are nearby.

The following shot uses the Thirds Rule, as well as including some grasses and plants in the foreground:

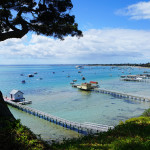
Bridgewater054small

In Photoshop adding a bit of “Saturation” to really bring up the blue sea, as well as a small amount of “Smart Sharpen” to preserve detail seems to work well.


Shots of Plants and Wood

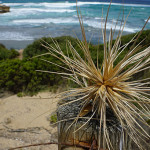
To create some variety in a photo album of a day at the beach, we suggest including some shots of the interesting plants, rocks, rock pools, and driftwood.

Detail shots of plants are difficult to get right, and we are still learning how to do this better.

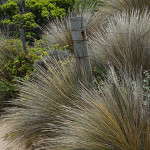
One thing we have found, is that is often NOT a good idea to sharpen pictures of grasses in Photoshop, as they tend to come out too rough and thinned out. You can see this in the fence post and grasses photo above.


Surf Photography

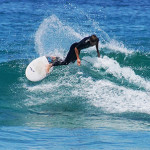
In our opinion the key part of Surf Photography is to capture surfers charging down waves with pure commitment and determination, as well as capturing maneuvers.

This can be best done by shooting in continuous multishot with your camera set on Sports mode.

There will be lots of photos to sort through, but this is the best way to capture those perfect moments.

The other major challenge is that if you want to stay safely on dry land, then the Surfers out at sea will be a long way from you and so a powerful Telephoto lens is needed.

The major problem here is that a fast focusing 70-400mm or higher powered zoom lens costs anywhere from $2,500 to over $10,000 here in Australia !

So instead, get a cheap zoom that goes up to around 250mm lens like a Sony, Tamron, or Sigma one, and put it onto a good image stabilised APC cropped frame DSLR sports camera like the Sony A77ii.

Then find surf breaks that are Beach Breaks close to the shoreline, or Photograph Point Breaks from a good cliff top viewpoint.

Meanwhile see how you go, and save up for a big heavy bazooka high powered zoom lens, and a suitable fluid ball head tripod to use.

We have started a Pinterest Board of what we think makes a great Surfing Photo here:

Photos By Passy Pinterest Surfing Photos


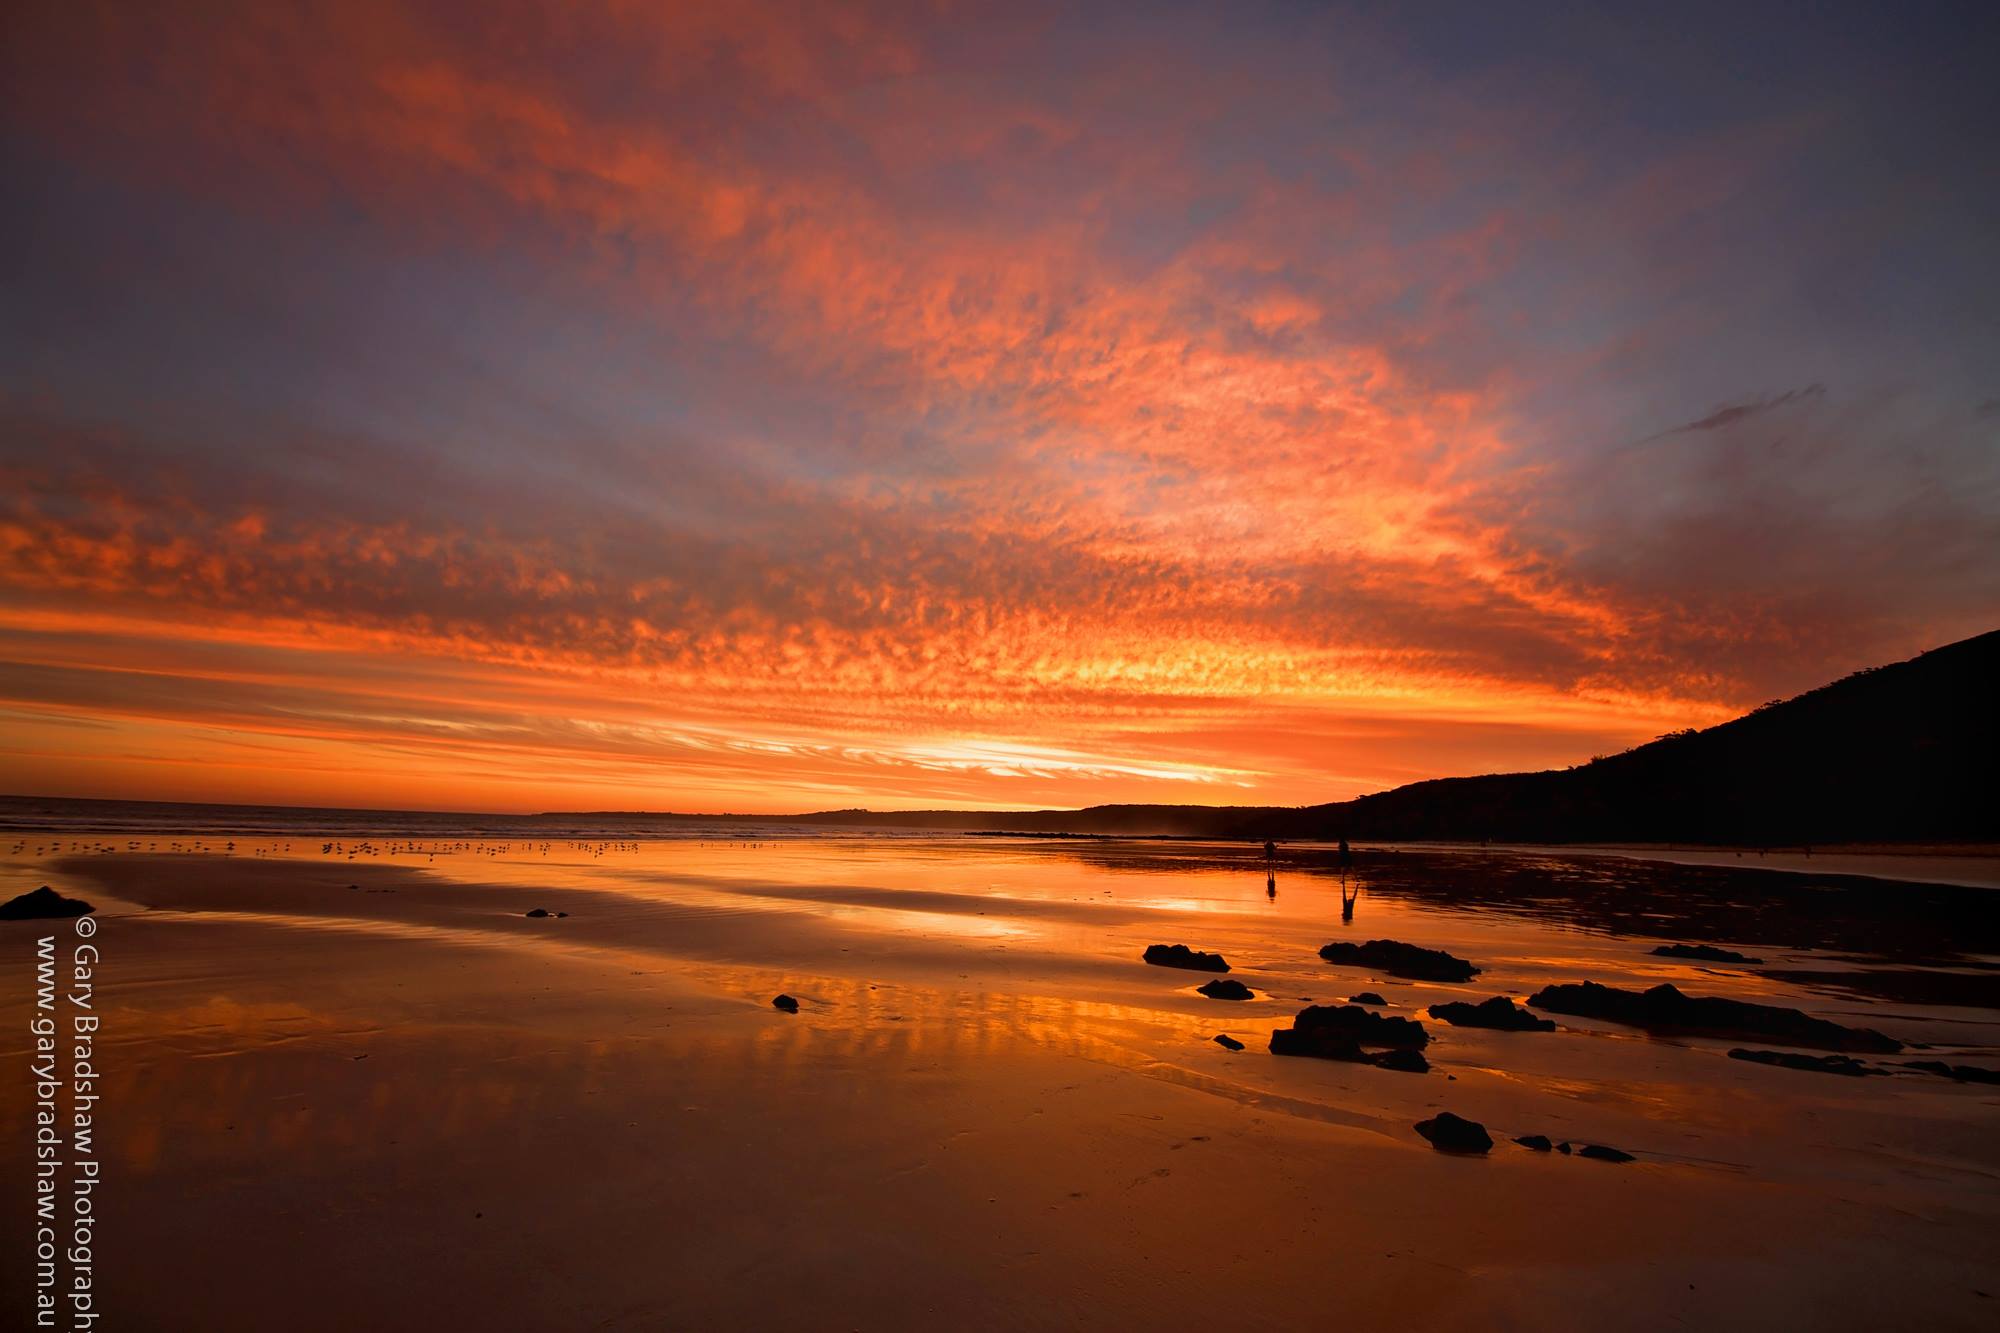
Beach Sunsets

BradshawSunset

Photo Credit: Gary Bradshaw

Gary Bradshaw Photography Facebook Page

Beach Sunsets are classic photos, but take a lot of planning, practice, and repetition to get just right.

The above photo has all of the right elements, the tide is out making the beach sand wet to capture sky reflections, there are foreground rocks and land included, and the colours of the clouds are gorgeous.

We have not fully explored doing Sunset photos, but have them on our Definite To Do List.

Sunset Images are best processed using Adobe Lightroom.

Eg. See our “How To” article dedicated to Lightroom and sunsets at the link below:

How to use Adobe Lightroom for Sunsets


Photos By Passy Beach Photos

Check out some of our Beach Photos in the following Flickr Albums:

Sorrento Back Beach

Sunset at Gunnamatta Beach

Paradise Beach at St Andrews

Millionaires Walk Sorrento

Bridgewater Beach Walk


Further Reading

The following article is a short easy to read summary of the various aspects of seascape photography

Seascapes Photography Guide

A good article about seascape photography can be found here:

Seascape Photography Article

Another article about how to produce very artistic seascape shots is the following one:

Tips for Coastal Photography

This next article gives five good tips relating to seascape photography:

Five Seascape Photography Tips

If you are a fan of long exposures to produce milky water effects at sunrise or sunset, then the following article is a great guide:

Long Exposure Seascape Photograpy Article

Another interesting short article to read that talks about tides and the useful reflective effect of wet sand is the following:

Seascape Shooting Tutorial

The following is a good general article about Surf Photography:

Surf Photography Guide

If you want to check out some great surfing photos, then the continually update Magic Seaweed site is a great resource:

Magic Seaweed Surf Photos

So if you get down the beach this summer be sure to take plenty of photos!

Enjoy,

Paul at Photos By Passy


If you found this article useful, then make sure you give our
“PBP Photos By Passy” Facebook Page a Like.

Photos By Passy Facebook Page

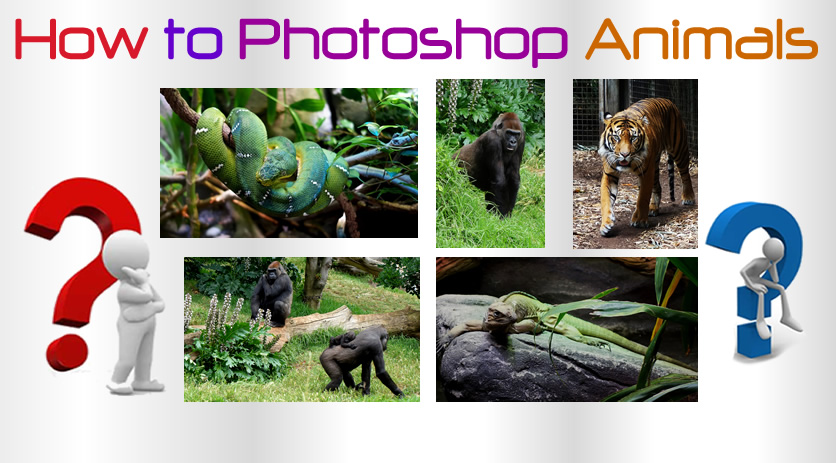
How to Simply Photo Edit Pictures of Animals

In this “How To” article we look at some basic Photoshopping which can be used to improve photos of animals taken outdoors
in bright sunlight. We also look at enhancing Photos that have been taken of Animals in Glass Cages.

If you do not have Photoshop, then the same enhancements can easily be made in either Photoshop Elements, or the great
free image editor called “GIMP” which is available for download here:

Click to Download Free GIMP Photo Editor


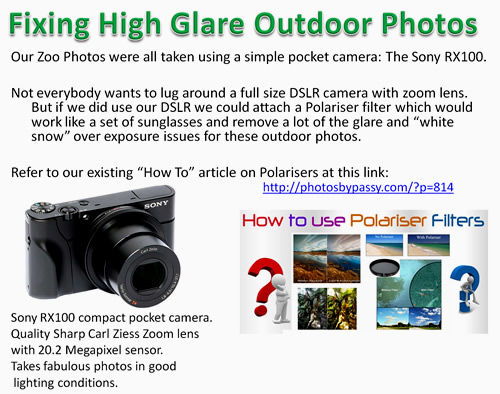
Recently we did a day trip to the Melbourne Zoo in Australia, and not wanting to lug around a lot of camera equipment, we took
along a small powerful pocket camera made by Sony: the RX100 Mark 2.

The Sony RX100 series is currently up to the RX100 M4 for around $1000 in Australia, but the camera we used for our Zoo photos
was the RX100 M2 which can be purchased new off eBay for around $500.

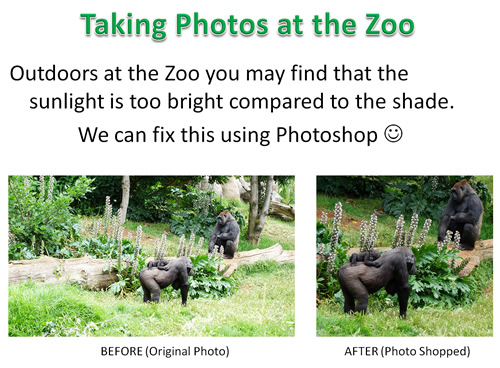
It was a cloudy day, with the sun occassionally breaking through very brightly, and so we had issues with over exposure
where the pictures came out too bright, with a white snow effect on grass and animals backs.

Also many of the photos were taken from a distance using the superb Carl Zeiss zoom lens, and due to this great lens, and because we have 20.2 Megapixels to play with on the RX100, we could easily crop the photos to make them look a lot closer, and still have plenty of quality pixels remaining when we resized the pictures to 2048 pixels wide for Facebook.

In this article we look at using Basic Photo Editing Techniques to enhance Photos of Animals.

It is basically a beginner’s lesson in Photoshop.

Photos can always greatly benefit from some simple Photoshopping.


Advanced Methods

If you want to try something a bit more advanced to enhance the example photos, then use “Colour Curves” to reduce the
high tones as shown in the following tutorial for Gimp, (but works equally well in Photoshop):

Basic Colour Curves Tutorial


Download Photos for Practice

If you want to download the starting versions of the Photos shown in this article, then bring up the following folder in a web browser, click to display the images, and then Save each photo using your Browser right click on photo Mouse options.

You can then try out the techniques we show in this article.

Click Here to Download Practice Images


Fixing Bright Pictures

Over Exposure can easily be dealt with using basic photo editing tools.

How to Photoshop Animals 02

If we had used a full size DSLR camera, we could have fitted an Adjustable Polariser Filter, which works like a pair of sunglasses,
and reduces glare and brightness.

See our previous “How To” article about Polariser Filters at this link:

How To Use Polariser Filters

How to Photoshop Animals 03

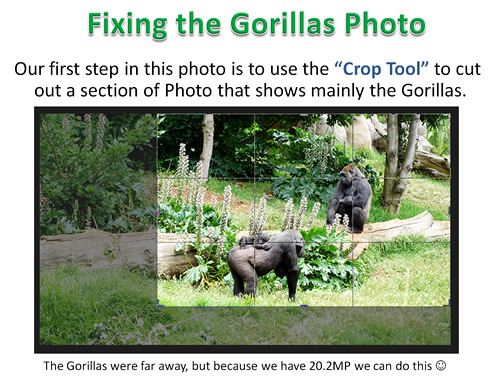
The first thing we do is crop our Photo to better frame the action, and make the animals appear closer.

How to Photoshop Animals 04

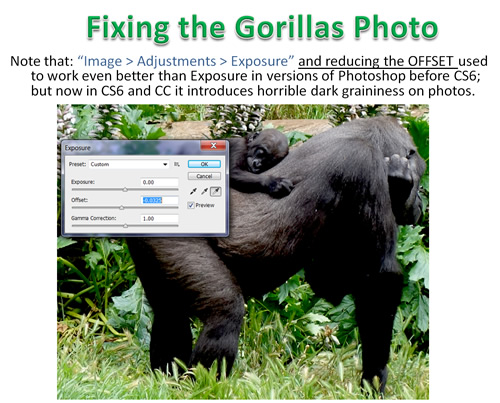
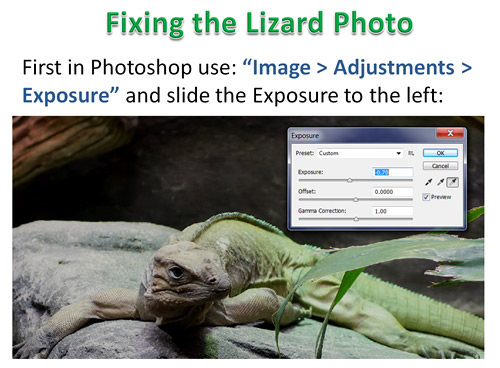
Next we adjust the Exposure down a small amount to darken the picture slightly:

How to Photoshop Animals 05

Note that if you have Used Photoshop CS5 or earlier, the “Offset” adjustment used to be brilliant for fixing overexposed bright and washed out Photos.

However in CS6 and the Creative Cloud versions of Photoshop, “Offset” has been changed to be very harsh, and appears to be virtually unusable:

How to Photoshop Animals 06

So do NOT use Image > Adjustments > Exposure and Offset.


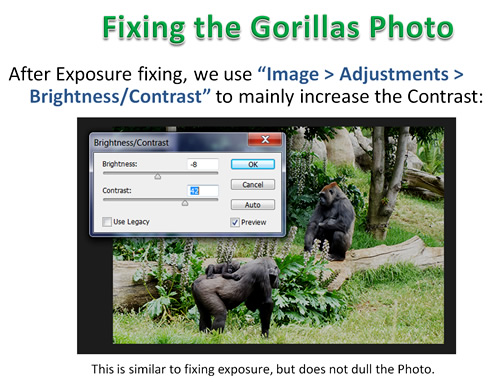
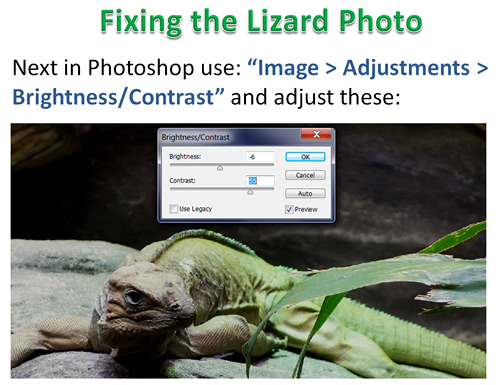
We now use Brightness/Contrast to introduce some “punch” into the photo:

How to Photoshop Animals 07

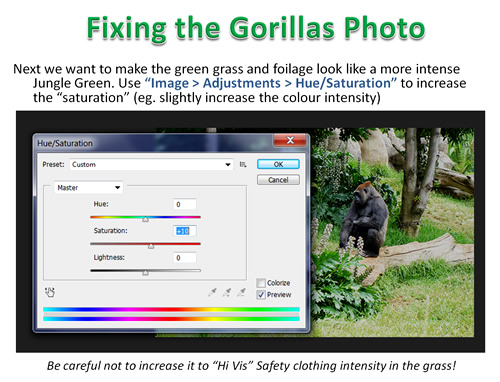
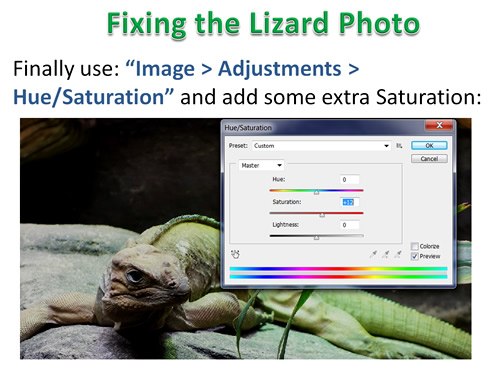
The next thing is to make the colours more intense using Saturation:

How to Photoshop Animals 08

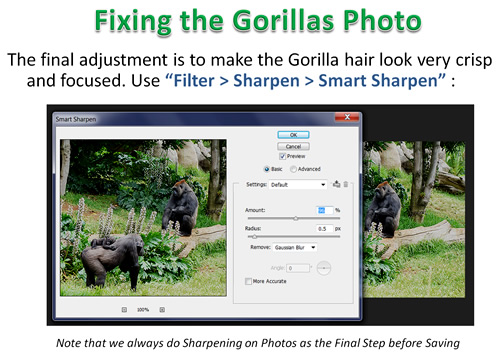
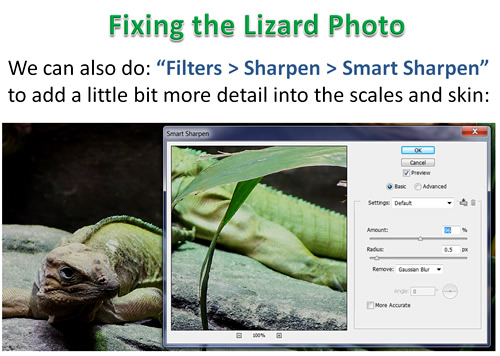
The last thing to do is to “Sharpen” the picture, to make the fur look its very best.

Note that Sharpening should always be done as the last step when enhancing photos.

How to Photoshop Animals 09

Note that the settings used on the above Sharpening are percent values between 90% and 98%, and a Radius Value between 0.2 and 0.7 (we used 0.5).

Our Photo is now finished and ready to Resize and Save.

How to Photoshop Animals 10


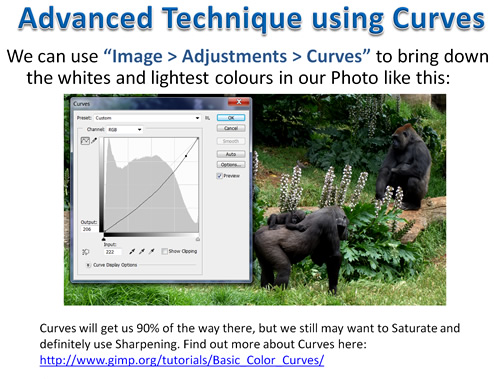
Advanced Technique – Curves

A Quicker way to fix our Original overexposed Photo with “white snow” on the green grass, is to use “Curves”.

Using Curves we can fix our Photo in one go, without having to do Exposure then Contrast then Saturation.

We need to understand that the brightest parts and the whites form part of the top section of our colour line.

If we click to make a dot on this top part of the line, and hold our mouse button and pull the line down to make a curve, we can remove the bright whites.

How to Photoshop Animals 11

Find out more about using Curves in the following Web Tutorial:

Learning to use Colour Curves


Photos Taken Through Glass

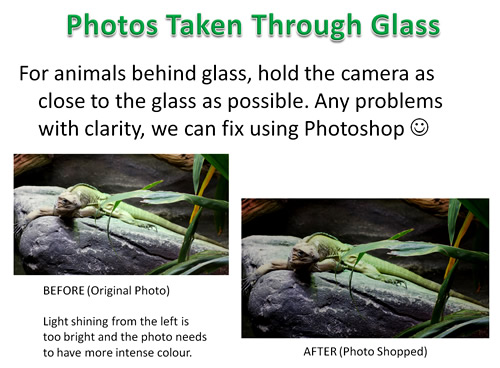
For taking photos through glass, hold the camera as close as possible to the glass, and check there are not any people reflections visible and take the photo.

The resulting photo might look too bright, grey and a little foggy, but we can easily fix this in Photoshop as follows:

How to Photoshop Animals 12

How to Photoshop Animals 13

How to Photoshop Animals 14

How to Photoshop Animals 15

How to Photoshop Animals 16

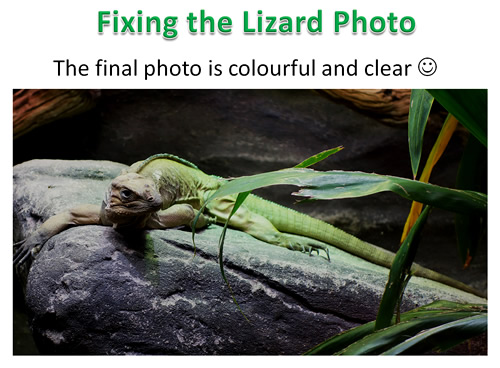
This produces the final photoshooped image, which is crisp and clear with nice colour.

How to Photoshop Animals 17


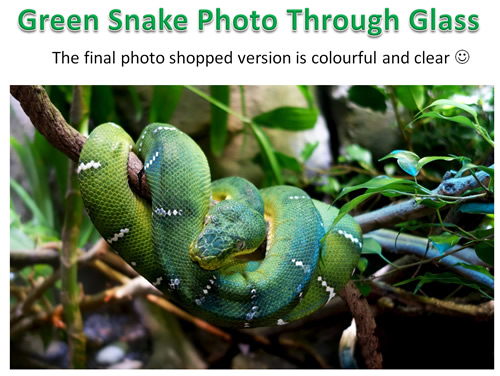
Here is a photo taken of a green jungle snake in a glass cage that now looks like a photo taken in the Amazon Jungle.

How to Photoshop Animals 18


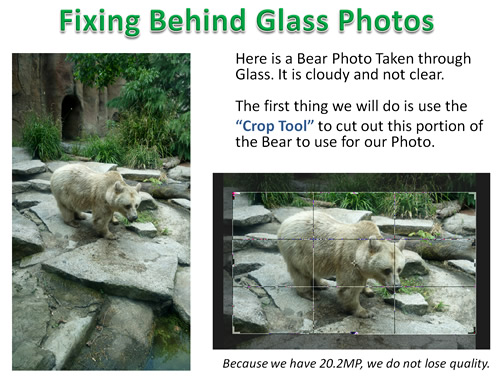
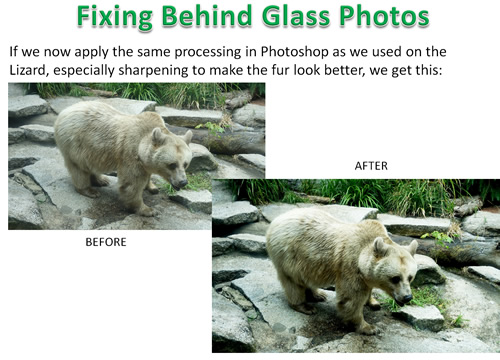
Finally here is a photo we took of a bear through Glass in vertical Portrait mode.

But because we have 20.2 Megapixels to work with we can easily crop it to be a Landscape Horizontal image.

How to Photoshop Animals 19

Working through the usual steps, we can transform the photo into the final enhanced image.

How to Photoshop Animals 20


Summary

Animal Photos and Photos through glass can be greatly enhanced using a photo editor like Photoshop or Gimp.

How to Photoshop Animals 21


Our Zoo Photos

You can check out all of our photoshopped Zoo Animal pictures at the following link:

Photos By Passy Zoo Pictures


Download Photos for Practice

If you want to download the starting versions of the Photos shown in this article, then bring up the following folder in a web browser, click to display the images, and then Save each photo using your Browser right click on photo Mouse options.

You can then try out the techniques we show in this article.

Click Here to Download Practice Images


We hope you have enjoyed this article about Basic Photoshopping Techniques for Photos of Animals.

We have plenty more “How To” articles on our Website at the following link, and constantly add new ones.

Photos By Passy How To Articles

If you liked this article, then go Like our “PBP Photos By Passy” Facebook page.


Subscribe

If you enjoy visiting Photos By Passy, why not get a free subscription to the website.

You can then receive notifications of new items and updates directly to your email address.

Go to the subscribe area on the left hand sidebar, (or down the bottom of the page if using a mobile phone), fill in your email address and then click the “Subscribe” button.

Enjoy,
Passy


If you found this article useful, then make sure you give our
“PBP Photos By Passy” Facebook Page a Like.

Photos By Passy Facebook Page

How to use Adobe Premiere for Videos

WARNING: This article contains quite a few embedded how to videos, and may take a while to load in.

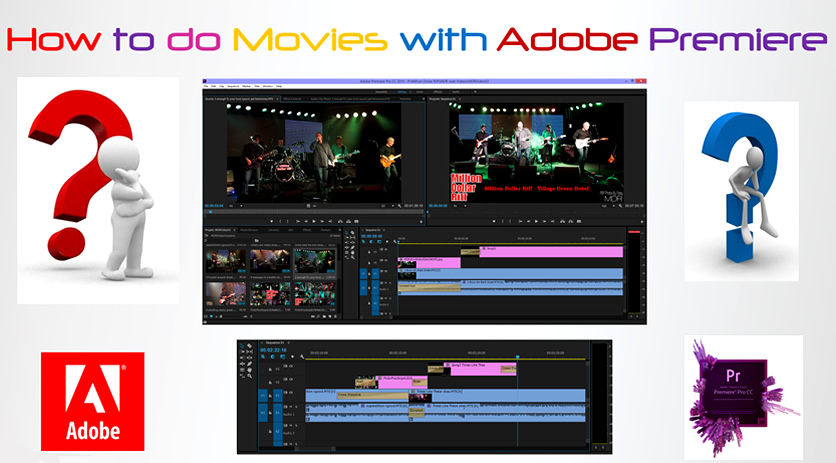
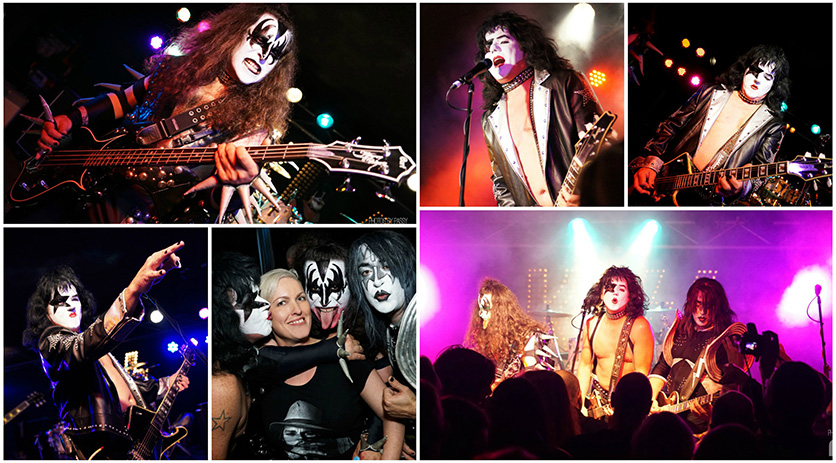
Recently we built a powerful Windows computer for Video Rendering, and learned how to use Adobe Premiere to combine a series of DSLR Camera video clips into a short movie.

You can watch two of our finished products here:

and

Takin' Cover Band – Live Covers from Paul Passy on Vimeo.

If the videos are loading too slowly, they are also uploaded to our Vimeo Channel at the following links:

Takin Cover Video on Vimeo

Appetite for Destruction Video on Vimeo

These were the first two videos we ever made using Adobe Premiere. Since then we have made several more videos which you can view on our Portfolio page at the following link:

Photos by Passy Videos Portfolio


The Takin Cover Video is also available on YouTube:

The filming for the Takin Cover Video was done completely hand held, and some up and down wobbling is visible in places.

For wide angle shots it is far better to do this type of filming with a Monopod, like was done for the Appetite for Destruction Video.

However close up shots really need to be done hand held, but I am investigating getting some kind of gimble rig to do this in the future. For now it is hand held for all close ups.

For the Monopod setup I had to make my own safety strap for the camera that was long enough to raise up the Monopod, but short enough so the camera would not hit the ground if dropped! Customising a standard sling strap did the trick.

Obviously a $3000 powered zoom lens would help too, but we just do not have that sort of money around at the moment.

Getting a proper Video DSLR setup (eg. Sony A7s II when it comes out, with a power zoom lens) is possibly further down the track in one or two years time. (Estimated Cost: $6000 to $7000 !) For now it is a matter of developing solid skills with our current equipment.


How to Use Adobe Premiere CC Document

Rather than write a very lengthy post here, we have written all about how to use Adobe Premiere Pro CC in a PDF document which can be downloaded at the following link:

Adobe Premiere How To Guide by PBP

In the document there is a step by step journal of how we learned Adobe Premiere and made a Live Music Video.

There are also links in the document to many YouTube videos and useful tutorials that we found on the Internet.


Getting Started in Premiere CC

Probably the most useful video for getting started in Adobe Premiere, for complete beginners, was this one by Gary Fong:

The following video shows how to use the effect controls panel to modify Video transitions:

For Audio transitions, watch this video:


Creating Black and White Video

For Colour Correction of Clips, including making clips Black and White or Sepia, watch these videos:

and


High Contrast Black and White

The standard B&W conversions in Adobe Premiere using Desaturation or B&W effects can sometimes produce very ordinary grey looking videos.

HOWEVER

Hidden away in Effects: Video > Channels > Calculations

is a two layer blending technique where we can set one up as say green, and the other as red (blue is very noisy), and then on this same panel set up the blending mode as
Multiply, or Hard Light, or Color Burn and we get great high contrast B&W effects.

This following YouTube “How To” video shows how to do this:

Here is a short video we made trying out these techniques.

Our objective was to make a grungey black and white video in bad lighting conditions and test out the Sony A57 DSLR for run and gun video. The final result is a bit “rough and ready” but we think it captures the essence of live rock in a small venue.

This video had focusing issues, and the lighting in the venue was awful, but we believe we could use these Premiere techniques to make some better quality High Contrast Black and White clips in the future.


Creating Selective Colouring

For Selective Colouring (also known as Pleasantville and Sin City Movie Effect), watch these videos:

and


Speeding Up and Slowing Down Video Clips

Sometimes we have scenes like walking along a street, or riding a bike along the road, a crowd filling up a venue, a band setting up the stage, etc where having the footage play at normal speed will be a bit long and boring in a Video we are making.
What people usually do is make this footage run in high speed, almost like a time lapse sequence.
Speeding up a Video like this using Adobe Premiere is very easy.

We may also have some footage that we want to make into slow motion, by decreasing the speed, and we can use the same tools in Adobe Premiere to do this as well.

Here is the first video we ever made trying out these effects:

There are two ways of changing the speed of clips in Premiere.

The following Tutorial video shows both ways, and in both of them click on your clip to have it selected.


To Summarise:

First Method is Window > Tools > then in the pop up tools use the 5th one down: “Rate Stretch Tool” or press the letter “X”
Then on timeline shorten back the clip and it does not lose any footage but just speeds it up to fill the shorter length.
Stretch the clip if you want to make slow mo.

Second Method is click onto the clip to have it active and then right click on the clip and pick “Speed/Duration”
or up on the top menu click “Clip” and then Speed/Duration
If you make speed in pop up box 200% it plays twice as fast, 50% makes half speed, 400% = 4X faster etc.

For our Bike Riding Video we found that the ultra fast speed for boring riding segments to use is 800% (or 8x normal speed).

For the slower section near the boats we used 200%, but as it is a long segment riding past all the boats, maybe we should have used 400%.

The Right Click Speed/Duration % method for speeding up video in Premiere seems to work really well.
We have not investigated “Speed Ramping”, because if you have a clip that is going faster, and then the next clip is normal speed, Premiere seemed to automatically do the gradient slowing down okay.

If you want to do very smooth fast then sudden slow motion, then try out “Speed Ramping” with Keyframes, as in this Tutorial:


Watermarking Your Video

For making a Watermark on your video, from a transparent PNG file that you have made previously, watch this video:


Multi-Camera Shoots

Using one Camera on a Monopod to do the wide angle view and capture the main soundtrack (eg. A Sony A77 with ECM-ALST1 stereo microphone), and then having other people operating basic handheld fully automatic cameras (like the Sony RX100 or the Lumix LX100), enables much more sophisticated Videos to be produced in Adobe Premiere.

This was the approach we used for making our “Appetite for Destruction” Guns and Roses show band Video Montage.

The following YouTube video has good suggestions about doing multi-camera shooting:

This is an example of a finished product, which shows to change the cuts on either a beat, or the end of a phrase or verse:

This is another good music video shooting type video how to tutorial:


Synchronizing Multi-Camera Clips

For our multi-camera “Appetite for Destruction” Video we used a wide angle camera and a close up camera.

Basically the wide angle shot was laid down as Video/Audio 1, and then the close up shots were pre-trimmed and laid down as Video/Audio 2.

Then comes the challenge of getting all the pairs of clips in sync, one at a time, using Premiere’s audio track matching function.

Unfortunately, on our main wide angle video, and the close ups videos, Premiere’s automated matching on Audio track wave forms only worked about 50% of the time.

When it did work it was pure magic, but when it did not work it was very long and tedious getting the close up cut in video manually shifted along the timeline to sync up with the main wide angle video.

Once the two clips are synched, we then unlinked the audio on the Video 2 cut in clip, and muted it in Premiere. We successfully rendered the final video without removing the muted clips at all. We also found for Audio transitions that using keyframes and our own custom fade in and outs was extremely useful.

It ended up taking about 12 hours of work, from camera unloads all the way to final uploaded web video. With experience this time could be reduced, but we reckon it would take at best 8 hours to make a 10 minute video featuring between 3 and 4 songs. Therefore Video is far more costly to produce in terms of labour time compared to a set of around 50 still images.

The following six minute YouTube video shows the basics of editing multiple Audio tracks in Premiere Pro CC:

Here is another video which also shows how to sync multicam clips:

This next video is rather long and is all about editing people dancing to Dance Beats:

This next video covers doing multicam editing for a music video.
The guy who did this video has quite a few other videos on YouTube that are worth watching.


Rendering Output for YouTube and Vimeo

And finally, to get to grips with all of the intricacies of Exporting Video to YouTube and Vimeo, this video is the one to watch:

So if you are interested in making movies with Adobe Premiere, using DSLR footage, then read our PDF document, and watch all the Tutorial Videos that are in it.

Enjoy,
Passy


If you found this article useful, then make sure you give our
“PBP Photos By Passy” Facebook Page a Like.
Photos By Passy Facebook Page

How to use a Polariser

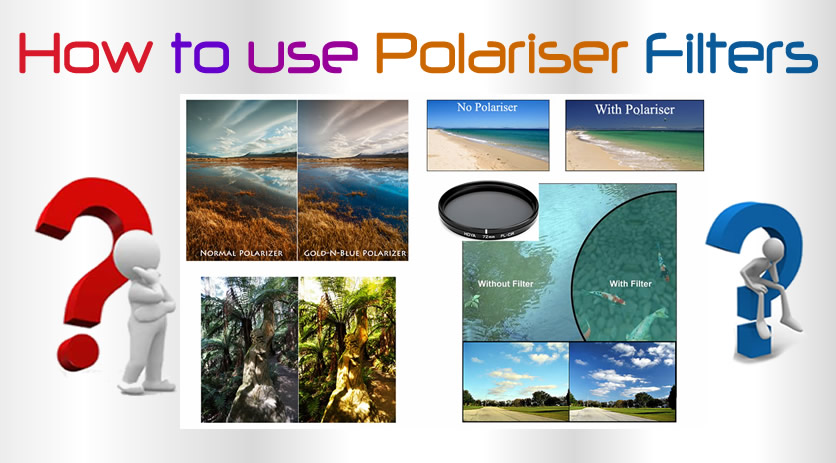
Polarising filters are great for fixing problems with bright light conditions.

Examples include taking photos in Forests, photos at the beach, as well as indoor photos, where bright sunlight is streaming through windows into the room.

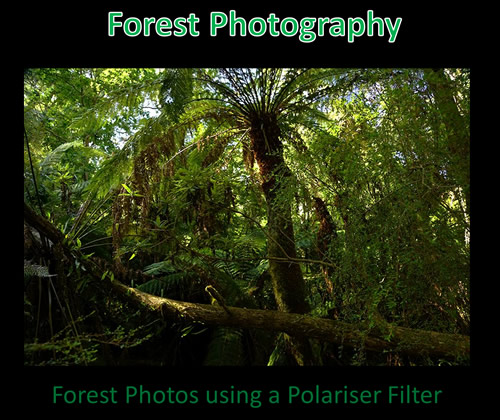
In this lesson we focus on techniques that can be used to get much improved photographs in rain forests when the sun is shining.

We also cover using Polarising Filters for indoor photos, and a brief mention of Beach Photo applications.


Polariser Filter 10

Forest Photography

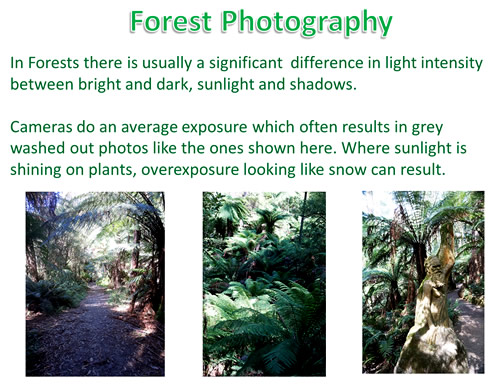
Let’s face it, most times we go hiking, it is nice if there is sunshine, although strictly speaking it is best to take forest photos of plants, streams, and waterfalls when it is overcast.

If we just put our camera into auto mode in the Forest, it struggles with exposure and color correctness.

This results in grey washed out photos, with foilage being a strange aqua green, rather than its natural colour.

Polariser Filter 01

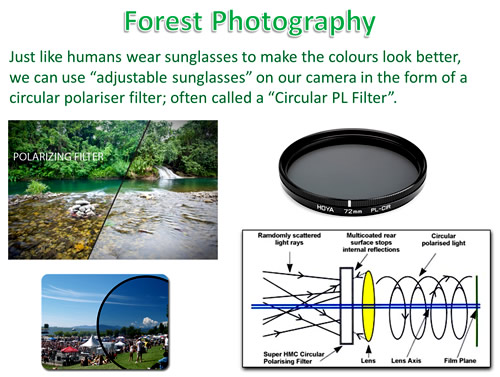
On a sunny day hiking, we would normally wear sunglasses, which makes the sky a more intense blue, as well as making plants greener and improving contrast.

To get this same effect for our photos, and stop harsh sunlight from washing out our images, we can use a “Circular PL” polariser filter.

This simply screws onto the front of a DSLR Camera, and is also rotatable. Rotation of the filter adjusts the degree of polarisation or sunglasses effect.
It is best to use good quality Japanese made Hoya brand filters, and we find these filters work extremely well.

Note that a Polarising Filter works best when the sun is shining from your left or right hand sides.

If you use a Polariser Filter facing directly into the sun, or with your back to the sun, it will often have minimal to zero effect.

Polariser Filter 02

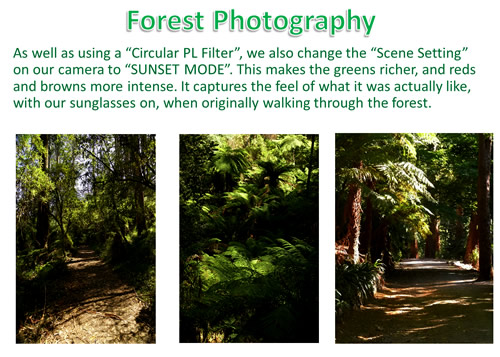
As well as a Polarising Filter, we have found that good results can be obtained by also setting our camera into “Sunset” mode.

Polariser Filter 03

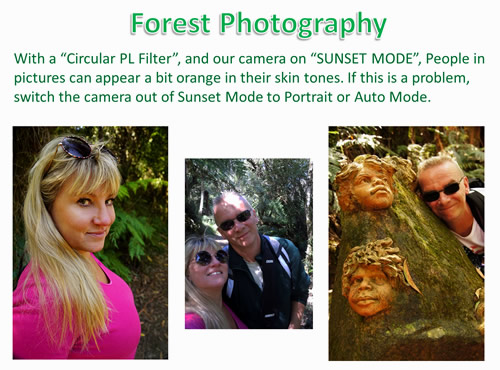
One downside of using Sunset Mode is that people’s skin colour can become very orange in colour.

Polariser Filter 04

For the portrait on the left in the image above, sunset mode warmed up the skin tones, and made the pink top intense in colour. Overall this was a good effect.

However in the photo on the far right, the skin tones do not look good with the orange glow caused by Sunset mode.

The photo in the middle has sunset mode turned off, and the people look more natural. However the scenery in the background is grey with a strange aqua green hue in the ferns and tree leaves.


Polariser with Sunset Mode Examples

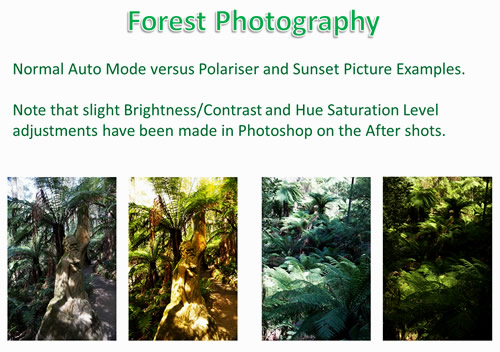
The following pictures show Auto Mode versus Sunset Mode with Polariser Filter.

We think you will agree that the right hand side Sunset Mode pictures look far better than the Auto Mode photos.

Polariser Filter 05

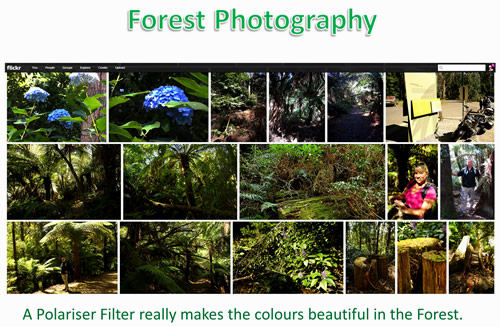
Using a Polariser Filter really makes the colours “pop” and look beautiful in the Forest.

Polariser Filter 06


Polarising and Indoor Photography

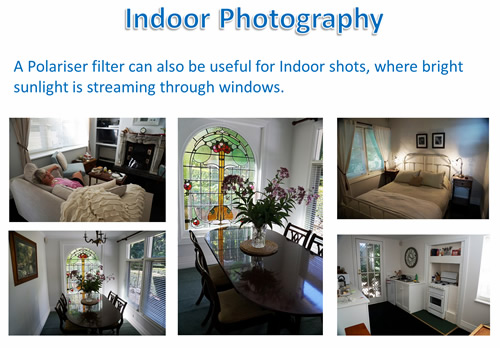
Natural light is the best medium for photos, as it is naturally diffused, and does not have the harshness produced by light from a Flash.

However, we get the same dramatic range in brightness as we do in the forest. Eg. Light near the windows will be washed out with white overexposure, and shadow areas will be dull and grainy.

Using a Polariser filter smoothes all of this out, with the added benefit that we can see scenery that is outside while looking through the windows.

Polariser Filter 07

One side effect of using a Polariser for Indoor Shots, is that we can get areas that are “light blue” in colour.

In the bedroom shot above, the blue looks okay. But the blue reflection on the dining room table is not so good, and probably should be photoshopped out.


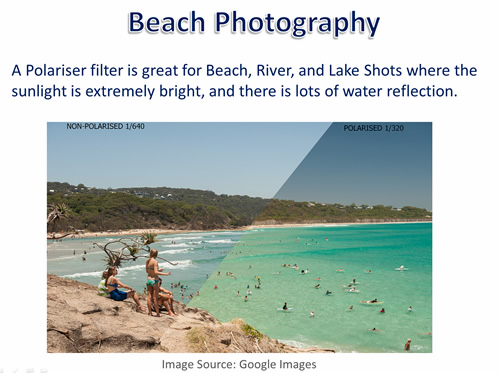
Polarisers and Beach Photography

At the beach we wear sunglasses to cut down the glare from bright sunlight reflecting off the water and white sand.

Beach photos also benefit greatly when our camera “wears sunglasses” in the form of a Polariser Filter.

Polariser Filter 08

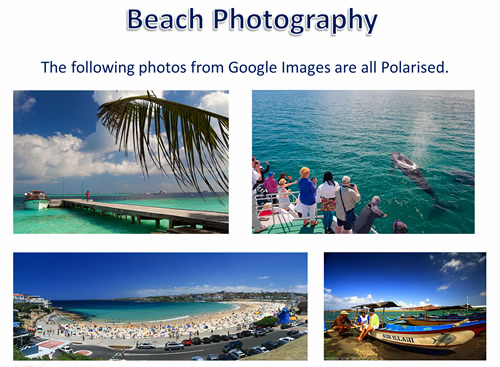
Like with Forest Photos, Polarised beach Photos will turn out with intense colour, and beautiful blues and greens and “see-through” water.

There is the downside of people’s skin colour tones being a bit orange and non-realistic, but this is a small price to pay compared to the overall beauty of the entire image.

Polariser Filter 09


We have not had a chance to try our Polariser Filter out at the beach yet, but when we do, we will update this lesson with some “Before” and “After” images to demonstrate how well it enhances sea scape images.


Polarising Filters Videos

Here are a couple of Videos which show how to use a Polariser Filter, and the improvements in color which can be achieved.


Like Us On Facebook

If you enjoy our Free Photography Lessons Photos By Passy, then you owe it to yourself to like our Facebook Page.

Click Here to Like our Facebook Page


Subscribe

If you enjoy visiting Photos By Passy, why not get a free subscription to the website.

You can then receive notifications of new items and updates directly to your email address.

Go to the subscribe area on the left hand sidebar, (or down the bottom of the page if using a mobile phone), fill in your email address and then click the “Subscribe” button.

Enjoy,
Passy