All posts by Passy

How To Do Sports Photos

In this “How To” Lesson/Guide we fully cover the fundamentals of Sports Photography.

Sports Photography can be a very time consuming and challenging activity, but it can be extremely rewarding when you get that precise “in the moment” shot from a sports event.

The basic approach to capturing fast moving sports is to shoot in “Burst Mode”, where the camera fires off several shots per second like a machine gun.

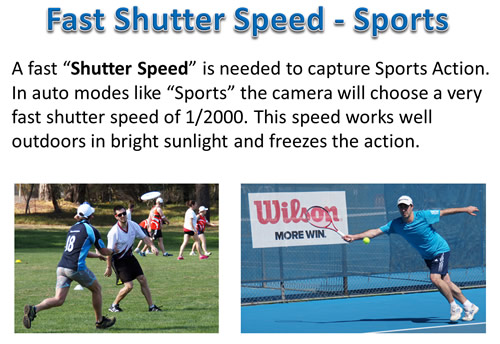
This shooting needs to be done at a very fast shutter speed of ideally around 1/2000th of a second or higher to freeze the action.

Such a fast Shutter Speed is critically important to isolate items and have them crisply in focus without any motion blur occurring.

Shutter Speeds for Sports is discussed in detail later in this article, along with everything else we could think of related to Sports Photography.

Good Sports Photography requires you to manipulate camera settings manually and not use Auto Mode on your camera.

If you have never been out of Auto Mode we suggest going through our Digital SLR Camera Course that can be found at the following Link:

How To Do Camera Settings Guide

To start off our comprehensive Sports Photography Guide, we have ten basic tips or rules for doing Sports Photography.


Top 10 Tips for Sports Photography

Here are our Top Ten Tips for doing Sports Photography.

They are based on our experience taking sports photos, as well as from researching the Internet and seeing what other people recommend.

An essential tip we have not included is to make sure you are at least reasonably interested in the Sport you are photographing.

We have found that our best photos have come from covering sports that we have participated in and know “the game”, or else Sports that have sparked our interest.

For example, here at PBP we love photographing Tennis, Basketball, Surfing, Sailing, Mountain Biking and Football, but loathe covering Netball, Badminton, and Gymnastics. We have tried photographing the sports we do not like, but it has been difficult and the photos we ended up with were only average to unusable. Maybe other people are different, but we have found that we have to do what we love or else it just does not happen for us.

So with that out of the way, let’s list and then detail each of the “Top Ten Tips for Getting Great Sports Photos”.

1. Camera and Lens Equipment
2. Do Not Use Automatic Mode
3. Use Burst Mode
4. Use Continuous Autofocus Mode
5. Shoot in JPG
6. Ask Permission For Children
7. Take Lots of Photos
8. Position is Everything
9. Shoot From Down Low
10.Post Process Your Images


1. Camera and Lens Equipment

You need a reasonable quality DSLR type camera that allows you to set the Shutter Speed, ISO, and Aperture, or one that has a “Sports Mode” option where the camera can set these values.

Various suitable cameras are discussed later in this article, including various DSLRs as well as the very powerful Sony RX100 pocket camera.

To get close to the action and get those newspaper or magazine type images, the lens of the camera needs to be able to zoom to at least 200mm. If you can use an even bigger zoom that will be great.

Ideally the zoom lens will be a “fast zoom” with a wide aperture of F2.8; however in daylight conditions F4 or F5.6 is okay. F2.8 fast zooms are very expensive, but are needed for doing indoor sports photography.

It is true that expensive equipment can get much better shots, but we suggest starting off with a basic all round kit unless you have plenty of spare cash to spend.

We have found that during the last five years moving from a $1000 to a $2000 to a $4500 to a $7000 (Australian Dollars) setup has improved quality, but not in proportion to the dollar spend.

Eg. The $7000 setup gets pictures that are about 1.5 to 2 times better than the $2000 setup, not four times better!

At the present time it is not possible to capture very good sports photos with a mobile phone or iPad, and so we would say you need to spend around $2000 to $3000 on equipment to get started.

If you think this is a lot to spend, then consider the professional sports photographers you see at major events from Getty Images and the like. These photographers use $8000 camera bodies and $40 000 plus “hubble telescope” sports lenses on sticks, and they usually have two of them!
How to do Sports Photography Getty Lens Gearhaurus
(Click Image to View Full Size)

Another reality to face is that it is very unlikely that you will make much money at all from taking sports photos of events, relative to the dollar outlay in equipment. This is pretty much a sad reality of modern professional photography in general.


2. Do Not Use Automatic Mode

Most amateur photographers set their camera to fully automatic mode, or a preset mode such as “Sports” or “Action”. Cameras are not intelligent enough yet to get the settings right for a reasonable percentage of the time doing sports photos. Only a few photos will turn out well in these modes, but most will not.

However, it can be okay to use “Sports” or “Action” the first couple of times you do sports photography, and then view the good photos you get, and see what Aperture, Shutter Speed, and ISO the camera chose to use for these good images. These values are often shown as information at the bottom of the picture when you play it back on the camera, or you can put the camera onto a computer and look at the “EXIF” properties data to find these values. Another way is to load your photo to Flickr and then view the EXIF data.

Professionals use semi-manual or full manual mode on their cameras when taking sports photos. The options they use are “Aperture Priority”, “Shutter Priority” or “Manual Mode”.

In Aperture Priority mode (Usually “A” on the camera dial) an aperture is set, and then the camera takes care of all of the other settings.

Set to the lowest number on your lens such as 2.8 or 4.0 to let the most light in, and to blur backgrounds.

In theory the camera should then automatically set the shutter speed high enough in bright daylight and choose a suitable ISO value.

We have tried this mode but do not like how it sometimes puts the ISO right up which makes grainy not fully clear images. Eg. We found that the camera sets itself to overly high shutter speeds of 4000 and then to compensate the ISO gets boosted making overly bright and grainey pictures.

We have found that this mode sometimes works well for Sports Photography, but we prefer to use Manual Mode most of the time.

Try it out and see what kind of pictures result.


In Shutter Priority mode (Usually “S” on the camera dial) a shutter speed is set, and then the camera takes care of all of the other settings.

For Sports outdoors use 2000 or higher, for indoors pictures may be dark and 1000 or 500 may need to be used. Sports Photos will usually be too blurred at 250 or lower.

We have tried this mode but found that this mode always sets the aperture to F2.8, which is not always the sharpest setting for our lenses, and F3.5 or F4.0 would work better.

Try it out and see what kind of pictures result.


In Manual Mode the photographer sets all of the values rather than the camera.

We have found that this works best for most of our Sports Photography, and gives consistent predictable results especially outdoors.

We set the Shutter Speed to anywhere between 2000 and 3200 depending on how sunny it is outside, and sometimes use 1600 if it is cloudy. Indoors we use 500, 1000, or 1600 if the lighting is not great.

For Aperture we like to use F3.5 a lot, but will sometimes use F2.8 or F4.0. For ISO in Sunny conditions we use 250 or 320 or 400 if it is not sunny. Indoors we have to put up the ISO to get enough brightness, sometimes as high as 800, 1200, or even 1600.

Manual Mode can be stressful at first, but experience has shown us that it always gets the best results. Just remember to try and have speed 2000, Aperture no higher than 4.0, and then set the lowest ISO possible to get a bright enough picture. Do the settings in that order: Speed, Aperture, and lastly ISO.

Try it out and see what kind of pictures result.


3. Use Burst Mode

In Sports Photography we always set our camera to take multiple images, usually referred to as multiple “frames per second”, “burst mode”, “rapid fire”, “continuous shooting”, or “motor drive”.

Always make sure that this Burst mode for shooting many pictures per second is always turned on when doing sports photos. Taking lots of shots at lightning speed like this greatly increases the chances of getting that picture that captures the perfect moment, known in the business as “The Money Shot”.

The downside is that there will be hundreds of photos to sort through from the camera.

The effort is worth it when you get a great “Photo Finish” money shot like the one below.
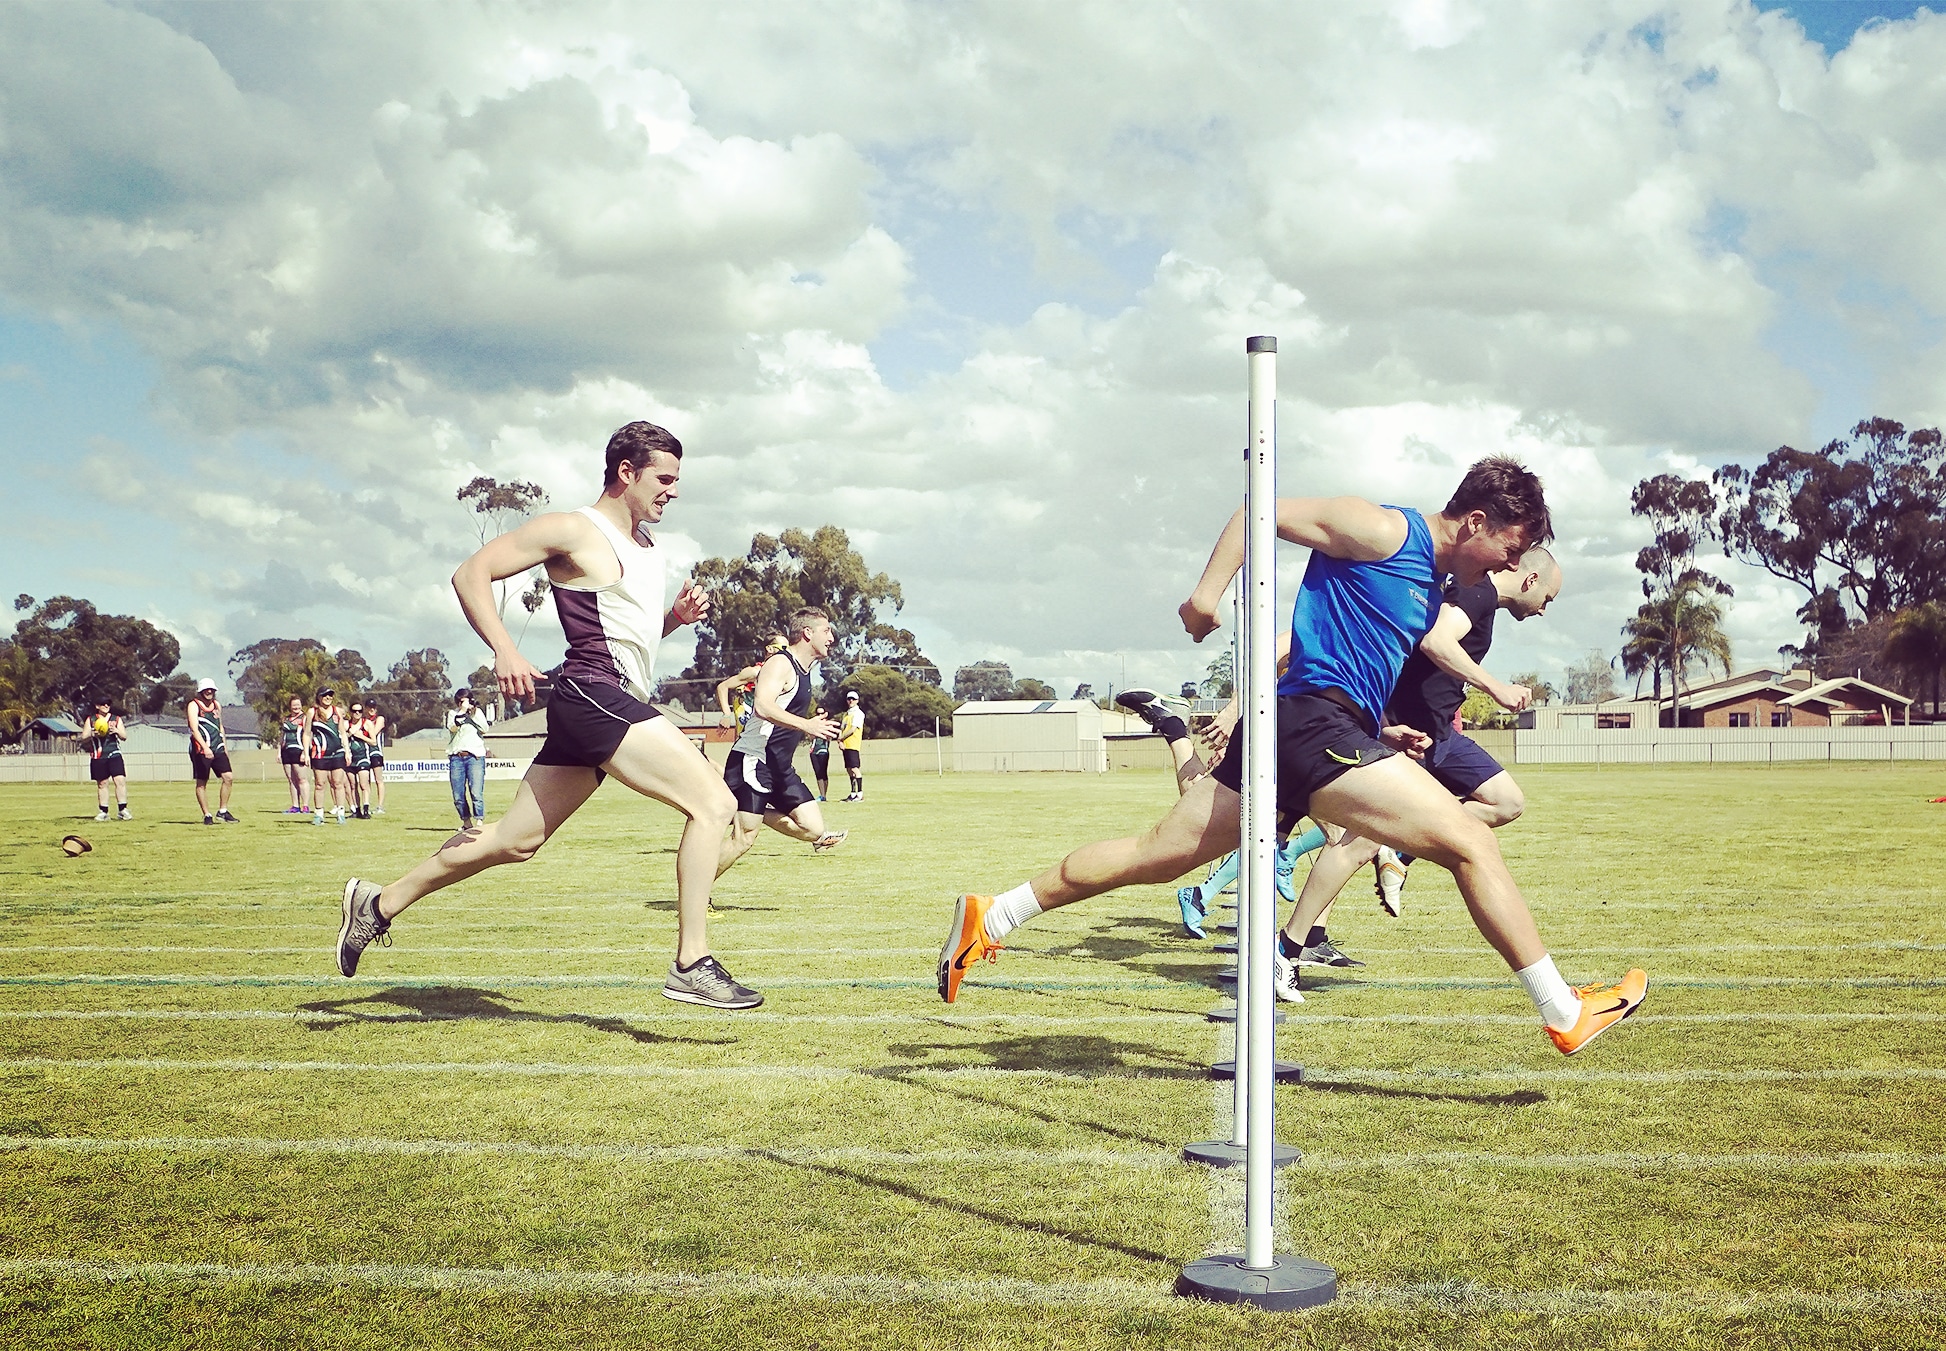
How to do Sports Photography Sprint Race Finish
(Click Image to View Full Size)

If your camera has Slow and Fast (Or Low and High) Burst Rate Options, go with the Highest Burst Rate to get the most images and not miss out on any critical moments. There should be no difference in image quality using the Highest Burst Rate, compared to the Lowest frames per second Burst Rate.

Also make sure that your camera has a very fast speed high capacity quality SD card in it, so it can write the many burst mode images to the card quickly ready for you to take your next set of shots.

We mainly use 32GB and 64GB Sony Class 10 94 MB/s SD Cards. (32GB is ample for sports events if you want to save a few dollars). We also use 32GB or 64GB SandDisk Extreme Pro SD Cards that are Class 10 and 95 MB/s as these are 10 to 20% cheaper than Sony ones and seem to do just as good a job.

Always have a spare SD Card with you. We have never had a card fail or filled a card up, but it is better to be safe than sorry. Think of it like having a spare tire in your car boot. If the day ever comes when you need to use it you will be very grateful.


4. Use Continous Autofocus Mode

Make sure your camera is set to continuous Autofocus. That way the camera should keep focussing as the subject moves, assuring that in focus shots are obtained during the burst shooting.

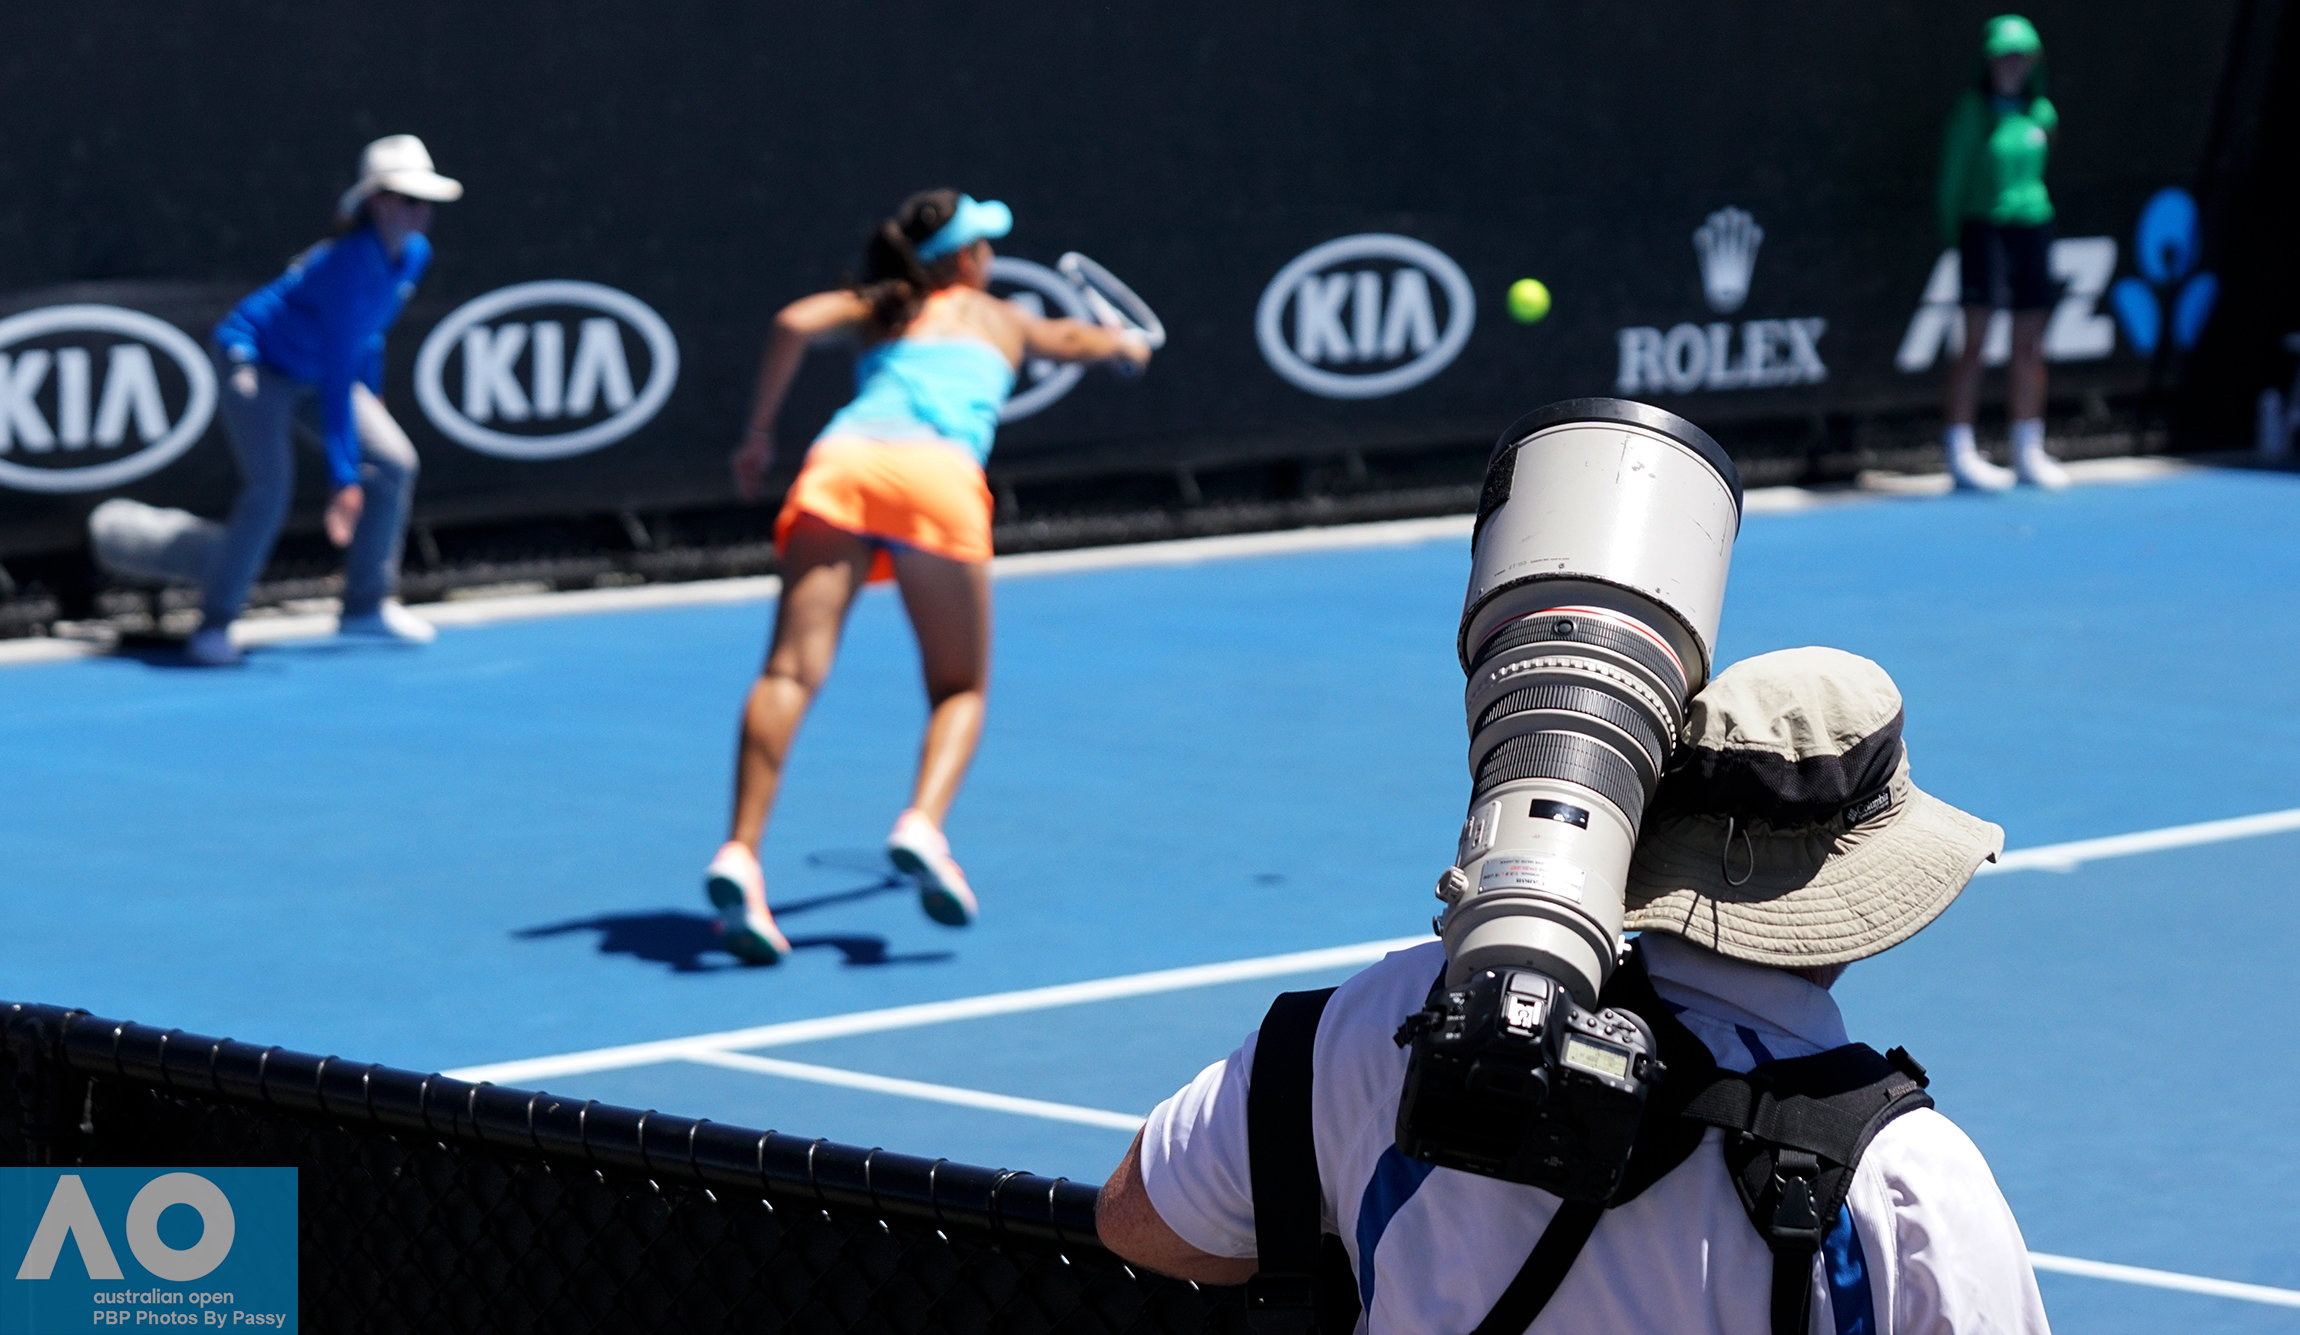
It is also important to pay close attention exactly where the camera’s focus squares are focussing. At events like the tennis, where there is advertising signage behind the player, the camera may choose to “back focus” onto the signage and the player will then be out of focus.

This can be seen clearly in the image below (click it to view full size) where “KIA” is in focus but the player is blurred and out of focus.
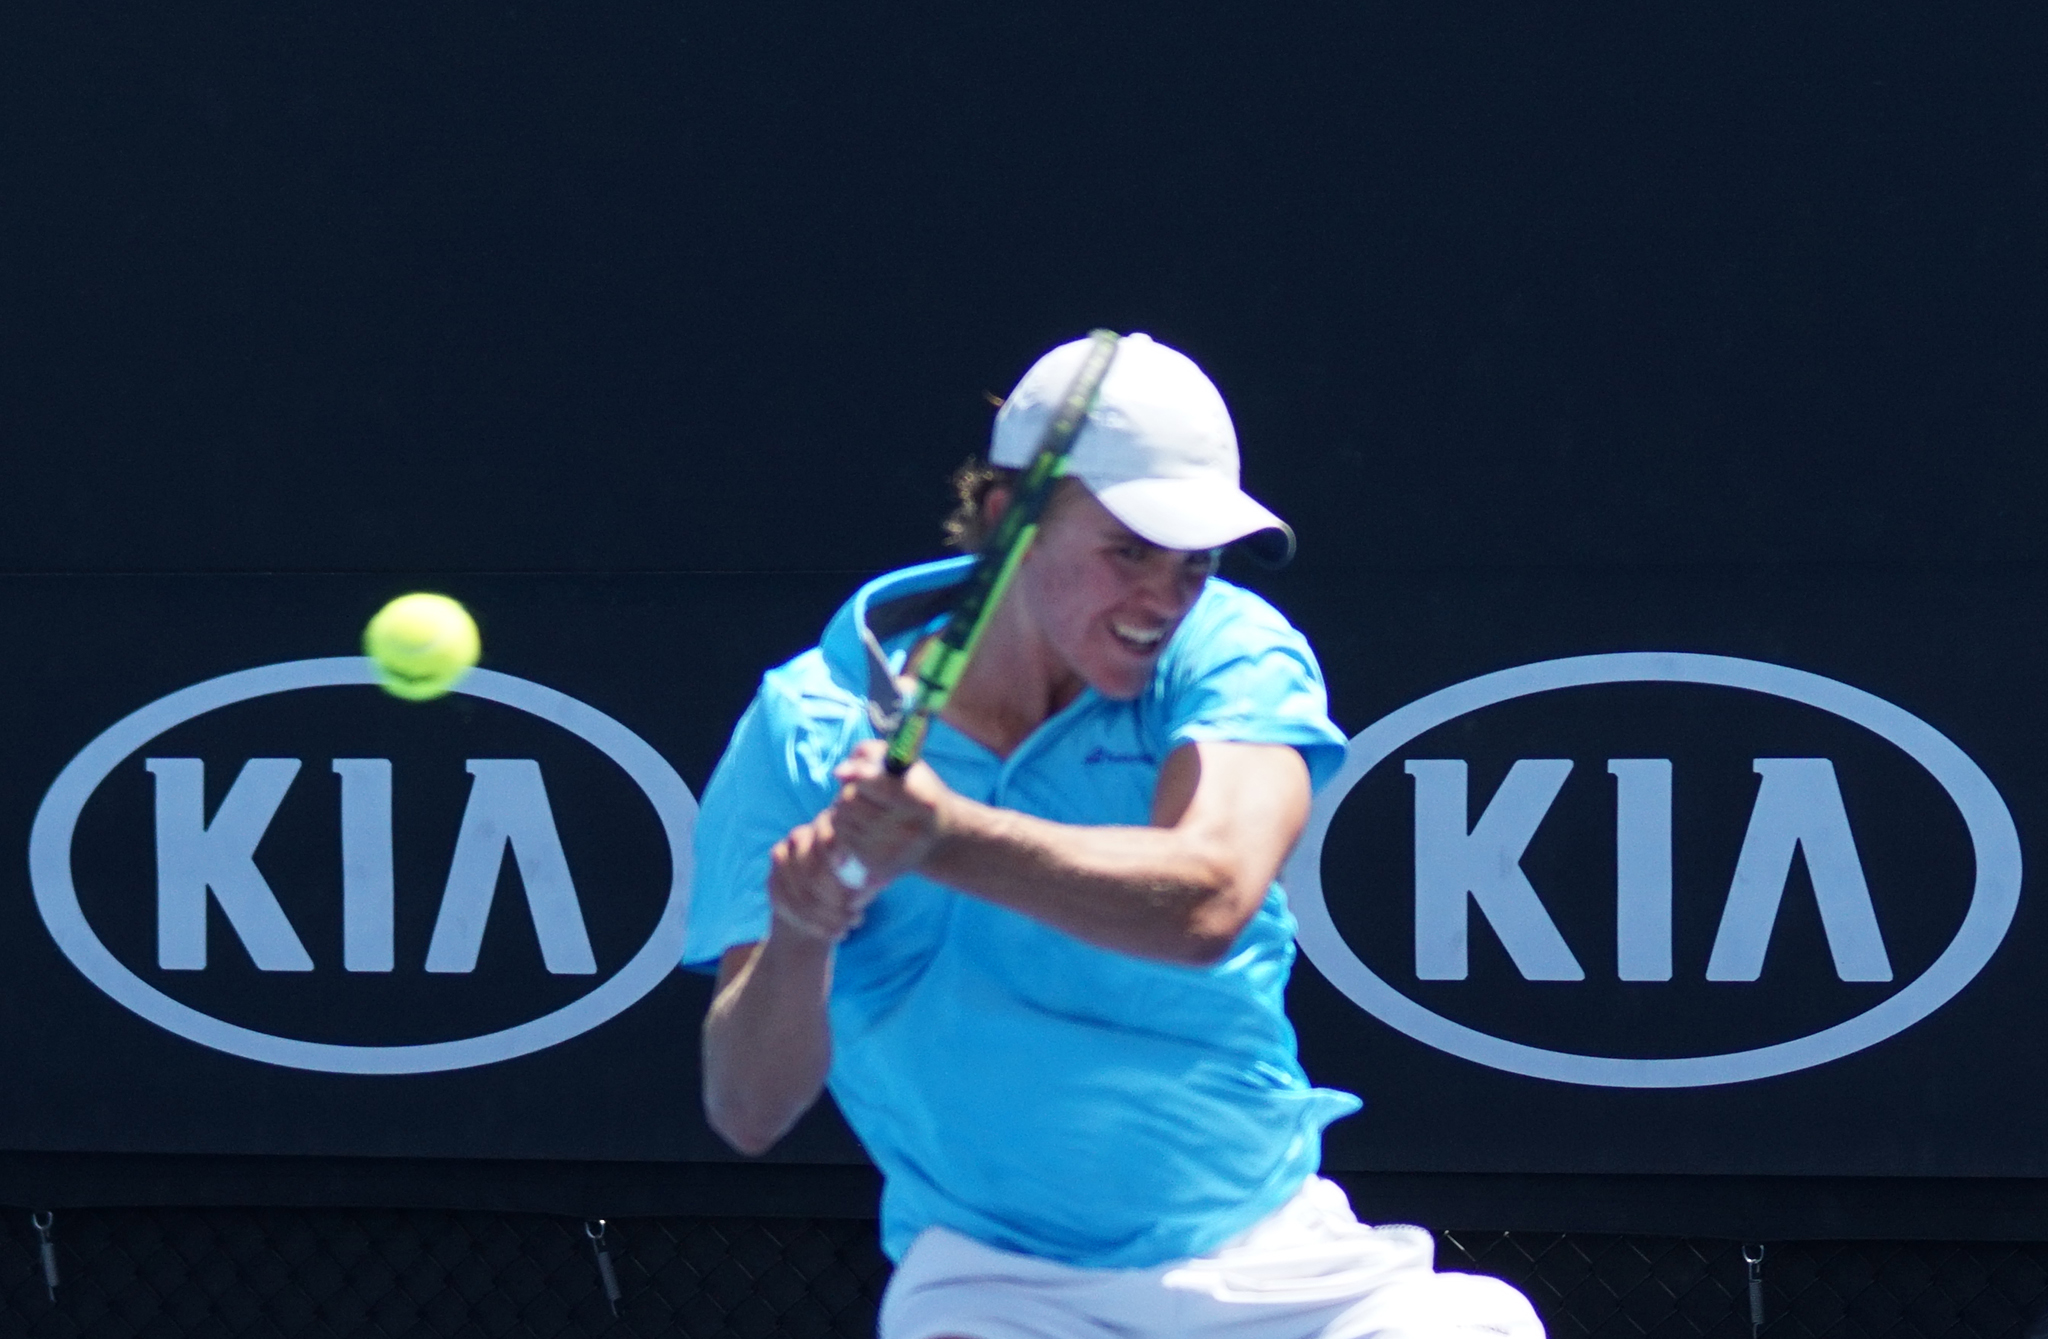
How to do Sports Photography Back Focus Tennis Signage
(Click Image to View Full Size)

Sony cameras are fantastic for sports because they have focus tracking that locks onto moving objects and stays with them.

On the Sony A99II camera just use AF-C and the camera will continuously focus on any movement when you half-press the shutter button. But it can be a problem if something in the background moves.Therefore make sure you concentrate on where the green focus squares are located before pressing the button all the way down.

For the Sony A77II we basically set the specific autofocus mode to “Lock-on Expand Flexible Spot” as shown in the video below.

There is a movable slightly bold black focussing rectangle that you need to lock onto the moving object. This is easier said than done. Black was not a good colour to make this focus square, I wish that Sony had made it a different colour, because it is hard to see amongst all the green squares. However we have tested it and it does work well if you can get it activated.

The following video explains Sony Focus Tracking in detail.

There are more details about using specific Sony cameras such as the A99II, A77II, A55, RX100V, and Ax Mirrorless cameras later in this article.


5. Shoot in JPG

Shoot in the highest quality JPG that your camera allows. On Sony Cameras this is called “JPG Fine”.

It is not worth shooting in Raw mode, as these are very large image files and will use lots of space on the SD Card and could possibly slow down the SD Card transfer when shooting in Burst Mode.

Raw mode is great for Landscapes, Sunsets, Portraits and low light Music Performance shots but is totally unneccessary for sports photos. The quality obtained from JPG is great, and it is very doubtful that Raw would produce any noticeable improvement.


6. Ask Permission For Children

In most countries including Australia it is not legal to photograph children, even in public places. If you are attending a sports event with young children competing then make sure you get permission from the team(s) or sporting organisation before taking any photos.


7. Take Lots of Photos

Burst Mode will produce lots and lots of Photos but sports photography is a percentage game, and the only way to get some great action shots is to take lots of pictures.

If you leave the process of going through all of the photos (called “chimping”) until you get home on a laptop or PC; it will be a mammoth job.

It is a good idea to check photos during breaks in the game play, and delete as many “Bad” photos as you can while at the event. Check the photos on your camera screen and zoom in to check focus and only keep the best ones.

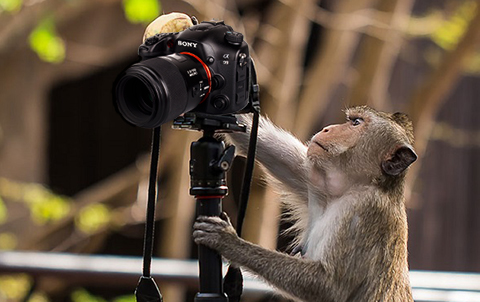
This checking process is called “Chimping” because people look like a monkey chimp while they are doing it, as shown in the photo below:

How to do Sports Photography Sony Monkey Chimping Photos

Be careful when Chimping at the event that you do not miss any vital game play or action by being distracted with chimping and not taking photos while the game is taking place. Do Chimping at breaks in play, or stop shooting and move to a quiet location, sit down and have a rest, and do some chimping. There is no worse feeling than hearing the crowd roar while you are chimping, and realising that you just missed out on getting the shot of the day!


8. Position is Everything

If you are outdoors then position yourself with the sun behind your back. This will make sure plenty of light will be hitting your subject so that you can use high shutter speeds like 2000 and 3200 and guarantee freezing the action.

Sometimes you will have to shoot into the sun, but avoid this if at all possible. It will make the players dark and dull sillouettes and can also create weird lens flares and glare.

The other thing is to know the Sport you are photographing and what makes a good image. Research on Google what are the most popular images and even put these onto a Pinterest Board to study them before going to the event.

To work out the best place to be located when taking photos, a great rule of thumb is to look at where the umpire of referee stands most of the time and try to get near that location. Later in this article we discuss shooting locations and techniques for various sports.

Try to workout where the ball or the action is most likely to be and concentrate on that area to get the best possible shots. Follow the action with your camera in continuous autofocus with tracking turned on and zoom in close enough to have most of the frame filled with the players. Use the camera’s viewfinder, and not the screen on the back of the camera.

If you are going to be in the way of spectator views, referees, or professional photographers with event ID Passes, you will have to use a daring “run and gun” approach of just quickly stepping into a location getting shots for 30 seconds, and then quickly vacating the area. Always turn around and thumbs up, nod, and/or verbally thank spectators and referees as you leave.

Sometimes on very crowded days at major events, or if security tells you to move, you will have no other option than to shoot from sitting in the stands. Sit down and rest your elbows on your knees to form a human tripod and go for it.


9. Shoot From Down Low

Some good advice from the Internet is to shoot from as low as where your knees are located to capture much more of a dramatic angle as well as letting in more of a clear background rather than other players and spectators. This lower perspective is a technique that you will see professional photographers using at events.

Shooting low does work well for Football, Soccer, Basketball, Mountain Bikes etc, but is not universally applicable for all sports. Getting a small fold up camping stool and sitting at the sidelines like the pros do should allow you to get this low perspective.
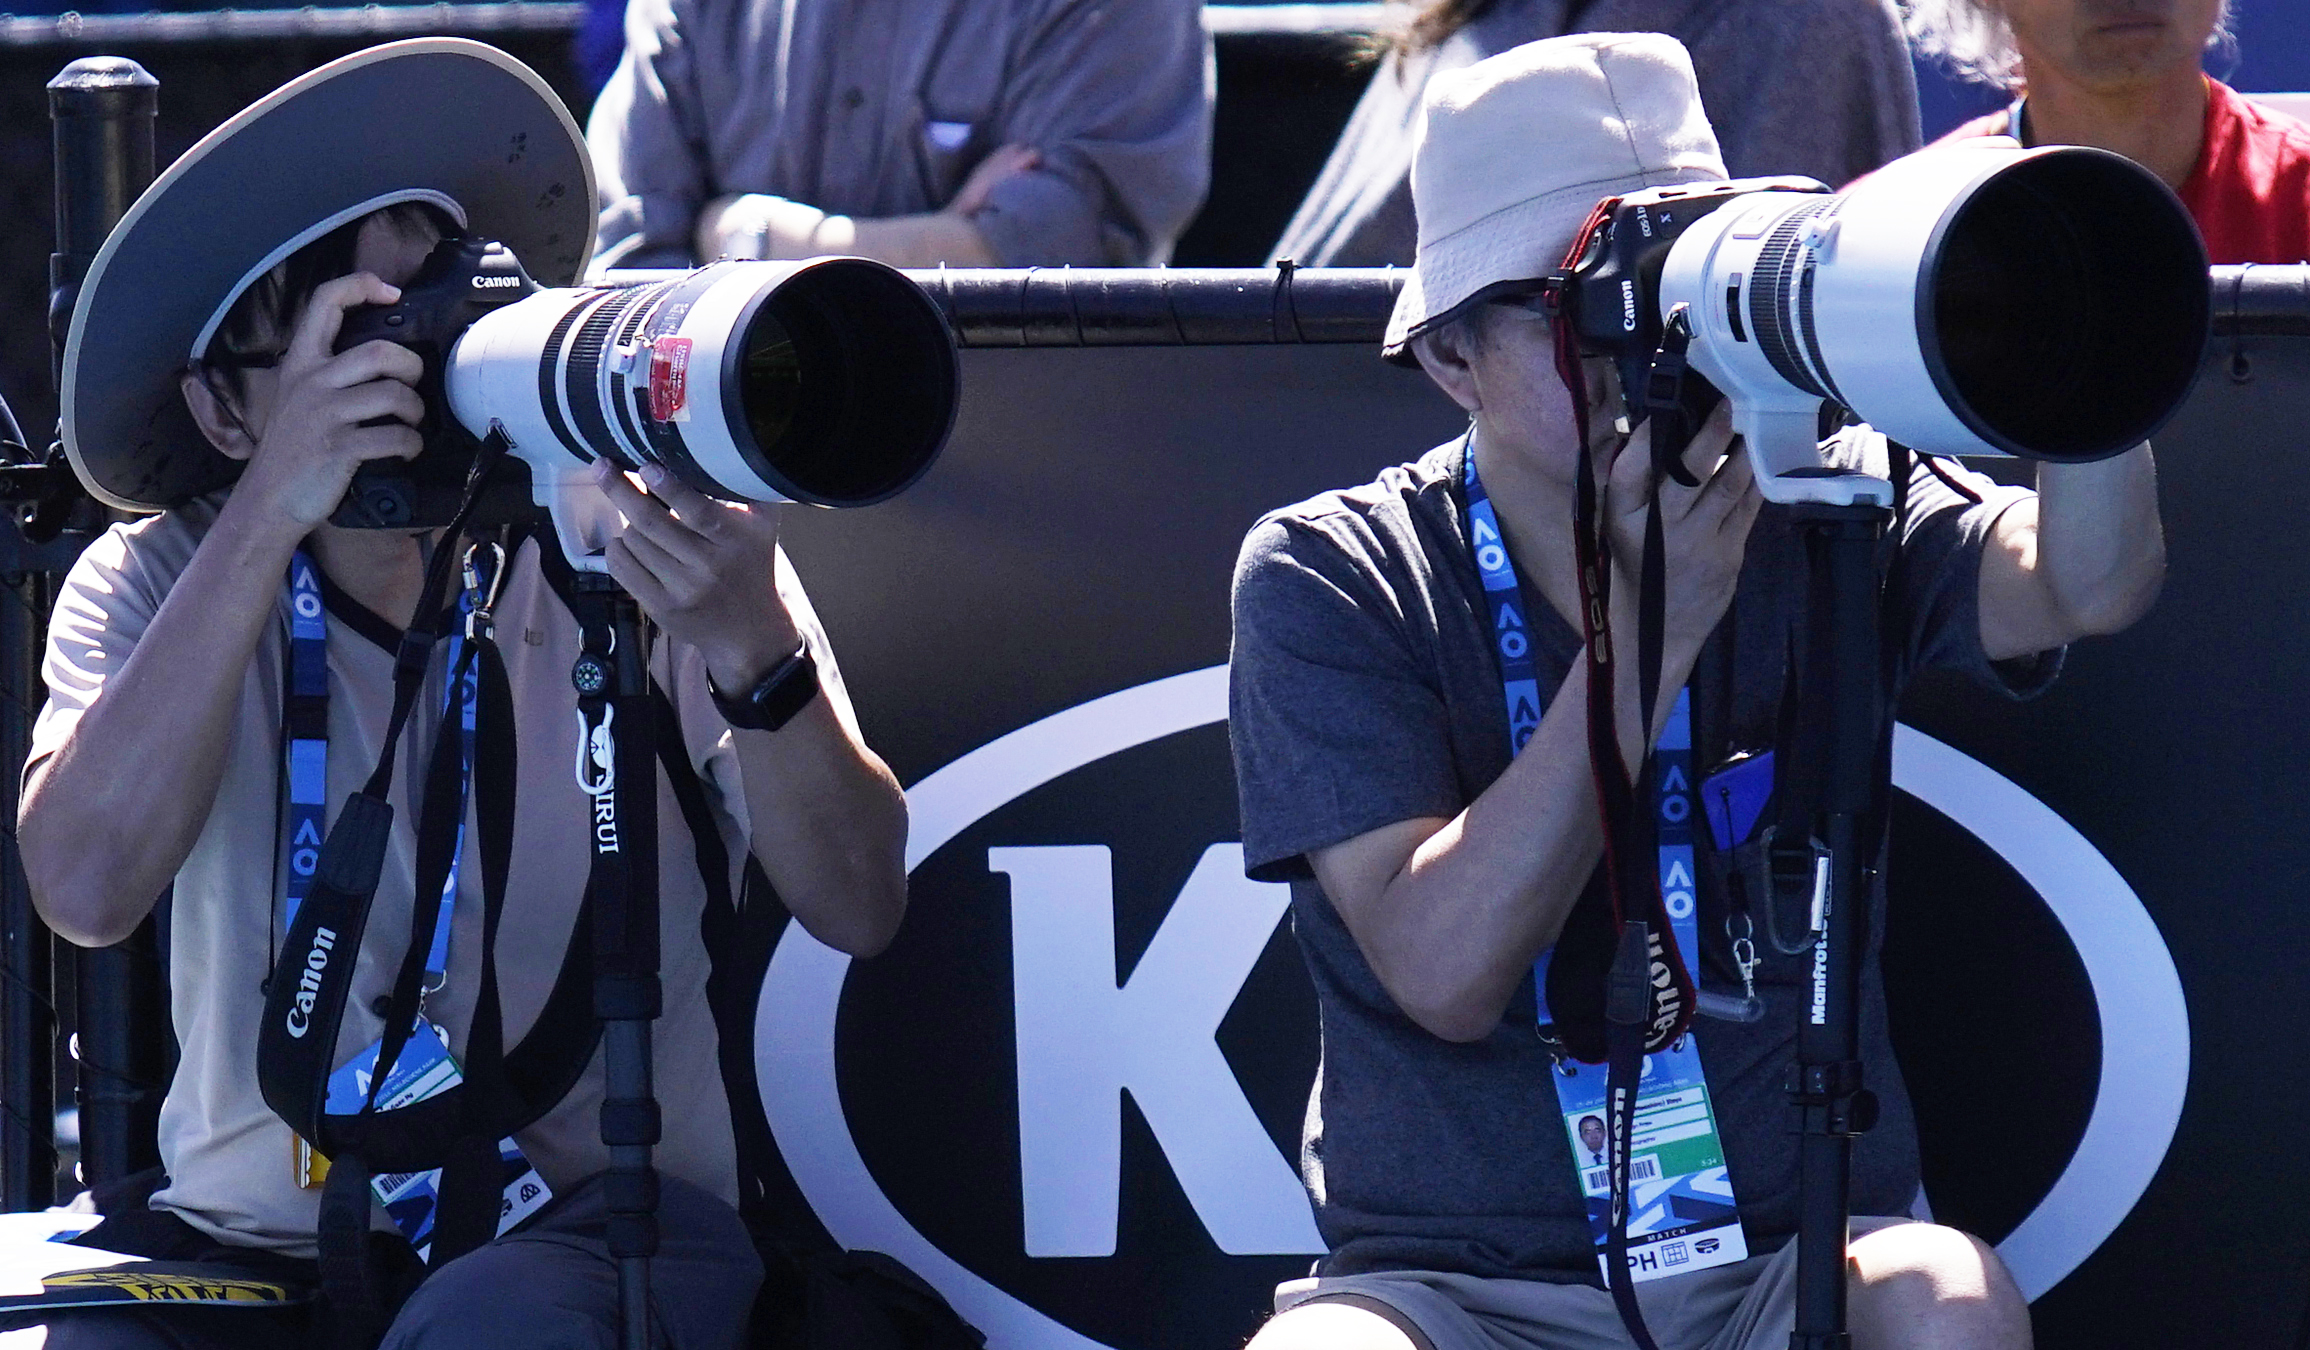
How to do Sports Photography On court Tennis Pro Gearhauruses
(Click Image to View Full Size)

At major events you will be very lucky to get a photo Pass or permission to sit courtside like the pros do, and so you will need to shoot hand held from the sidelines.
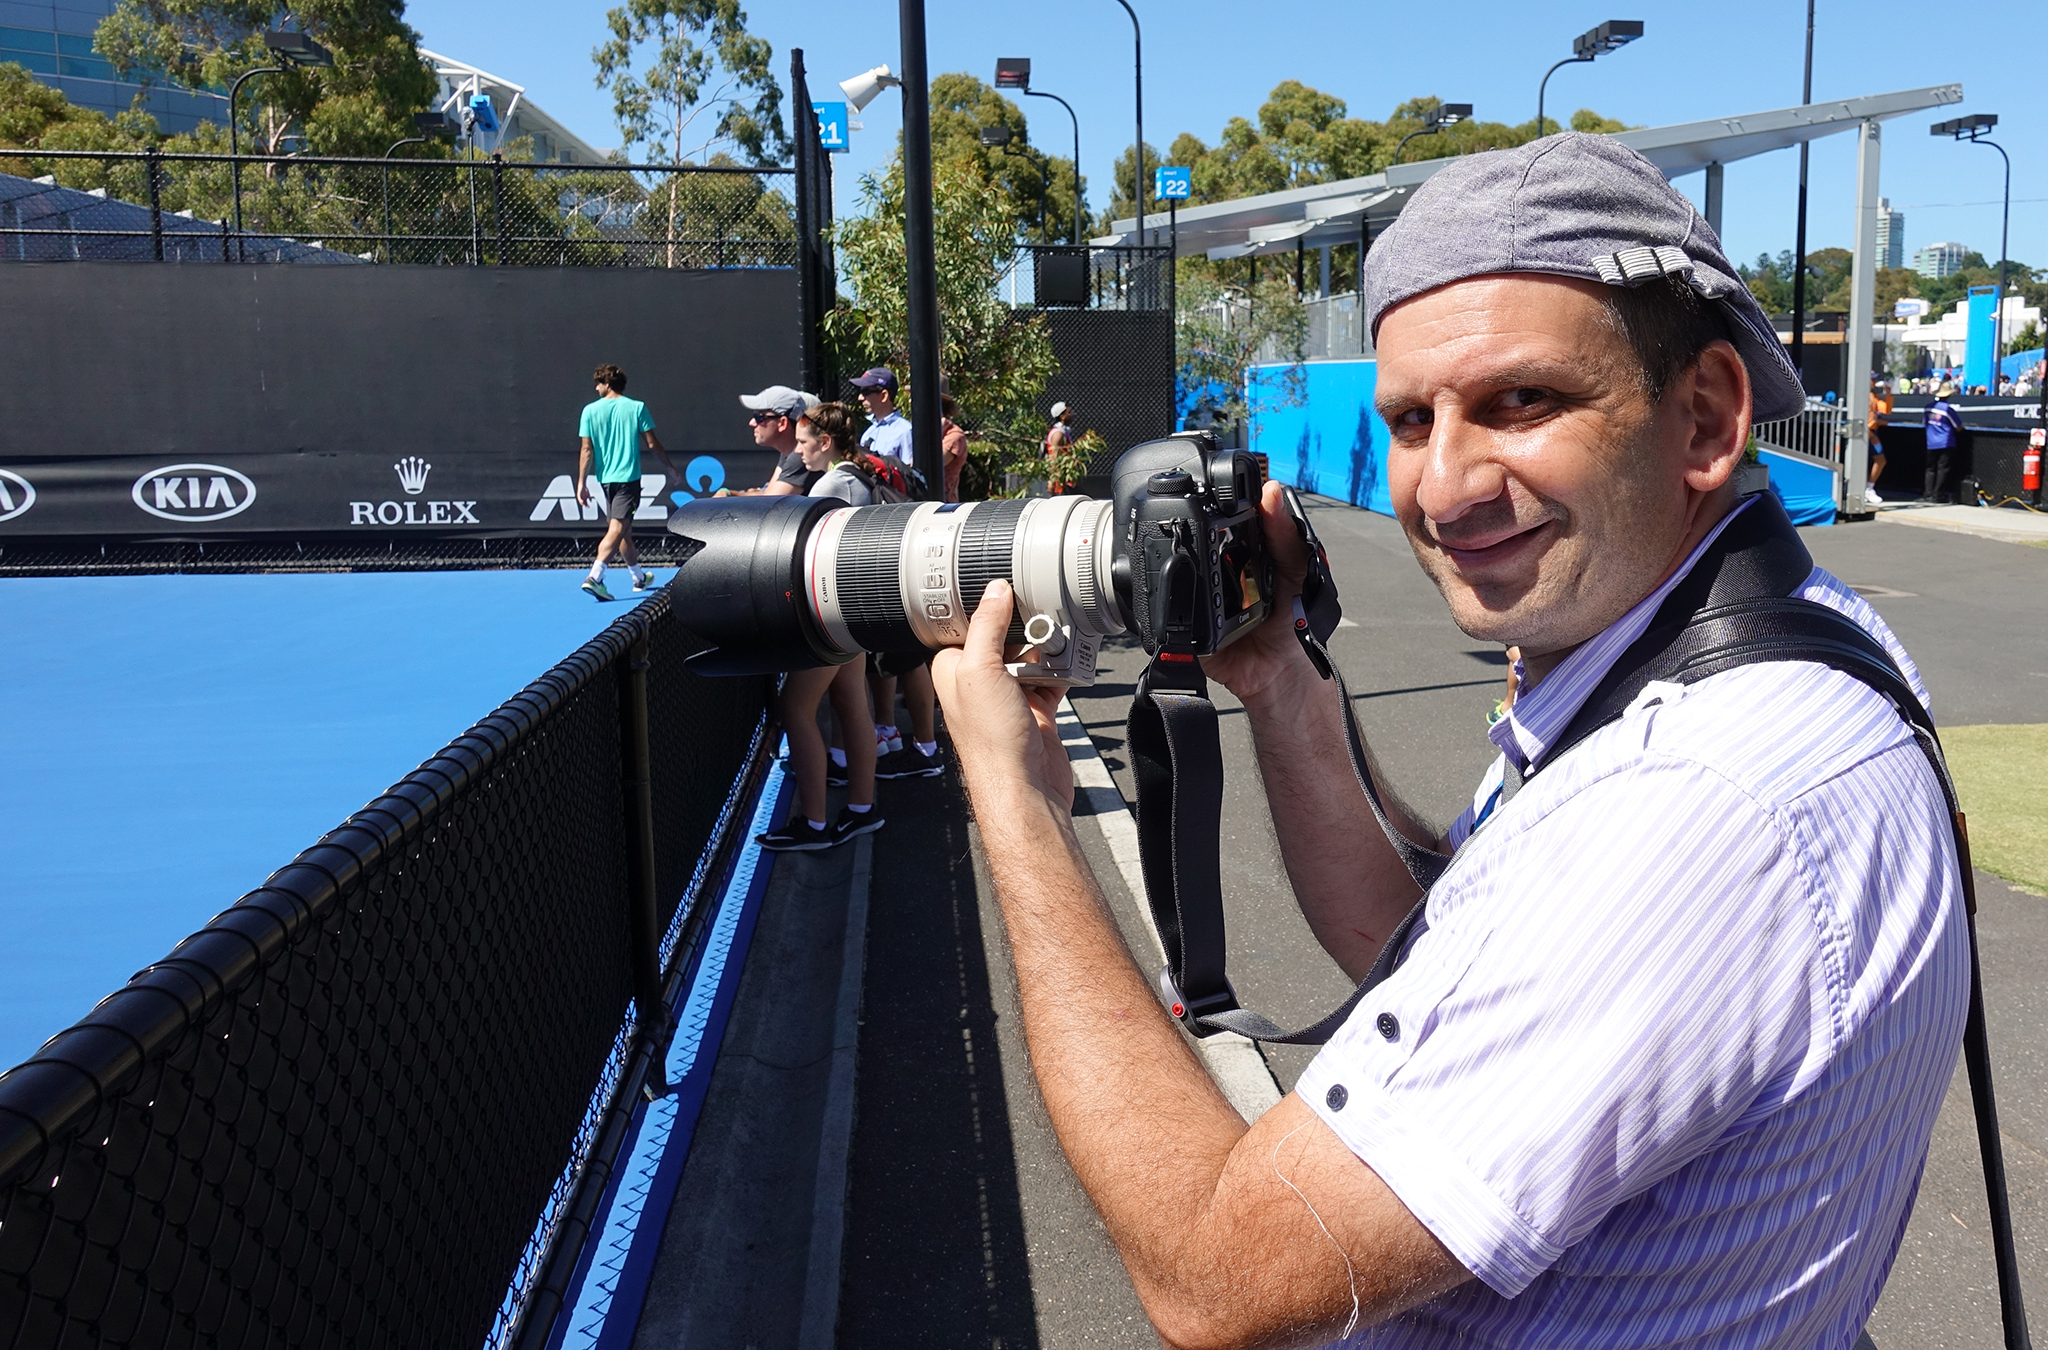
How to do Sports Photography Tennis sidelines shooting
(Click Image to View Full Size)

Shooting low is a general rule, if you cannot sit on a stool then sit cross legged on the ground, or kneel on one knee to get lower if you can only stay a little while to take pictures at that particular location.

However for sports like Volleyball we mostly shoot standing up or kneeling on one knee, and we do most of our Tennis shots and Football shots like this as well.


10. Post Process Your Images

Use Adobe Lightroom and Photoshop to post process your images.

For bright sunny outdoor shots like Tennis and Football there is never any need for Lightroom, and the exposure, colours, sharpness, etc can all be adjusted using Photoshop.

However, when we have indoor sports photos to process like Basketball, Volleyball, etc then using Lightroom first on the JPG files, and then editing in Photoshop is certainly the way to go.

You might not think of using Adobe Lightroom for Sports JPG images bit it works wonders on JPGs from Sony cameras!

Exceptions to the JPGs only Rule might be for Beach Sports, or maybe an Indoor Stadium where the lighting is not great.
The Sony A99II can Burst Shoot in Raw + JPG shooting mode; we tried it out down at the Beach with a fast SD card and it worked fine at shooting Raw images for Kite Surfing.
But it in 90% of cases it is probably easier to actually just shoot in JPG and use Lightroom on the JPGs.

The original volleyball indoors photo shown below was dark and dull due to the high shutter speed used in an indoor stadium. The after photo was produced by taking the JPG image from the camera into Lightroom. Yes Lightroom is great for fixing dull indoor jpg files!
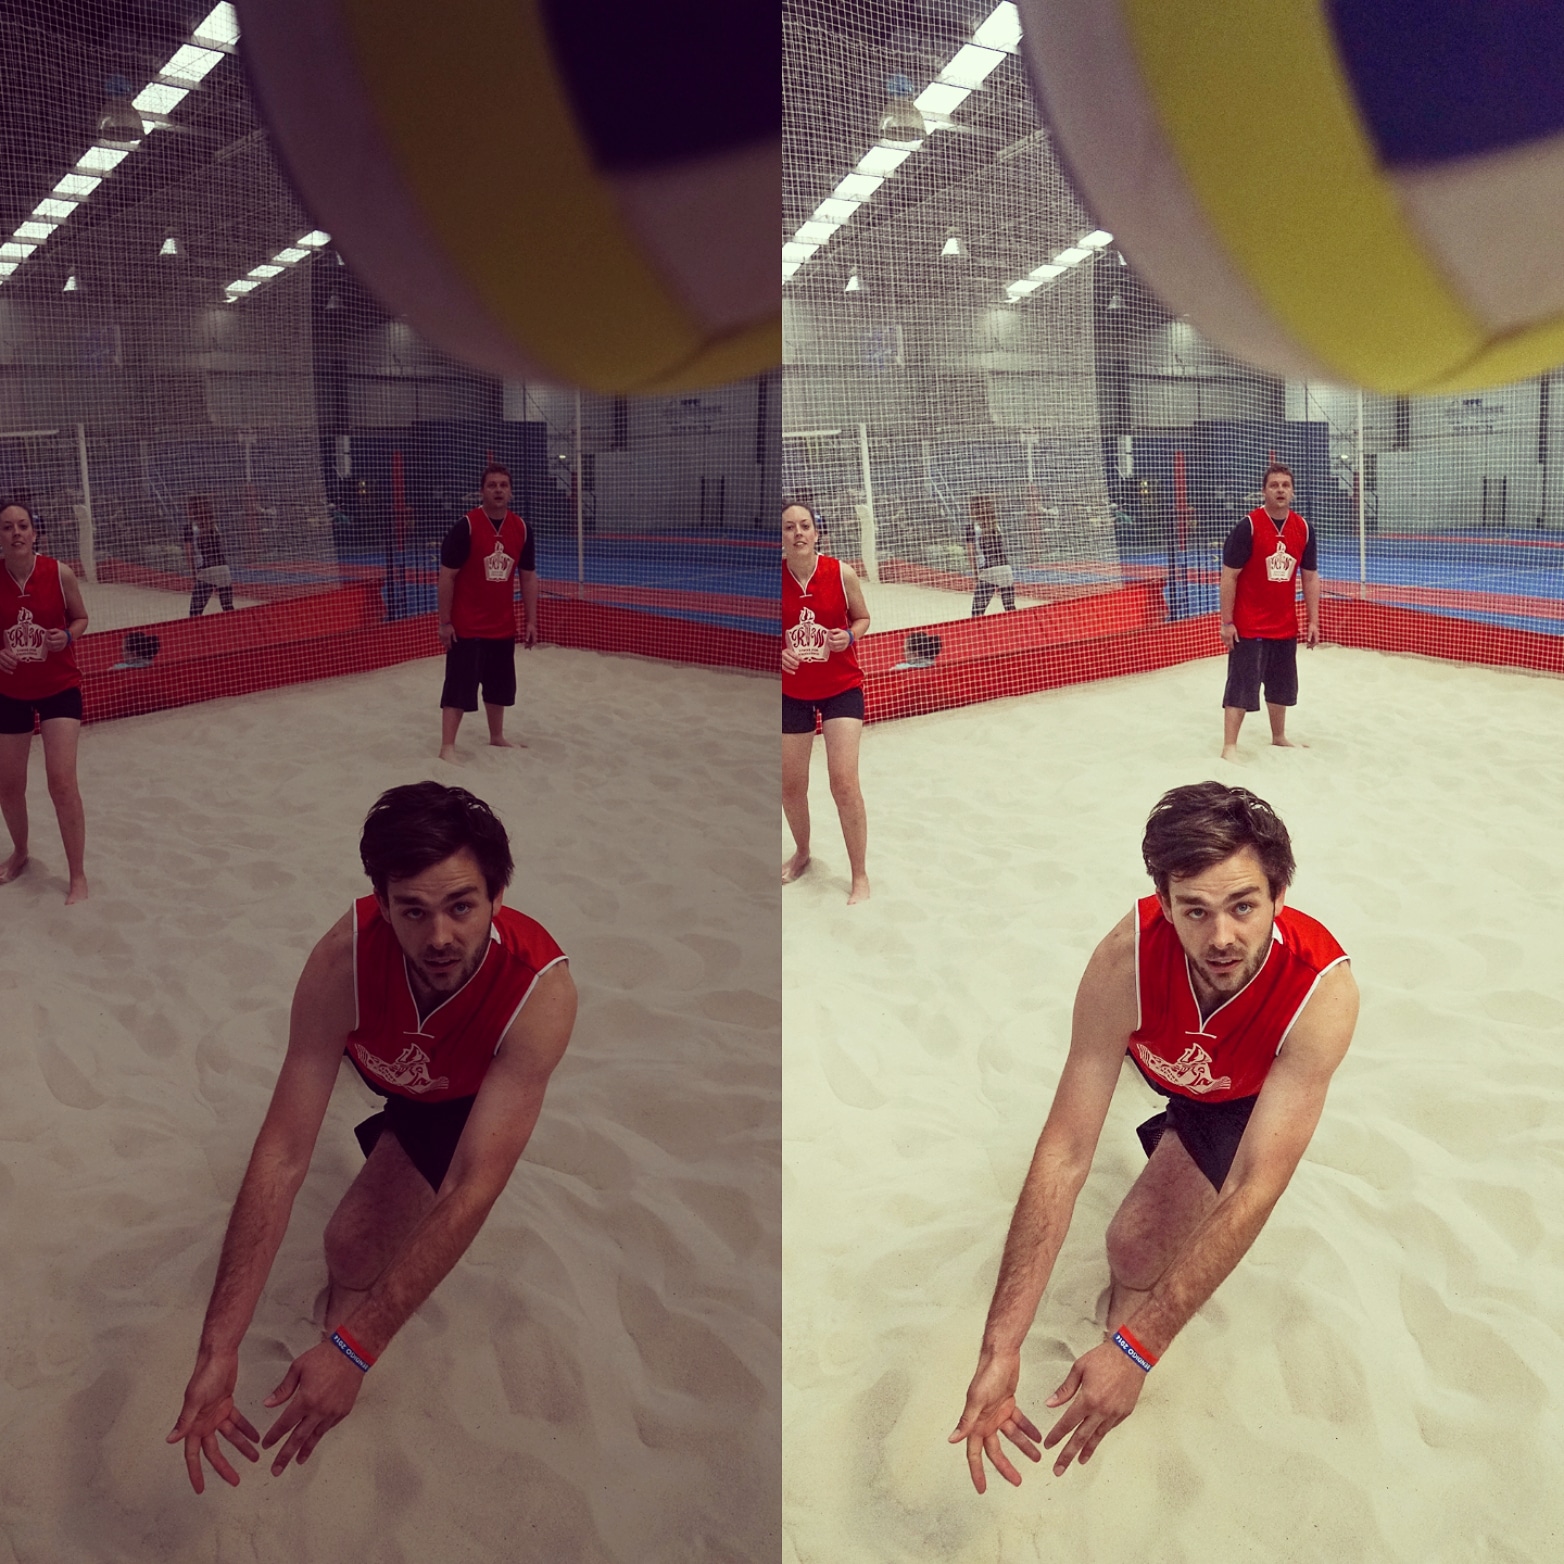
How to do Sports Photography Lightroom Before After
(Click Image to View Full Size)


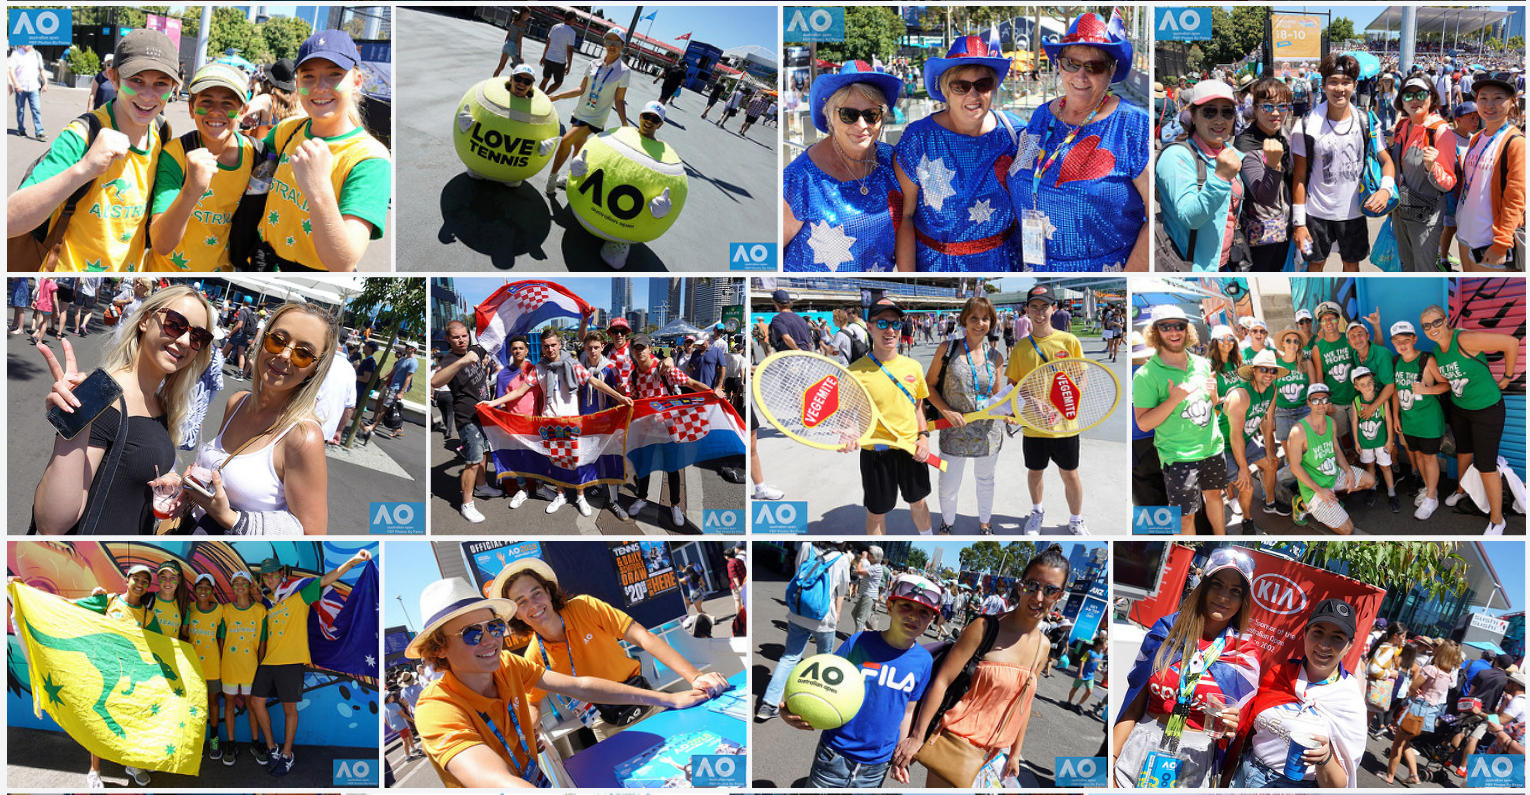
Extra Tip – People Pictures

At major events also take photos of Spectators, and casual shots of the Players.

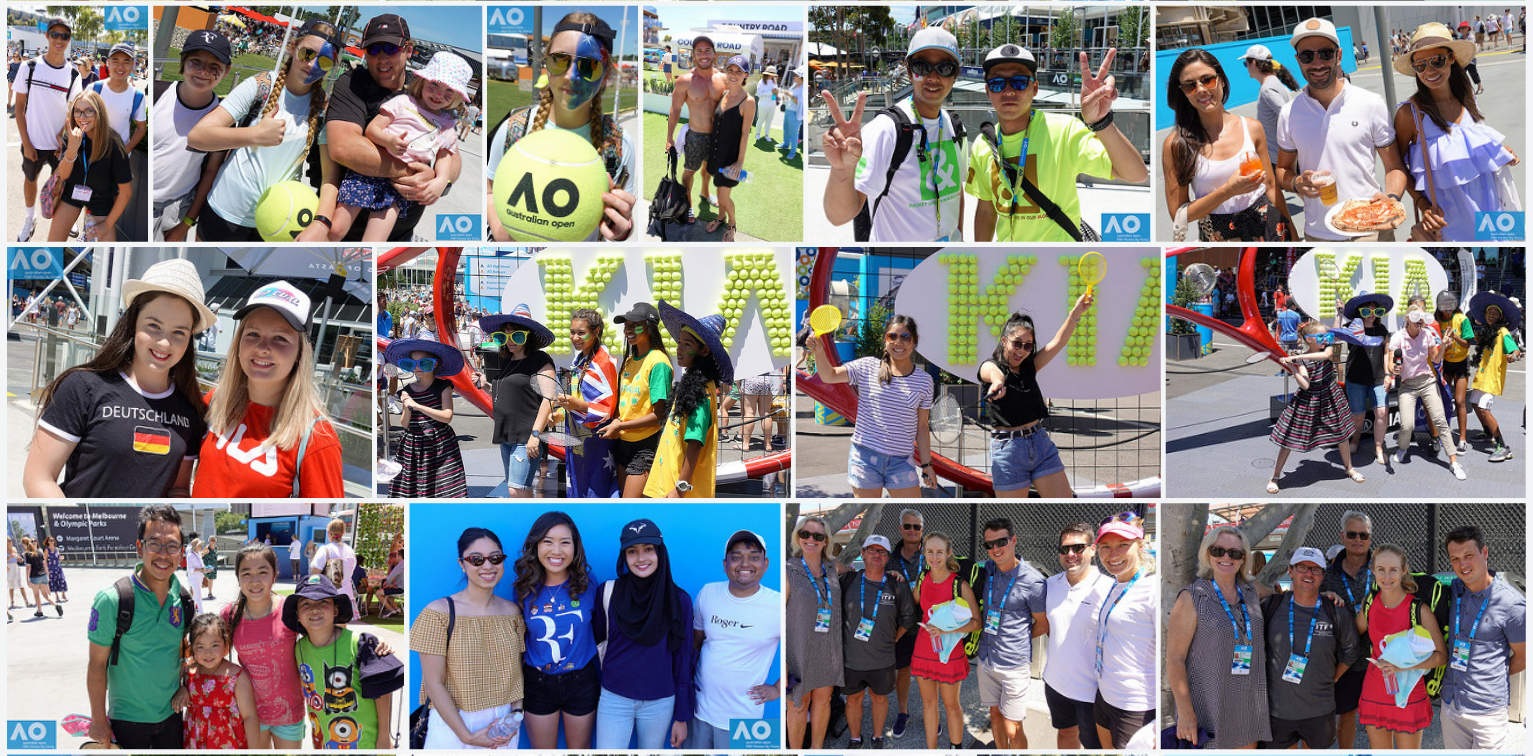
People love looking at “People Pictures”,. These work well in the middle section of your final album to break things up and add some interest.

How to do Sports Photography Aus Open Green Shirt People
(Click Image to View Full Size)

We look at this as “the difference that makes the difference”.

Check out the following Tennis Album to see what we mean.

Tennis Album with People Pictures

Most photographers at Sporting Events only do action shots and do not even think about getting some people images to complement these.

Naturally you need to ask for people’s permission first when taking any images, but we have found that 80 percent of people are usually in a great mood just being out and about at a sports event, and are quite happy to be in a group photo.

Click either the image or link below to check out our People Pictures from the Australian Open Tennis.

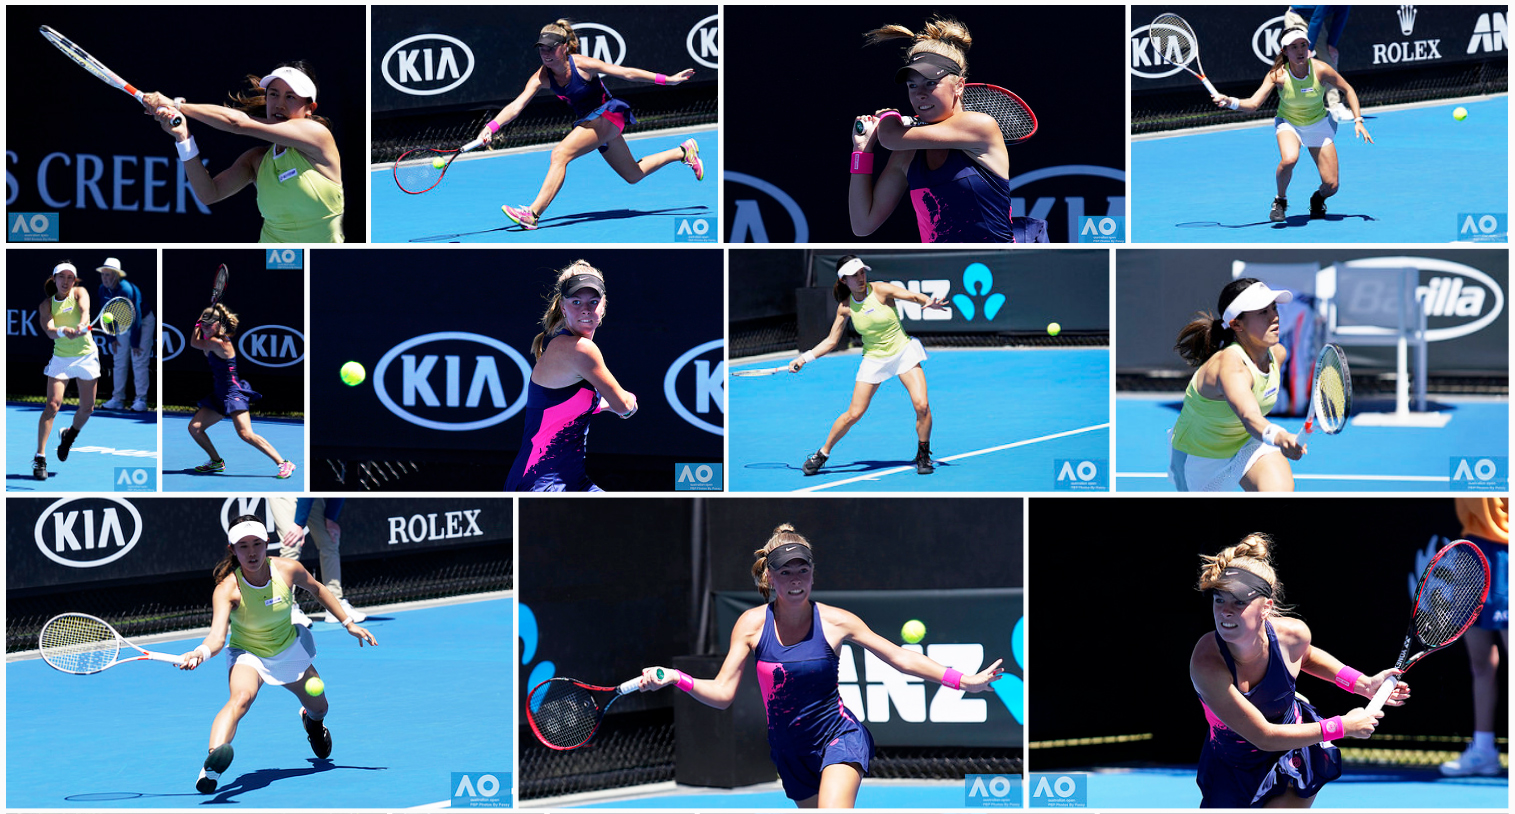
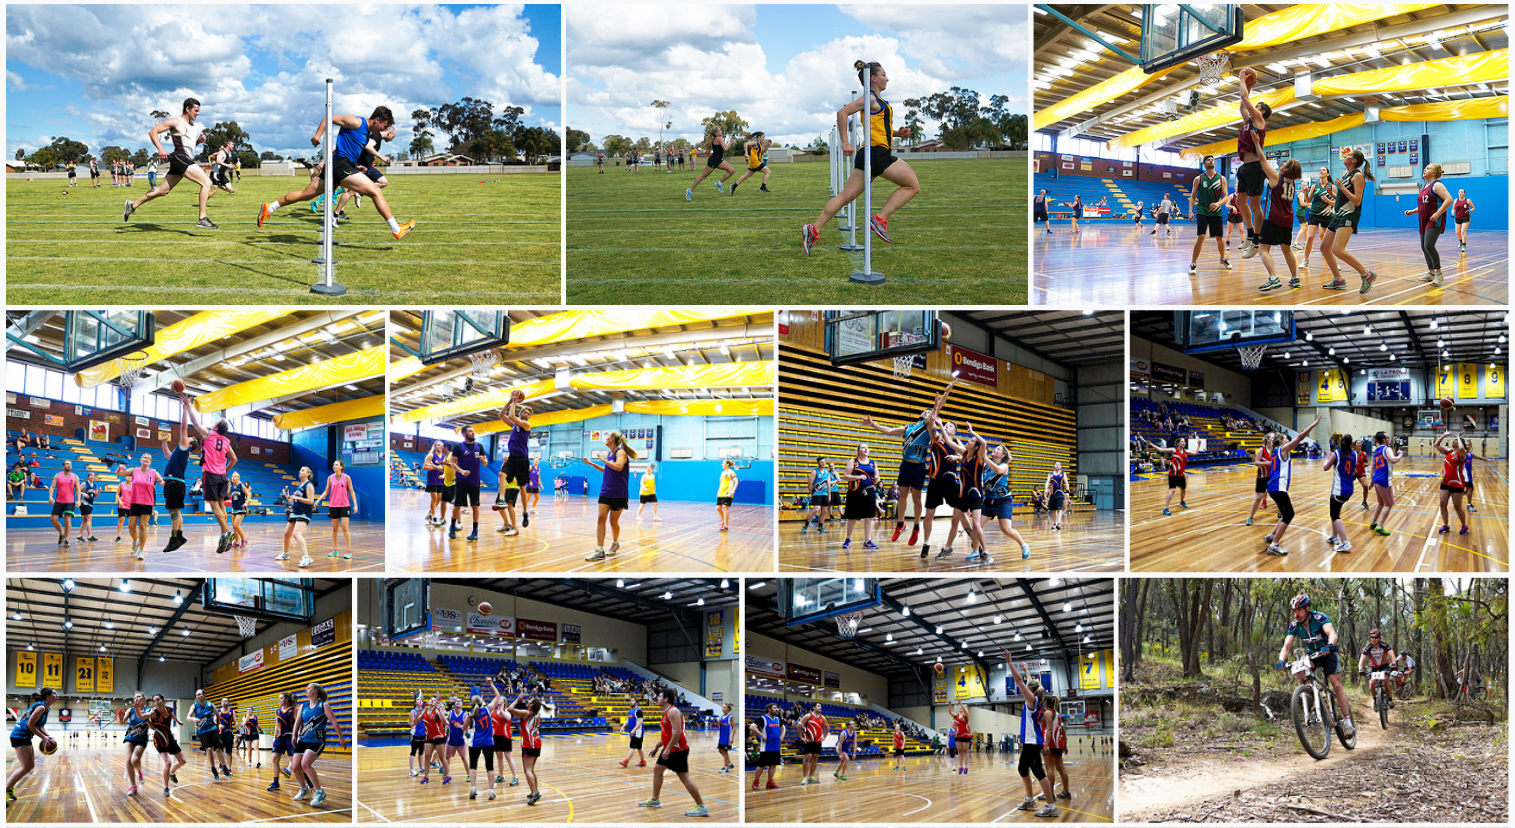
Sports Photography Collage 01

Australian Open People Pictures


Shutter Speed

High Shutter Speed is the key fundamental of Sports Photography, and so it warrants discussion in some detail.


Definition of Shutter Speed

Every digital camera (except the Sony A9) has a shutter which opens and closes quickly to let light through the lens to the image sensor.

Think of the shutter as like being in a dark room during the daytime, and opening and closing a set of venetian blinds quickly to let a burst of light into the room.

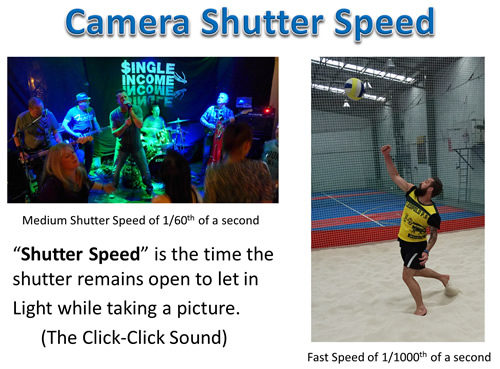
Basically a camera shutter is like a curtain in front of the camera sensor that stays closed until the camera fires and goes “click click”.

When the camera fires, the shutter opens and fully exposes the camera sensor to the light that passes in through the lens.

After the sensor is done collecting the light, the shutter closes immediately, stopping any more light from hitting the sensor.

The button that fires the camera is called the “shutter” or “shutter button”, because it triggers the shutter to Open and Close.

How to do Sports Photography Shutter Two

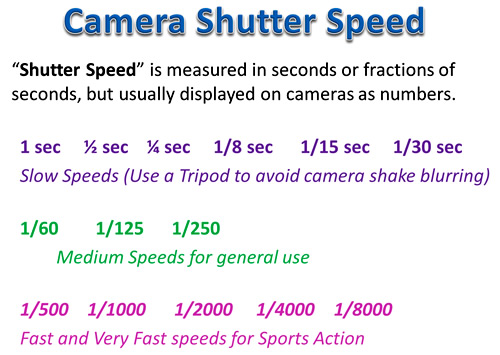
The speed at which the shutter opens and closes is usually a fraction of a second, such as 1/8, 1/15, 1/30, 1/60, 1/125, 1/250, 1/500, 1/1000, 1/2000.

The bigger the number in the bottom of the Fraction, the faster the shutter opens and closes.

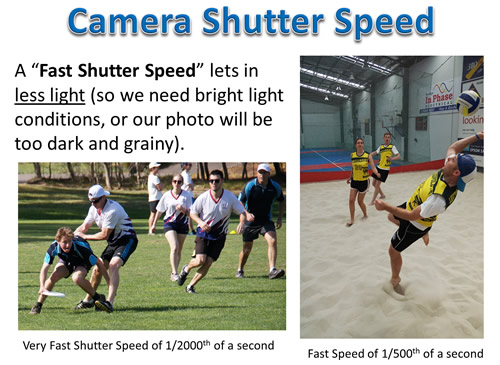
A “Fast Shutter Speed” is needed for Sports to freeze the action. But a fast speed lets in less light, and so we need good lighting conditions.

How to do Sports Photography Shutter Three


Standard Shutter Speeds

“Shutter Speed” is measured in seconds or fractions of seconds:

1, 1/2, 1/4, 1/8, 1/15, 1/30, 1/60, 1/125, 1/250, 1/500, 1/1000, 1/2000, 1/5000

Note that the bottoms of the fractions always double, except for the jumps between 1/8 and 1/15, and 1/60 and 1/125.

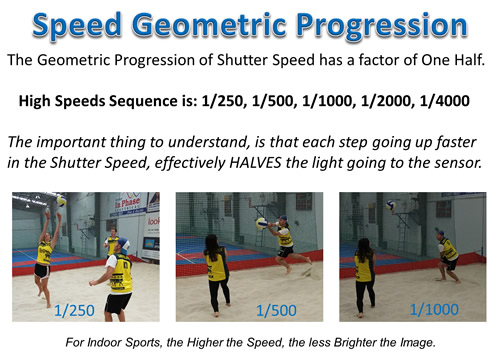
The doubling of the bottom of the fractions is a mathematical pattern called a “Geometric Progression”.

The jumping of 1/60 to 1/125, instead of 1/60 to 1/120, is deliberately designed that way so that the doubling pattern is simpler for the 1/125, 1/250, 1/500 end of the Range.

There is also the out of sequence jump between 1/8 and 1/15 for the same reason.

How to do Sports Photography Shutter Five

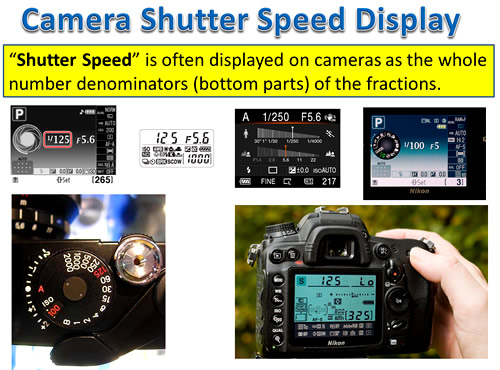
Note that the Speed is usually displayed as whole numbers on cameras, due to LCD and Viewfinder sizes.

Eg. 1, 2, 4, 8, 16, 30, 60, 125, 250, 500, 1000, 2000, 5000.

How to do Sports Photography Shutter Seven

The above pattern where the numbers basically keep doubling is called a “Geometric Progression”.

The important consequence that photographers need to understand, is that each step between the numbers effectively halves the amount of light reaching the sensor.

Eg. If we give the shutter an open/close time which is twice as fast, we only let half as much light in.

How to do Sports Photography Shutter Nine

Many modern Digital SLR cameras also have in between Shutter Speeds which can be dialled up and used.

For example in between 1/60 and 1/125, there might be speeds of 1/80, or 1/100, which are also available.

These in between values allow finer increments of speed increase and consequent light reduction.


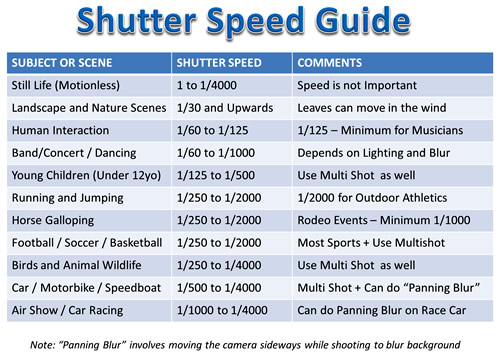
Shutter Speed Guide

How to do Sports Photography Shutter Ten

“Panning Blur” involves tracking the moving subject with the camera using multishot mode.

This creates motion blur in the background to give the viewer a sense of the speed.

Eg. For Panning Blur on a Runner in the Park, use speeds of 1/30, 1/60, or 1/100 so that the subject is captured, but the background is blurred.

The following video shows an example of how to do “Panning Blur”.


Fast Shutter Speeds for Sports

Capturing the action in Sports can be a trade off between freezing the action, and having enough light coming in through the shutter to get a good clear picture.

Outdoors in bright sunlight we are usually okay, and if we set our camera to “Sports” Mode, it will use a very fast speed like 1/2000 and get good clear shots.

Outdoors it is even better to use full Manual Mode and do higher shutter speeds like 1/3200, 1/4000, and possibly even 1/8000 if your camera can handle these and still produce good quality bright shots.

That way you are guaranteed of freezing the action, and also removing any blur that might come from your hands shaking the camera. Even the slightest shaking when being zoomed right in can make a photo blurry.

So the highest shutter speed possible is always the way to go, even with modern 5-axis auto stabilized cameras like the Sony A99II.

How to do Sports Photography Shutter Eleven

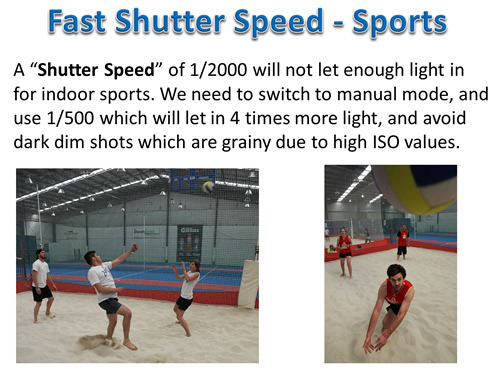
However for Indoor Sports, even if the stadium appears to have good lighting, a Shutter Speed of 1/2000 can make our shots come out too dark.

You can try shoot at 1/2000 and increase the Camera’s ISO Brightness to compensate, but be aware that high ISO beyond 400 can often introduce a lot of noisey graininess into photos. This graininess can be partially removed afterwards in Adobe Lightroom, but it is best to avoid having to do this if possible.

We need to remember that our human eyes adjust extremely well to reduced lighting conditions, but cameras do not!

If in “Sports” or “Auto” mode, we take an indoor shot, and it comes out too dark, then we will not be able to use our camera in automatic mode.

In these situations we can do some basic mathematics and figure out that 1/2000 + 1/2000 = 2/2000 = 1/1000.

This means that if we reduce shutter speed from 1/2000 down to 1/1000 we will get twice as much light onto the camera’s sensor.

If we change 1/2000 to 1/500 we will get four times more light, and reducing 1/2000 down to 1/250 will give us 8 times more light.

We will need to put our camera into either “Manual” mode “M”, or “Shutter Priority” mode “S” to be able to make these changes.

How to do Sports Photography Shutter Twelve

The trade off will be that we might not freeze the action perfectly, but sometimes a slightly blurred ball can help show some fast movement in the photo, and so it is actually a good thing.

Eg. Sometimes a slower Shutter Speed which does not totally freeze the action is good for two reasons:

Firstly it will let in more crucially needed light if shooting in an indoors situation.

Secondly having some blur gives a sense of fast movement occurring as in the “One that Got Away” Beach Volleyball action shot below:
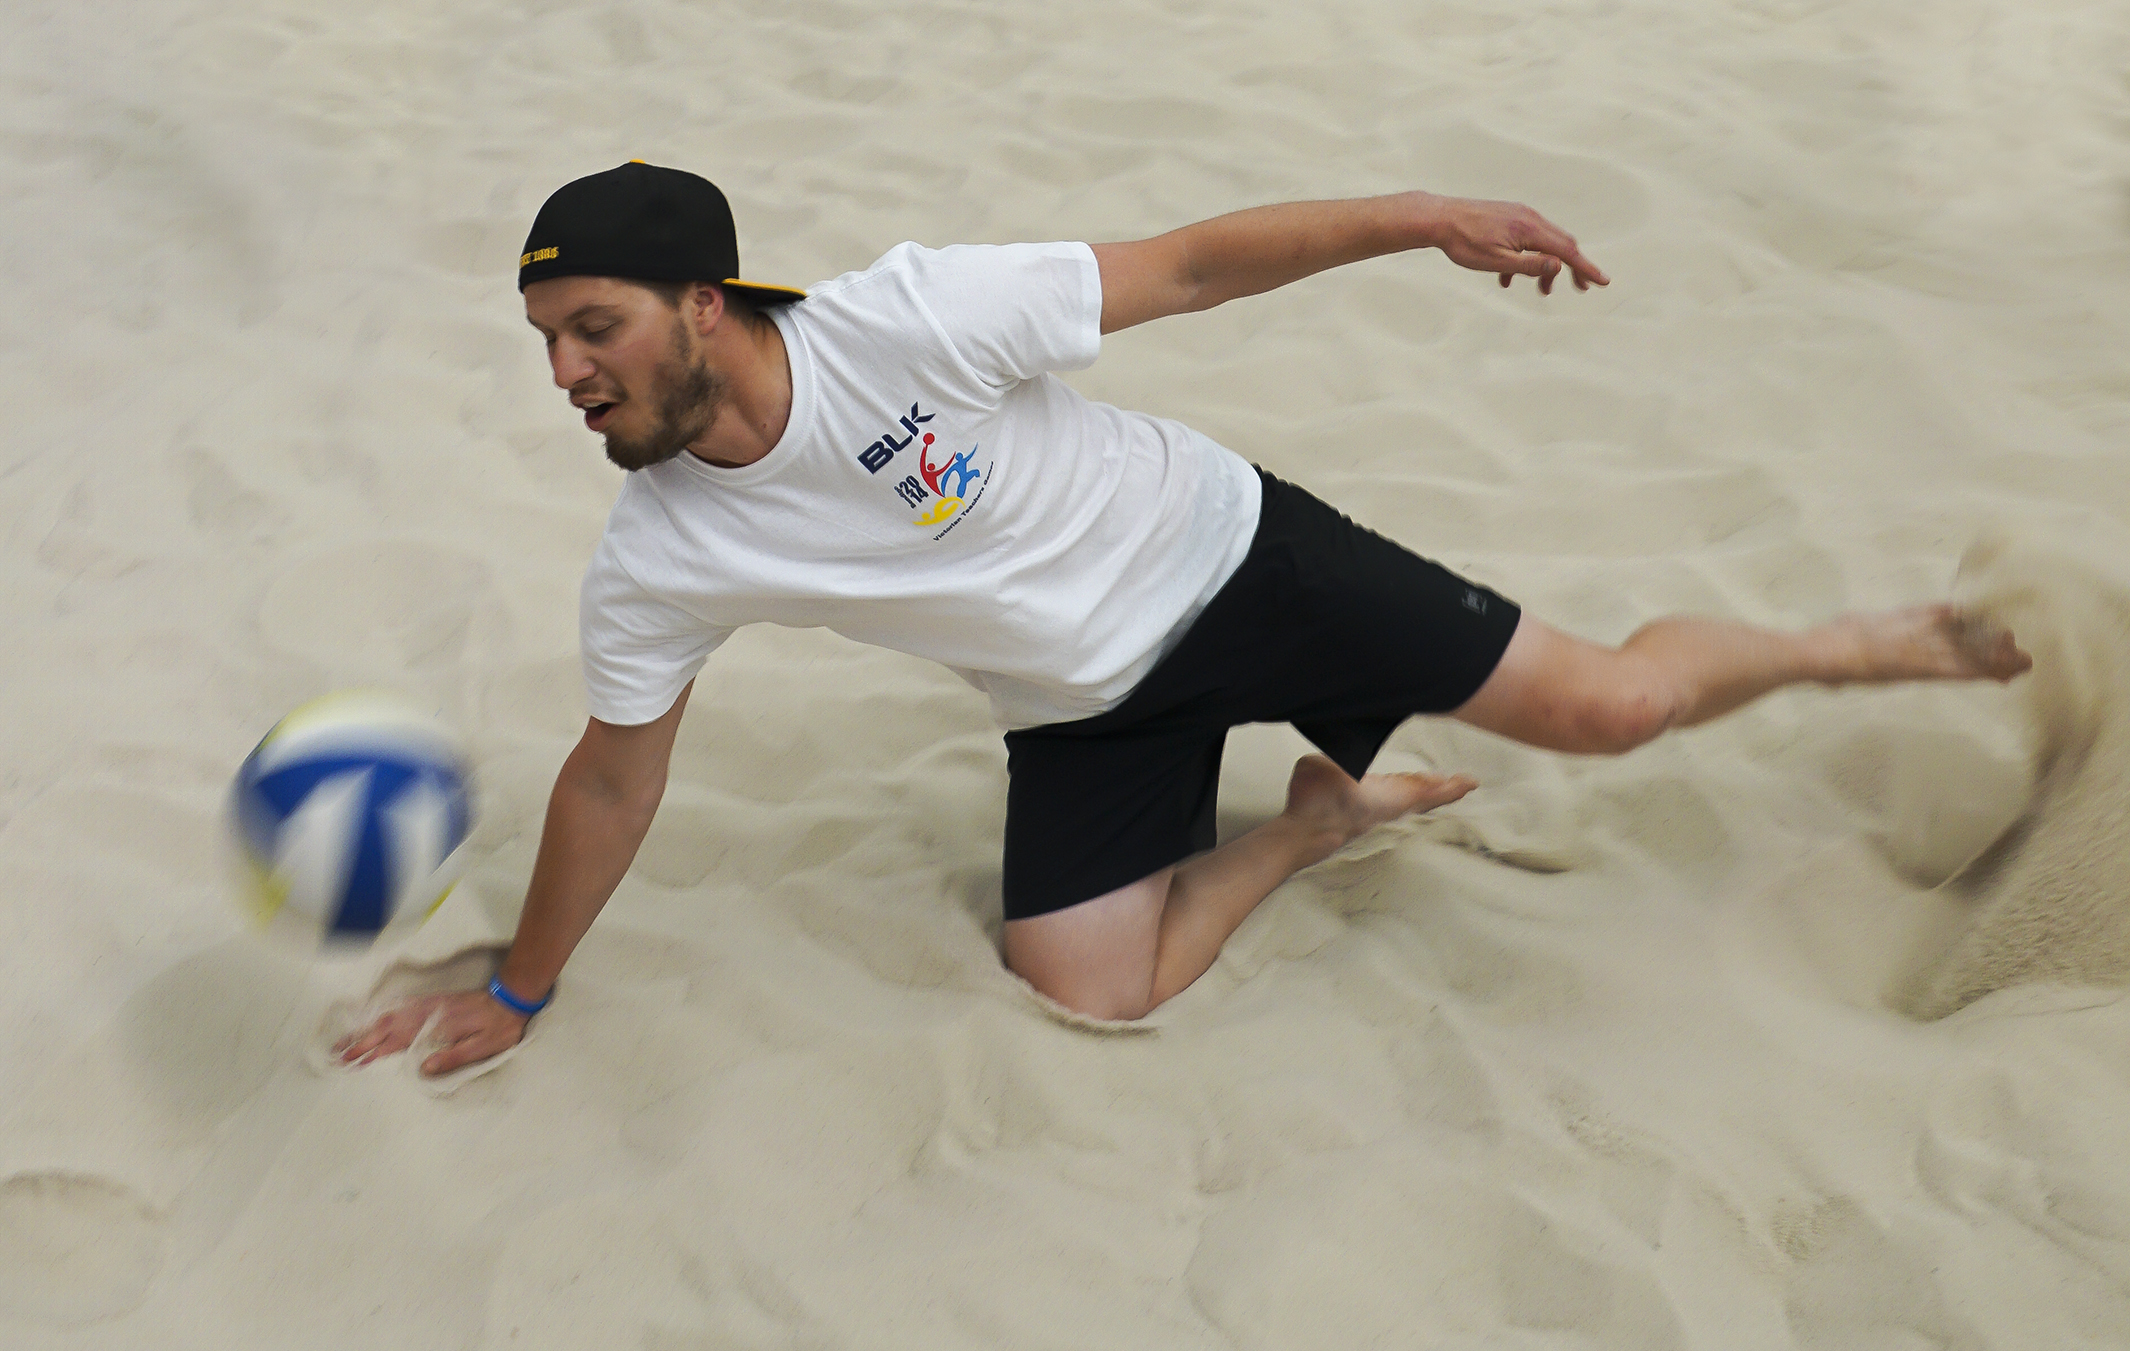
How to do Sports Photography Blurred Volleyball
(Click Image to View Full Size)


Shutter Speed and Lens Aperture

A Faster Shutter Speed will let us freeze the action, but will let less light into the camera.

In bright daylight sports this will probably not be a problem as there is plenty of bright light available.

For sunny outdoors, we can capture action sports using a cheap f3.5 to f5.6 Zoom Lens and a speed of 1/1000 to 1/2000.

However for indoor sports, with less light, using a high / fast shutter speed to freeze the action can result in very dark pictures.

This is because we do not have enough light entering the camera when the shutter speed is higher than 1/250.

Increasing the ISO Light Sensitivity to lighten up the photo, can often result in ugly dotty grainy effects on our photos.

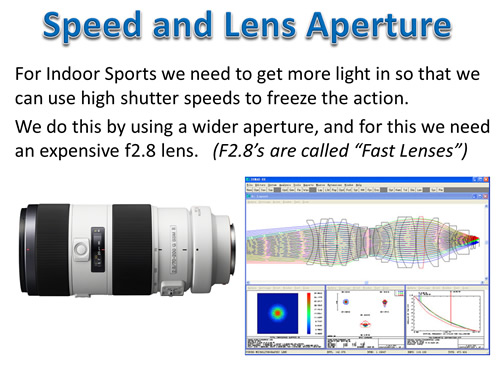
The only solution is to get more light in using a wider aperture, and for this we need an expensive f2.8 lens.

How to do Sports Photography Shutter Nineteen

This is why f2.8 zoom lenses, and f1.4 portrait lenses are called “Fast” Lenses.

It is because these lenses can supply enough light using their wide open apertures to allow us to use a high shutter speeds indoors of 1/500, 1/1000, and even 1/2000.

f2.8 Fast Zoom lenses are very expensive due to the amount of high precision optical components and electronics inside them: eg. $2500 to $15000 to $45000 and beyond.

These lenses can be used for both Indoor and Outdoor Sports and are usually White in Color, and look like big “Telescopes” or “Bazooka Guns” mounted on cameras.

The other great thing about expensive f2.8 zoom lenses is that they can also be used for shooting high quality clear photos and videos indoors.


Using Burst Mode for Sports

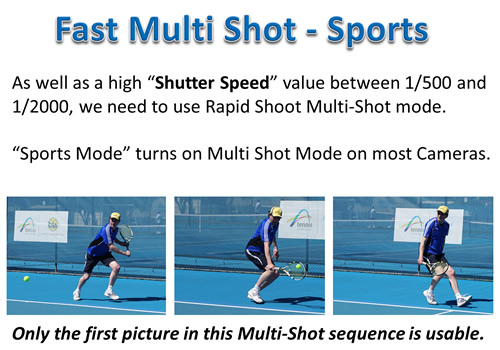
For fast moving ball sports, especially Tennis and Volleyball, a lot of shots will be unusable because the ball moves so fast it is often out of frame by the time the camera fires.

The solution to this issue is to make sure that “Burst Mode”, or “Multi Shot” or “Rapid Fire” is turned on, so that several photos are quickly taken in a row, while the camera makes a machine gun type sound.

We can then pick the best photo from the multi shot sequence and use that one in our photo album.

Most cameras have a rapid shoot preset “Burst”mode that can be dialled in, and/or they have “Sports” as one of their Scene Modes, and “Sports” mode will automatically turn multi shot on.

How to do Sports Photography Thirteen

Make sure Burst Mode is used for all Sports Photography, not just Tennis and Volleyball. Having a full sequence of action is always going to give you the best chance of capturing a great shot.

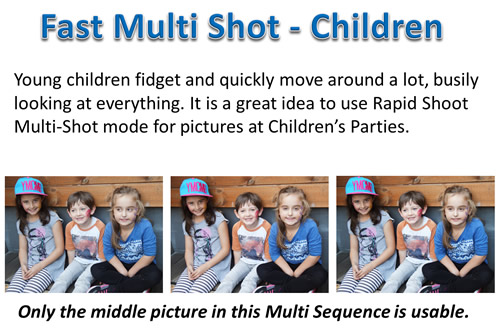
Burst Mode Multi Shot mode is also very useful to use at young Children’s Parties.

Kids move around a lot and are very easily distracted. It often takes several shots to get one where they are all sitting still and looking at the camera.

How to do Sports Photography Shutter Fourteen


Cameras for Sports Photography

The following discussion covers various Sony cameras that can be used for Sports Photography.

This includes the Sony A55, Sony RX100, A77II with Minolta Lens, Sony A77II with Sony Lens, Sony A99II, and Sony A9.

The sequencing of the cameras in the list above is from cheapest to most expensive.


Sony A55, A57, A65 Series

These are old cropped sensor APS-C cameras, so any lens you put onto them is actually 1.5x more powerful.

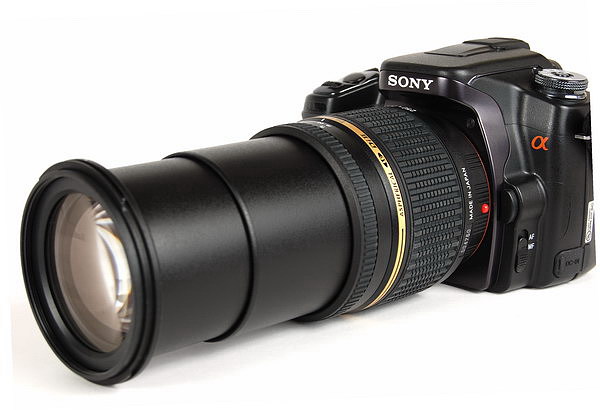
Buying one of these old cameras second hand, with the Sony DT 18-250mm or the identical Tamron 18-250mm lens gives a good beginners sports setup for under $1000 Australian ($780 US).

With a bit of luck in the auctions on Ebay you might even get this setup for as low as $550 Australian ($430 US).

How to do Sports Photography Tamron 18-250 Lens

An 18-250mm lens on an old cropped camera like the A55, 57, 58, or 65, has a 35mm Full frame equivalent of 27-375mm and so gives a great range for Sports Photography.

My first Sports Photography setup was an A55 with the Sony DT18-250mm zoom lens.

The outdoor images were reasonable, but with the Aperture shrinking from 3.5 to 6.3 as you zoom into a subject, it was not very good indoors.

Here is a typical sports image taken with this camera setup.
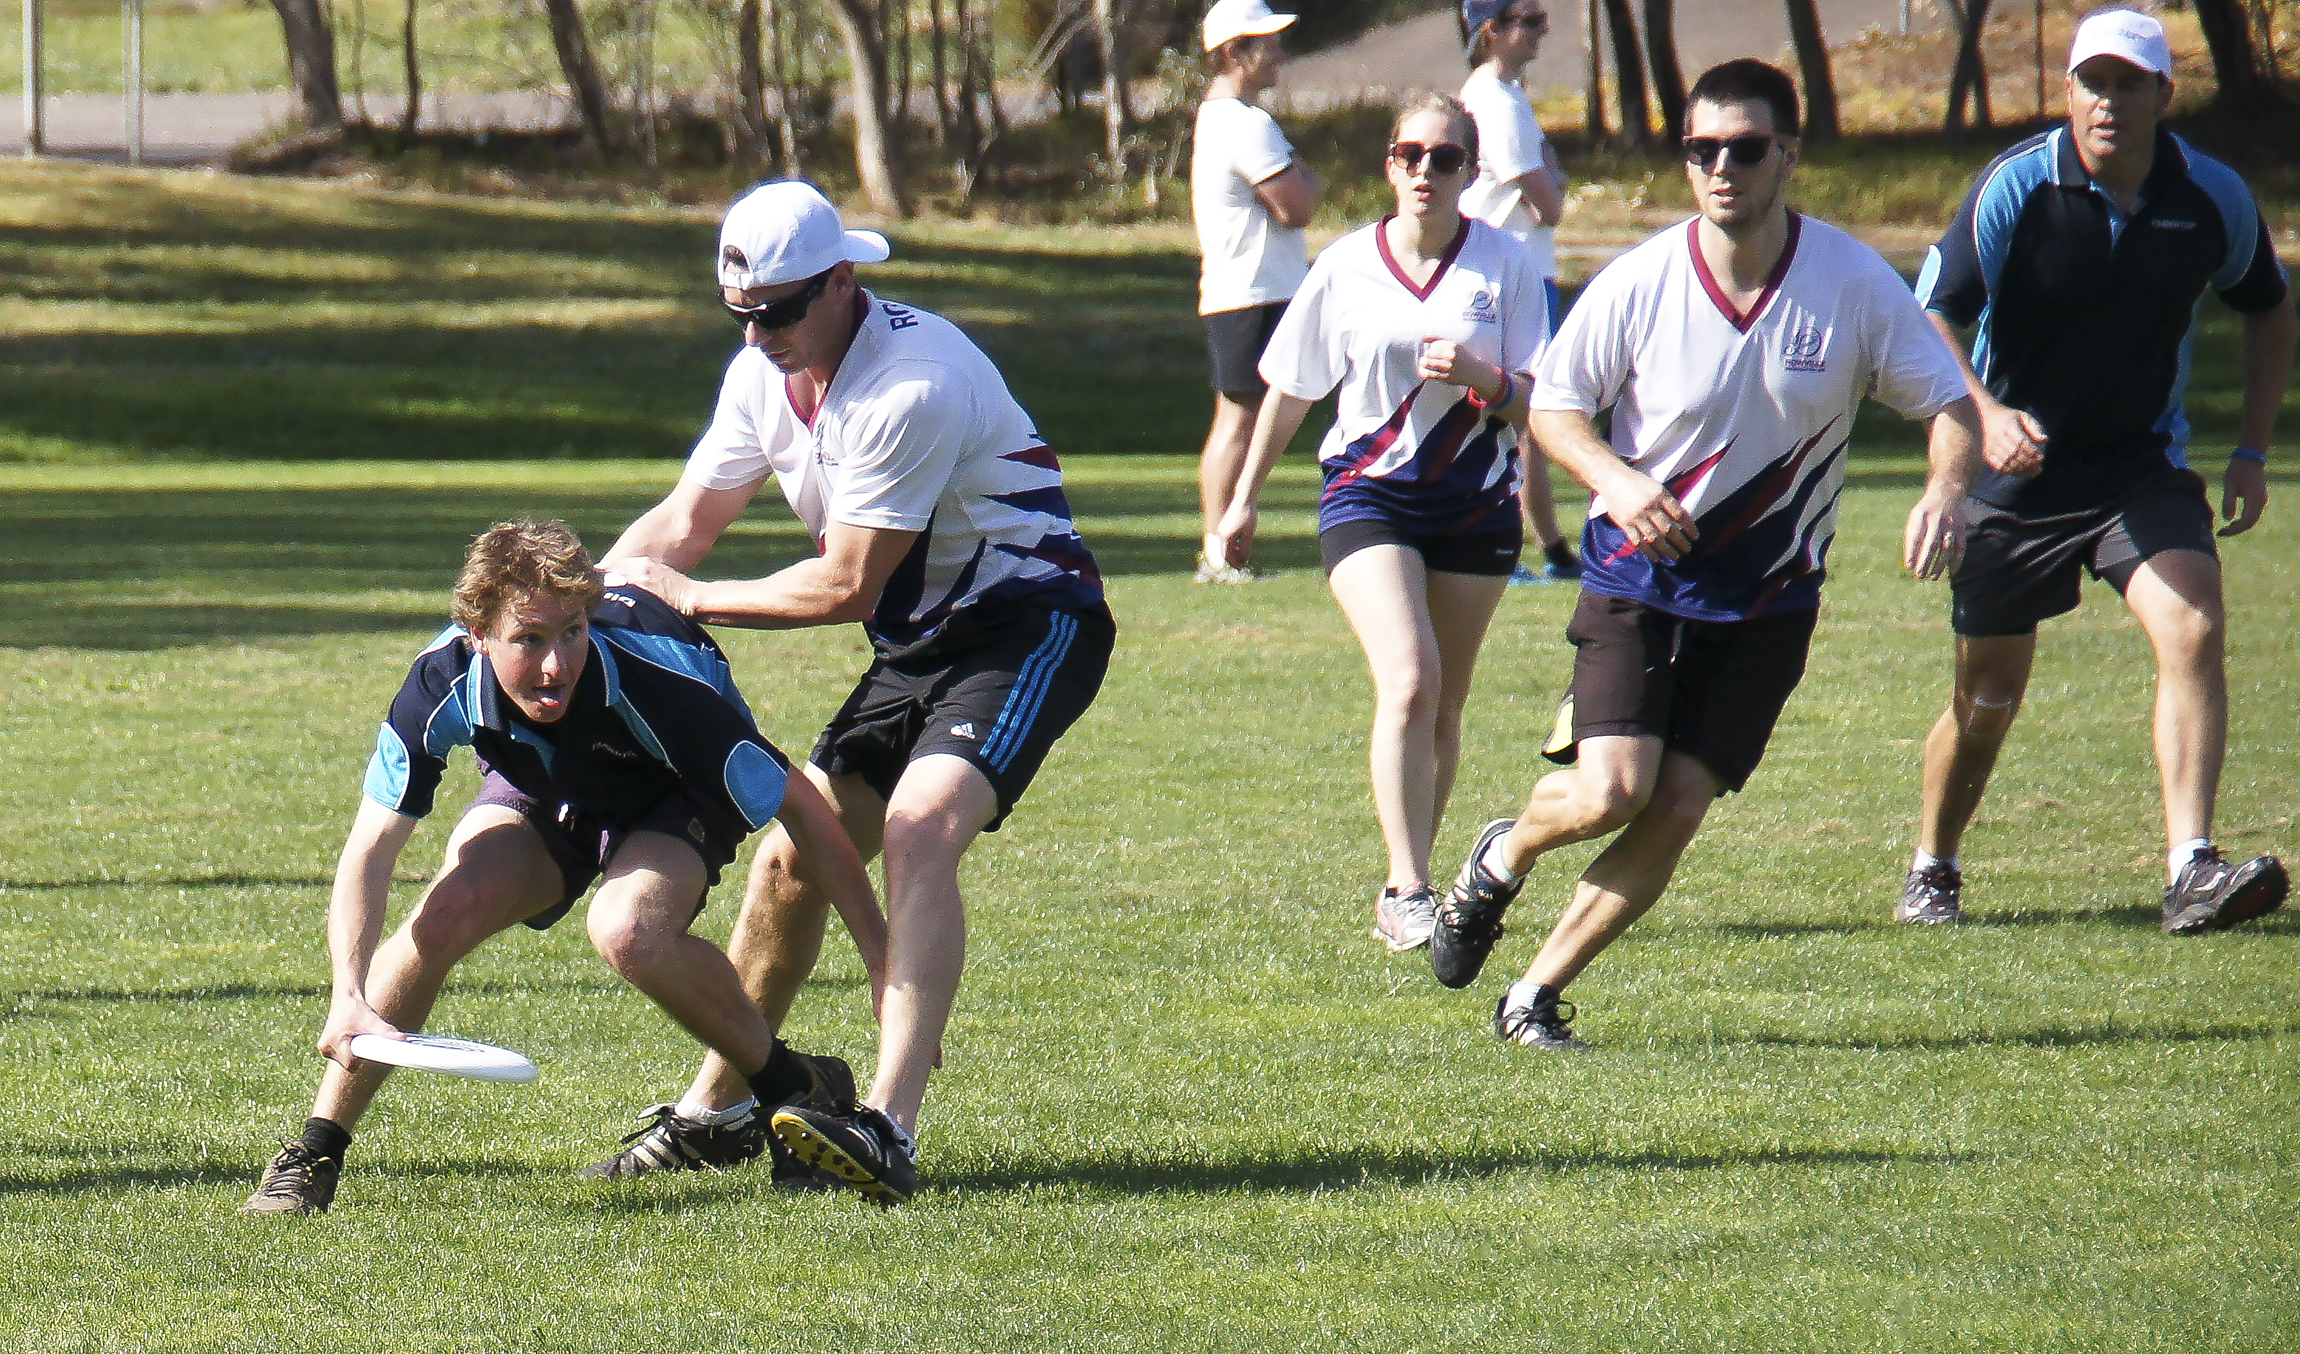
How to do Sports Photography A55 Frisbee Pic
(Click Image to View Full Size)

Typical Camera Settings:
Aperture F5.6 at 135mm Zoom
Shutter 1/2000th
ISO 800

We highly recommend to Post Process JPG images in Lightroom and Photoshop to reduce ISO grainey noise and sharpen up what will probably be fairly soft images straight out of the camera.


Sony RX100 Series

The Sony RX100 is a very compact high powered pocket camera. It has often been voted the best compact camera that you can buy.

The latest model is the Sony RX100V that can be obtained new for around $1100 Australian ($860 US) on eBay; older models can easily be purchased for $400 to $500 Australian ($310 to $390 US).
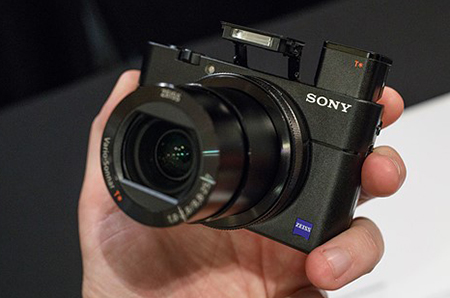
How to do Sports Photography RX100 in hand
(Click Image to View Full Size)

The RX100V is a very high performance compact pocket camera. It even has a pop up viewfinder which is essential for outdoor sports photography.

It has a 1 inch 20.1MP sensor, 24-70mm equivalent F1.8-2.8 Zeiss lens, and 24fps burst shooting in both JPEG and Raw with full autofocus and autoexposure.

We have found that set into Portrait Mode it is a brilliant people pictures camera, and used it for all of our People Pictures of sports fans at the Australian Open tennis.

Click either the image or link below to check out an album of these people pictures taken with the Sony RX100V.

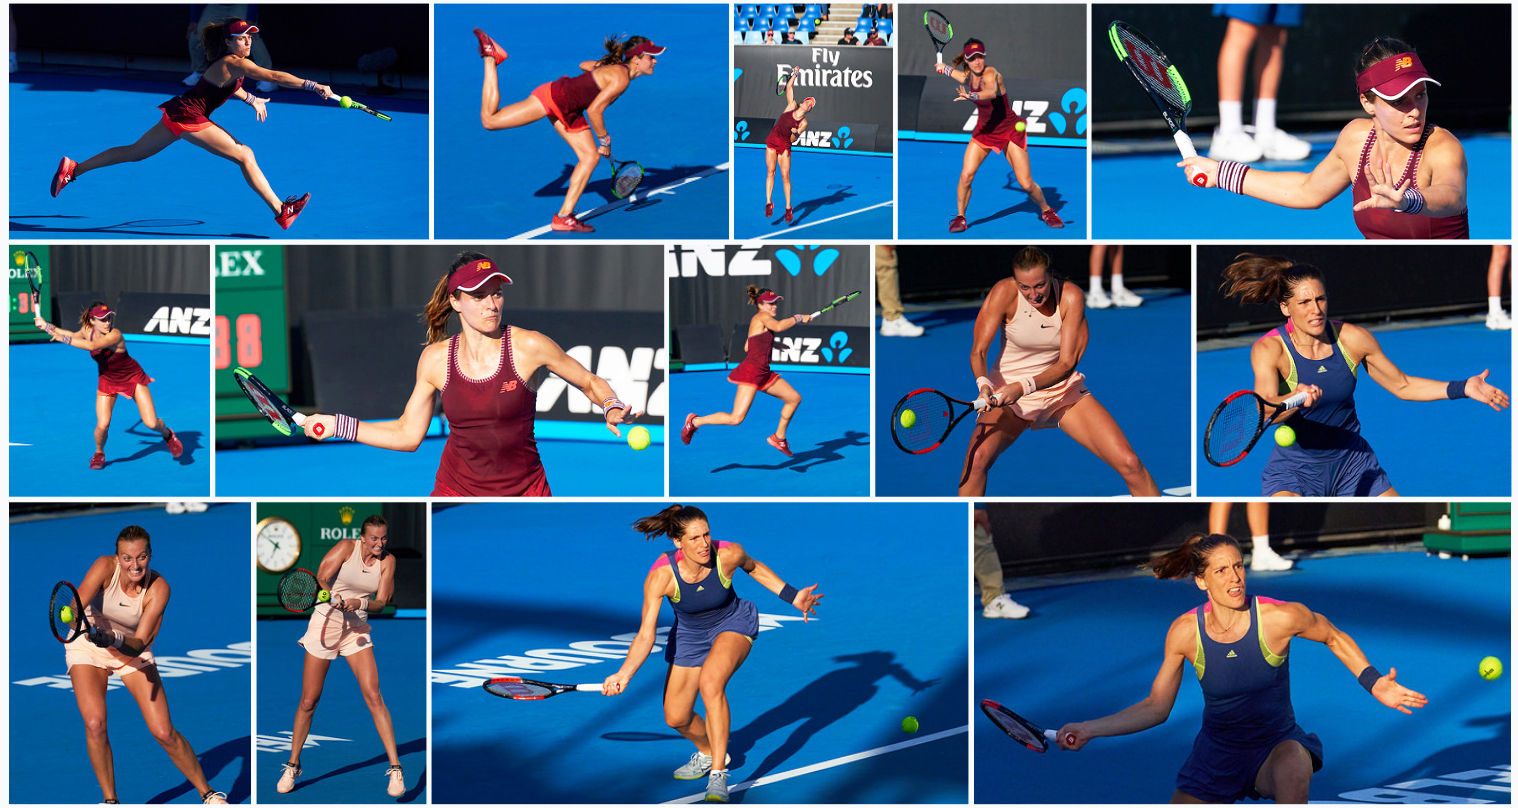
Sports Photography Collage 02

Australian Open People Pictures

Given its 24fps burst mode specification, the camera should be good for freezing fast action and getting sports photos.

We tried out the RX100V compact camera for some sports action tennis photos.

We used the camera’s SCN Sports Mode which seems to automatically set aperture to F2.8 and Shutter Speed to 1/1600th.
ISO in bright sunlight conditions then seems to be manipulated by the camera between 160 and 320 to get a bright exposure.

The camera shoots at up to 24 fps with tracking AF and so it has no problem freezing the action.

However we found you need to stand right on the court sidelines fence, and be no more than 3m to 4m away from the player to be able to get reasonable results.

Close proximity to the subject is necessary because the camera only has a 24-70mm zoom lens. Usually for sports photos on DSLR cameras a 70-200mm zoom lens is used, and so the RX100 zoom lens is very small and does not have much reach. At F2.8 the lens is fast and therefore should allow enough light at high shutter speeds to capture reasonable sports images.

The images looked okay previewed on the camera; however we found on the laptop zoomed in they were a bit “pastey” with smudgey skin features on players faces like one would expect at very high ISOs. Even though the images were shot by the camera at ISO 160 to 320, they were a bit overly bright straight out of the camera and looked like they had been shot at ISO 1600 or 2000.

HOWEVER, cropped and adjusted in Photoshop (reduce brightness of the camera exposure), and then put onto a phone the images are quite acceptable.

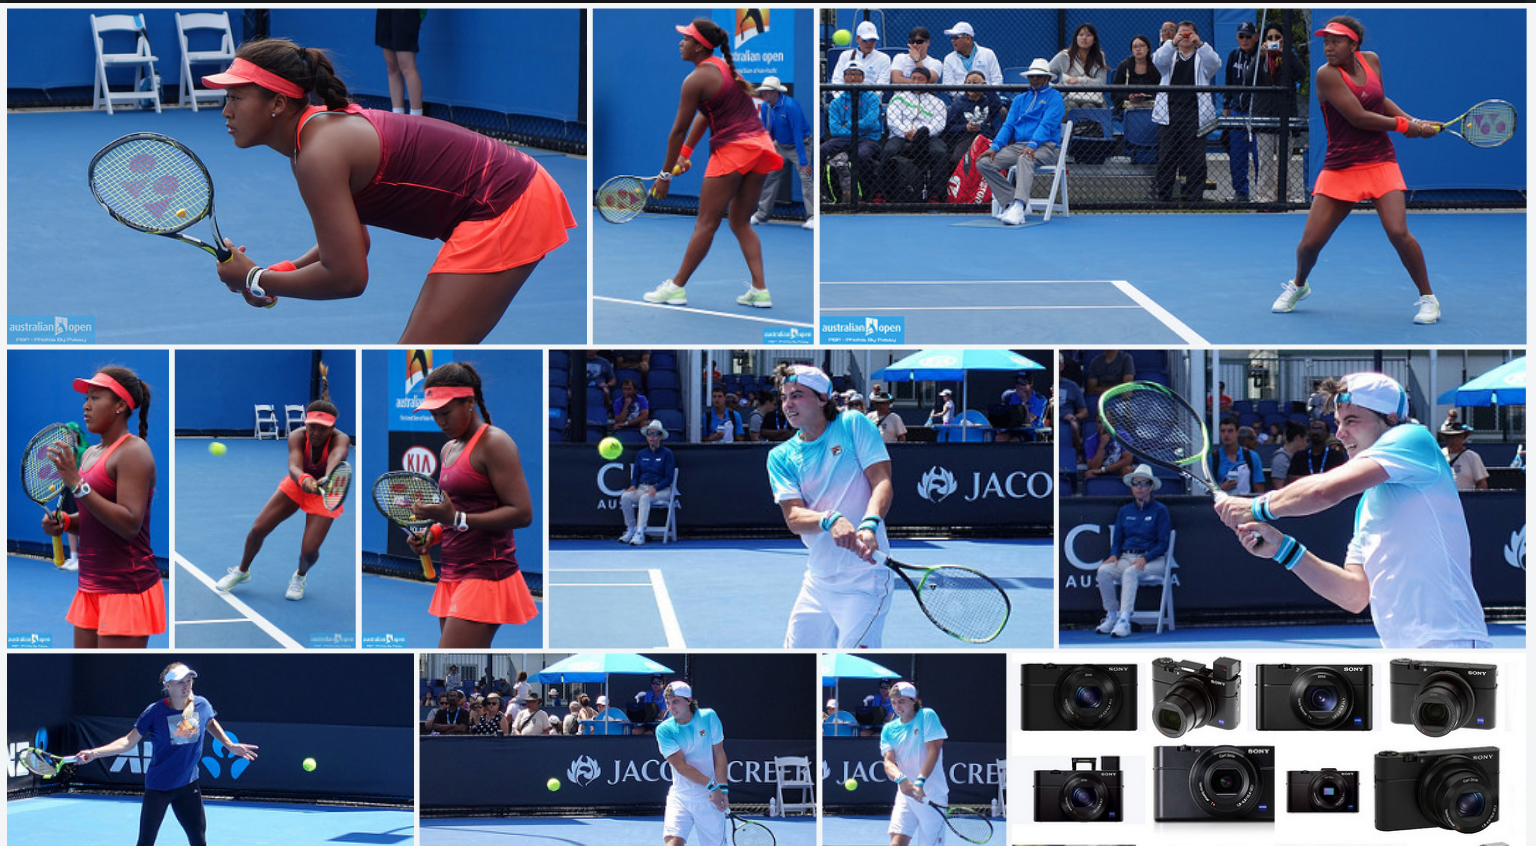
You can check out our small collection of sample images taken with the Sony RX100V and RX100II by clicking on either the image or link below.

Sports Photography Collage 03

Sony RX100V Tennis Photos

The female player in the orange was taken with the Sony RX100II and the photos of the male player were taken with the RX100V.

The resultant quality of the images indicates that the RX100II is quite adequate at close range.

It is also available for about one third of the price of the latest RX100V.

So our advice would be to just get an RX100II camera for doing some snaps if cost is an issue.

Verdict on RX100V Camera

The sports photos capablity of the RX100V is reasonable, but not good enough to warrant buying this camera just because you want a compact sports camera.

However the RX100V (and the earlier RX100 models) are great all round pocket cameras, and so if you have one, by all means try it out on Sports Photos.

As we mentioned previously, if you just want to take some close range sports pictures, and video is not important, then get the RX100II as it only costs a few hundred dollars (eg. about one third the price of the RX100V).


Minolta with A77II

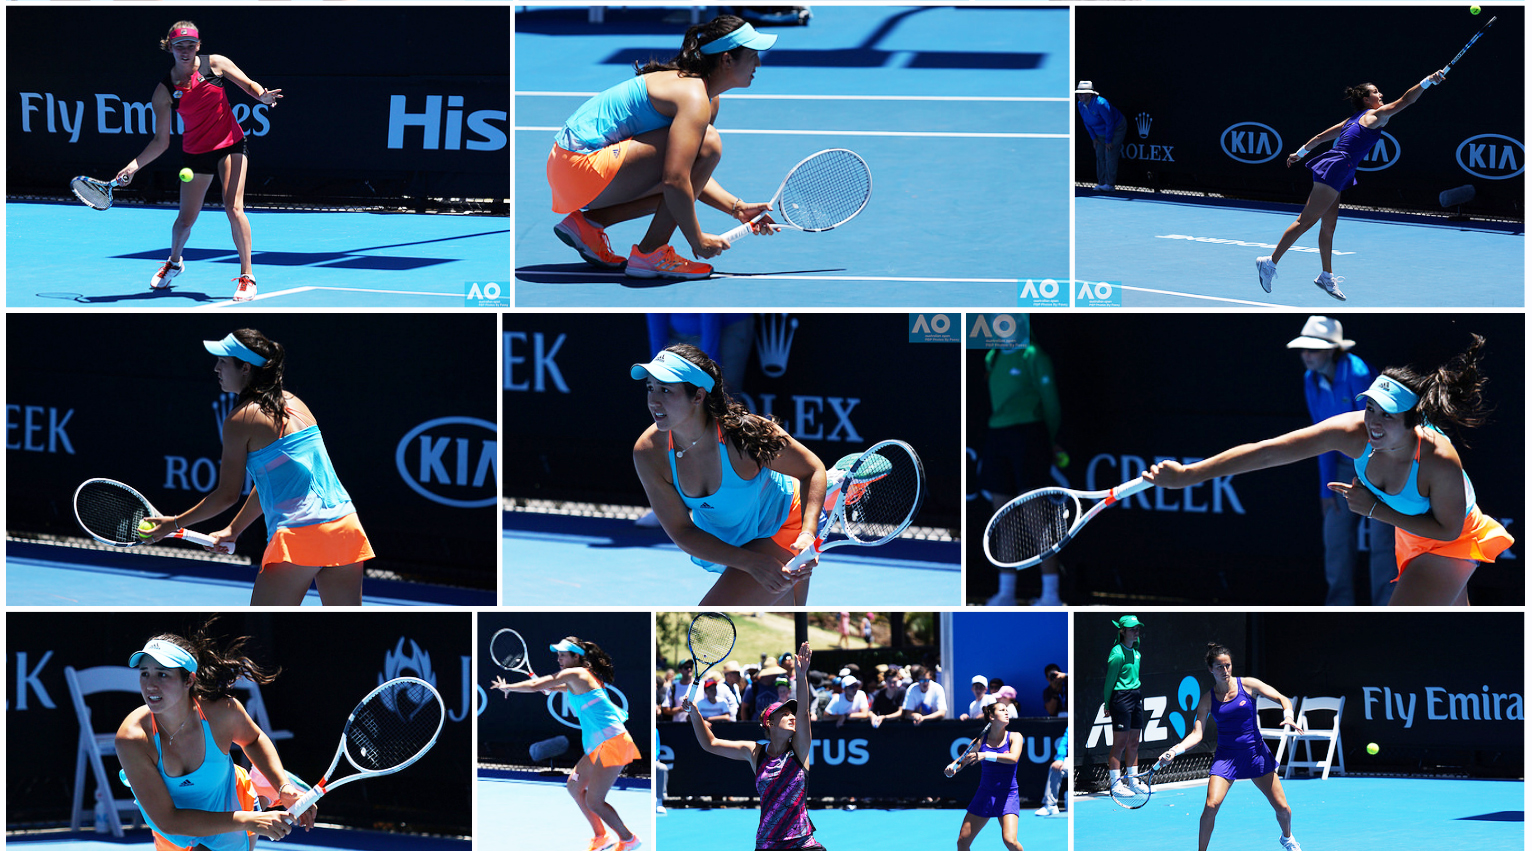
For photographing the Australian Junior Open we used our “old” setup for Sports Photos.

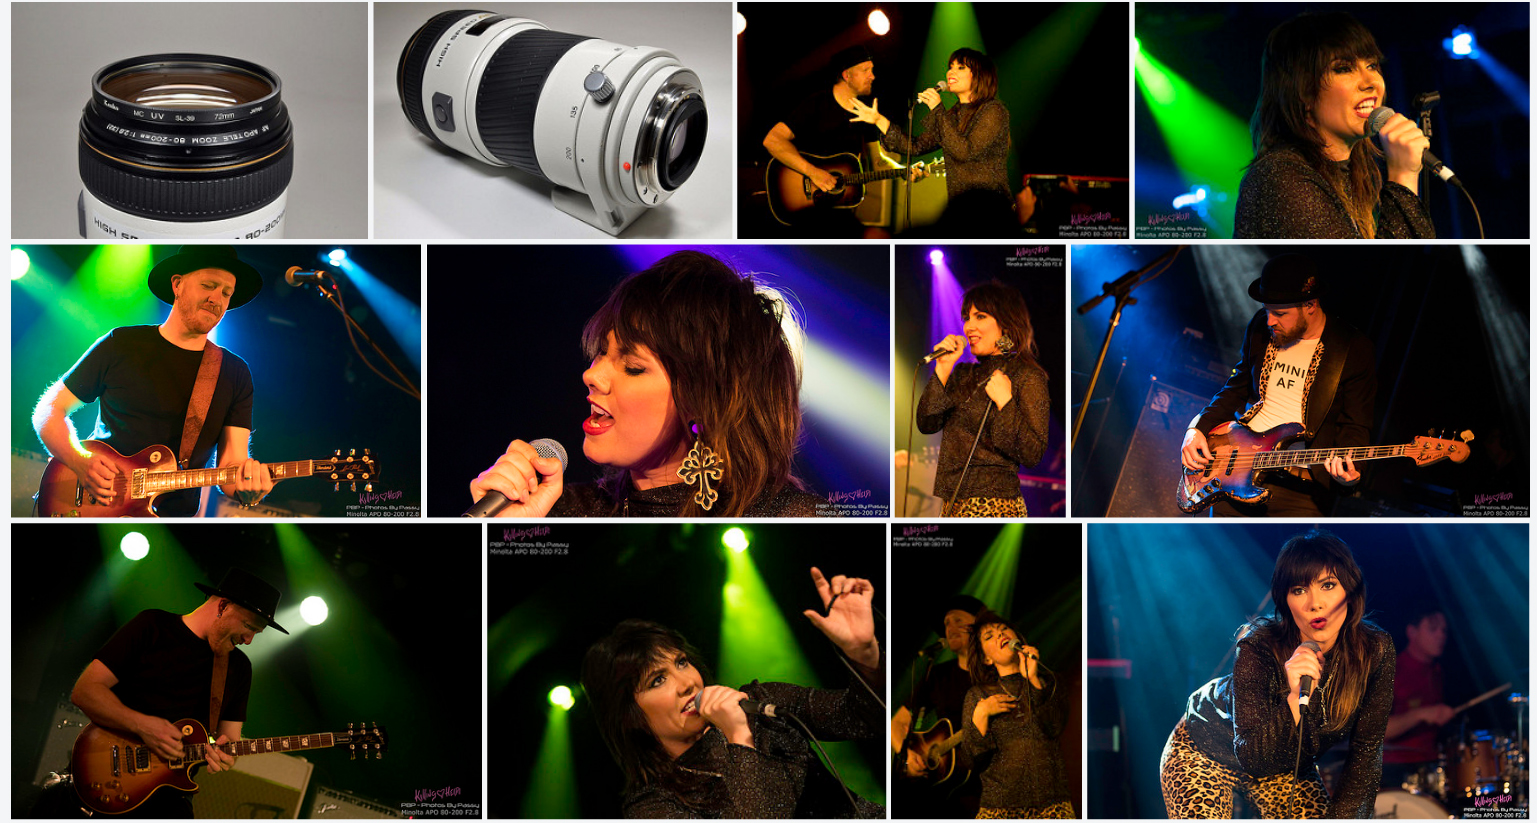
This consisted of the Sony A77II camera with the 1980’s Minolta 80-200 F2.8 APO high speed lens.
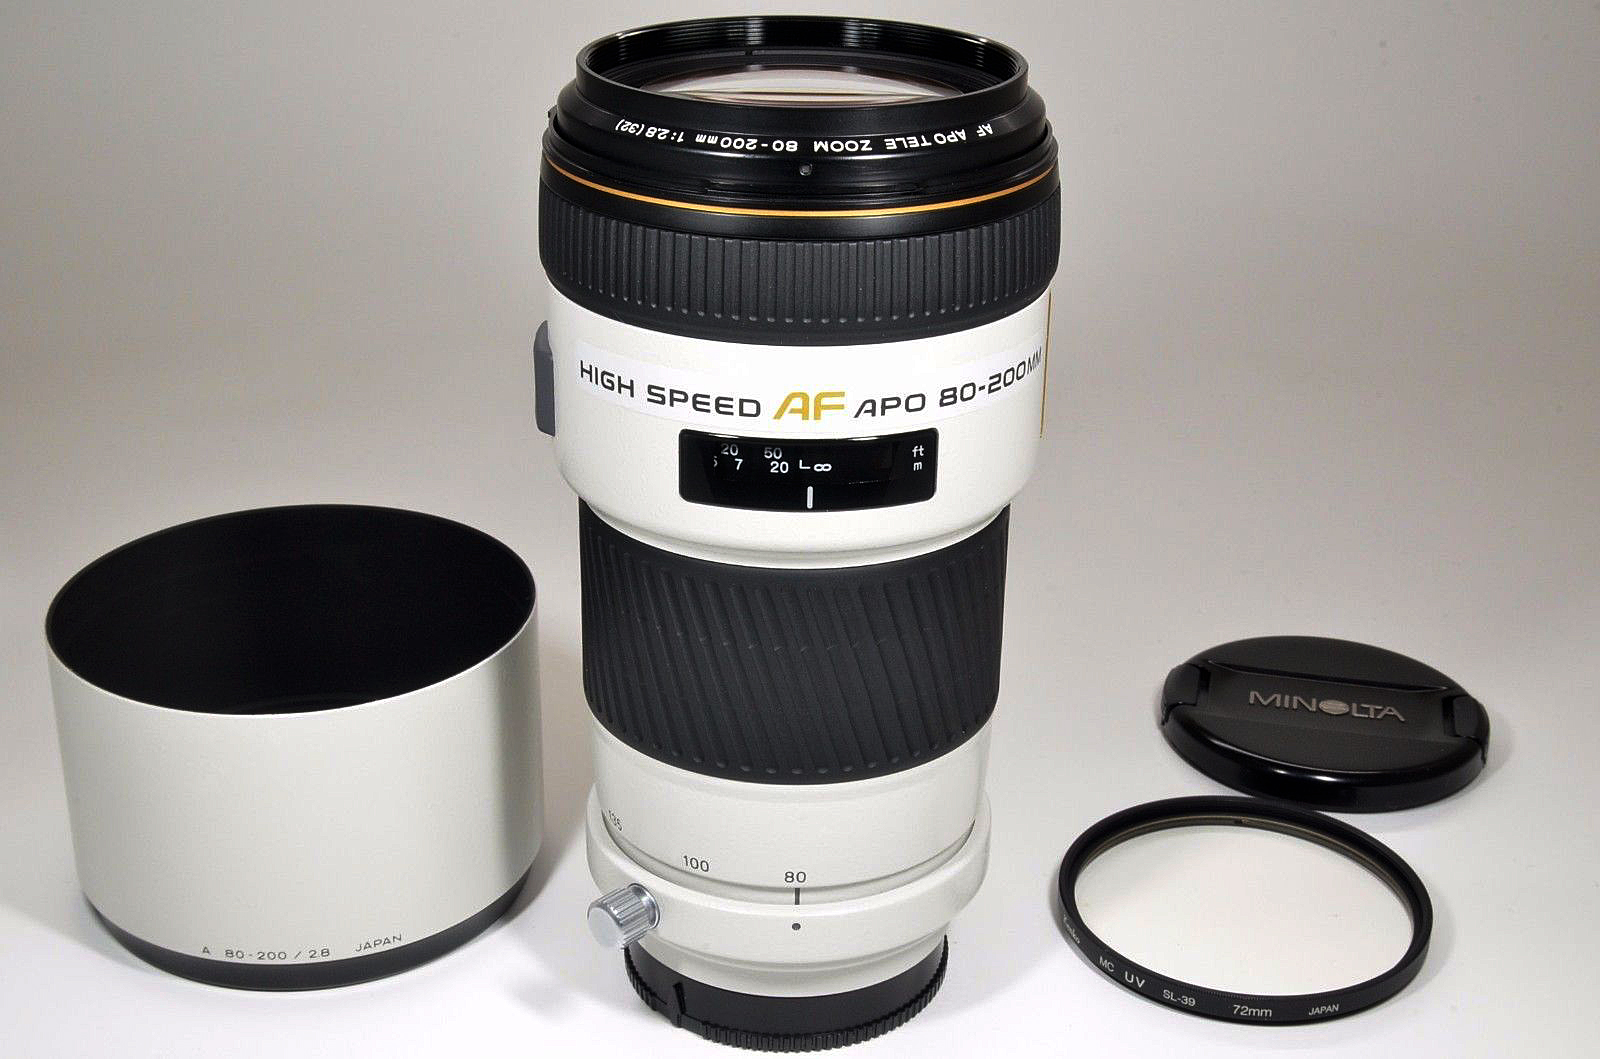
How to do Sports Photography Minolta APO Lens
(Click Image to View Full Size)

You can check out the resulting Tennis photos from this fabulous vintage lens at the link below:

Sports Photography Collage 04

Minolta 80-200 Lens Tennis Photos

The setting we used on the Sony A77II camera was “M” manual mode, rather than SCN Sports mode.
Shutter Speed was always kept at 1/2000th, Aperture at F2.8 or F3.5 and sometimes F4.0; ISO was manually set at either 320 or 250 depending on sunlight brightness.

The A77II Minolta setup can get great photos, but the “hit rate” is not as good as the state of the art Sony A99II with Sony 70-200 F2.8 G2.
We had a number of unusable images because the camera focused on the advertising signage behind the player and so the player ended up blurred.

This happened even though we were set on AF-C continuous focus with one of the tracking focus modes turned on for the A77II.

The way to overcome this is to really concentrate on the green AF squares while shooting and make sure they are on the player, and do not jump onto background signage.

The average hit rate with the A77II setup is about 1 in 10 shots being satisfactory, whereas the A99II setup can supply about 1 in 6 perfect shots.

The thing to keep in mind is that the A99II sports kit costs about $7000 Australian ($5700 US);
whereas a brand new A77II can be had for about $1500 Australian ($1200 US), and a mint condition second hand Minolta 80-200 F2.8 lens for $900 Australian ($730 US).

So basically we are looking at a $2000 AUD ($1500 US) setup with the A77II versus a $7000 ($5500) setup with the A99II.

The equivalent mirrorless setup would be either the Sony A7RII, A7RIII, or A9 and be around $7000 to $10,000 Australian, ($5500 to $7800 US).

So if you are on a budget and want to do some sports photography, then we recommend the Sony A77II with Minolta 80-200 F2.8 lens.

This setup is not just great for sports, but also great for general walk around, portrait, and low light music photography.

If you want to see a full album of our Minolta 80-200 F2.8 APO images, (not just Sports images), then check out the Flickr album at the link below:

Sports Photography Collage 05

Minolta 80-200 Lens Assorted Photos

As shown in our photo album, The Minolta 80-200 lens is also usable on full frame Sony cameras like the A99 and A99II. It is a lifetime keeper!

The Minolta 80-200 F2.8 lens could also probably be used on Sony A7x mirrorless cameras with the Sony LE-A4 adaptor.

No matter what Sony setup you go with, you can be assured it will be great for high speed sports photos.


Sony A77II 70-200mm F2.8

The Sony A77II with the Sony 70-200mm F2.8 G2 Lens is an awesome combination for Sports Photography.

How to do Sports Photography @@

Because the A77II is a cropped sensor we essentially have a factor of 1.5x giving 100-300mm full frame equivalent zoom power.

The A77II is a 24MP camera and performs really well outdoors with reasonable cropping ability on shots.

The A77II has a special focus tracking option, but we did not have much luck using this at the Tennis.

You basically set the Sony A77II autofocus mode to “Lock-on Expand Flexible Spot” as shown in the video below.

There is a movable slightly bold black focussing rectangle that you need to lock onto the moving object. Why did Sony not make this square a different colour to black: it is so hard to see when chasing action with the camera).

Perhaps the Lock On function works better for Football and Soccer than for Tennis.

The price of the A77II Sports kit is a step up at around $4500 Australian ($3500 US).

Eg. A brand new A77II can be had for about $1500 Australian ($1200 US), and a Sony 70-200 F2.8 lens for around $3000 Australian ($2400 US) brand new.

For doing Surf Photography the Sony “2x Teleconverter” SAL20TC costs an additional $840 Australian ($650 US) but triples** the zoom range to 200mm to 600mm and gives usable images.

** The Zoom Range is tripled because the 70-200 lens is doubled by the 2X Teleconverter, then increased a further 1.5 times due to the A77II cropped sensor.

2 x 1.5 = 3 times increased zoom power when compared to having the 70-200 lens on a full frame camera like the Sony A99II.

Check out some Surfing Photos done with the A77II using the 2X Teleconverter at the link below:

Sports Photography Collage 06

Sony A77II Surfing Photos

Check out some Tennis Photos (without any Teleconverter) done with the A77II camera at the link below:

Sports Photography Collage 07

Sony A77II Tennis Photos

Note that in the album of Tennis photos, all of the people pictures were done with the Sony RX100 pocket camera, and not the A77II. All action shots are from the A77II.


Sony A99II 70-200mm F2.8

The Sony A99II is a 42 Megapixels beast of a full frame camera with 5-axis built in image stablisation and is our current “Go To” sports camera.

We use the A99II with the same 70-200 F2.8 lens that we use on the A77II.

The extra megapixels mean there is incredible cropping ability on shots to make close up images that are crisp and clear.

However with the extra quality and possibilities comes a steep rise in price.

The A77II rig as mentioned previously costs around around $4500 Australian ($3500 US).

The equivalent rig (same lens) with the A99II comes in around $7200 Australian ($5600 US).

Does this 60% increase in price give 60% better images ?

As with most technology there is a decline in bang for buck as you move up through the offerings, and we would say the 60% price increase only gives you about 20 to 30% better images.

But the big thing is the cropping ability it gives you and increased yield: eg. We get 1 in 6 good images on average from the A99II, versus 1 in 10 out of the A77II rig.

The Sony A99II is a greatly more complicated camera than the A77II and so setting it up for the first time can be a bit overwhelming.

Thankfully YouTube came to the rescue with this video all about how to set up the A99II for Sports Photography.

Check out some of these Tennis Photos (without any Teleconverter) done with the A99II camera at the link below:

Sports Photography Collage 08

Sony A99II Tennis Photos


Sony Ax Mirrorless Cameras

Sony’s latest cameras are the A7 and A9 series of Mirrorless cameras.

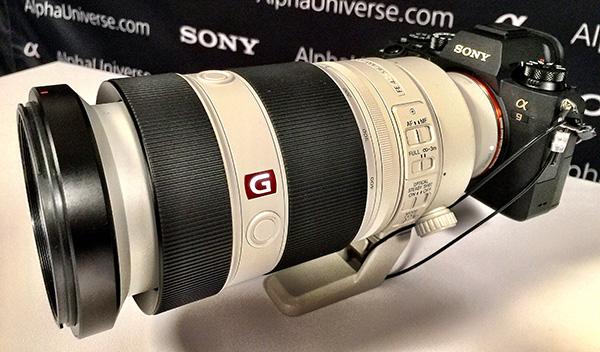
How to do Sports Photography A9 Camera

These Ax mirrorless cameras use a different lens mount to the Alpha A-mount cameras that we use here at PBP like the A77II and the A99II.

The A7RII and A7RIII (costing about the same as the A99II) are basically the same large sensor full frame camera that the Sony A99II is, and so the Sports Photography capabilities on these A7R’s should be about the same as the A99II.

However the A9 flagship mirrorless model is something really special when it comes to Sports Photography. It uses an electronic “virtual shutter” and can shoot at an incredibly fast and reliable 20 FPS Burst Mode. (The Sony A99II shoots 12 FPS in Burst Mode).

This is combined with a 24 Megapixels sensor and hundreds of focal points. It is the most advanced AF system yet to be developed on any Sony camera.

Check out this video showing the quality of images a sports novice can capture from this amazing camera.

Joe Black is a Melbourne Photographer who shot some of the Tennis action at the Australian Open.

He used a Sony A9 and E-Mount 70-200 F2.8 lens with Sony E-mount 1.4x Teleconverter.

Compare his A9 shots in the following album with my shots at the same event using the A99II. You can clearly see the improvement in richness of colour and clarity and crispness.

Sports Photography Collage 09

Sony A9 Tennis Photos

Joe did shoot at high ISOs of 3200 and 6400 and very high shutter speeds of 1/16000 and 1/32000 to push the limits of the A9. However one could probably reduce these down to 1/4000 and shoot at lower ISOs and thereby obtain negligible background graininess in shots.

The cost of the A9 with the 70-200 lens is about $8000 Australian dollars ($6250 US).

This is about $1000 Australian or 12.5% more than the Sony A99II rig we have here at PBP.

So if you want to get the best possible sports rig, and you have the money to finance it, then the Sony A9 package is the ultimate sports camera for you.

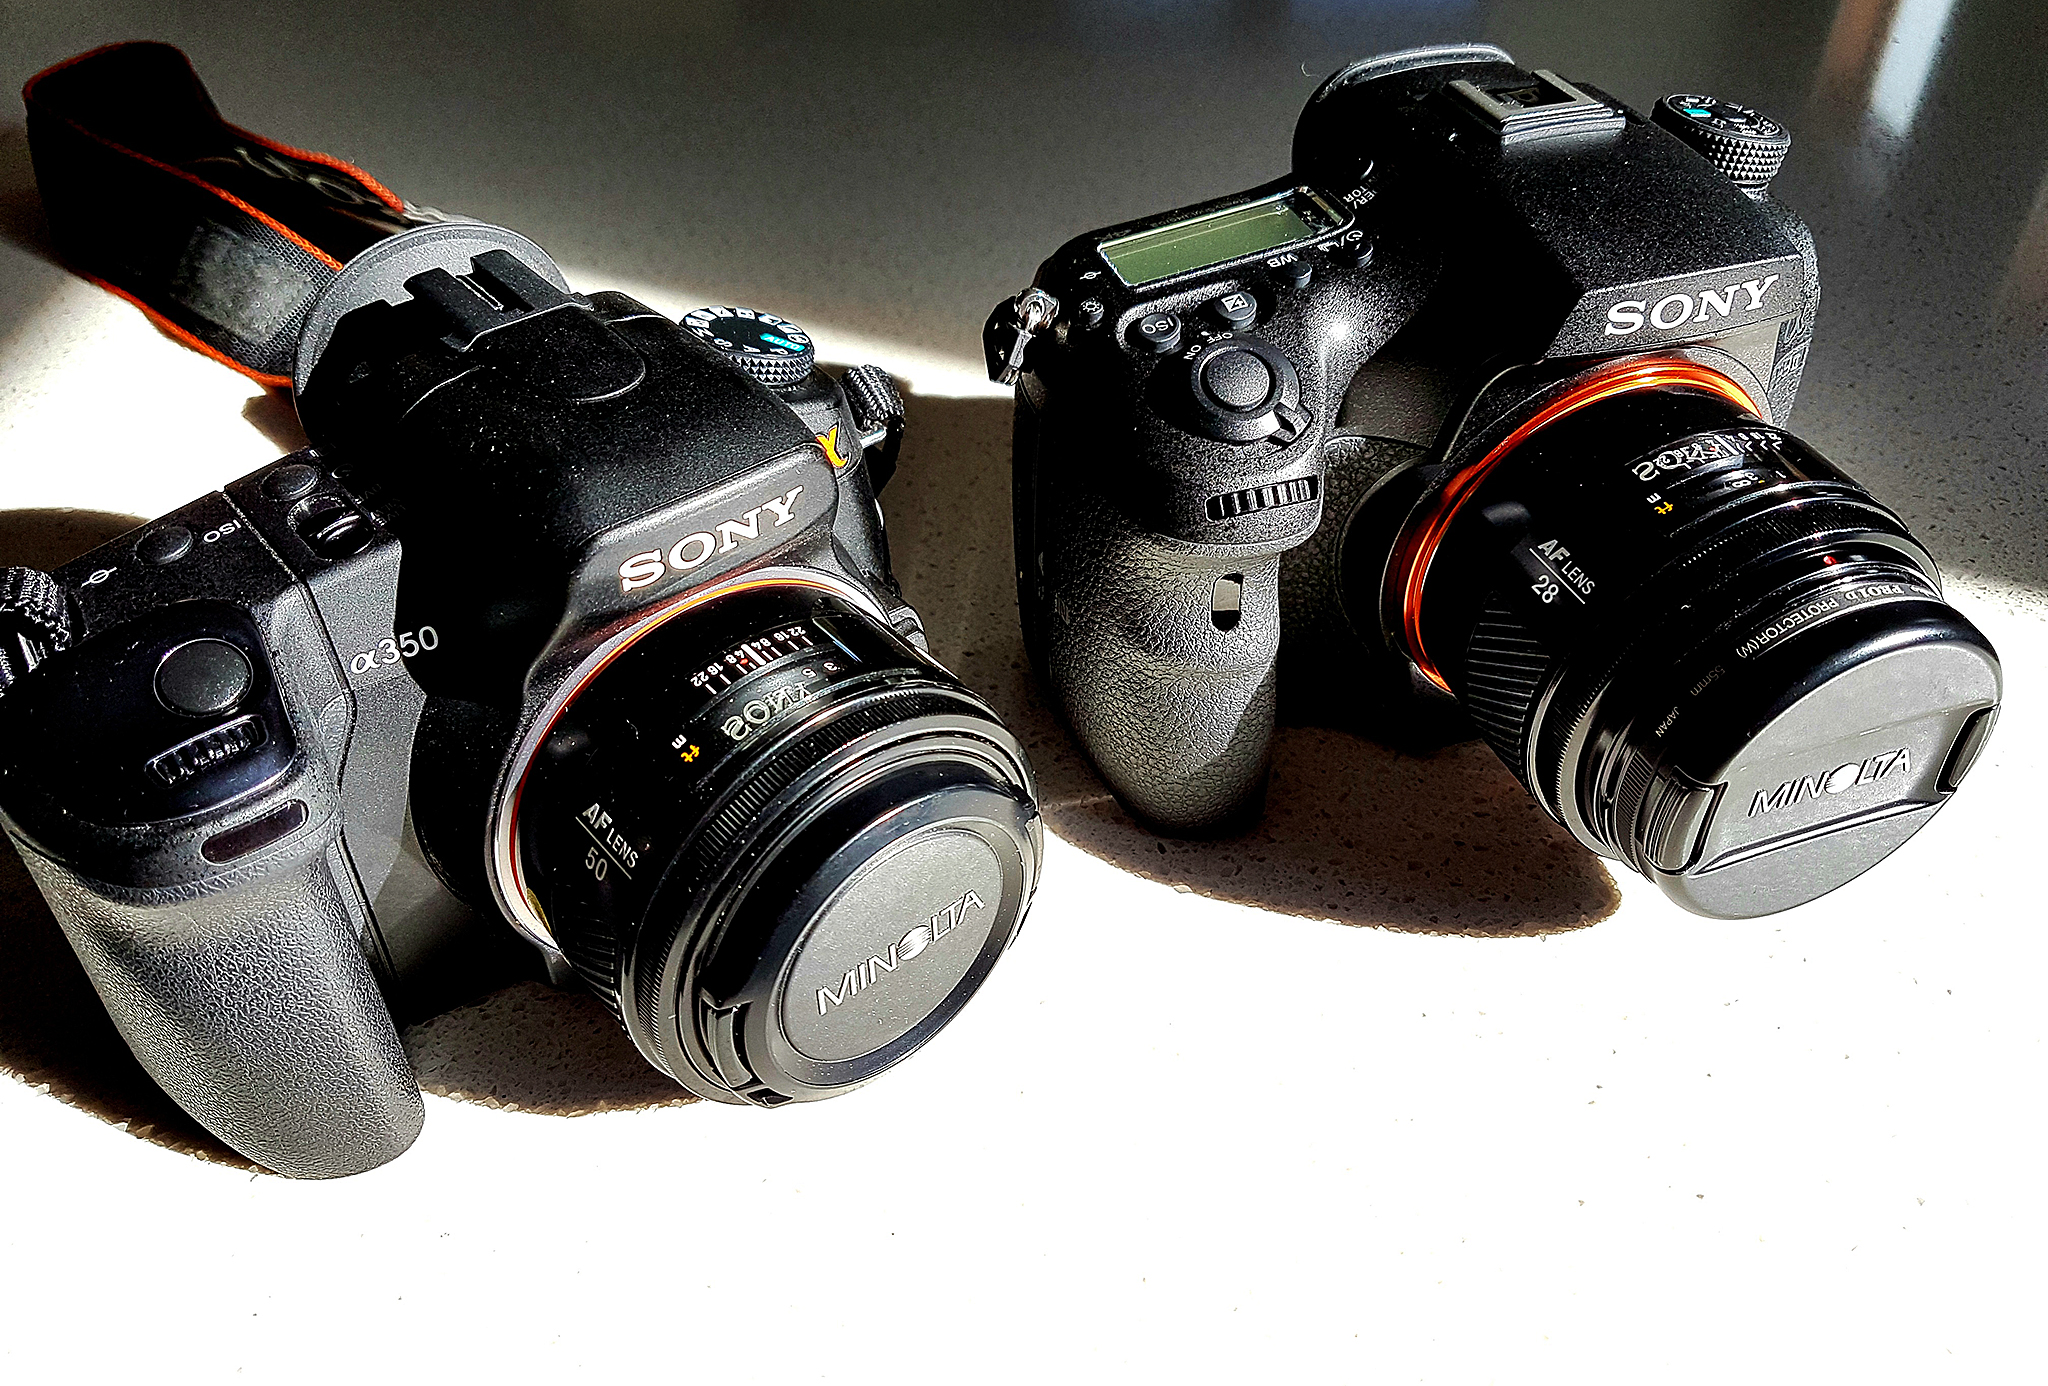
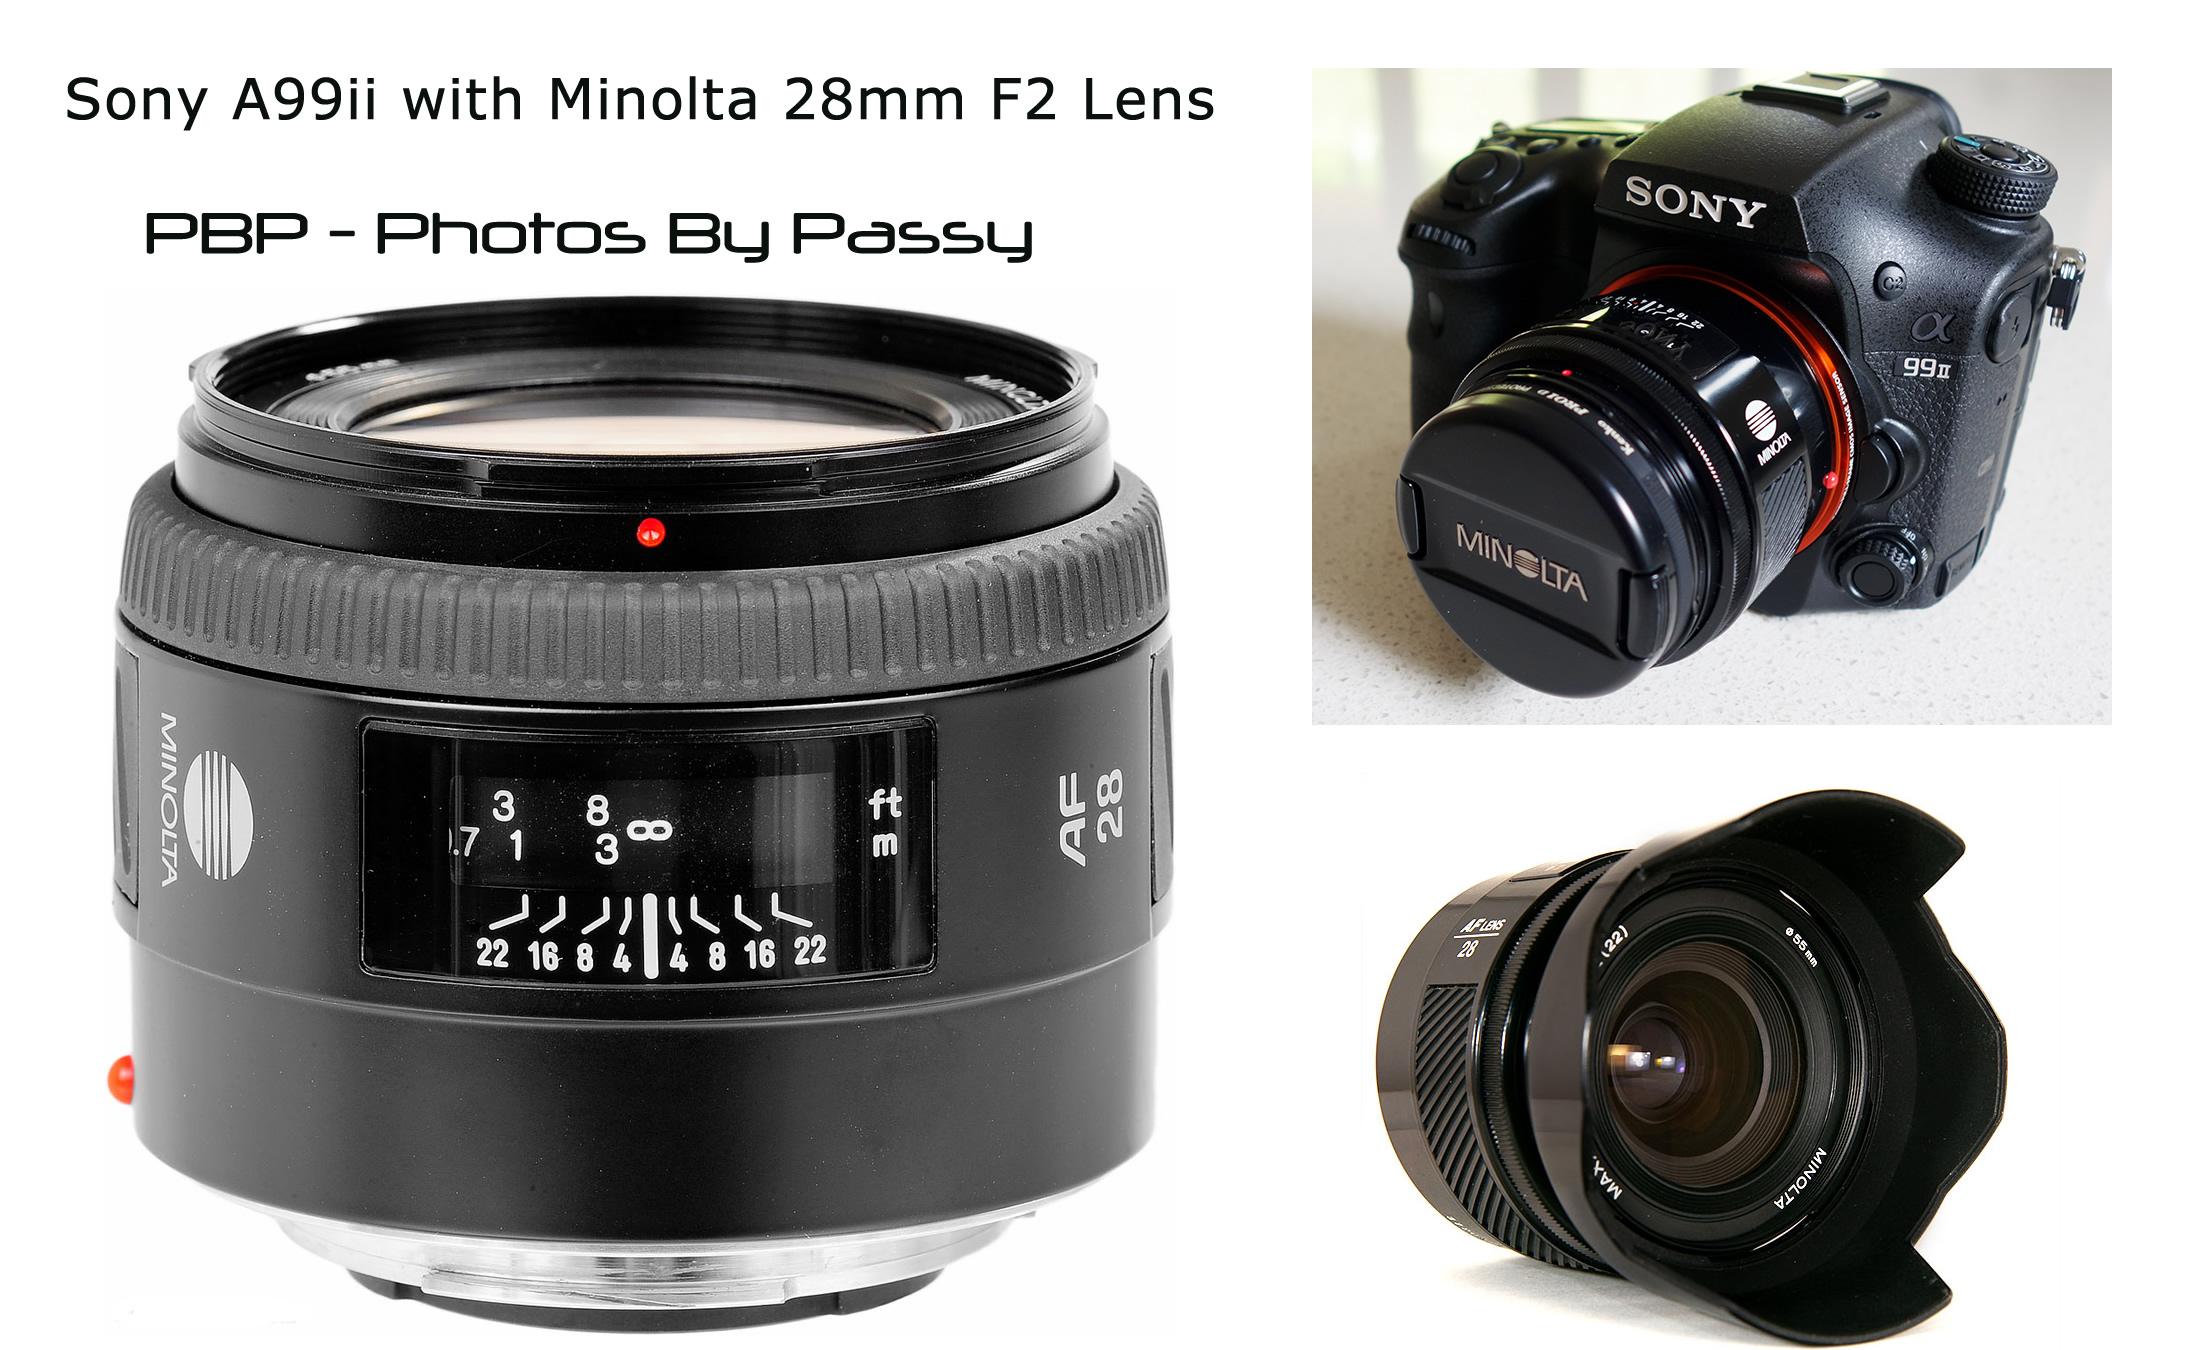
Here at PBP we purchased our A99II months before the A9 was publicised and released. The A99II suits us better for the variety of photography we do (not just sports photos), as it has a much larger 42 megapixels sensor giving amazing cropping capabilities. (The A9 has a 24 Megapixels sensor). We can also use all of our fabulous retro 1980’s Minolta 28mm, 35mm, 50mm, and 85mm prime lenses on the A99II because it is an A-mount camera. However eventually we would love to get an A9 setup for Sports and low light Music Photos. At the moment we simply do not have the ten thousand dollars needed to make the upgrade, and we want to keep the A99II and all of its lenses rather than trade them in.

Also….. Get Insurance!

We have full insurance for our Equipment here at PBP and the best Australian Company for this is PPIB (Professional Photographers Insurance Brokers).


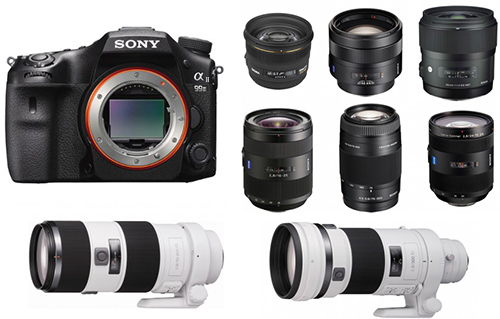
Lenses for Sports Photography

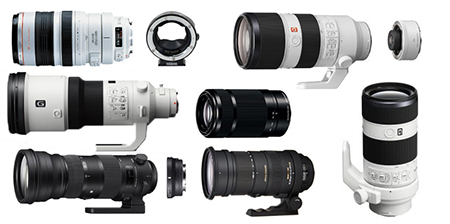
Because Sports Photography requires lots of light to enable fast shutter speeds, then the best Sports Lenses are any that are F2.8 Aperture.

How to do Sports Photography Sony Zoom Lenses

F2.8 Lenses enable both outdoors and indoors photos to be taken, without having to go to very high ISO values to get brightness which can then produce grainey blurry photos.

F2.8 lenses have a lot of glass and sophisticated motors in them, and so they are very expensive. The first F2.8 lens that we started off with was a 24-70mm Tamron F2.8 which is a great lens costing around $1200 Australian.

At the moment we are now using a Sony F2.8 70-200 zoom lens for Sports Photos. A 70-200 zoom should be the first lens that you purchase at a cost of $2000 to $3000 Australian Dollars ($1500 to $2300 US).

Sports Photography is expensive ! The upside is that you will also be able to use the 70-200 lens for low light band photos in big venues. It is also an excellent portrait lens.

When we need further reach for Surfing or Kiteboarding, we use a 2X teleconverter which changes our lens to 140mm to 400mm, but this causes a maximum Aperture of 5.6 rather than 2.8.

The best lenses that professionals use are Telephoto Lenses with no zooming which are called “Prime” Telephoto lenses. These are very expensive eg. $10,000 to $40,000 Australian dollars and upwards.

Typically Professional Football and Tennis Photographers use 400mm or 500mm F2.8 or F4 Prime lenses.


Tips for Different Sports

We have mentioned this previously that if you do not know where to stand, then the best vantage point for a given sport is where the Umpire is located. So try and get close to that position without interfering with the Umpire or spectator views.

Shooting players with the crowd in the background is often not good, because it makes it hard to see the player against a multicolour background of people. That is unless you are in a huge stadium or at a large Football Field, where the crowd will be blurred away in the distance.

Often you will have to sit in the stand with other spectators. If possible get a vantage point looking at the back wall or sight board as much as possible, so that this forms the background. However this has problems with the camera wanting to focus on advertising signage instead of the player(s); be aware and be careful of this.

If shooting outdoors, always try and have the sun behind you. It is possible to shoot into the sun but the results are not nearly as good.

The better the standard of the players, the better the photos will be. In low skilled matches players make awkward movements and pull horrible faces while doing them. Avoid photographing such games if you can.

Check out our album of selected Sports Photographs at the link below.

Sports Photography Collage 10

Album of Selected PBP Sports Photos

One of the most important rules for getting good Sports Photos is:

ALWAYS SHOOT IN MANUAL MODE WITH CONTINUOUS AUTOFOCUS TURNED ON.

The first couple of times out doing sports it is okay to use the preset “Sports” or “Action” mode on your camera.

Load the images up to Flickr and individually browse them to see the “EXIF” data that tells you what settings the camera used for Shutter, Aperture, ISO Brightness, etc.

But after that always use full Manual Mode. We have supplied a good set of Manual Settings for particular Sports in the next few sections of this article.

From the Sports we have done photos for, here are some specific tips and general camera settings for each of the sports.


Tennis Photography

One of our own personal favourite places to take photos is at The Australian Open Tennis each summer.
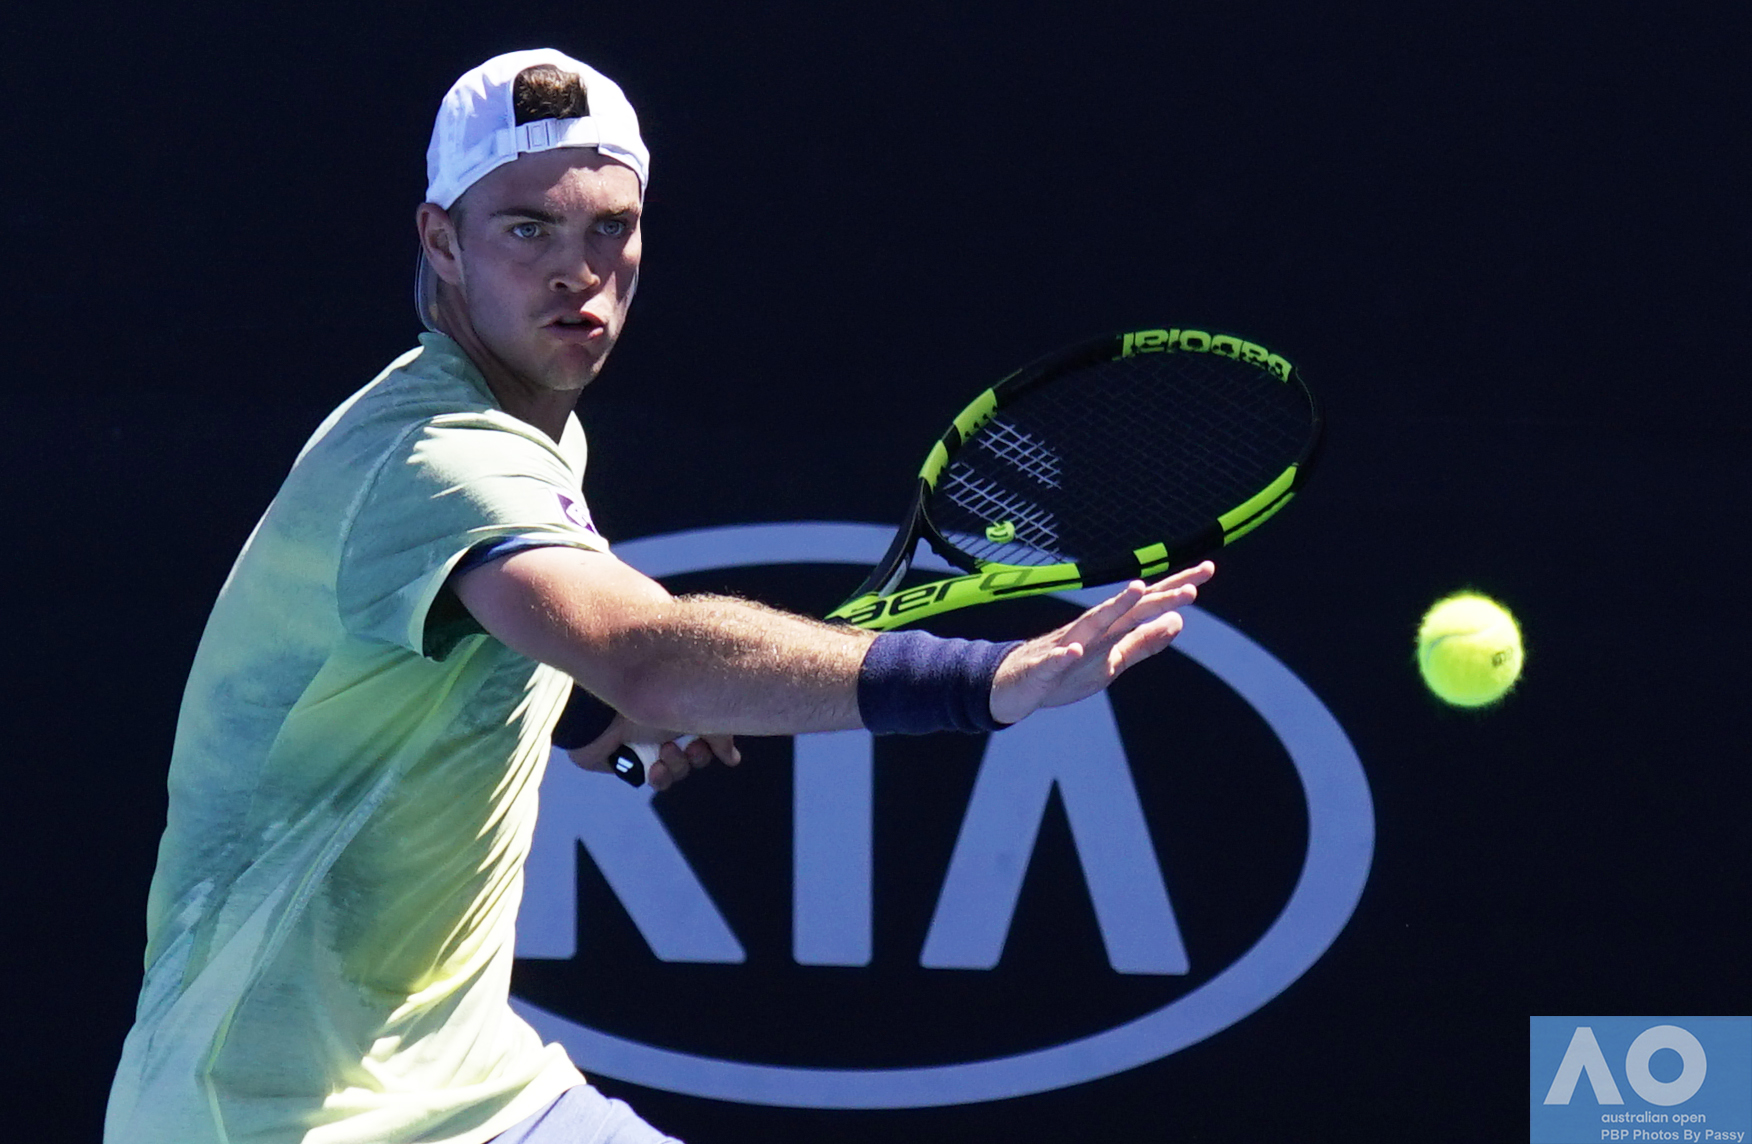
How to do Sports Photography Tennis Shot One
(Click Image to View Full Size)

It comes as no surprise that the best location for shooting Tennis photos is where the Professionals do it from.

The Pros get access to sit courtside on the court just down from the net. That means they can shoot towards the back of the court and get good front on shots of all the action.

We cannot get courtside like this, but we need to think about getting positioned somewhere so we can shoot at the same kind of angles that the Pros do.

Sometimes the Pros also stand on the outside of the court fence next to the net as shown in the photo of a Professional Photographer below.
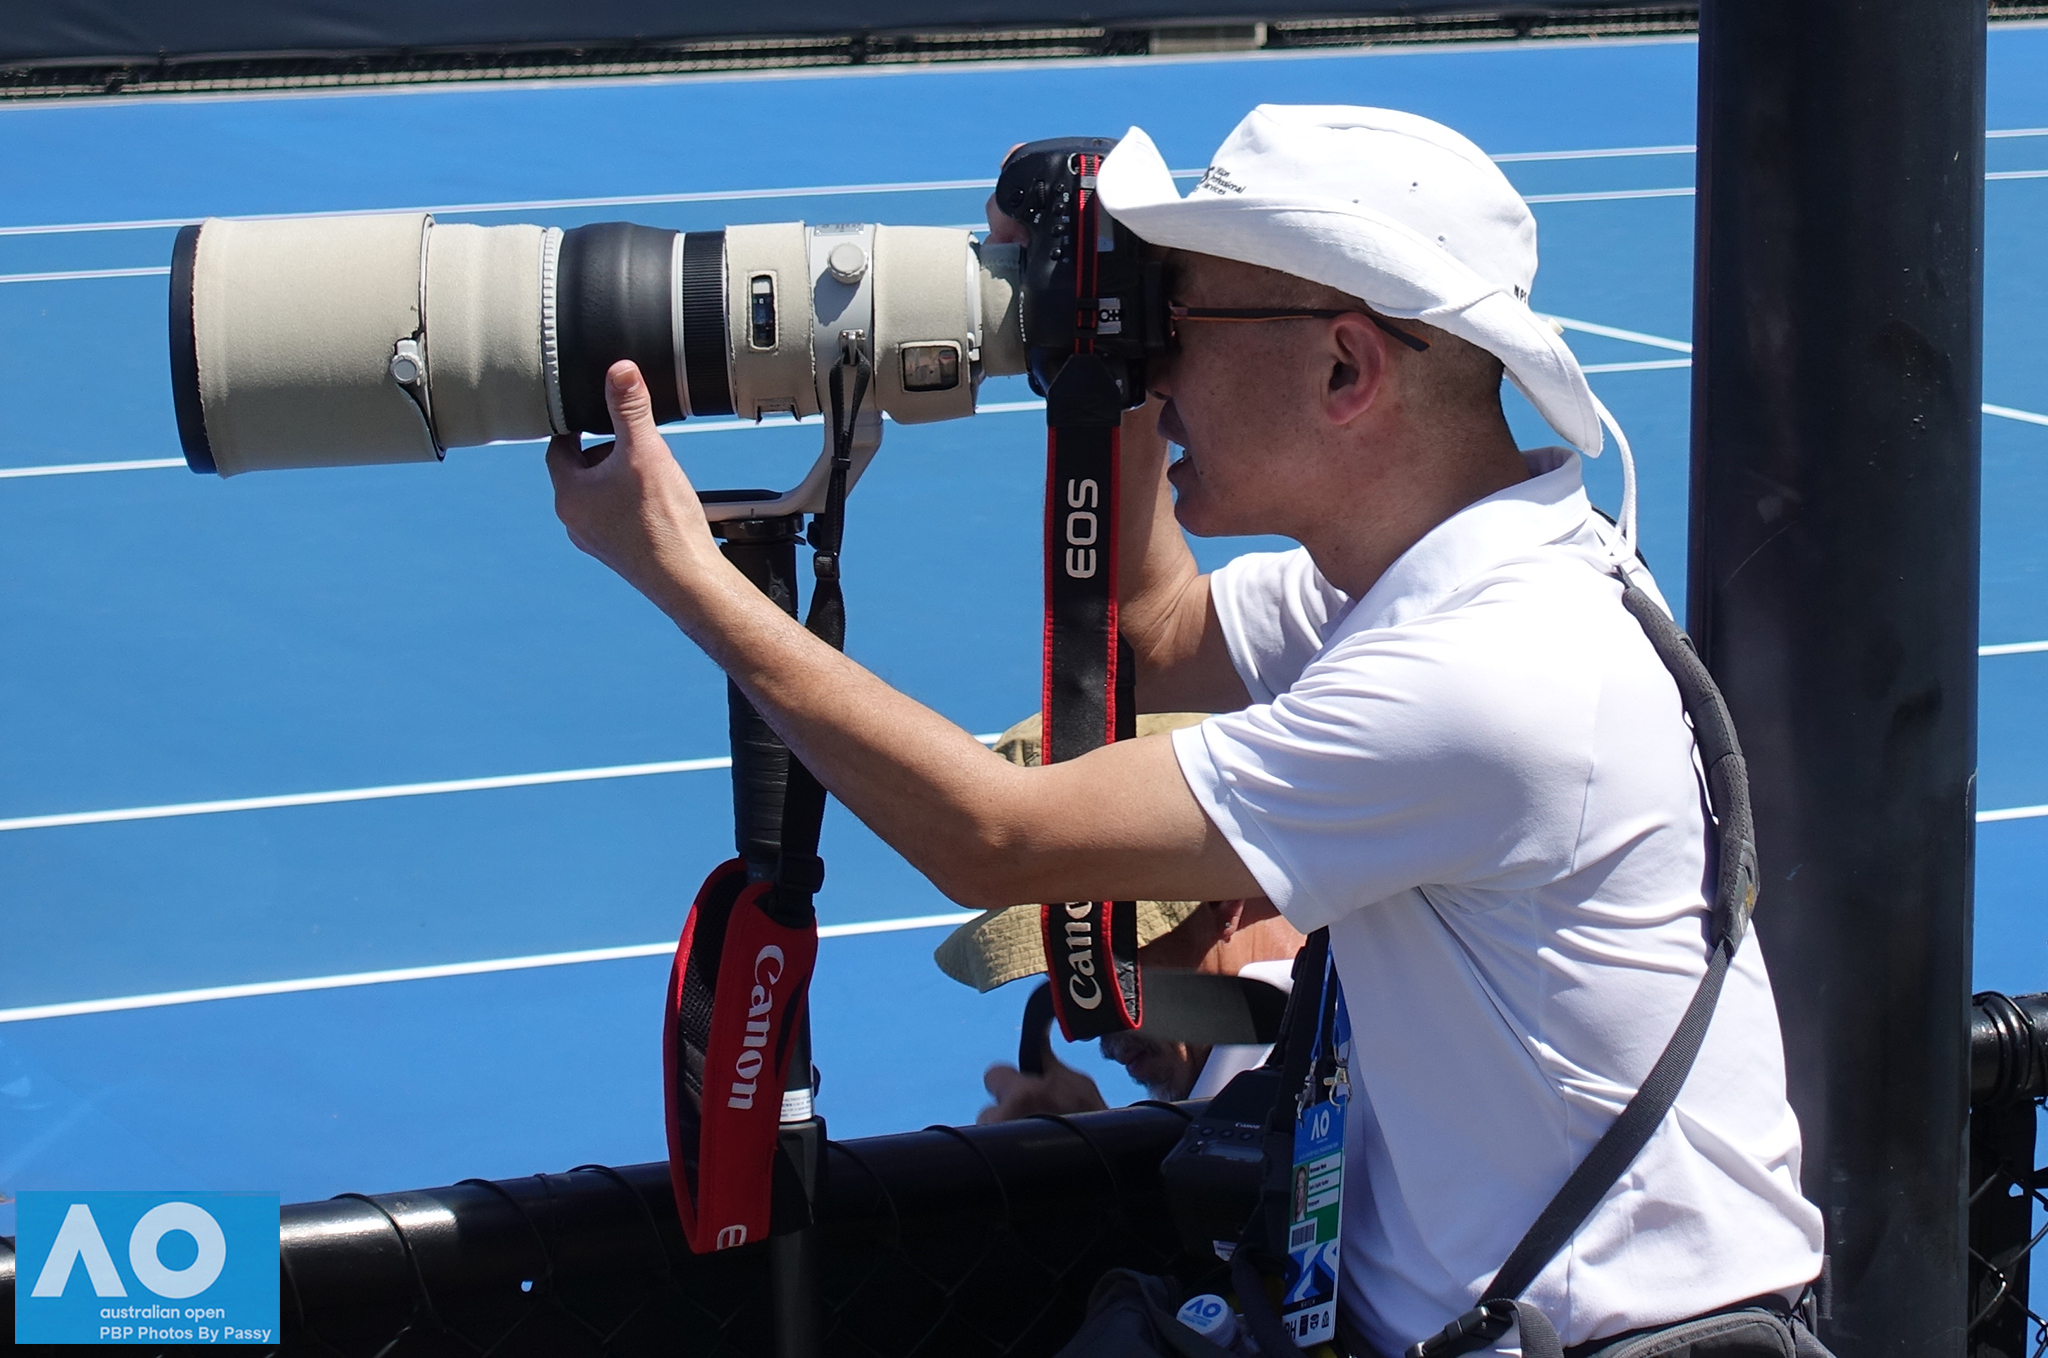
How to do Sports Photography Great Tennis Location
(Click Image to View Full Size)

This gets the same kind of angled front on shots, but from a bit higher up. If there are no Pros around, sometimes we can also locate ourselves here for a couple of minutes and quickly take some shots.

However a lot of the time we cannot stand at the fence to take shots and we have to sit in the stands with the other spectators. Here there are lots of obstructions like people’s hats and heads, umbrellas that players sit under, and courtside mounted cameras.

In the stands we need to try and sit in an aisle seat so that we have room to pan our camera with its long lens and follow the action. Sometimes if you are in an aisle or the back row, you may even be able to stand up to take some shots.

Typical Tennis Camera Settings:

Aperture F2.8, F3.5, or F4.0
Shutter 1/2000th, 1/3200th, or even 1/4000th
ISO 250, 320, or 400.


Football Photography

In Football Photography it is very easy to get lots of images where we cannot see the players faces at all. Photos of the backs of people are not good and need to be immediately deleted.

A good Football shot always shows the players faces and emotions like this one.
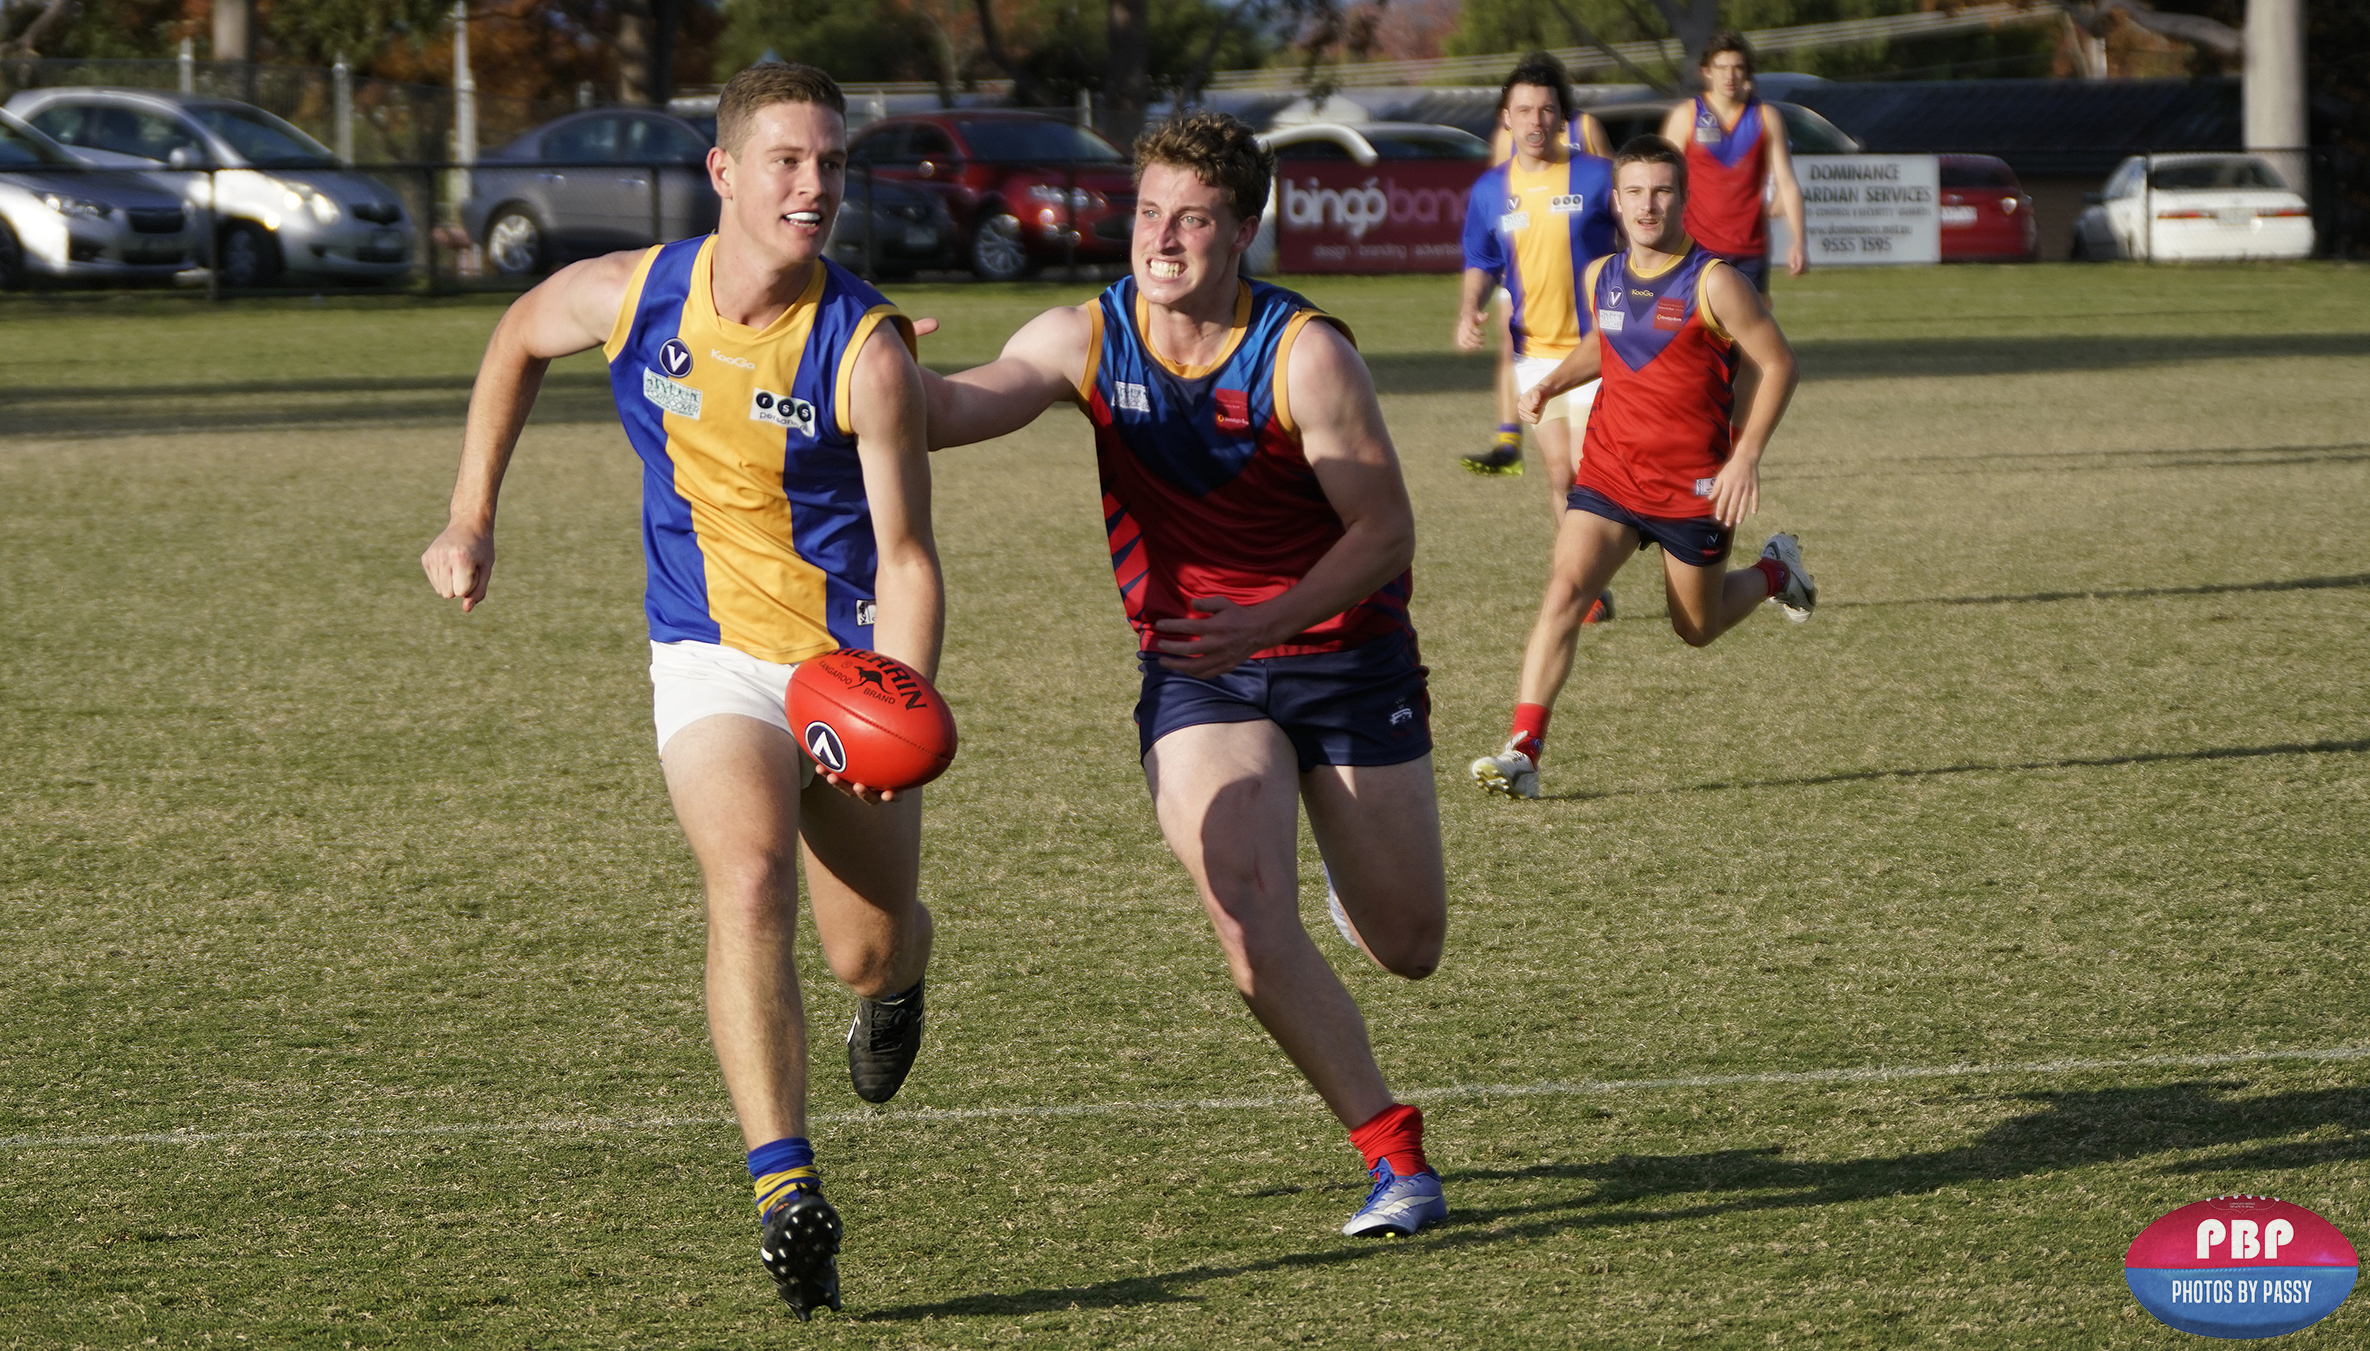
How to do Sports Photography Football One
(Click Image to View Full Size)

We tend to wander around the outside of the ground to take photos. First we stand at the wing at get some good rucking photos from the centre bounces. After this we spend most of our time on the half forward or half back flank.

The flanks are best because you get offensive play coming towards you, and then kick outs from the goal line coming toward you as well.

Usually the play tends to go around one side of the ground, and so stay on that side of the ground. Have the team that is dominating play running towards you. Locate yourself on the half forward flank of their goal scoring end.

There is no point standing behind the goals because you will get far too many photos of the backs of people, and could also get hit by the ball.

It is recommended to always have the ball visibe in all football photos. However sometimes a close up shot showing competitive emotional expressions on players faces can also make for a great shot.
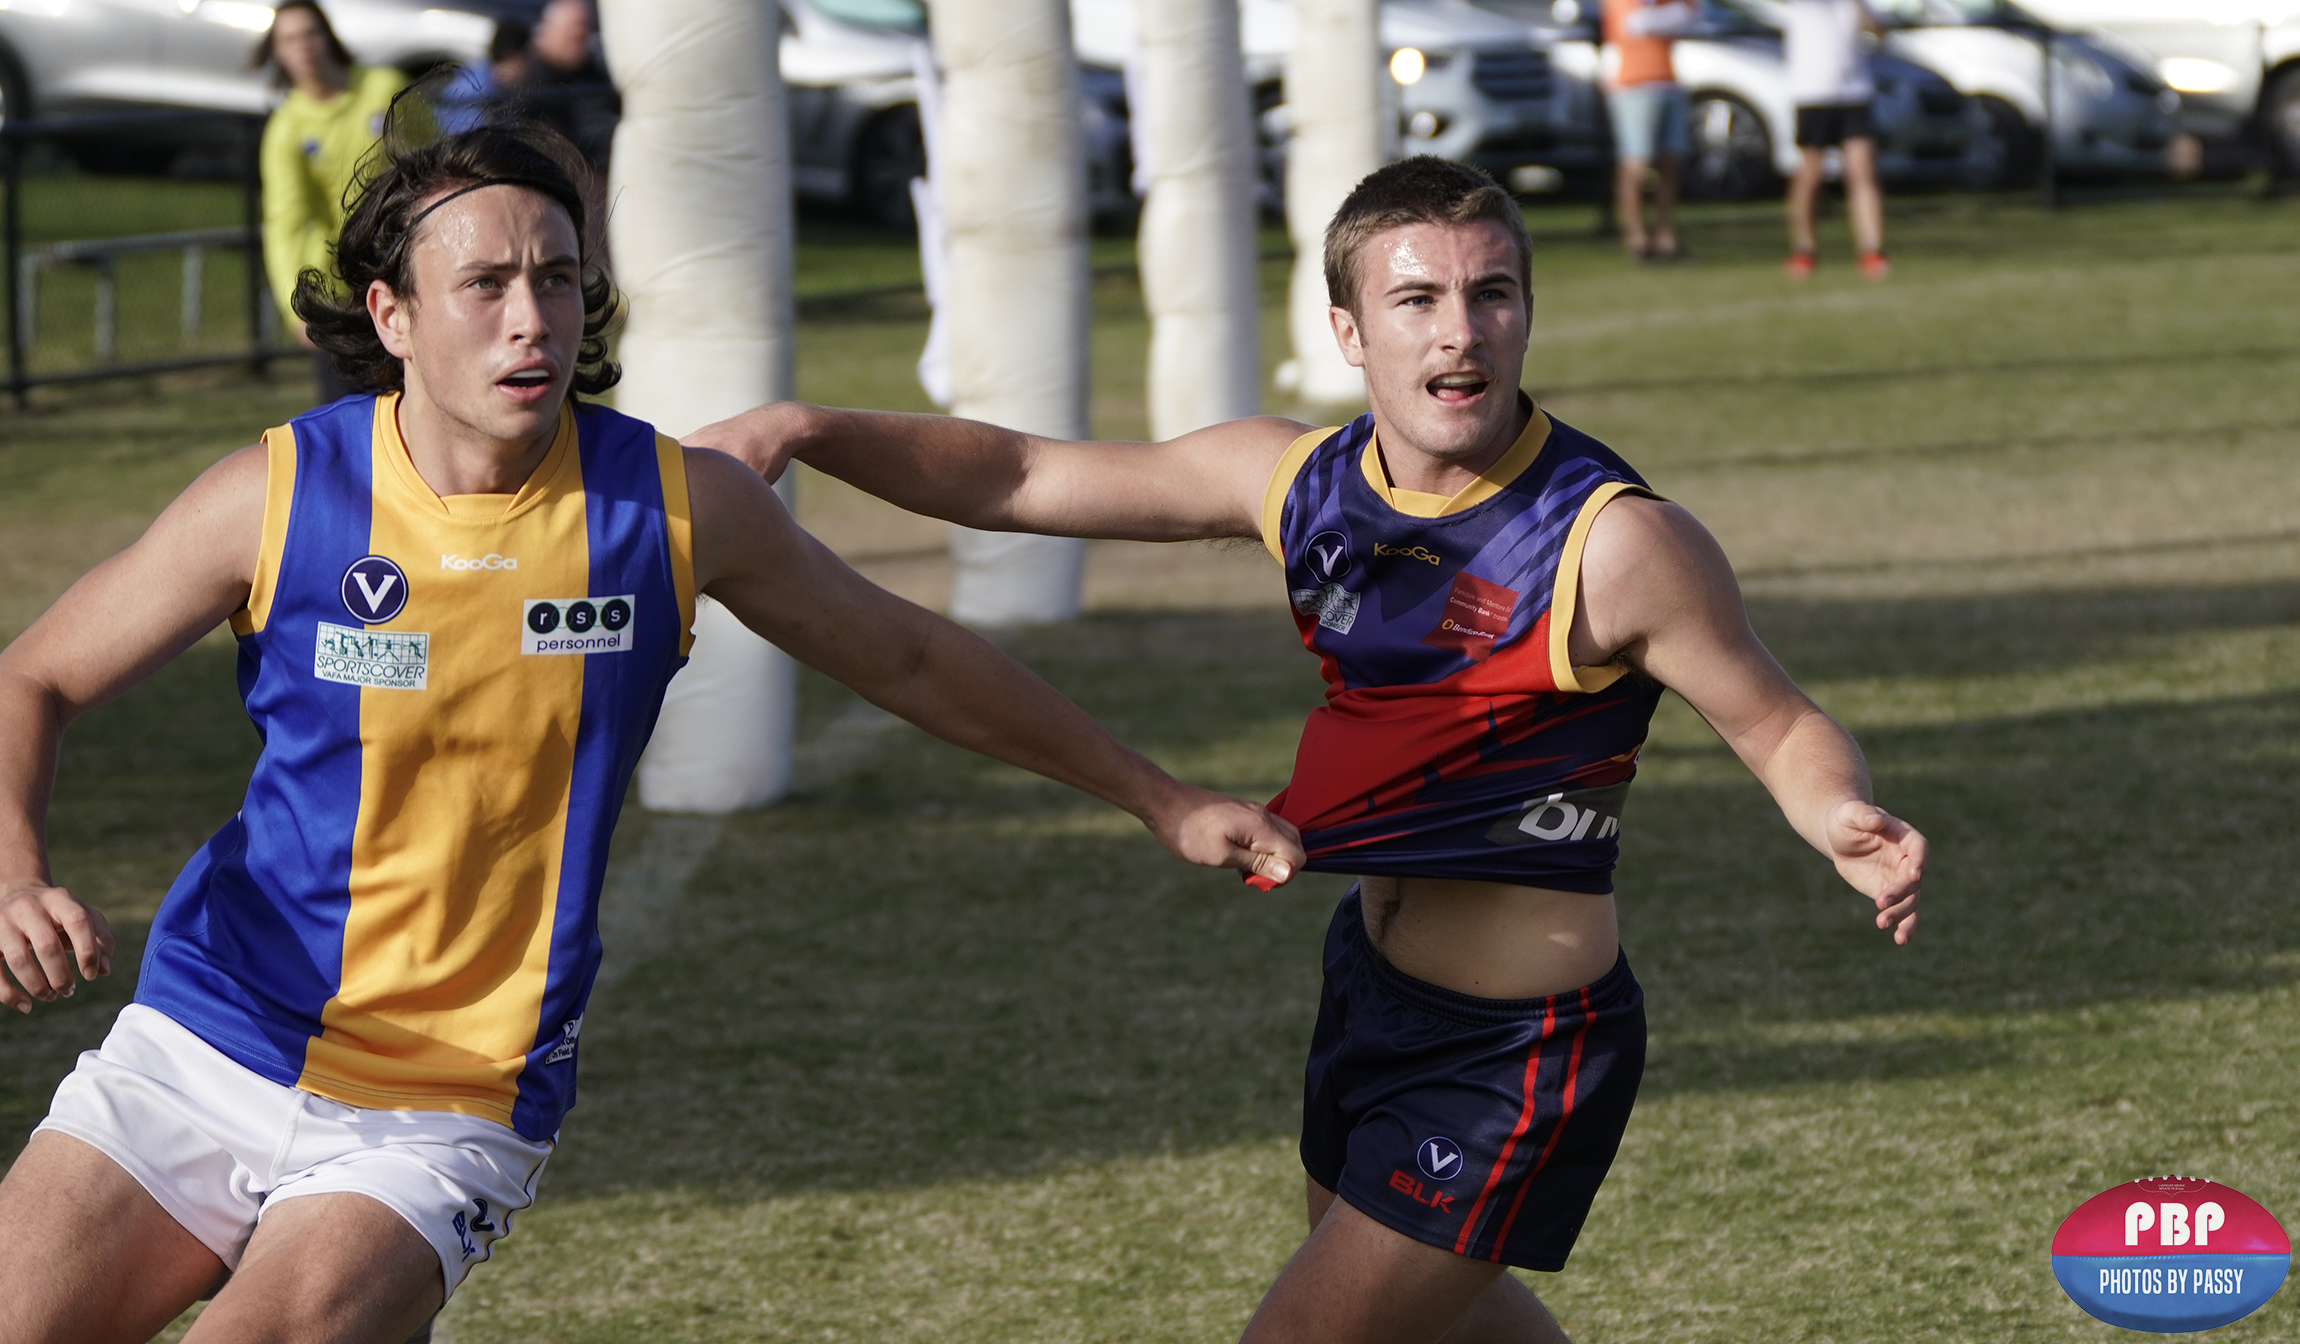
How to do Sports Photography Two Footy Guys
(Click Image to View Full Size)

Typical Football Camera Settings:

Aperture F3.5, F4.0, or F5.6
Shutter 1/1000th, 1/1600th, 1/2000th, 1/3200th
ISO 250, 320, or 400.


Basketball Photography

For Basketball photos it is important to have the Backboard, the hoop, and the faces of the players all visible.
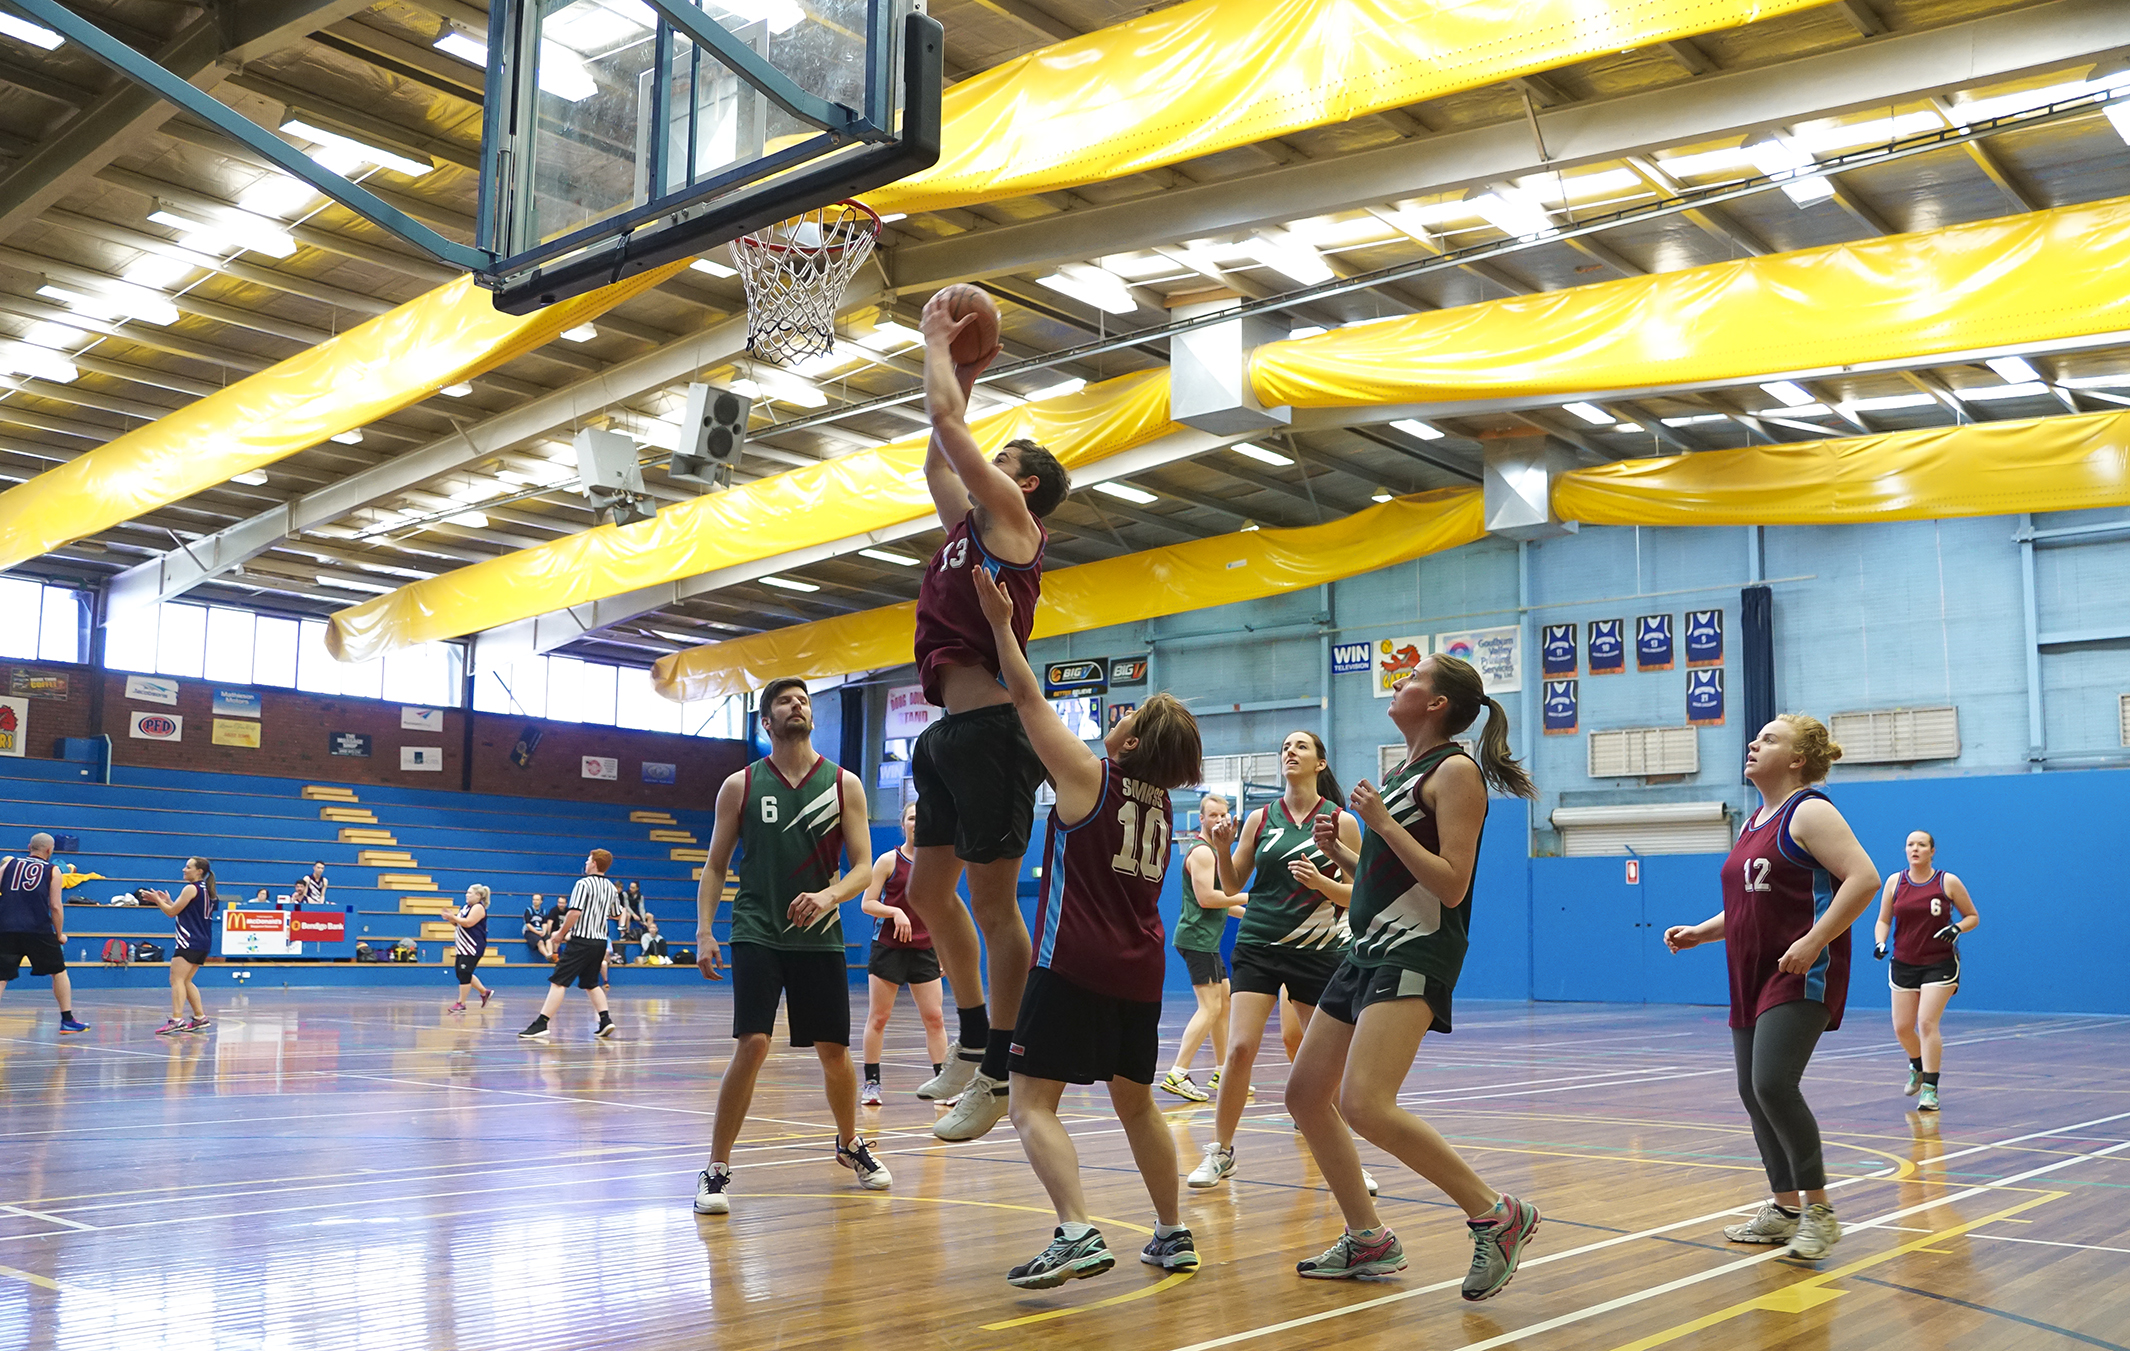
How to do Sports Photography Basketball One
(Click Image to View Full Size)

For Basketball Photos the best place to stand is as close as possible to the back corner of the key. However the referee might keep getting in your way. Just run to the side where they are not… continually.

Make sure you shoot from down low by kneeling down on one knee, (not sitting on the floor), so you can get out of the way quickly if you need to.

If you get relegated to the stands then try and get a medium high vantage point looking towards the end of the court. This way you can get front on shots as the teams charge down the court. Basically use the same positioning approach as in football: be in a position a bit forward towards the centre line but able to see the hoop and backboard.

Typical Basketball Camera Settings Indoors:

Aperture F2.8, F3.5, or F4.0
Shutter 1/500th, or 1/1000th
ISO 400 or 800.


Netball Photography

Shots for Goal are an easy and great Netball Shot to get. There is some focussed action in the shot while the other players tensely await the outcome.
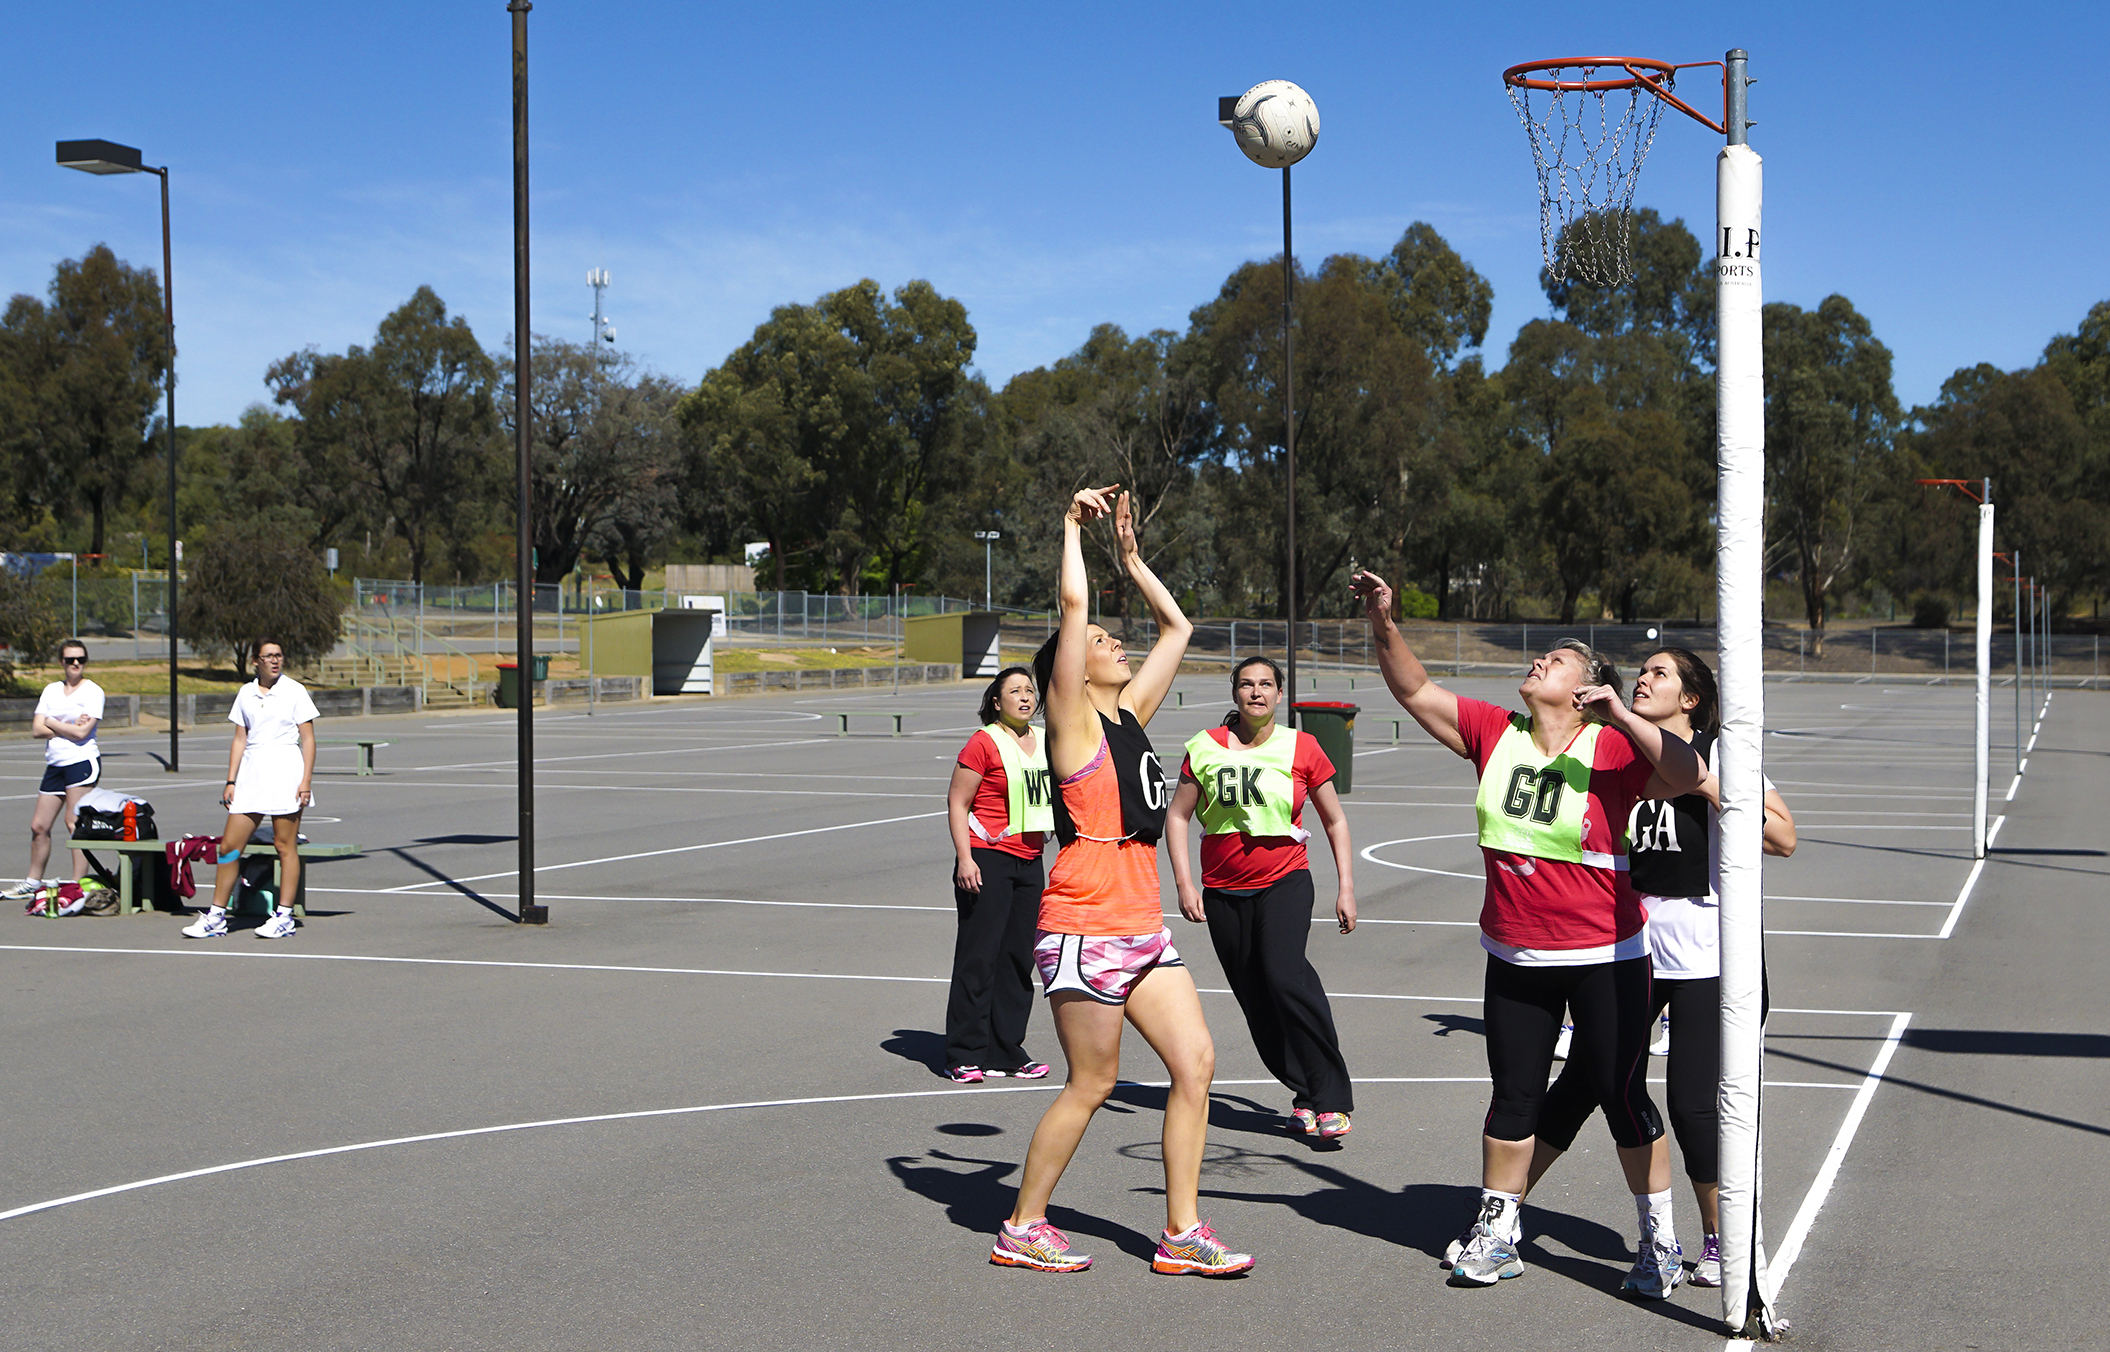
How to do Sports Photography Netball One
(Click Image to View Full Size)

Netball is a very start stop game of passing shots and low skilled players can look very awkward and not make for good images.

Often there are outdoor courts right next to each other and players from all the teams everywhere, as well as spectators standing or continually walking around on the sidelines. This makes for confusing backgrounds.

Try to get competition for the ball shots like the one below, as well as shots for goal images as discussed previously.
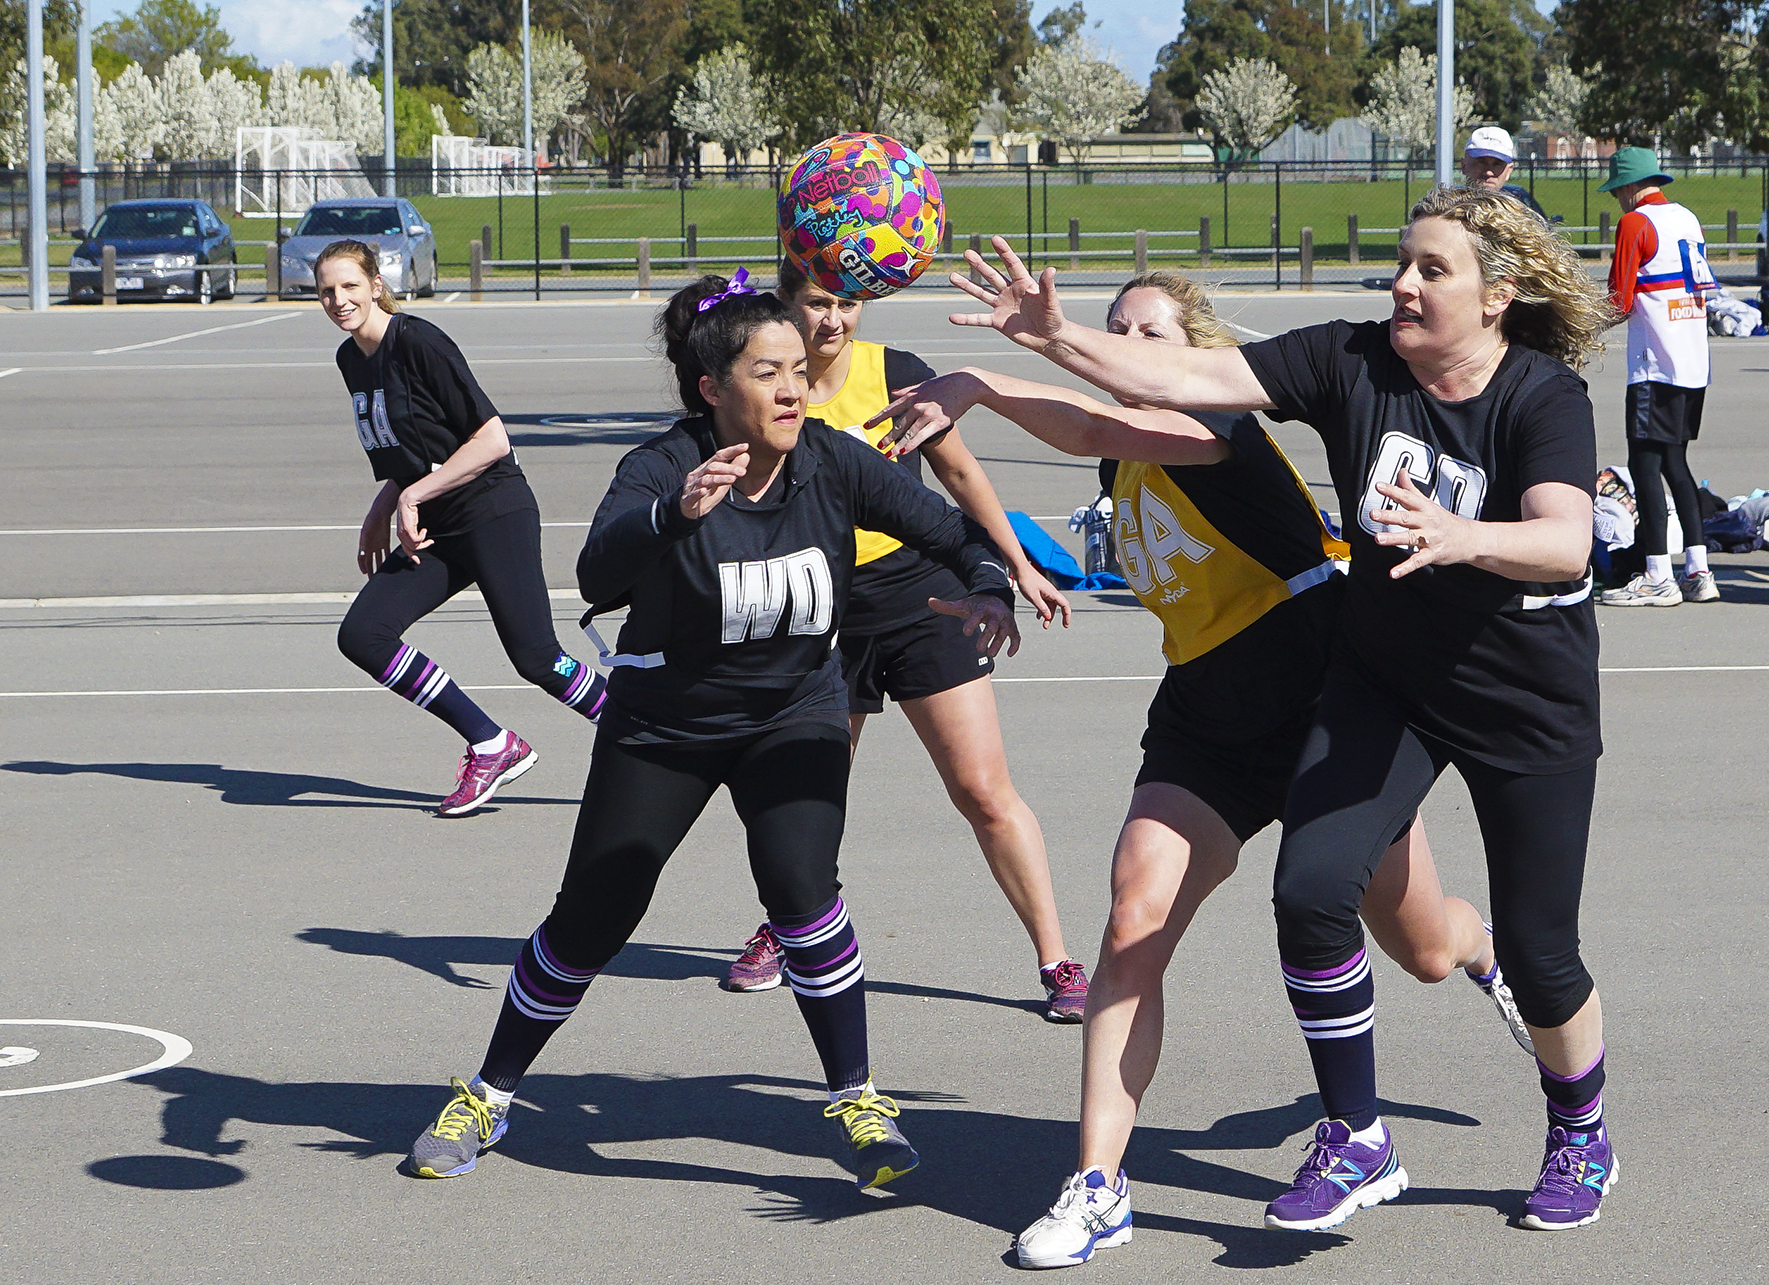
How to do Sports Photography Netball Two
(Click Image to View Full Size)

Typical Netball Camera Settings:

Aperture F3.5, F4.0, or F5.6
Shutter 1/1000th, 1/1600th, or 1/2000th
ISO 250, 320, or 400.


Volleyball

In Volleyball games the ball goes way too high up in the air and moves too fast to get many good images. The best place to be is in a stadium shooting a quality skilled game where you can get photos of the whole court action like the one below that we found on Flickr.
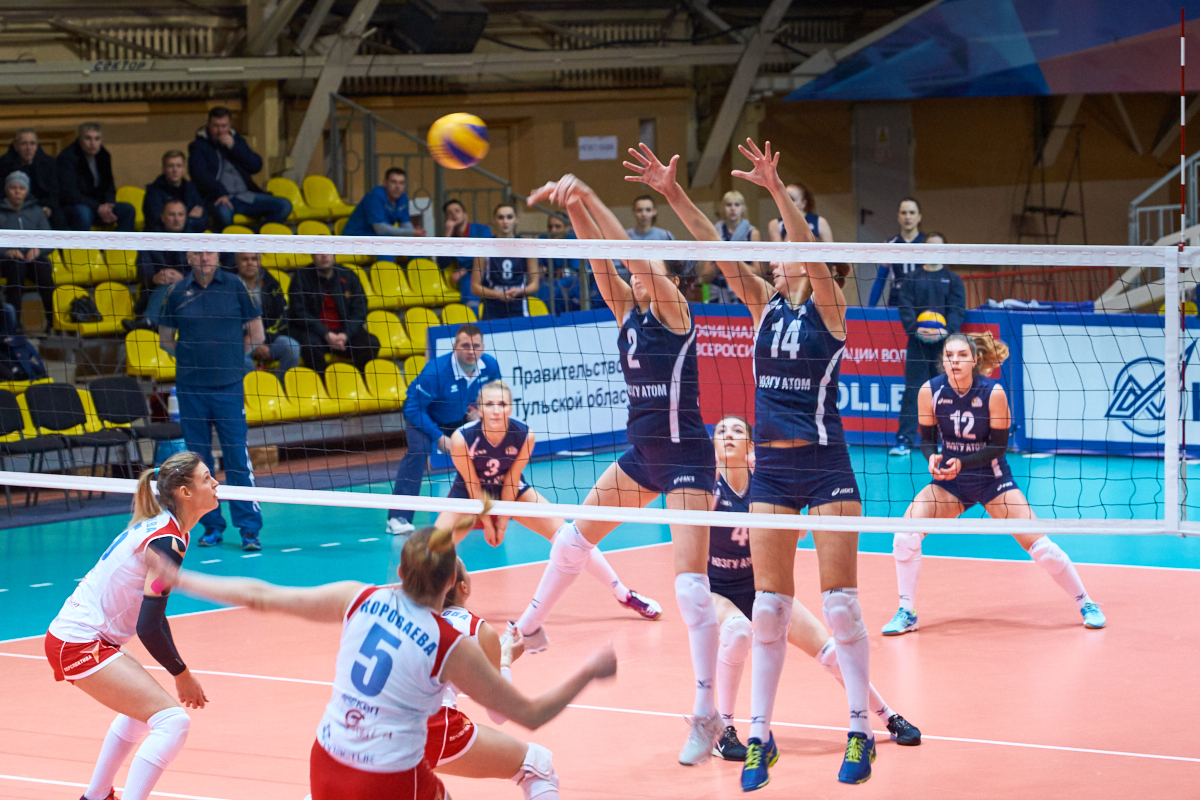
How to do Sports Photography Volleyball One
(Click Image to View Full Size: Photo from Flickr)

Photographing Indoor Beach Volleyball puts you in a very confined space, with the ball moving at high speeds and bouncing off the side nets. Stand right at the net, and try not to get hit by stray balls.

It will also be necessary to use a High ISO like 400 or 800, an Aperture of F2.8 or F3.5, and then a slower shutter speed of 1/1000th or even 1/500th to get enough light in for the indoor lighting conditions.
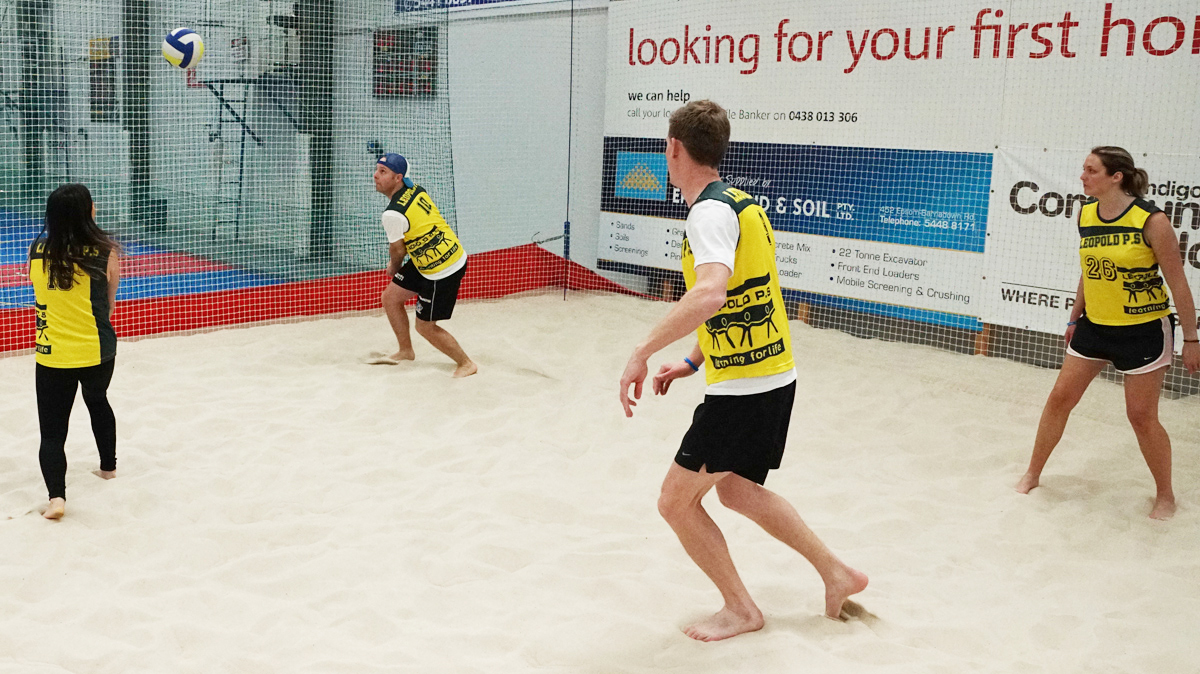
How to do Sports Photography Beach Volleyball
(Click Image to View Full Size)

Indoor Beach Volleyball is extremely fast in a very enclosed area and can be dangerous for the Photographer. Low light means we have to shoot at low shutter speeds producing blurred ball movement.

The Ball within proximity of players is very hard to capture because it moves so fast and can be hit very high into the air.

Typical Volleyball Camera Settings Indoors:

Aperture F2.8, F3.5, or F4.0
Shutter 1/500th, or 1/1000th
ISO 400 or 800.


Athletics

Most of the Athletics shots we have done have been for schools and so we cannot display them publicly.

However, here is one shot that has adult aged competitors.
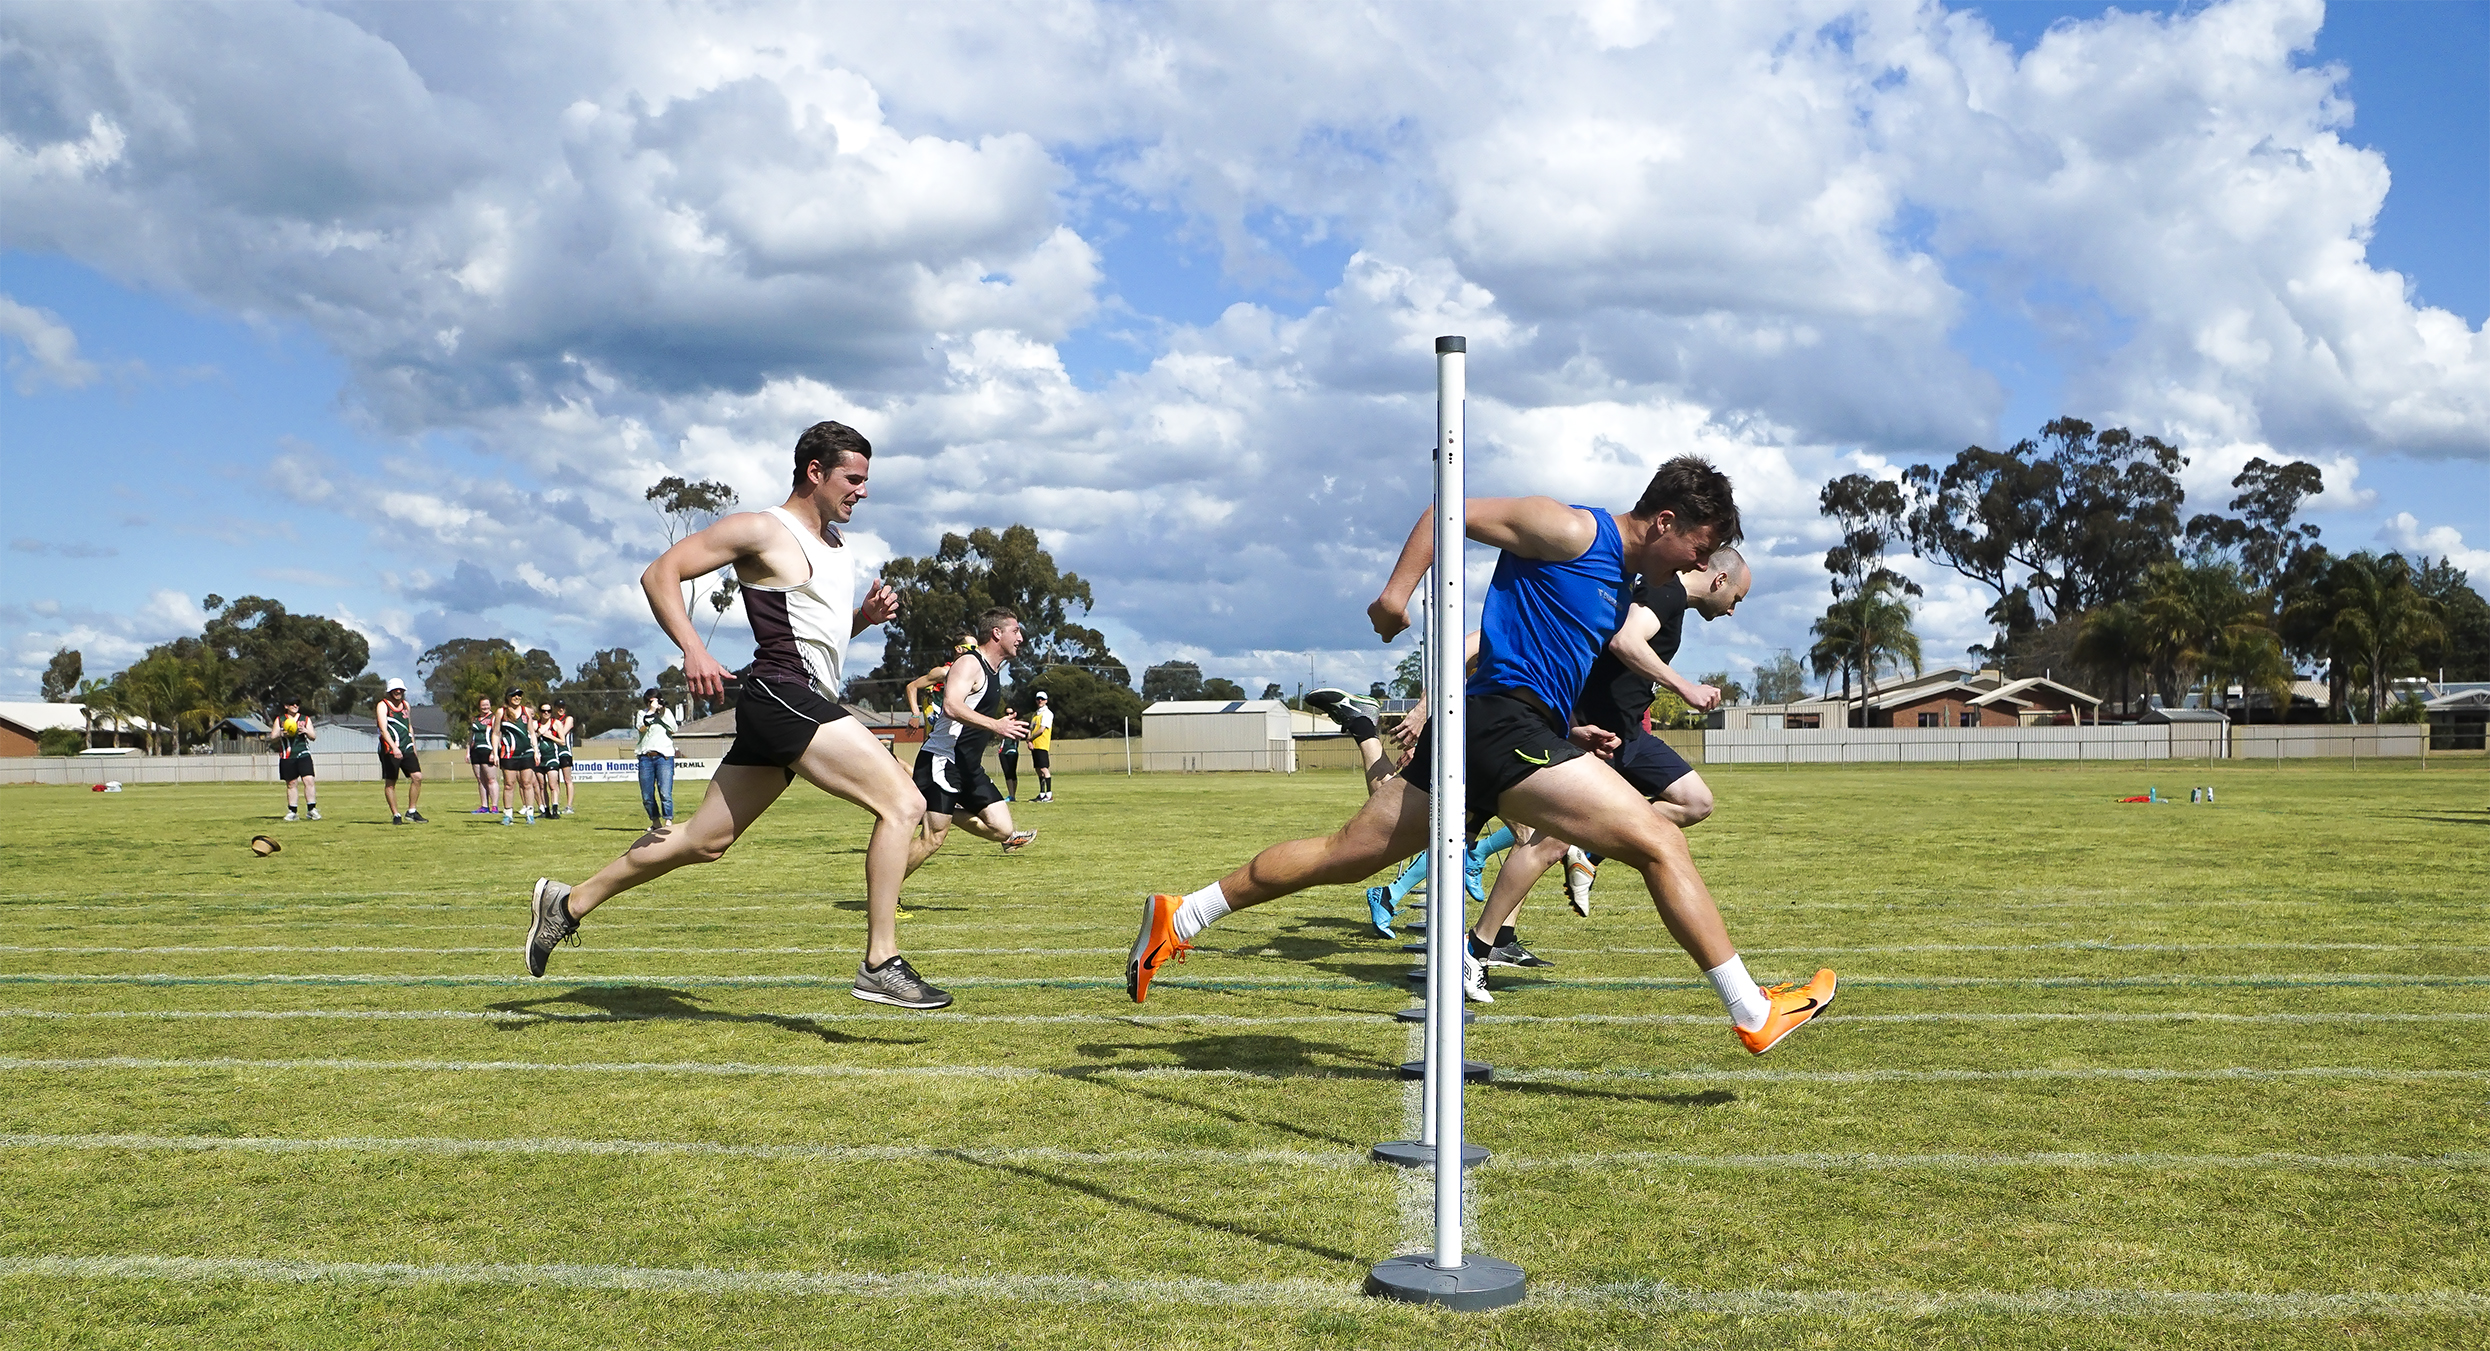
How to do Sports Photography Athletics One
(Click Image to View Full Size)

For photographing running races it is best to be located at the inside edge of the track about 5 meters (15 feet) or so from the starting line. Get down as low as possible and shoot to capture the explosive strides of the runners coming towards you.

Another great position is at the Finish line directly side on to the line to capture the athletes finishing the race and lungeing towards the line.

For long jump and triple jump, get down as low as possible (even lying down on your stomach) at the end of the sand pit. Shoot upwards to make the jumps look even higher than they actually are.

The same approach applies for High Jump. Get down really low behind the landing mat and shoot upwards as the jumper crosses over the bar.

Throwing events like Shot Put and Dicuss are far too dangerous to attempt photographing! However you can get to the side of a javelin throw and capture the launch.

Typical Athletics Camera Settings:

Aperture F2.8, F3.5, or F4.0
Shutter 1/2000th, 1/3200th, or even 1/4000th
ISO 250, 320, or 400.


Mountain Bikes

The main tip for shooting Mountain Bikes is to shoot from very low down, kneeling on one knee, sitting down cross legged, or even lying flat on your stomach. Get close to the edge of the track, and being near corners produces good shots.
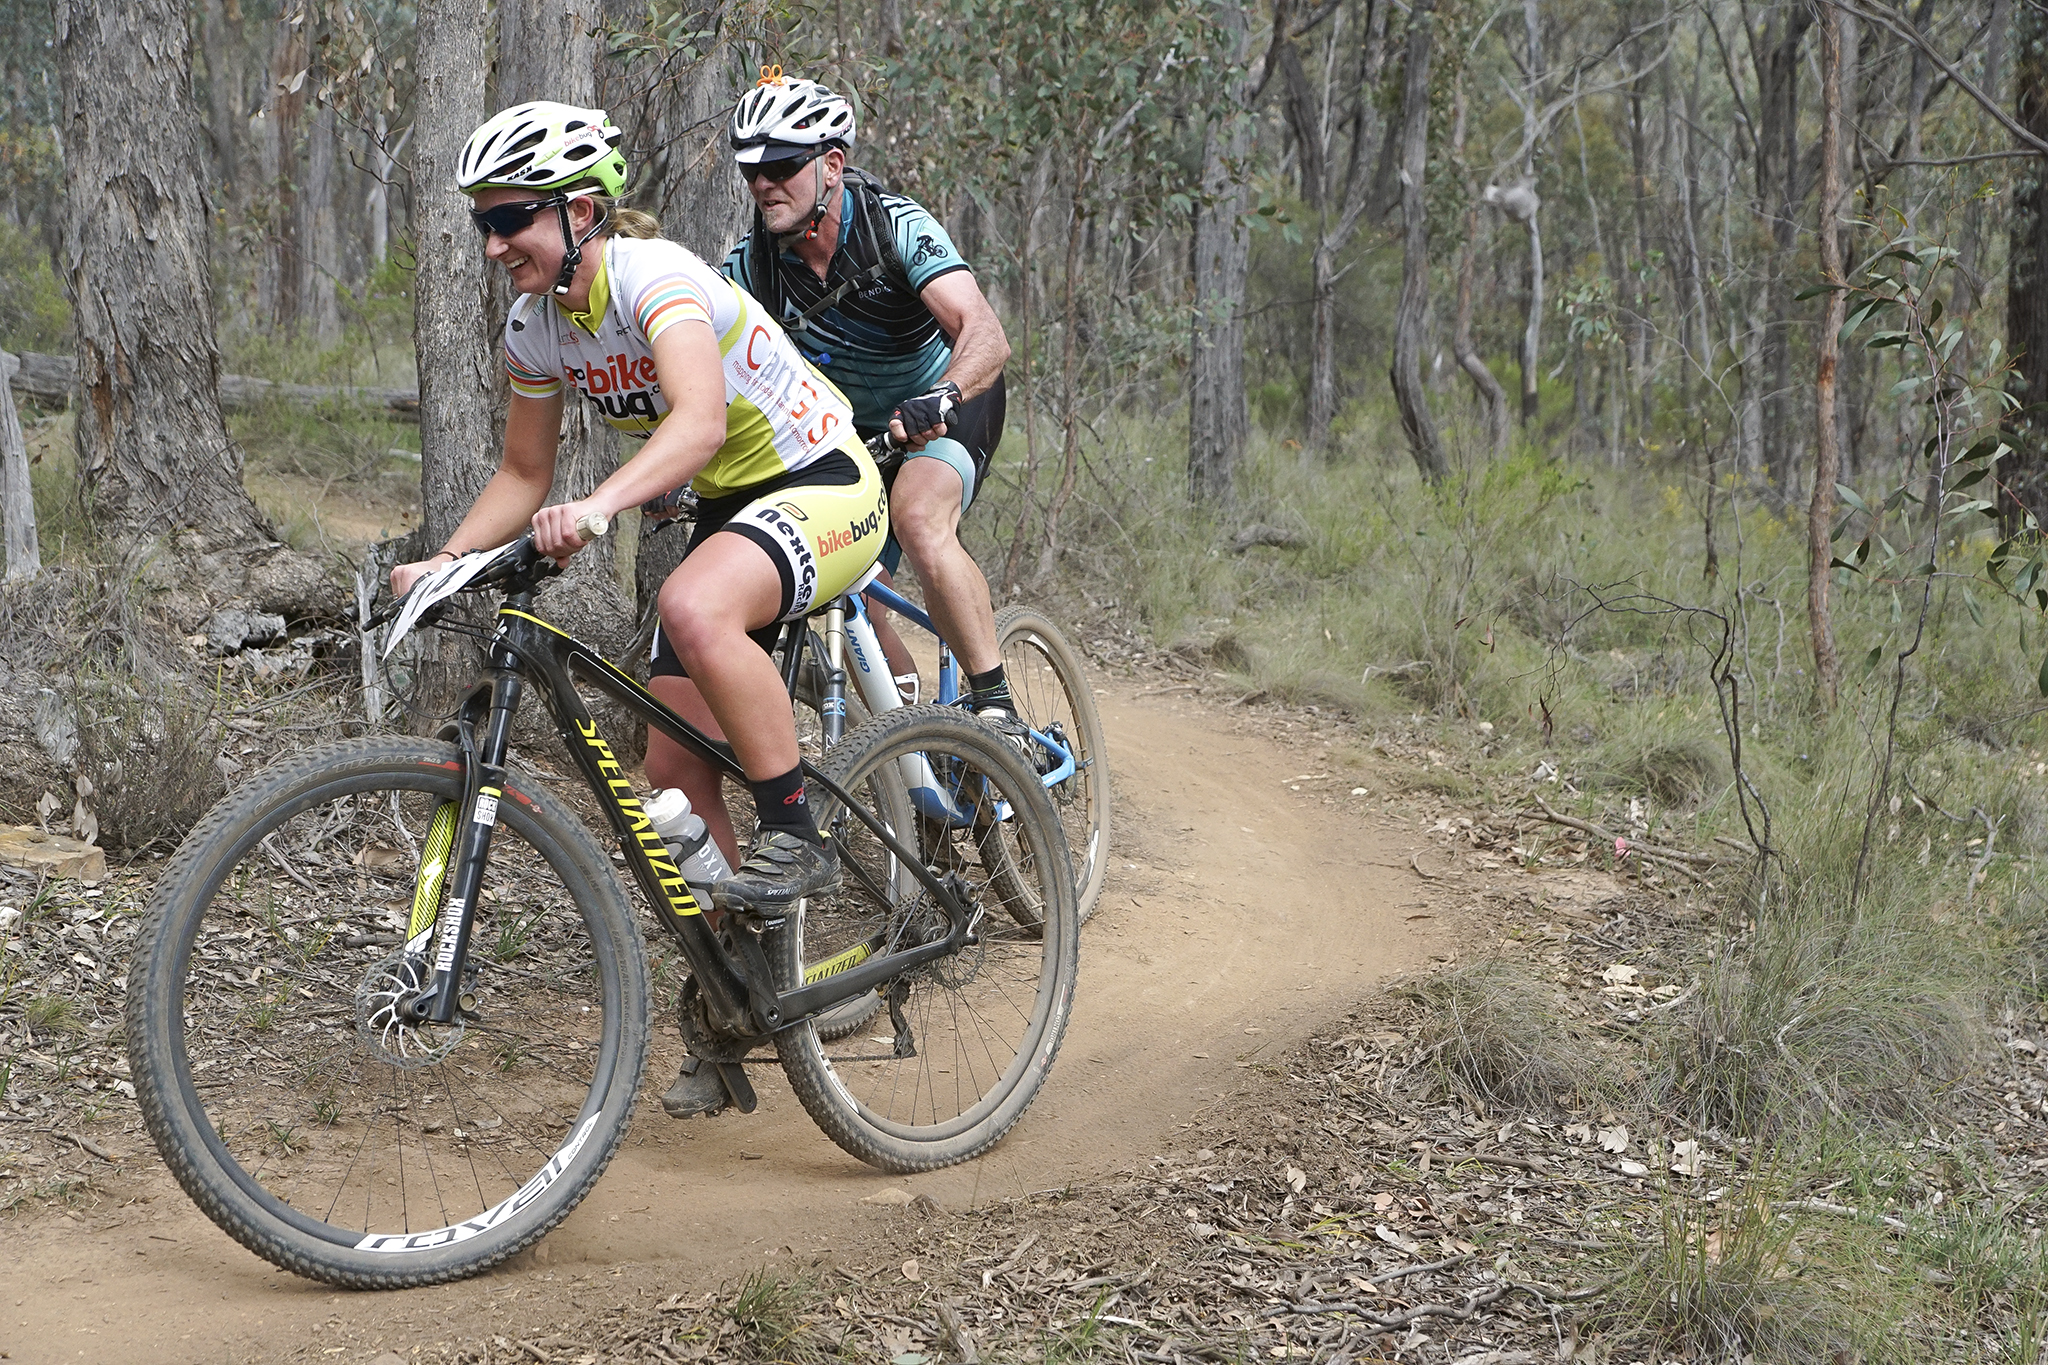
How to do Sports Photography Mountain Bikes Corner
(Click Image to View Full Size)

There will be a lot of dust or mud generated from the bikes and flicked your way so best to have a weatherproof camera and lens, and make sure you have a clear UV filter on the lens to protect it.

Another great tip is to take lots of photos early in the race when the riders are still grouped close together and riding hard as they jostle for position.

How to do Sports Photography Mountain Bikes Start
(Click Image to View Full Size)

If there are any decent jumps on the course, then get down at the side of the track lying on your stomach and shoot upwards to make the height of the bike in air look really big.

Typical Mountain Bikes Camera Settings:

Aperture F2.8, F3.5, or F4.0
Shutter 1/1000th, 1/1600th, or 1/2000th
ISO 250, 320, or 400.


Kite Boarding

Kite Boarding is a great high speed water sport with aerial “tricks” performed by riders.
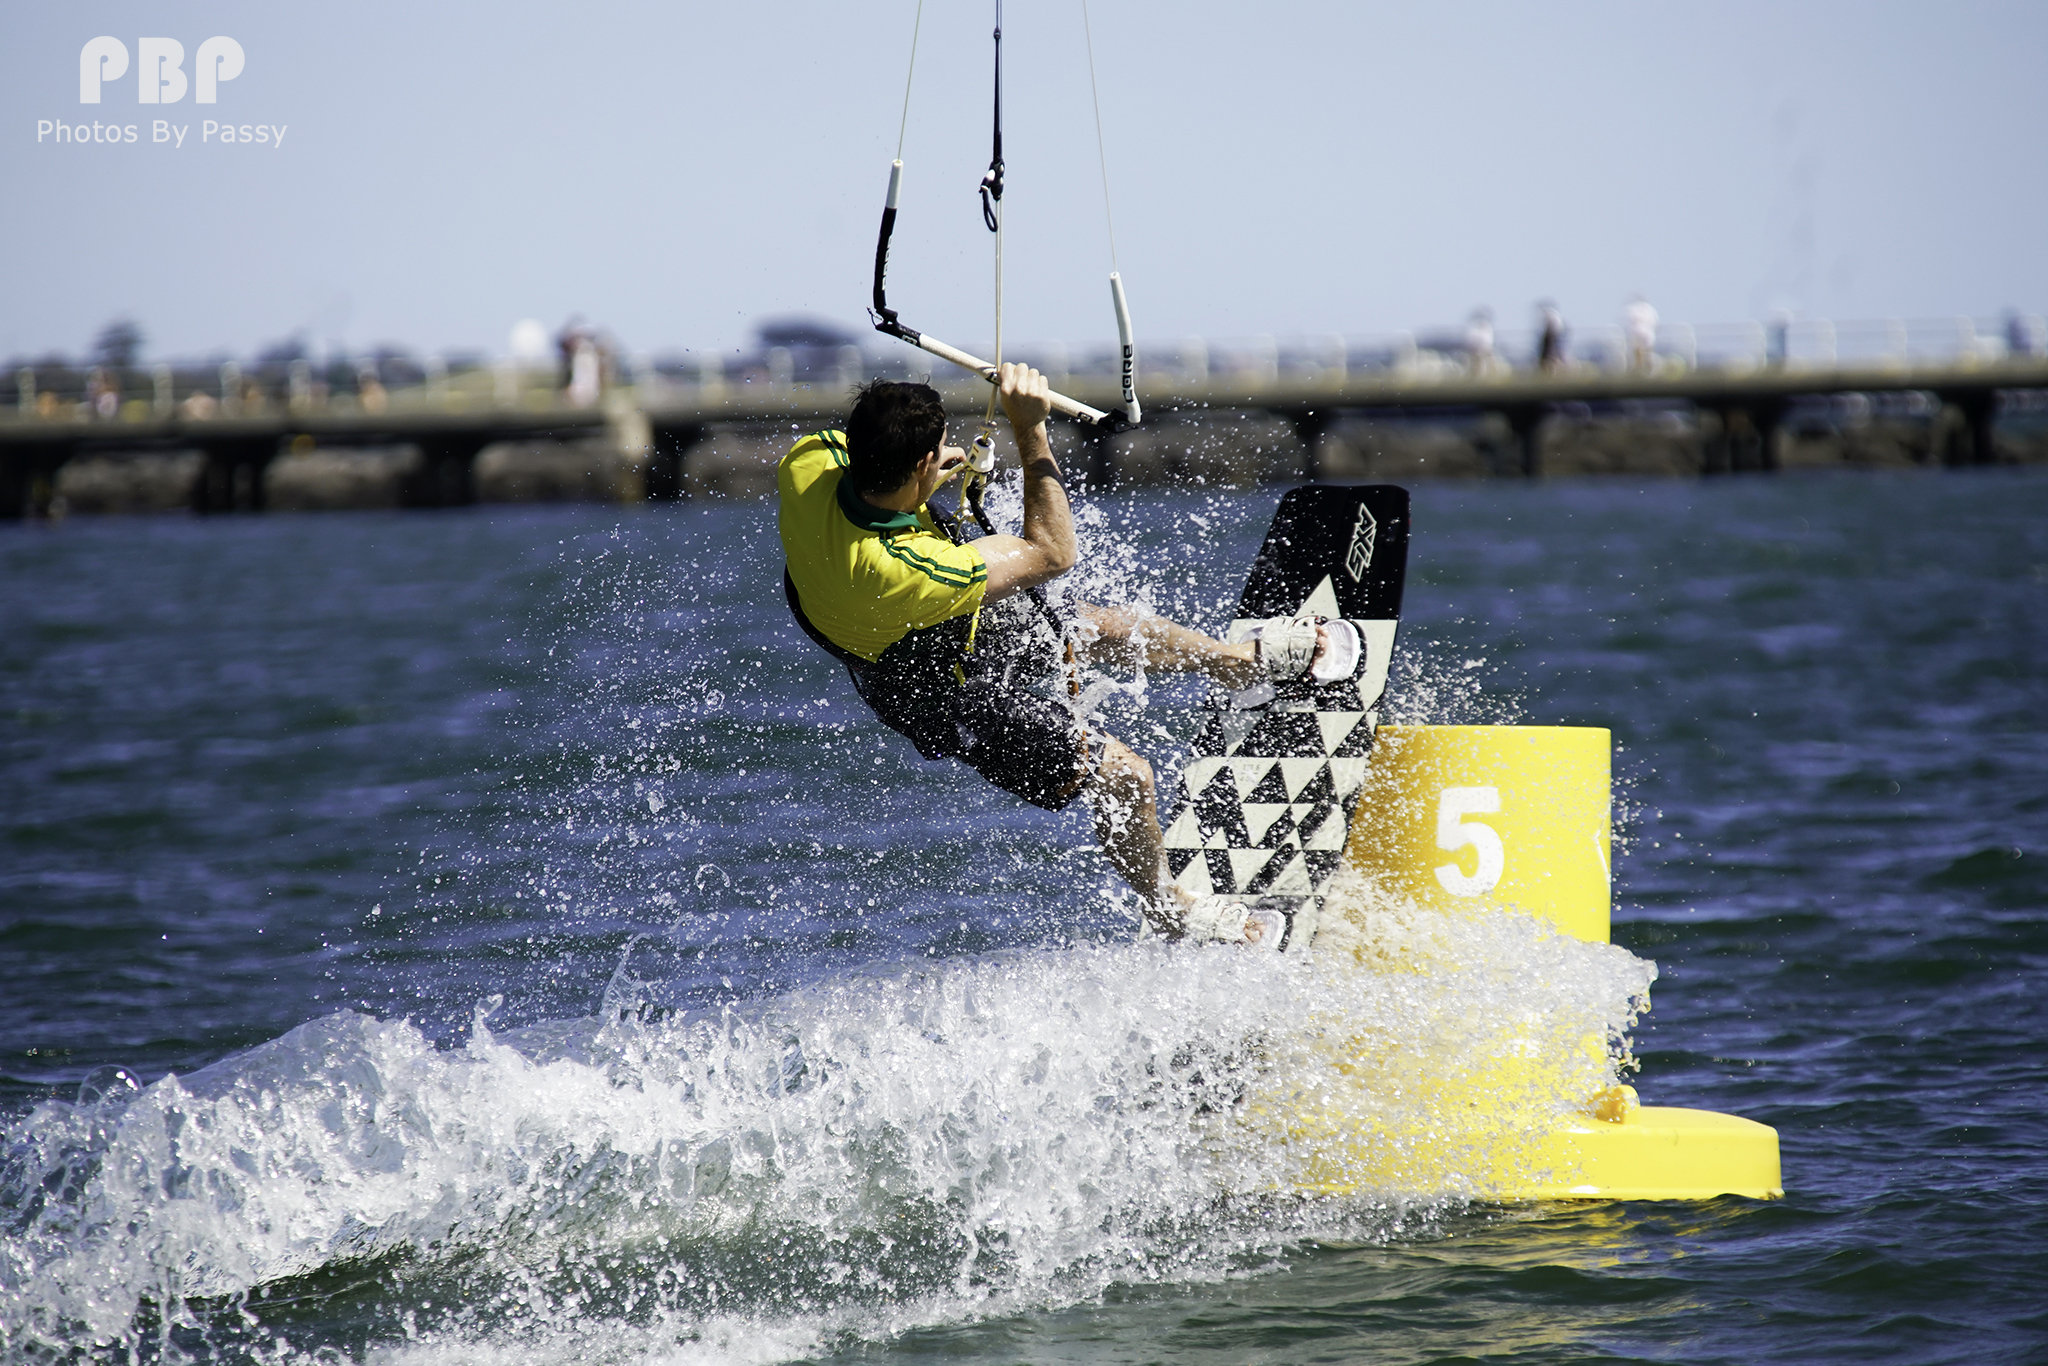
How to do Sports Photography Kite Boarding One
(Click Image to View Full Size)

If the wind is blowing in the right direction and you are lucky, there will be kite boarders doing long runs in close and parallel to the shoreline.

If this is not the case, then the boarders will quickly move too far offshore to get good pictures. This means the time to take your photos is when they are first launching close to the shoreline.

Make sure you also get some sky pictures of all of the colourful kites and people setting up on the shoreline as well.

Use “Burst” Mode at the fastest speed possible with focus tracking to capture multiframes of “trick manouvres”.
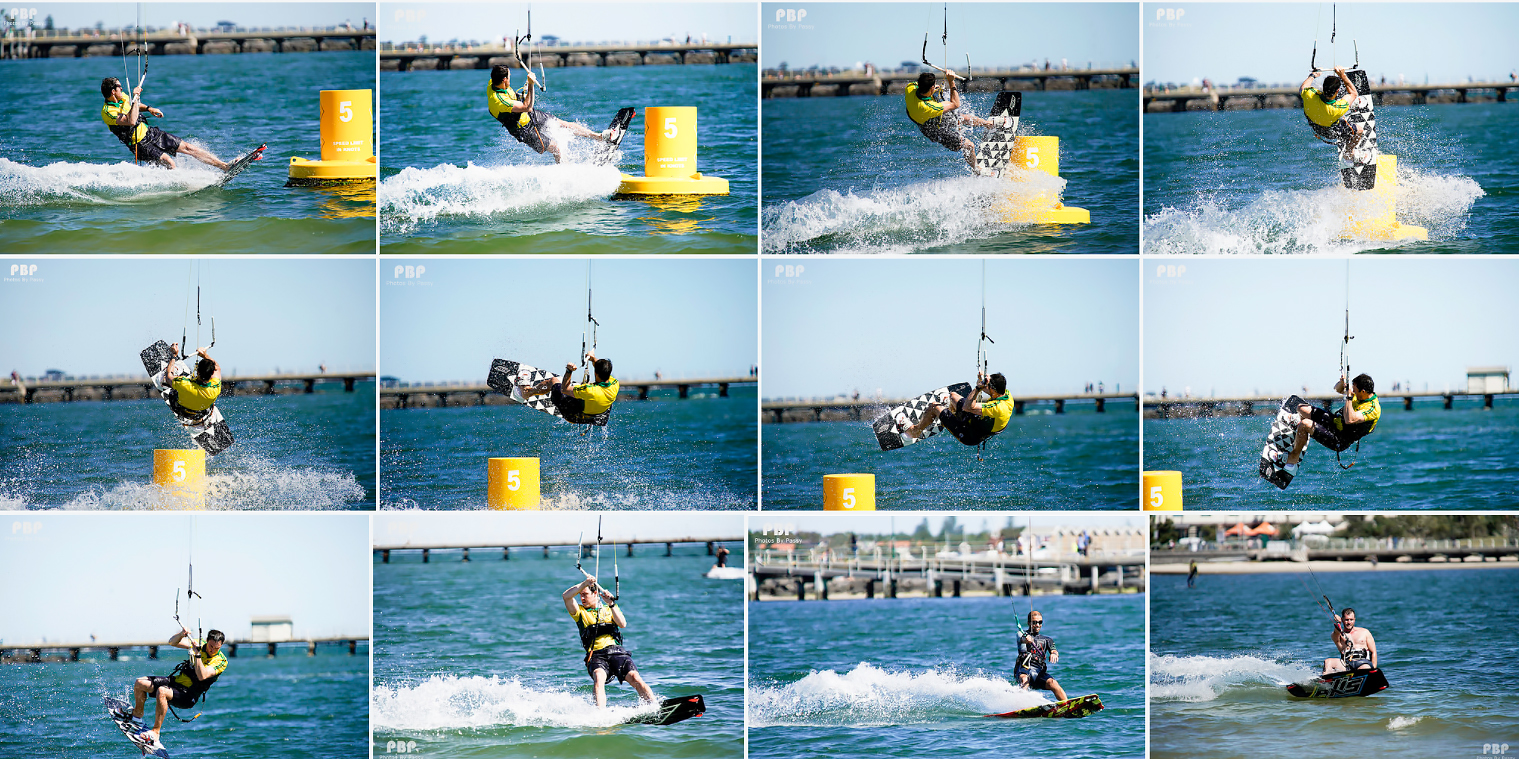
How to do Sports Photography Kiteboard Trick Sequence
(Click Image to View Full Size)

There will be lots of shots to “chimp through” and this may take a lot of time, but it will be worth it to get the best tricks captured.

Typical Kite Boarding Camera Settings:

Aperture F3.5, F4.0, F5.6
Shutter 1/2000th, or 1/3200th
ISO 320, 400 or 500


Surfing

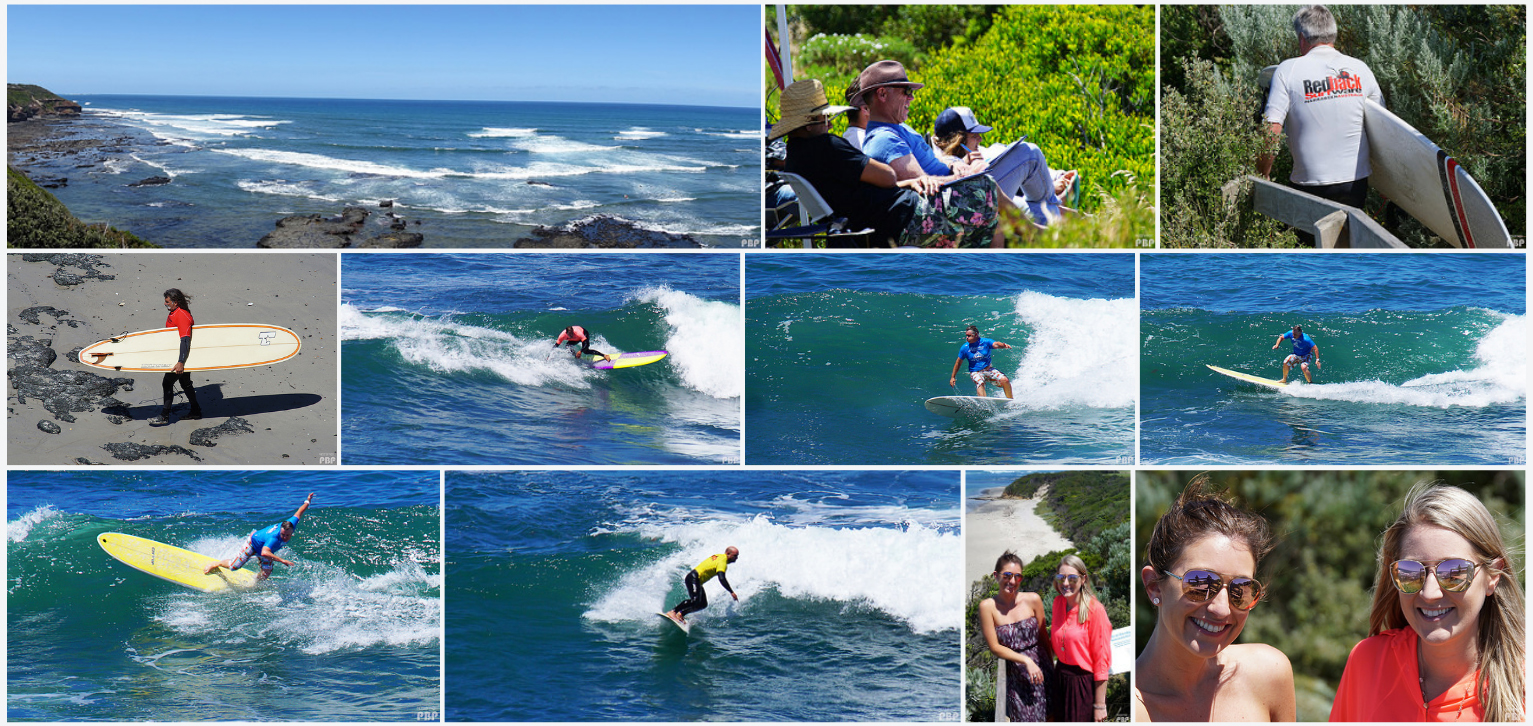
Surfing is difficult without specialised big lenses, as often the action is so far offshore from where we can stand on a beach or a cliff top.
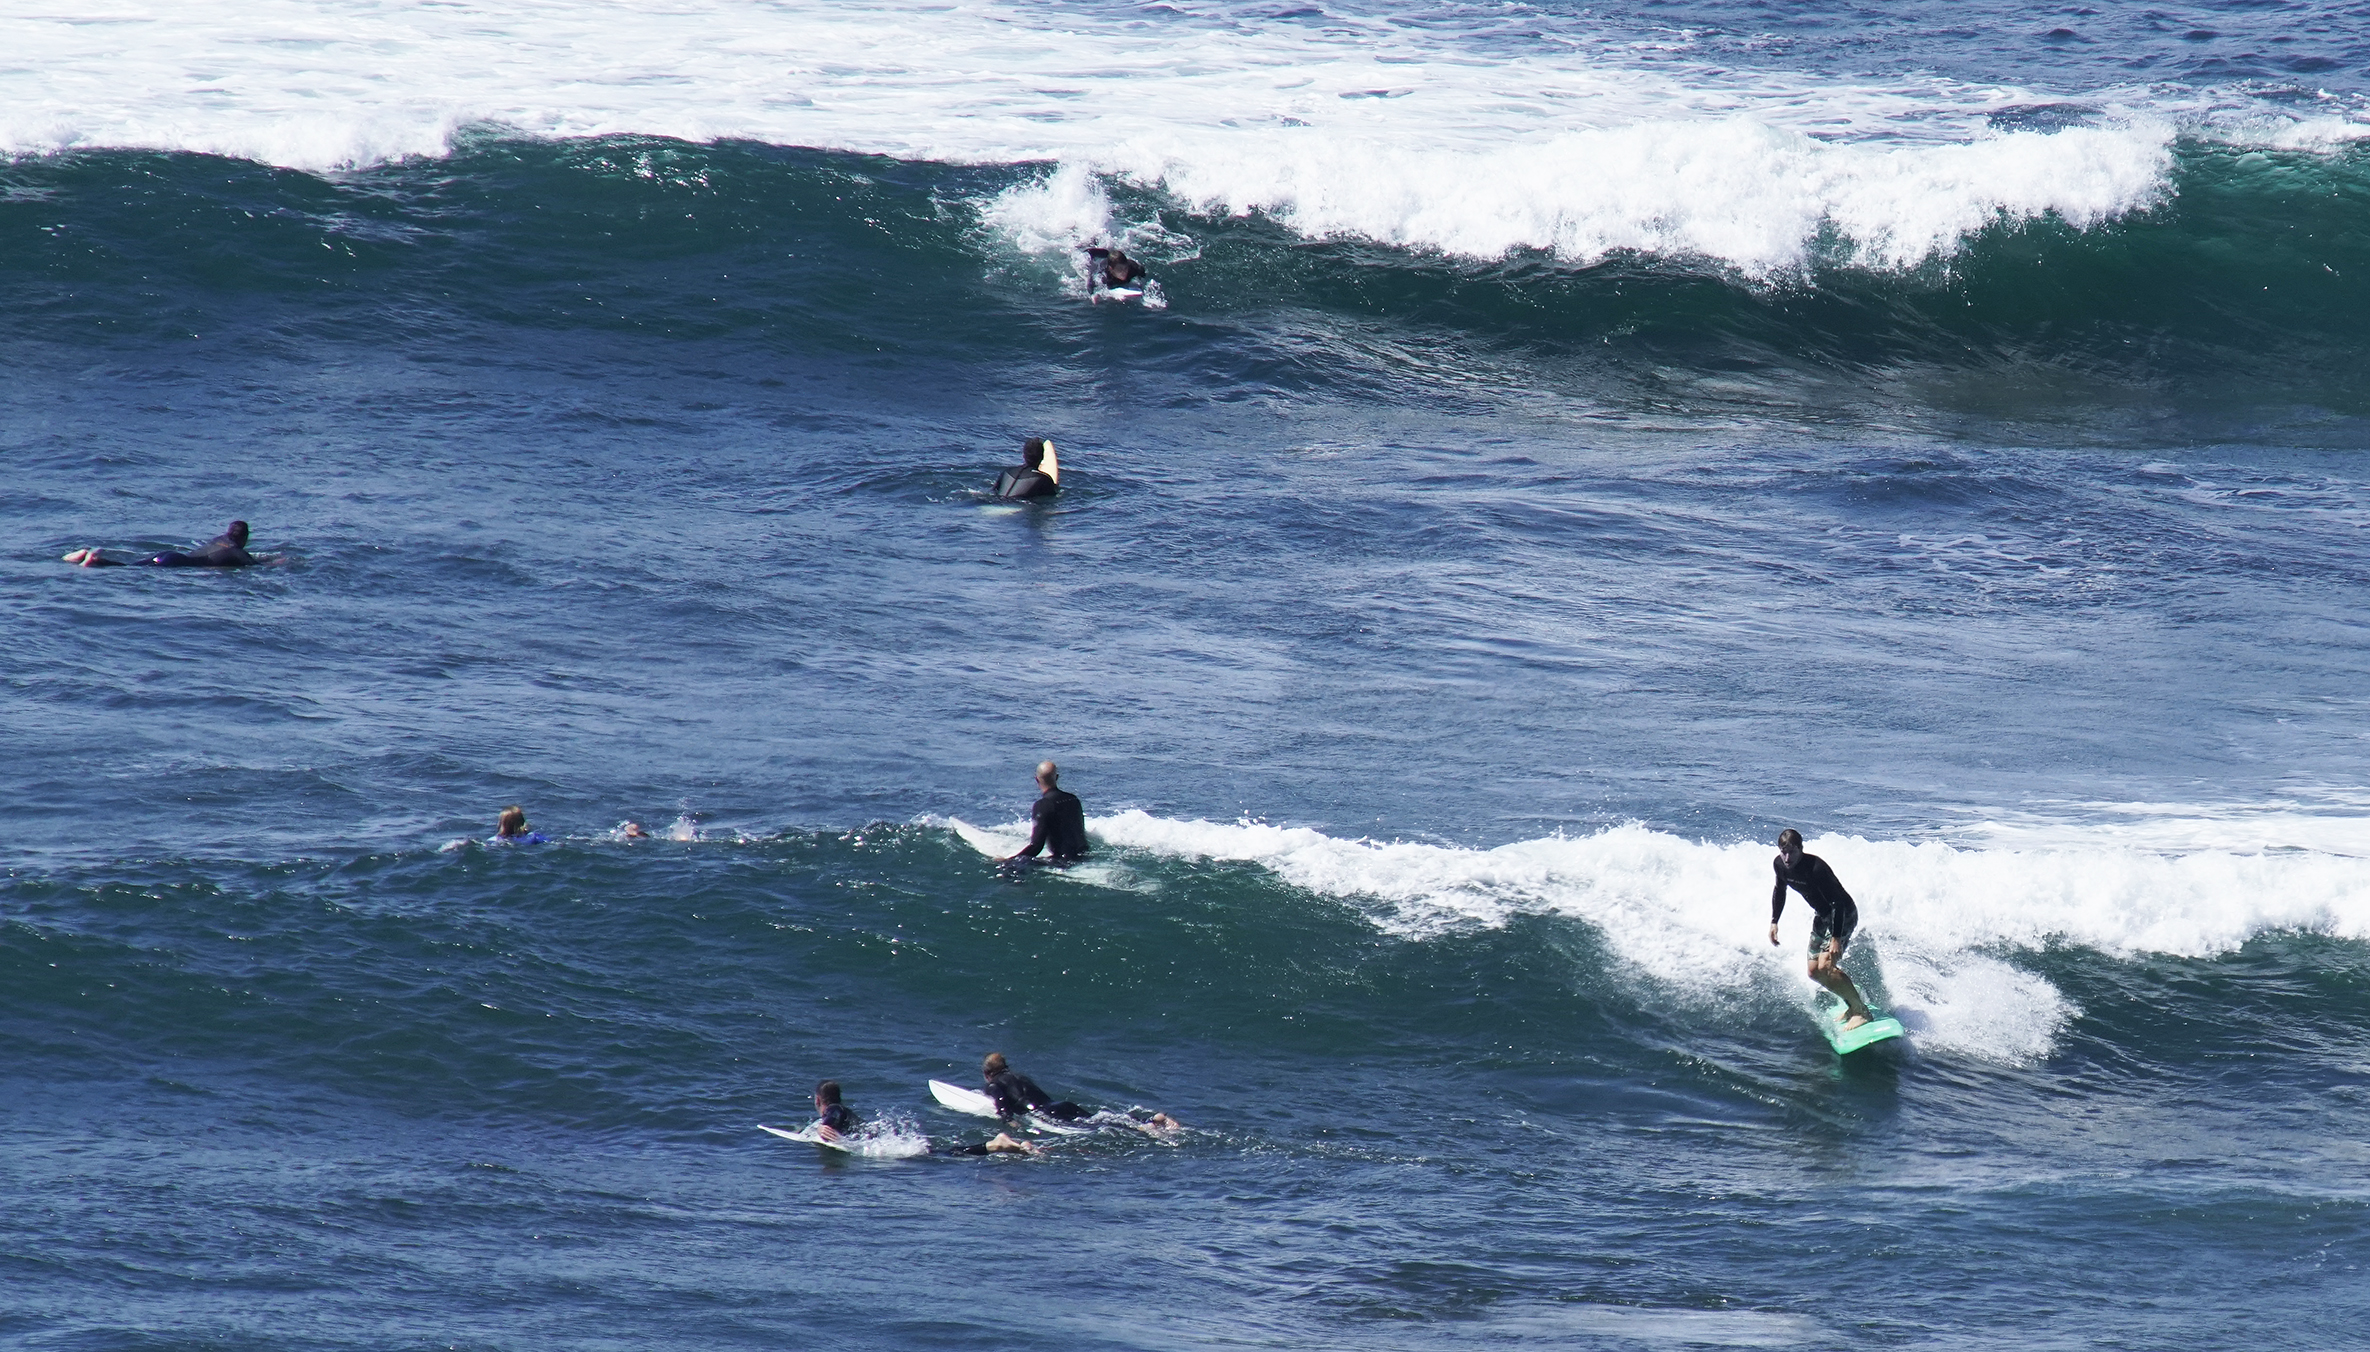
How to do Sports Photography Surfing One
(Click Image to View Full Size)

At the moment we are using our 70-200 F2.8 lens with a 2X Teleconverter that turns it into an F5.6 lens capable of shooting at 400mm on the A99II Full frame Camera.

If we put this setup onto the cropped sensor A77II camera then we get a maximum zoom of 1.5 x 400 = 600mm.

This enables us to get reasonable surf shots like the following:
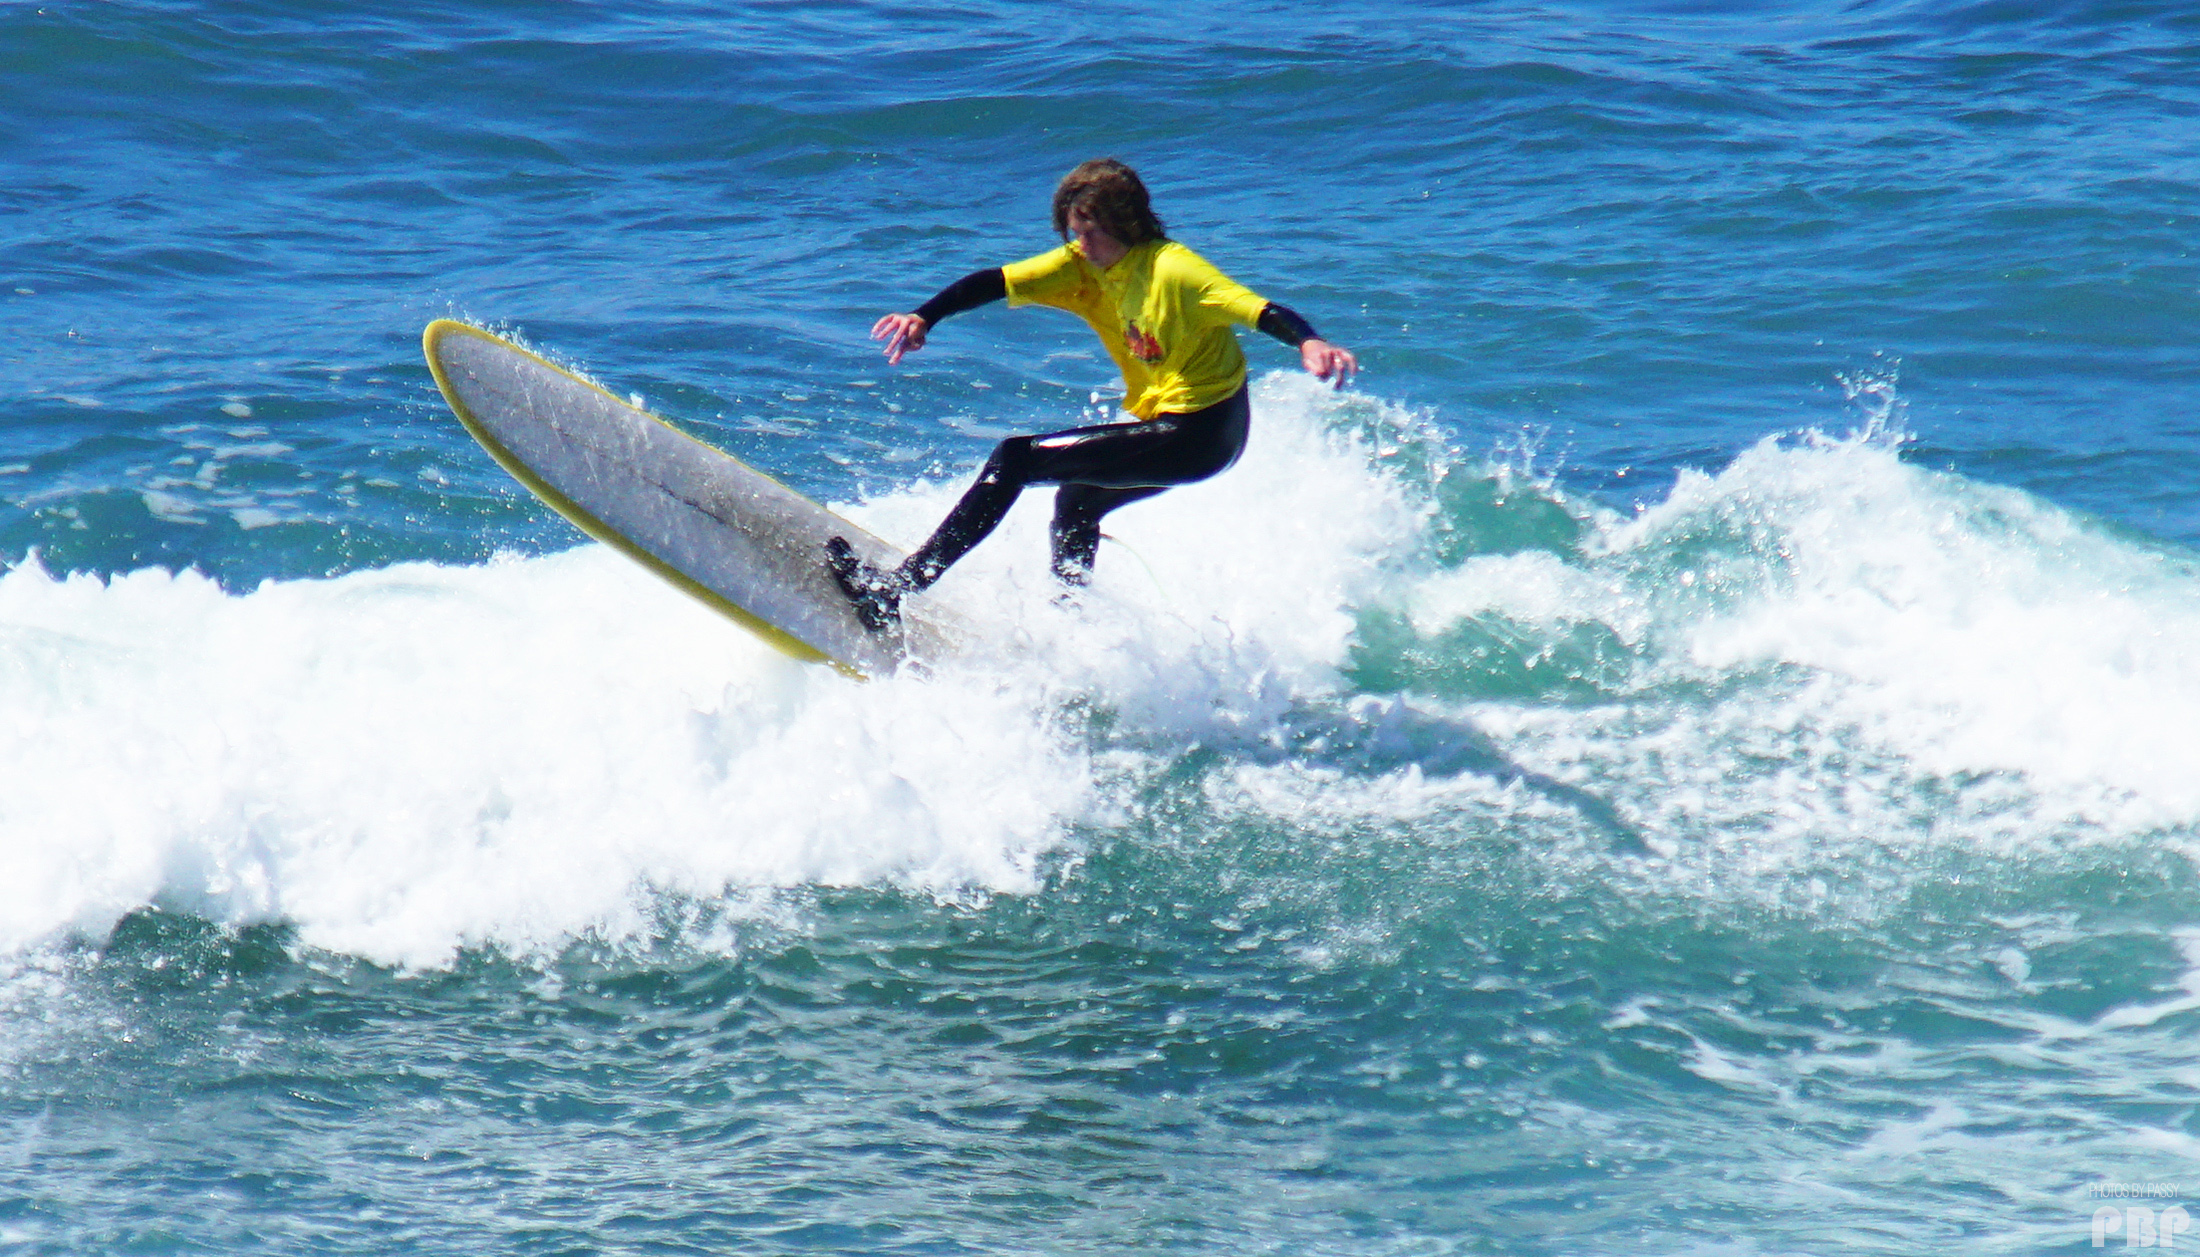
How to do Sports Photography Surfing 2
(Click Image to View Full Size)

We would love to get some much sharper and detailed images, but cannot justify spending huge amounts of money (thousands) on giant Telephoto or Zoom lenses.

Our current plan is to save up over the next 12 months and purchase a Tamron 150-600mm F5.6 / 6.0 lens which will give as a little more reach on the Sony A99II and up to 1.5 x 600 = 900mm on the Sony A77II.

The Tamron lens is around $2000 Australian to buy, and seems to have fairly good reviews on the Internet. It will be a luxury if we buy it, but we may be able to use it for Football photos as well.

Typical Surfing Camera Settings:

Aperture F4.0, F5.6, F8.0
Shutter 1/1000th, or 1/2000th.
ISO 400 500 or 800

Note that because the action is so far away and difficult to focus on we often use 1/2000th, ISO 800, and F8.0 to help with the distant focussing.


Soccer

We have not shot any outdoor soccer matches, but if we did we would probably use the same approach as for Australian Football.

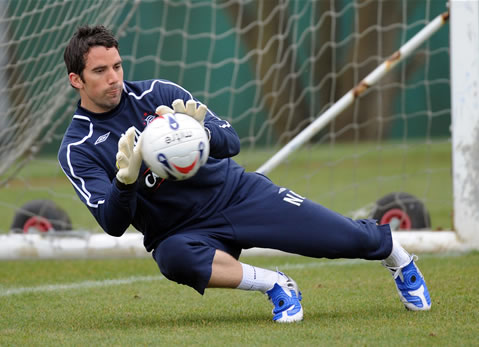
In addition we would try and get some shots of diving goalie saves. These are not very easy to get as a search of Google Images did not find that many images, except for the following one which is a great shot.

How to do Sports Photography Google Goalie

We have tried photographing Indoor Soccer. It was way too fast paced, and too dangerous for getting hit by the ball or colliding with players. The indoor lighting was also very poor. The photos were barely usable and very grainy and blurred.


Cricket Baseball Softball

These are all long and tedious games with only occasional intermittent action.

There is also a real risk of getting hurt if a stray ball hits you.

We avoid shooting these sports.

If we did have to shoot them, our approach might be to shoot 4K video and then try and pull some stills off the video.


Table Tennis and Badminton

These sports are played indoors in cramped conditions and the ping pong ball and shuttle cock move at incredibly high speeds.

Because we have to shoot at low shutter speeds to compensate for the poor lighting, it is very difficult to get any usable shots.

We have attempted to shoot both of these sports with very poor results due to the slow shutter speed in low light, as well as tables and courts all being too crowded and close to each other.


Cycling

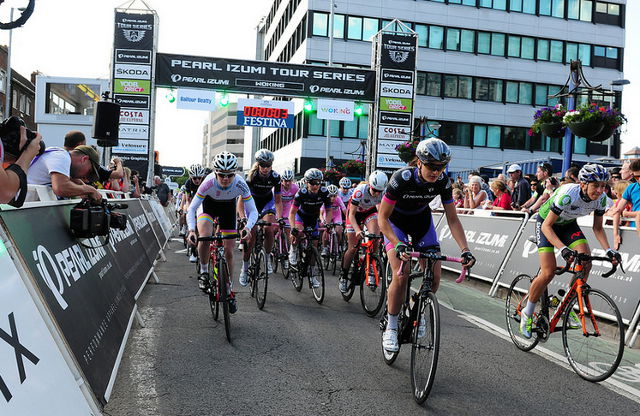
We have not done any photos of cycling. If we did shoot a race we would make sure that we definitely covered the front facing aspect of the start of the race, like the photo shown below from Google Images.

How to do Sports Photography Bike Race Start

For the rest of the race we would shoot down low on corners like we do for Mountain Bikes.

A Panorama shot of the pellaton group coming around a corner would be tricky to create, but looks great from some of the images we have seen on Google.

There might also be opportunities for Blurring and Panning of side on views of riders, like is done in motorpsorts.

The other shot to get would be of the winner with hands in the air crossing the finish line.


Motor Sports

We have not shot any cars or motorcycles racing.

However if we did we would try using a slower shutter speed of perhaps 1/500th and pan our shot to try and get background blurring to emphasize speed.


Other Sports

There are many other sports we have not covered here such as Equestrian, Rodeo Events, Swimming, Water Polo, Hockey and so many others.

If we had to shoot any of these we would first look at Google Images as well as websites for the particular sport to see what the “Good” and “Popular” shots look like.

The next step would be to work out what location and position the shots were taken from, and then go to the event and try and get these same types of shots.


Taking Group Shots of Teams

When doing Group Team shots at a Sports Event try mixing it up and “racking and stacking” the groups in different arrangements.
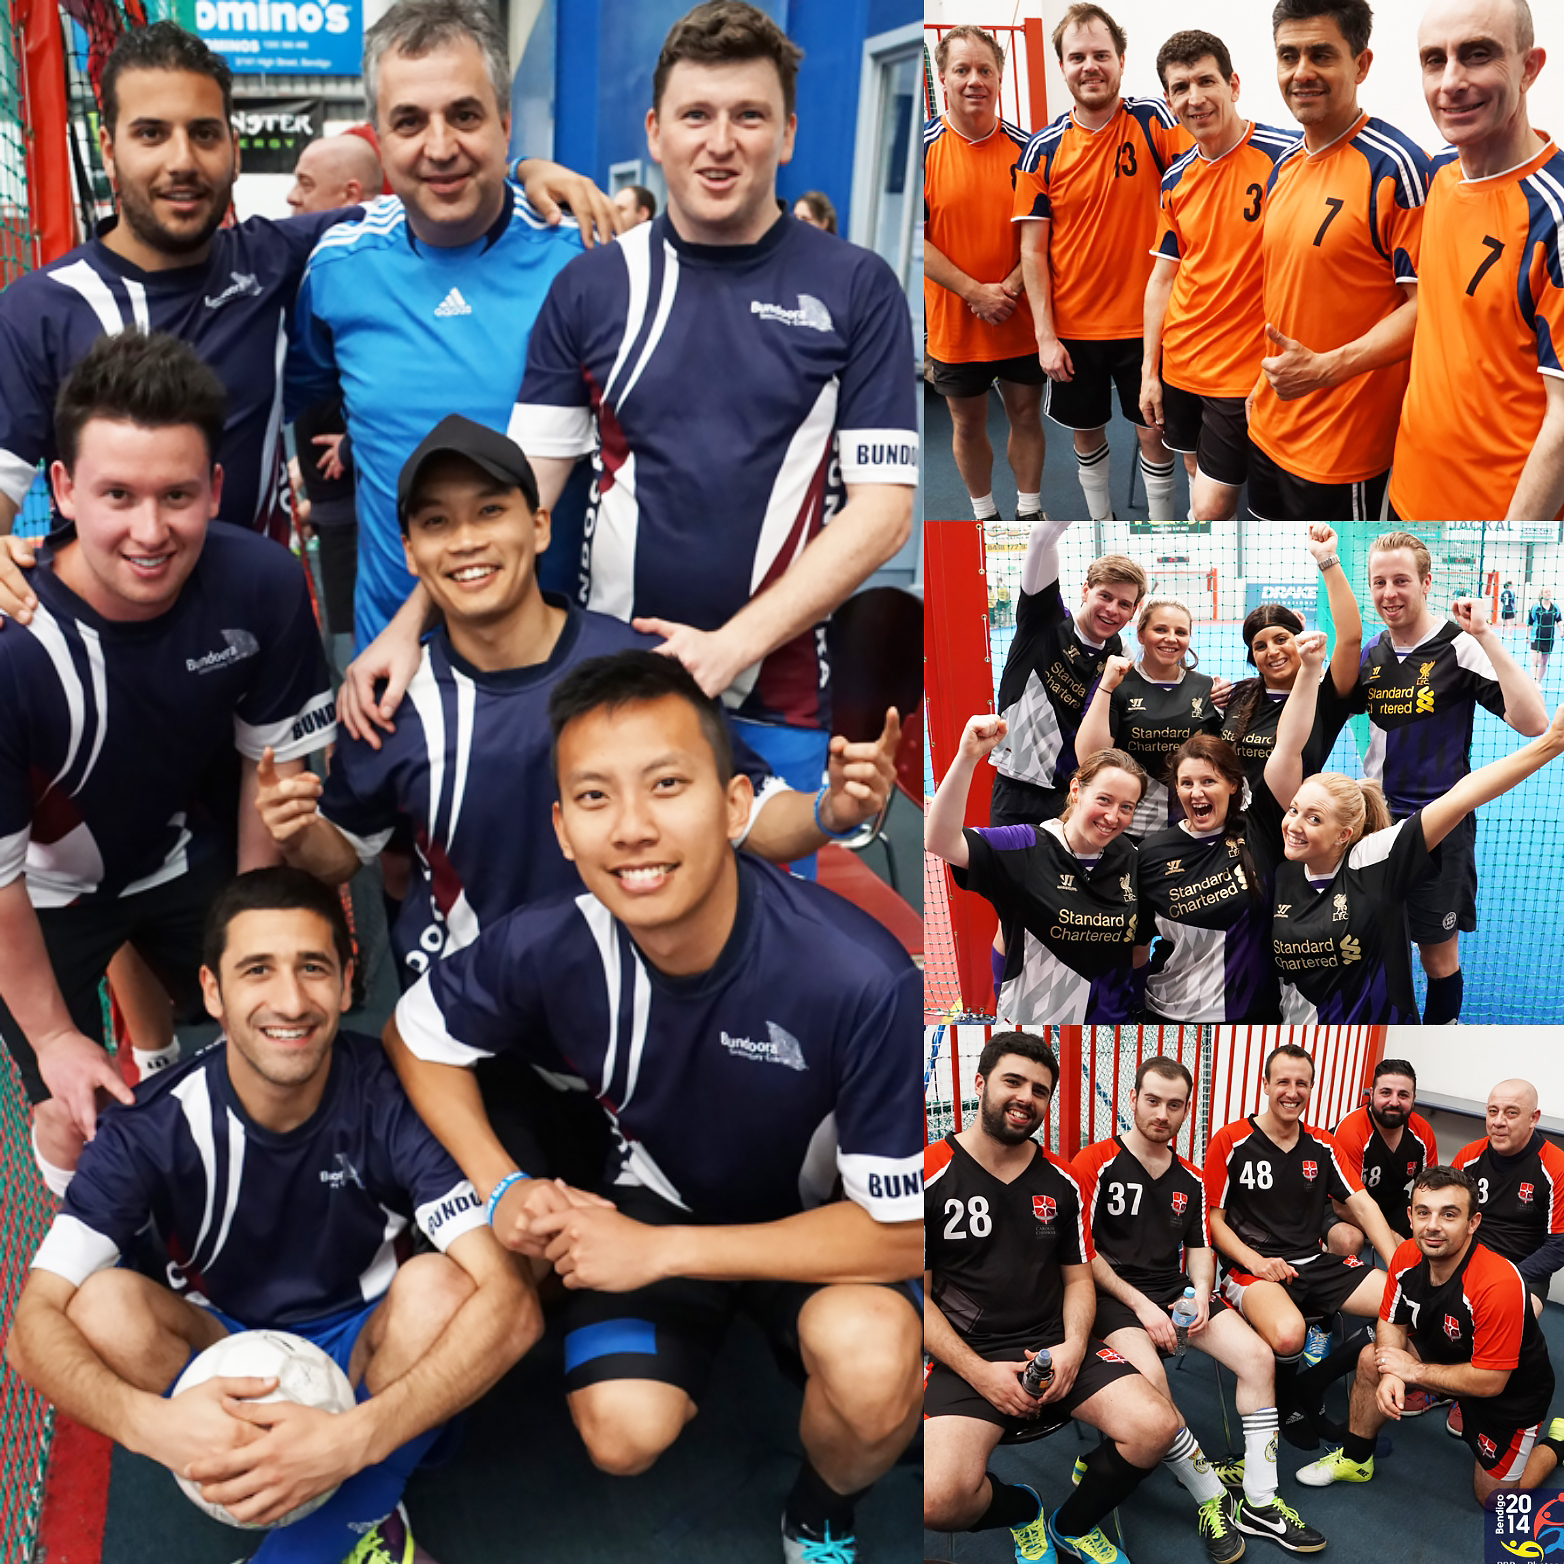
How to do Sports Photography Socer Teams
(Click Image to View Full Size)

These pictures are much more interesting in a Photo Album than having every group in the same standard arrangement in every team photo.


Final Summary

We find Sports Photograhy fun because it is such a challenge to get that elusive shot where a great moment is captured with emotion and clarity for a particular sporting match or event.

However due to the time and effort of travelling and shooting events, as well as the long hours spent sorting through and processing burst rate photos, we seriously doubt that we would like to do it full time.

Sports Photography is not for everyone, and only a special breed of photographer becomes a full time professional Sports Photographer.

Having Hundreds or even Thousands of Burst Rate photos to go through to meet very tight deadlines can make Sports Photography a painful grind. That’s why it is so important to pick an event or sport which excites you and where you know about how the game is played and what makes for a good image.

High Speed F2.8 Zoom lenses for Sports Photography and high frame rate DSLR Cameras are also incredibly expensive to buy. So start off simple, and really make sure you like doing Sports Photos before spending big dollars upgrading to sophisticated equipment.

Most importantly, take your time learning, and make sure you are having fun. If Sports Photograhy is not bringing you great joy, then move onto something else.

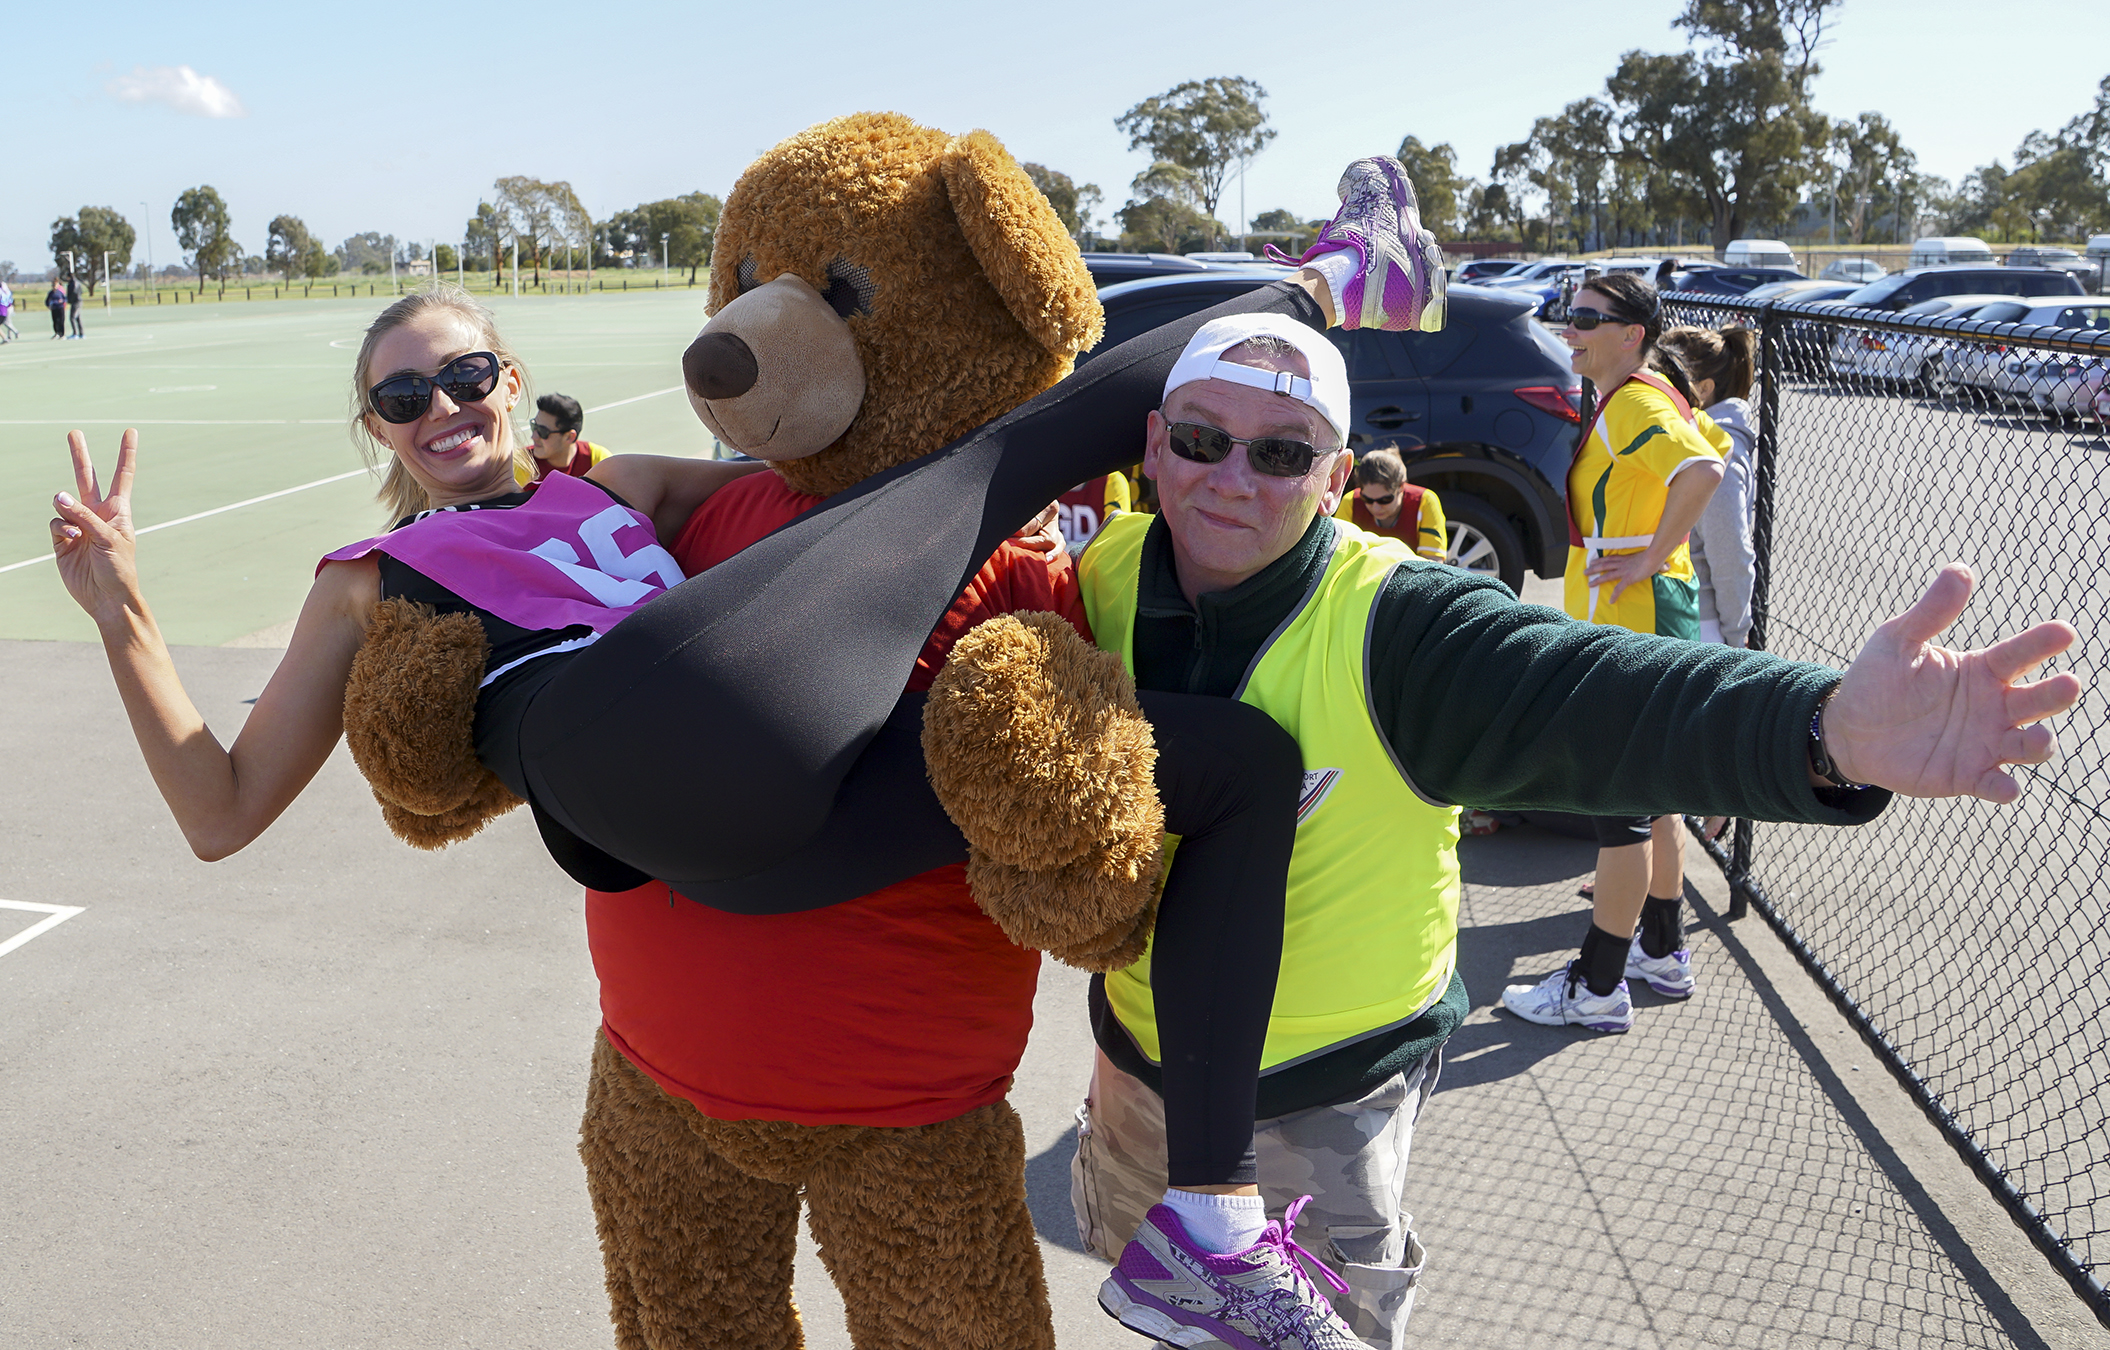
How to do Sports Photography Fun Mascot Shot

Enjoy,
Passy

Follow us on Instagram @photosbypassy

Like and Follow our Facebook at
“PBP Photos By Passy”
How to Female Portraits

In this “How To” article we look at shooting individual portraits of females.

The lesson covers:

– Basic Rules For Female Portraits
– Example Female Modelling Poses
– Camera Equipment and Lighting

The article is mostly about poses and techniques for getting the best looking aesthetically pleasing images. It is more about the posing and modeling side of things rather than the technical equipment and lighting that can be used.

This article will focus on female portraits (as the web has boundless information on this). As such it should be useful to anyone taking photos of people.

It is a long and comprehensive “How To” article, so take your time going through all of the material.

At a future point in time we plan on writing separate How To articles about Male Portraits, Couples Portraits, Group Portraits, and Street Photography portraits.


Introduction

There are certain poses that work better than others, and it is important to fully understand this.

Often we are shooting people on the street, or at functions and events, and so we need to be able to “direct them” into certain poses that are going to make them look their best. We need to know how to make a person look like a photographic model.

The ideas we present here are what we have found makes for a good portrait shot from researching the web and doing our own photography. For example we are not a fan of sulky and angry looking poses and always think that a smile looks best for a portrait. Therefore our article and examples will be biased towards smiling shots.

Many people have taken lots of “selfies” on their phone and have an idea of what good poses look like. Our challenge as a portrait photographer is to get them to try something different that also makes for a great photo. We want them to be very pleasantly surprised by the portrait we have made of them.

It is the Photographer’s responsibility to direct the subjects into good poses, and the subjects are expecting the Photographer to do this. The Photographer’s role is to confidently take charge and “Direct the Shoot”.

There is nothing more awkward than a clueless model and a quiet photographer. Hence shooting a subject requires a lot of continual talking, getting the subject to make slight re-posing moves, all done whilst continually shooting.

We need to make the subject feel good about themselves and what they are doing. This can be done by showing them image results on the camera screen throughout the shoot. Get feedback from them about which ones they like and which ones they dislike. Have them continually change posing positions slightly and take lots of pictures.

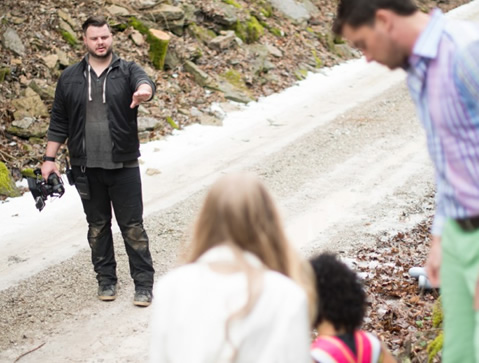
As advised by portrait photographer Clay Cook: During a Portrait Shoot you need to be confident in what you tell your subject and if one pose or technique does not work then simply move onto something else. Keep experimenting and keep talking. Connect with your subject and be patient, if you stop talking and connecting, you will never get that perfect pose.

Female Portraits Photography 01
(Portrait Photographer Clay Cook directing a shoot)

We hope that this “How To” article will give you the tools and techniques you need to become a confident maker of Portrait Pictures.


Basic Rules for Posing

There are a series of basic rules that we think greatly assist female portrait shots.

The basic “rules” we follow here at Photos By Passy when shooting individual portraits are the following:

1) Shoot From Above
2) Chin Down
3) Tortoise Chin
4) Eyes in Focus
5) The Two Thirds Turn
6) Mouth Open / Lips Apart
7) Placing The Hands
8) Using Props
9) Sit and Lean In
10) Slimming Poses
11) Using Trees Walls and Doors
12) Sideways Looks
13) Position The Hair
14) Use The Favoured Side
15) Gaps Between the Arms
16) Cross the Legs
17) Getting a Natural Smile
18) Maintaining Good Posture

Many of these rules are equally applicable to group shots. The primary aim is to get people looking their best by having strong jaw lines, feminine curves, and looking healthy.

If you are more of a visual learner, then you may want to jump straight to our Pinterest Board of examples at the link below:

Female Portraits Pinterest Board

Let’s discuss each of our portrait making rules one by one with plenty of real life examples.


1) Shoot from Above

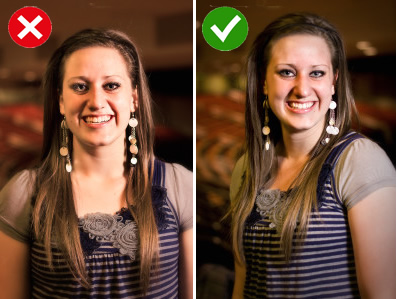
A strong jawline without multiple chins looks great, so always take the camera to a position higher than the person’s eyes. Never shoot at the subject with your lens below the level of their eyes. Basically we are using the same technique as used on phone selfies.

Female Portraits Photography 02 Bethan Brunette

So the rule is to shoot above the subject’s eyes, looking down. This angle not only gives the jawline more definition, but also slims the body as it looks smaller when it is placed further from the camera. Curvier women look great in this pose.


2) Chin Down

This is a follow on from Rule 1 and is all about getting a strong jawline.

People often have a natural instinct to lean backwards in a photo. When they do this we can see up their nose, into their mouth, and their eyes are partially closed. It is not a good look.

Female Portraits Photography 03

We need to tell the subject to bring their chin down which will fix these problems and should also help open their eyes up. The eyes are the most important in a portrait.

Also try getting the subject to use their tongue.

It might feel strange, but pressing your tongue on the roof of your mouth while smiling is an effective way to help avoid the dreaded double chin, as it elongates your neck and your jawline.

However, it is important that if trying this method they do NOT press their tongue into the back of their front teeth. if this happens the tongue will show through the teeth and make their smile look awful.


3) Tortoise Chin

This is another technique to get a strong jawline onto the subject, especially if we are facing them directly when shooting.

In their natural position everyone including skinny people will have some flab appear under their chin. Tortoise Chin Technique can remove this.

In this technique we tell the subject to bring their chin and ears forward and down, as if they were a tortoise poking its head out of its shell.

This should make their chin come out and down, resulting in a much more attractive jawline.

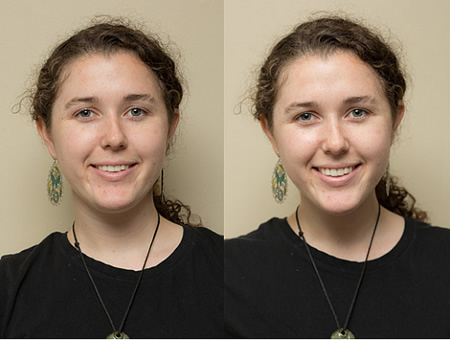
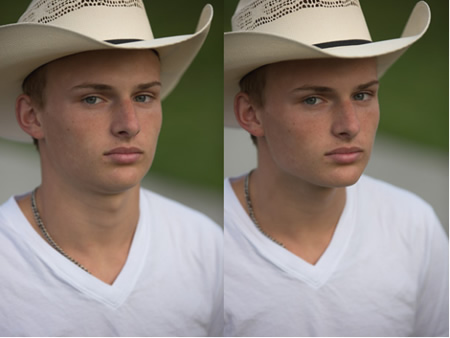
Here are some images from the “photography.tutsplus.com” portraits tutorial that shows how this works.

Female Portraits Photography 04

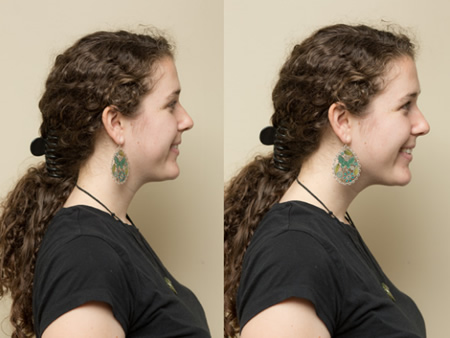
The above before and after effect was produced by telling the subject to bring their ears forward like a tortoise. Side on the Before and After looks like this:

Female Portraits Photography 05

The Tortoise Technique works equally as well on males as on females.

Female Portraits Photography 06

When the subject pushes their chin forward and then down and is faced directly towards the camera, it will probably feel incredibly awkward and uncomfortable for the model.
However from the photographers perspective the jawline will become extended with stronger lines formed and be far more attractive.

Perhaps show the subject before and after shots of this technique so they can see for themselves what improvements this “torture / tortoise process” achieves.

A similar outcome to the Tortoise technique can also be obtained when the model leans forward towards the camera and we shoot from above.

Female Portraits Photography 07
(Click Image to View Full Size)


4) Eyes in Focus

It is critically important that both eyes are fully in focus.

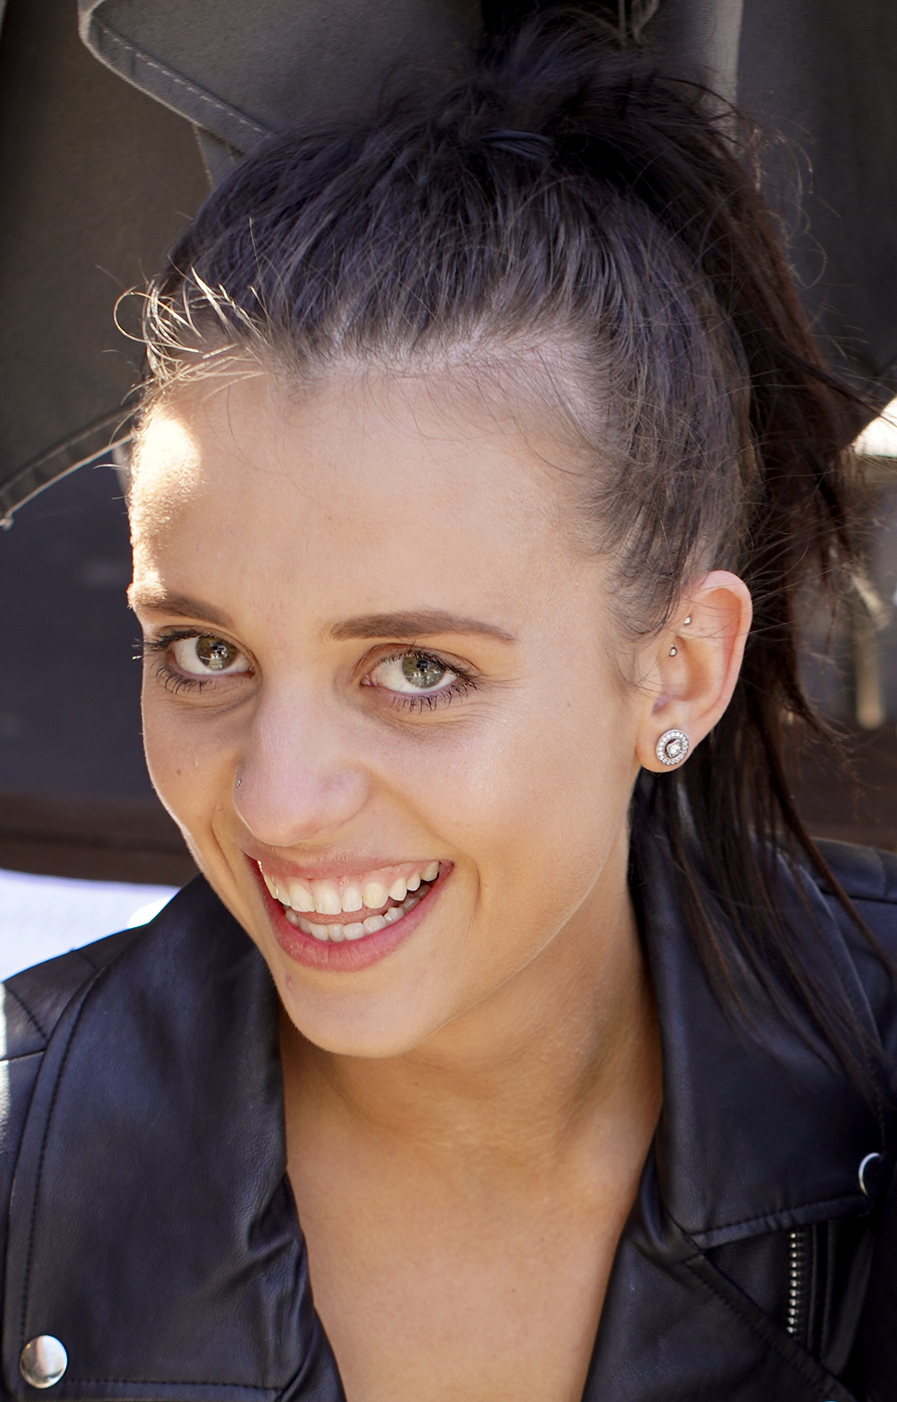
If we shoot the model at an angle at a shallow with an open aperture of F1.4, 1.8, or 2.8, we can get the problem of one eye in focus and one eye out of focus. This can be seen in the following example taken from the web:

Female Portraits Photography 08

At PBP we find it is best to shoot our portraits at an aperture of F4.0 to F5.6 whenever we have the face turned at an angle.

This works well for eye focusing as shown in the following casual portrait taken at an Aperture of F4.0

Female Portraits Photography 09 Port Melb Leather Jacket
(Click Image to View Full Size)

To get the eyes in focus, it is important to use a movable spot focus point if your camera has this, and place it over one eye of the subject. Or simply get one of the latest Sony Cameras with intelligent eye focus built into the camera.


5a) The Two Thirds Turn

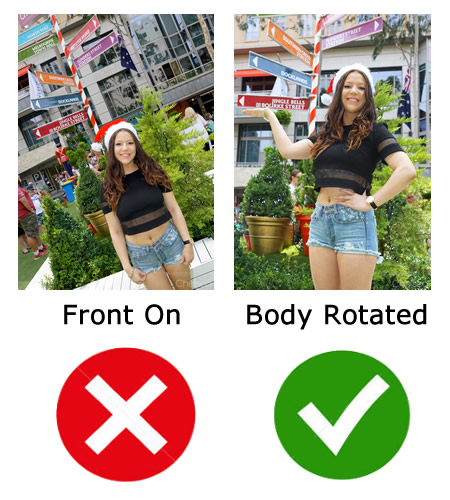
Shooting straight on facing a person makes them look big, but having them turn away will give them a slimmer profile look in the camera.

Female Portraits Photography 10

Tell the subject to turn their right side away from the camera by about two thirds. Move their body but keep their face looking straight at the camera. They can do this by stepping their right foot back.

Female Portraits Photography 11 Bethan in White

Another slight change of position which looks good for rotated looking over the shoulder shots, is to get the model to raise the shoulder closest to the camera slightly.

Female Portraits Photography 12
(Click Image to View Full Size)

Popping a shoulder up and forward can make a significant difference, because raising one shoulder higher than another adds dimension and strength to the image.


5b) Avoid Shooting Straight On

This is basically the same idea as the “Two Thirds Turn” Rule. Avoid shooting from directly in front of your subject facing straight on. A straight on orientation will make the subject look her widest.
Instead, ask the subject to turn her body 45 degrees (or about two thirds) and then raise the shoulder that is nearest to the camera.

Female Portraits Photography 13

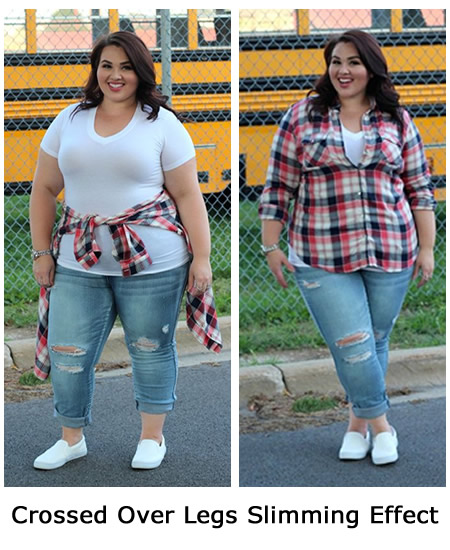
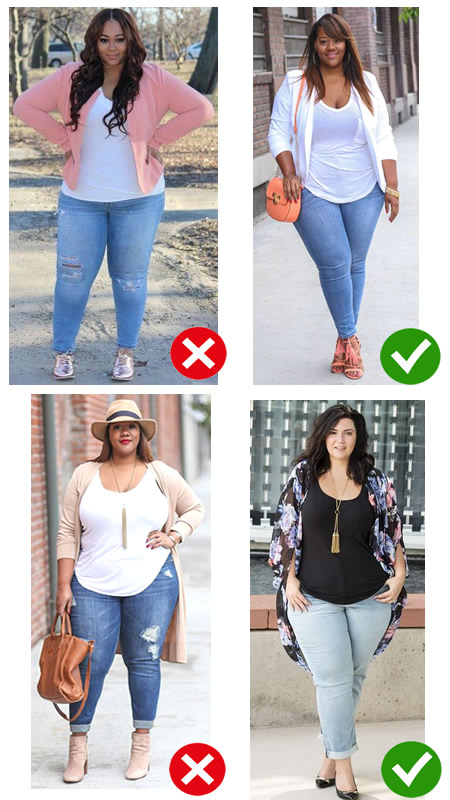
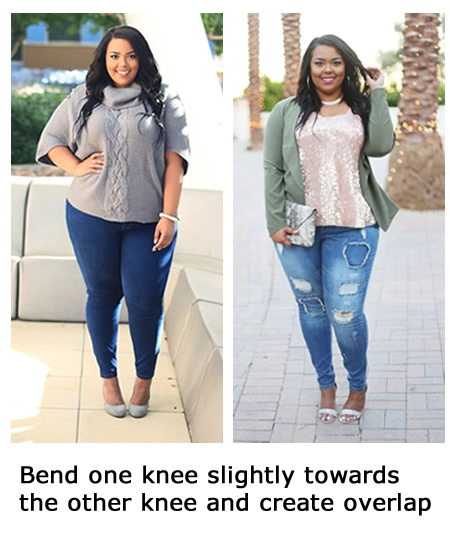
When doing a full length portrait, try the following approach for the legs and hands.

Next have her bring one leg forward (leg closest to camera) and turn that foot slightly outwards, keeping the knee bent.
This closer to camera bent knee leg can alternatively be slightly crossed behind the back leg.
Ask her to roll her hip slightly up and to keep her weight on her straight leg.

All of these things help give the bulkier parts of the body a slimmer appearance.

Keeping the weight on the back leg furthest from the camera is a ground rule for full length portraits.

The hands can be placed to the side or to the front of the model as shown in the examples below.

Female Portraits Photography 14


6) Mouth Open / Lips Apart

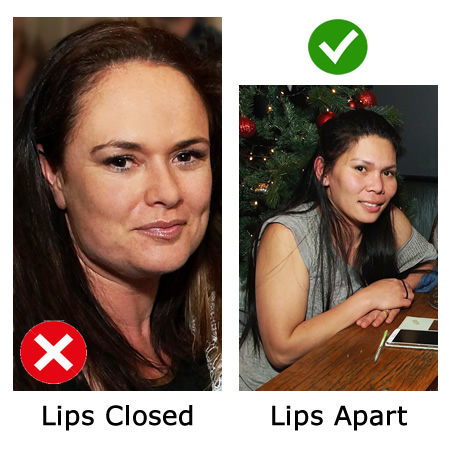
We are not quite sure exactly why this technique works, but basically a closed tight mouth is a body language sign of anger or disinterest, whereas a slightly open mouth often occurs when people show interest or agreement in something.

Having the mouth slightly open can set a completely different mood in the photograph. With the mouth closed, the jawline clenches and adds extra weight to the sides of their face. It can also give negative energy to an image, a bored neutral look.

With the mouth slightly open, the jawline is elongated and gives a subtle interesting and pleasant look to the portrait.

Female Portraits Photography 15 heidi

The lips just need to be slightly open, just enough to relieve the closed lips tense look.

Female Portraits Photography 16


7) Placing The Hands

Photographer and Educator Sue Bryce uses the term “Ballet Hands”. Hands are one of the more challenging aspects of posing and can make or break an image if the hands are displayed incorrectly. Sue’s advice is that the subject should relax their hands as if they were in a ballet, spreading the fingers lightly, slightly broken at the joints. From there hands should be placed in a position that works with the image.

It is important to realise that a person’s hand is almost the same size as their face, and so we do not want open hands, palms, and backs of hands in full view close to the face.

Female Portraits Photography 17
(Click Image to View Full Size)

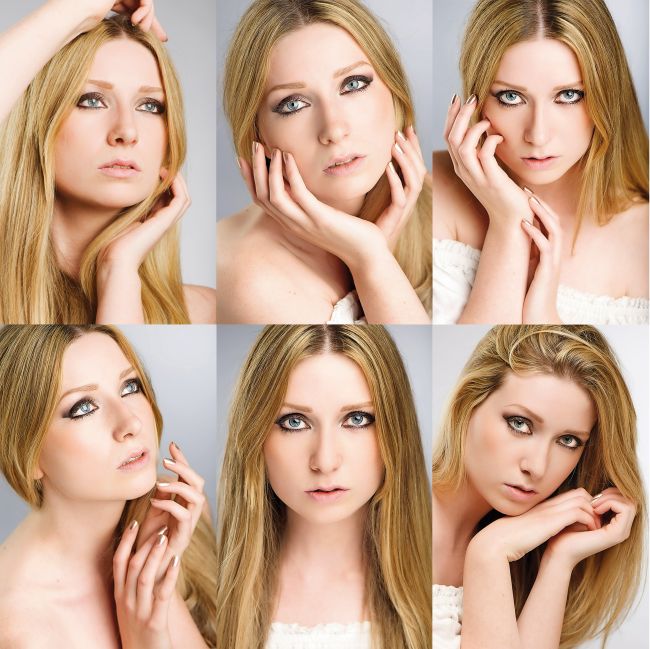
Under the chin, over the shoulder, to the side or through the hair are some common positions for hands.

Female Portraits Photography 18 Hands Montage
(Click Image to View Full Size)

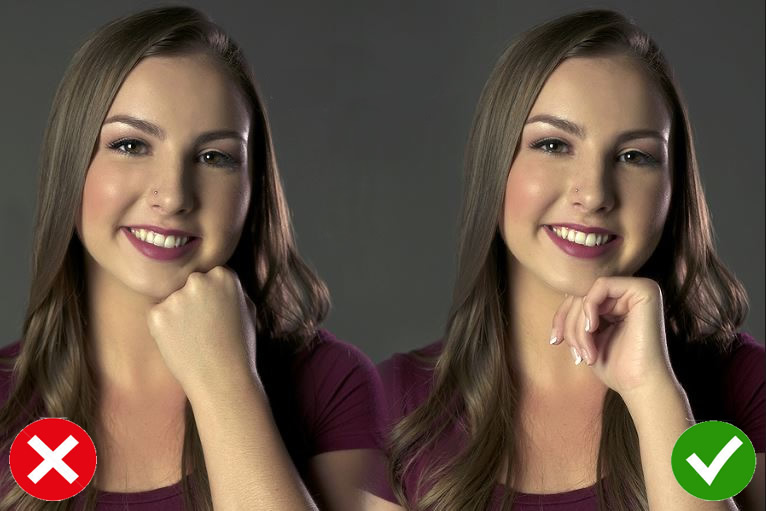
As shown below, the fingers need to be slightly curved, and slightly apart, only just touching the face or hair, and not pressing against anything.

Female Portraits Photography 19 tick cross hand clenched
(Click Image to View Full Size)


8) Using Props

Hats are awesome to use in Portrait photos. Build up a collection of them from second hand clothing shops.

Female Portraits Photography 20 Clay Cook hat Pic
(Portrait Photo by Clay Cook)

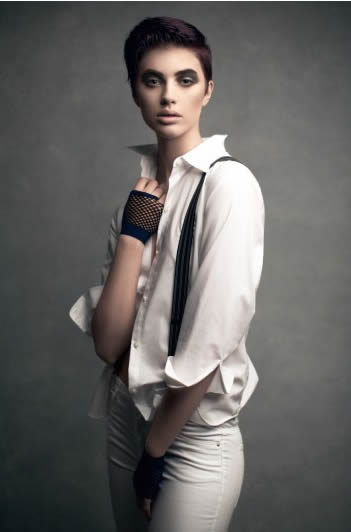
The following Portrait works well with the black 80’s Gloves and Black Trouser Braces against the white outfit on the model.

Female Portraits Photography 21
(Portrait Photo by Clay Cook)

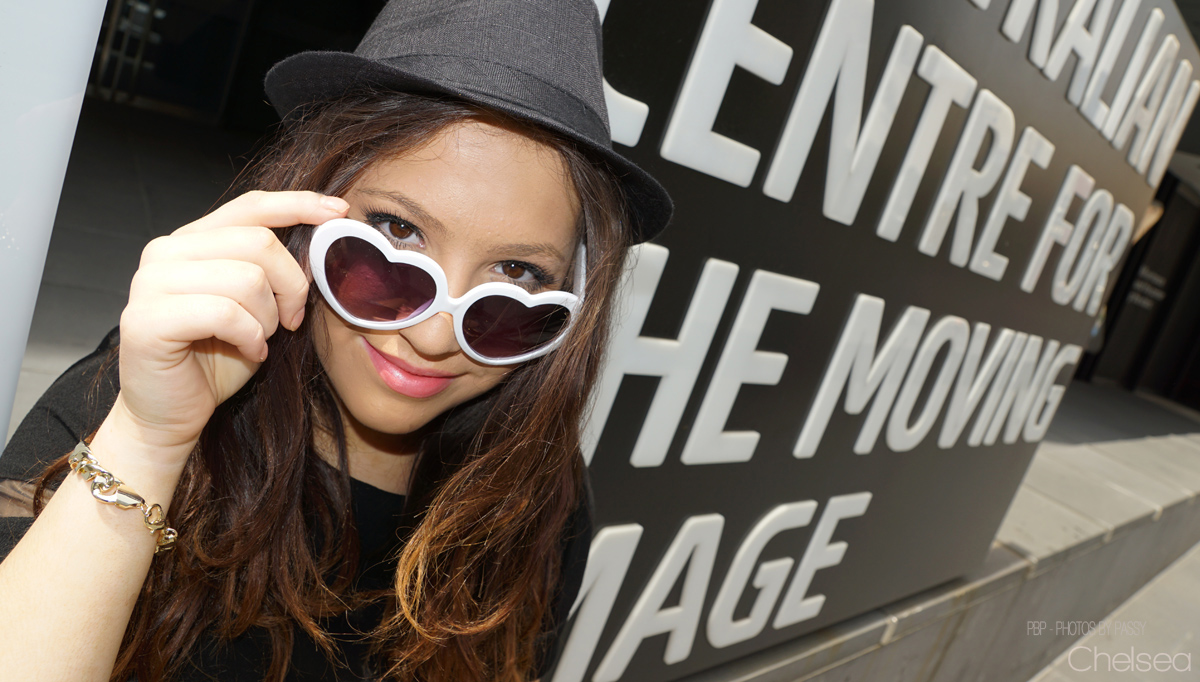
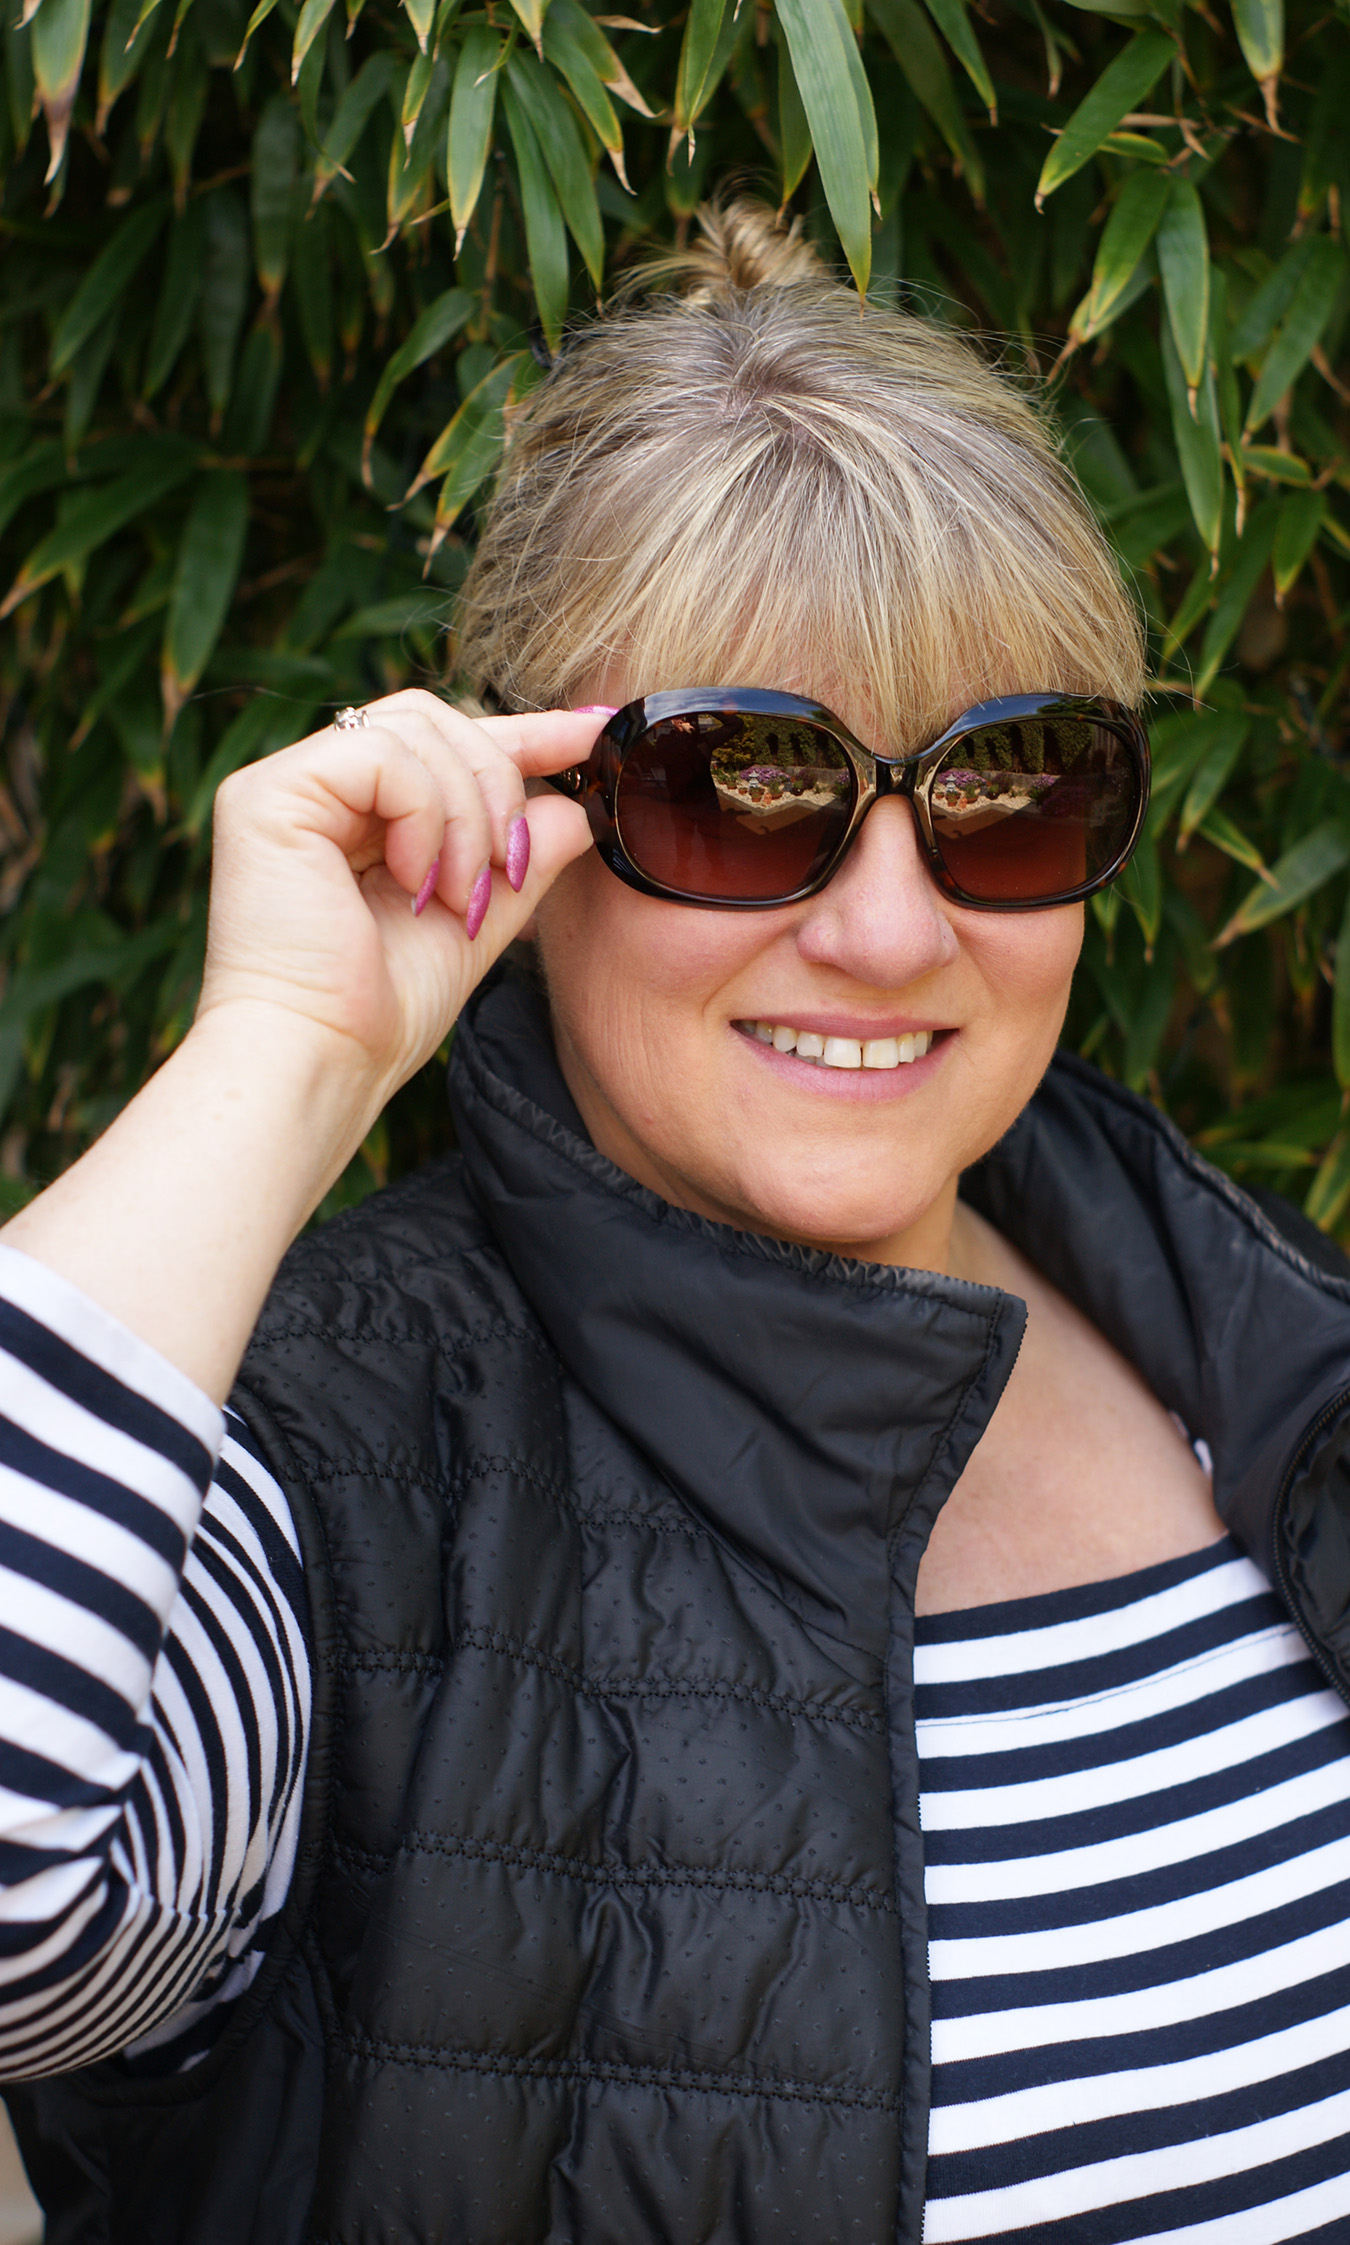
Sunglasses are also another great prop that can be used in Portrait photos.

Female Portraits Photography 22
(Click Image to View Full Size)

The sunglasses above were purchased at a second hand shop, it is a good idea to have some sunglasses as props to take along to outdoor shoots.

Female Portraits Photography 23 Noo Glasses
(Click Image to View Full Size)

Interesting jewellery (ear rings and necklaces) can add to a Portrait shot.

Female Portraits Photography 24
(Click Image to View Full Size)

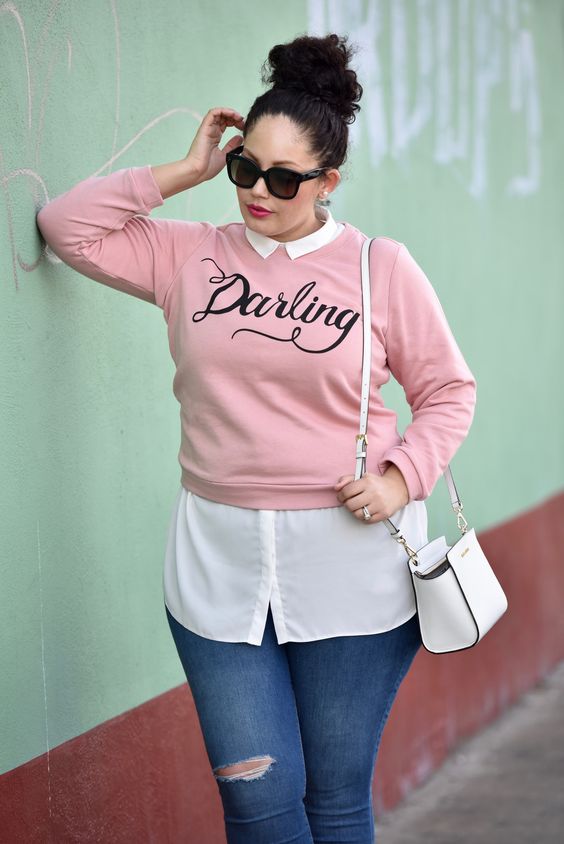
Handbags and Purses are another great prop which can add interest and solve the problem of what to do with the hands.

Female Portraits Photography 25
(Click Image to View Full Size)

If a subject is wearing a jacket, then we can do a pose where they pull lightly on the lapels.

Female Portraits Photography 26

A cup of coffee or a drink in the hand is another good prop that can be used for casual portraits at social functions.


9) Sit and Lean In

The approach here is to have the subject lean her face in towards the camera. This works well if the model is seated and will emphasize the face and hair. The subject leans her face towards you, parallel to her bent knees if she is sitting.  This elongates the neck, defines the chin, and let’s her hair fall down, away from her body making it look voluminous. Watch the curve in her shoulders and back, make sure she doesn’t slouch.
Shoot from above around to the side so that her shoulder is at 45 degrees (the two thirds angle) to camera.

Female Portraits Photography 27
(Click Image to View Full Size)

In this second example we have the model leaning in towards us, with right hand side hair forward, and left hand side hair back.

Female Portraits Photography 28
(Click Image to View Full Size)


10) Use Slimming Poses

No matter what size a woman is, it is more likely than not, that she wants to appear thinner.  Have her bring a shoulder to the front and turn her head toward you.  Shoot slightly from above and this creates nice angles that focus on her face and make the body look slimmer.

Any body joint bent (arms and legs) automatically looks slimmer. Never have arms straight and pressed against the body, or crossing over the body close to the camera.

If a person’s arm looks fat, they will think they look fat. Even slender women can get “fat arms” if they are positioned poorly. If she is leaning her weight back on an arm, it needs to be bent and positioned slightly away from her body.  Do not let it protrude out so it looks double jointed, this pushs the arm muscle to bulge in the back of the arm. A bent anything always looks slimmer.

Never shoot front on.

Arms and hands look overly big if they are the closest items to the camera. In the image below the arms and hands are positioned very badly. They should have been kept down to the side and bent with an open gap in between them.

Female Portraits Photography 29
(Click Image to View Full Size)

Arms bent with hands down lower away from the face gives a much better look.

Female Portraits Photography 30
(Click Image to View Full Size)

Bending the legs and taking the arms away from the body and also bending them creates a significant slimming effect.

Female Portraits Photography 31

A hand on the waist will help make it look smaller, as will that space between your model’s arm and torso when the arm is bent by doing this.
Have her drop the other arm slightly behind her body while turning towards the camera at that 45 degree angle. Or have the other arm on the other hip so the hand is just visible.

Instructions to the model are to Position her body 45 degrees and put the arm closest to the camera on her hip.
Then plant one foot slightly in front of the other, point her front foot toe to the camera and place her weight onto her back leg.

This classic celebrity red carpet pose ensures that the subject’s upper arm isn’t smooshed against her body making the arm look flattened and thus larger.

If the hand-on-hip pose is a bit forced and unatural to the model, get her to hold her arms out from her sides ever so slightly.

Never let the arms just hang against the subject’s side, because this will make her look wider.
Never have a side on view of arms pressed straight down against body as then the arms can look very large.

The images below show how this weight on back foot, leg bent, hands on hips slimming pose works.

Female Portraits Photography 32

Note that the hand on hip corresponds to the weight bearing leg arm, if only doing one arm, and that he hands are still visible when on the hips.


11) Using Trees Walls and Doors

Trees can be used as part of an outdoor portrait. Note in the example below we also have the fingers with a light touch and slightly curved, as per the “Hands Rule” described previously.

Female Portraits Photography 33
(Click Image to View Full Size)

Walls can also be used in Portraits.

Female Portraits Photography 34
(Click Image to View Full Size)

If we have a model sideways against a wall, then we can get her to arch her back while supporting her weight on her shoulders and this provides a flattering curvy result.

Female Portraits Photography 35

Doorways and Columns can also be used as posing aids for full length portraits.

Female Portraits Photography 36
(Click Image to View Full Size)

Note that in doorways we have one arm up and the other one down, with head tilted towards the lower arm, and the lower arm’s hip swung out. This makes a great curvy elegant look.

Female Portraits Photography 37
(Click Image to View Full Size)


12) Sideways Looks

When we have the subject move their eyes to give a sideways look, often the eyes are moved all the way across, which creates too much whites of the eyes visible.

For example, the portrait below could have been a good shot, but look at the far away eye and how much white there is visible. It is too much.

Female Portraits Photography 38
(Click Image to View Full Size)

The sideways glancing pose is a difficult one to get right. We really need to be concentrating when we get the pose happening and the shot lined up.

In the image below we have our subject looking sideways, but not all the way, and the eyes look so much better.

Female Portraits Photography 39
(Click Image to View Full Size)


13) Position The Hair

Hair sitting on the shoulders does not look good. It is best to have the hair with one side forward and one side back. Often it is best to try both combinations of forward and back, as the natural part in the hair will favour one combination over the other.

Alternatively depending on the model and the shot the hair can be pushed back, or forward on both sides. This is explained at “photography.tutsplus.com” using the following diagram.

Female Portraits Photography 40
(Click Image to View Full Size)

Hair position Number 1 should not be used, 4 and 5 are good to use, 2, 3, and 6 are okay to use in the right situations.

There is a link to the “photography.tutsplus.com” article in the “Further Reading” section later on.

Here are some Photos By Passy images showing hair positioning.

Female Portraits Photography 41


14) Use The Favoured Side

From taking selfies, a lot of women will know that they have a “favoured side” which looks best. This might be because the teeth look better on one side than the other, or just because the face looks better on that side.

Although people look identical on both sides of their faces, there is often one side which looks better than the other.

Make sure that you ask your subject which side is her favoured side and take all the shots from that side wherever possible.

In the images below, our model Chelsea has her right hand side as her favoured side.

Female Portraits Photography 42


15) Gaps Between the Arms

Arms can look oversized in photos and these tips from “photography.tutsplus.com” are an excellent way to remedy this.

When people stand naturally they tend to stand with their arms flat at their sides. This causes several problems. First, it makes them look awkward and uncomfortable in the photo. Secondly, their arm presses against their body which squishes the arm out and makes it look larger than it actually is.

As shown in the example below with the red measuring line, it is amazing how much thickness is added to the arm when it hangs down against the subject’s body.

Female Portraits Photography 43
(Click Image to View Full Size)

As shown above the arm thickness problem is solved by having the subject lift their arm out from their body, or place their hand on their hip.

When we have people move their arms out away from their body, typically by placing their hands on their hips, it is important that we can see both gaps between their bent arms on each side.

This is shown clearly in the example images below from “photography.tutsplus.com”:

Female Portraits Photography 44
(Click Image to View Full Size)

As shown by the red line in the diagram, without a gap showing for the far away arm, the subject’s body appears to be a lot wider. By having both gaps between both arms and the waist clearly visible we create a definite curvy and slimming effect.

So remember to get arms moved out from the body, especially when they are the closest object to the lens.

Female Portraits Photography 45

One final problem with arms occurs when the model rests their weight on an arm.

The arm can appear to bend backwards and look double jointed, as in the image below.

Female Portraits Photography 46
(Click Image to View Full Size)

In cases like this we need to get the model to bend the arm slighty so that it looks perfectly straight.


16) Cross the Legs

Models on the catwalk are trained to do a walk where they continually cross their legs over each other in an X pattern. This makes them look taller and accentuates curves.

For full length portraits of larger ladies, have them cross their legs over which creates a nice slimming effect.

We can clearly see the effect of doing this in the Before and After images below.

Female Portraits Photography 47

Here are some further examples of the effectiveness of the cat walk X shaped crossing over of legs.

Female Portraits Photography 48

The leg cross method works because the leg in front obscures part of the leg behind and thereby makes both legs look slimmer.

This rule is also called “Crossing the Ankles”.

As shown previously crossing the ankles is used for standing shots, even when the shot is going to be cropped later above the knees. This makes the bottom of the cropped shot look much better.

Eg. Ff the subject is being shot straight-on (for a street style looking picture) have the subject cross her legs, starting at the calf.
This ankles crossed stance will make the hips look narrower and the legs look longer, plus it looks a bit more casual.
The same pose also works when the subject is sitting.

An alternative for large sized legs is to use the knee bend, with weight resting on the non-bent leg as discussed in the slimming rules previously.

Female Portraits Photography 49


17) Getting a Natural Smile

Smiling too wide on purpose causes the face muscles to tense up, the eyes to squint, and the cheeks to puff out, which does not make for an attractive photo.

Female Portraits Photography 50

When people smile naturally, the area around the eyes tends to crease a bit, which looks much more sincere than a forced contrived smile with just the mouth.

Get the subject to relax their face and open their mouth slightly, so that a more natural smile results.

For people who do not have great teeth for smiling, smile with the lips and the eyes, as shown below.

Female Portraits Photography 51
(Click Image to View Full Size)


18) Maintaining Good Posture

Standing up straight makes a significant difference and gives an aura of confidence and good health.

It also helps elongate the subject in photos.

After a few shots people can tend to start slumping and slouching, so Posture needs to be constantly monitored throughout the shoot.


Photographing Curvy Women

Large curvy women can be made to look slimmer using a number of the rules discussed previously in this article.

The right kind of flattering outfit is a good start.

Obviously, horizontal stripes on a curvy model aren’t going to help her look slimmer.

Darker colors are more flattering and slimming, and long sleeves can help deaccentuate larger arms.

Curvy people sometimes dress a size or two too big to hide their curvy figures, but this often has the opposite effect: it can make them look larger than they actually are.

Clothes that fit are going to be much more slimming than clothes that don’t.

There are a number of great tips for photographing curvy women in the following article.

Tips for Photographing Curvy Women


Classic Modelling Poses

Here are fifteen classic modelling poses that could be used if you are stuck for ideas during a shoot.

Female Portraits Photography 52
(Click Image to View Full Size)

Female Portraits Photography 53
(Click Image to View Full Size)

Female Portraits Photography 54
(Click Image to View Full Size)

Read the full article about these fifteen classic poses which also includes a real life model performing each of them at the link below.

Fifteen Classic Modelling Poses

There are many other great poses and ideas in the “Further Reading” section later on in our article.


Pinterest Board of Examples

Check out our Pinterest Board of over 100 female modelling shots and poses at the link below.

Female Portraits Pinterest Board


Camera Equipment for Portraits

A telephoto lens (85mm or 135mm F1.4) or a long range zoom (70-200 F2.8) is really essential for portrait photography, as the shorter the focal length of your lens the greater the potential for unwanted distortion.

An 85mm F1.4 lens is perfect on a full frame camera for portraiture as it enables half-length portraits to be taken from a comfortable distance away from the subject of around 2 to 3m, so you can direct your subject without crowding in and making them feel awkward.

On a cropped sensor camera, use a 50mm lens that will give you an equivalent of 75mm focal length.

Use open apertures of F1.4 through to F5.6 to get background blurring behind subjects. Be careful using F1.4 wide open as it can be easy not to have both eyes fully in focus.

The latest Sony Cameras like the A99II have a special eye autofocus feature which make them fabulous for doing Portrait Photography.

Read the following article all about the best type of lenses to use for Portrait Photography:

Best Lenses for Portrait Photography

Also go through the following multi page article which discusses Aperture, Shutter Speed, ISO, and Exposure Compensation:

Camera Settings for Portrait Photography

Here is a great article by Mark Galer about using Sony Cameras for Portrait Photography.

Sony Camera Settings for Portraits


Lighting for Portraits

In regards to lighting, it is vitally important to produce great quality indoor and outdoor portraits.

This four minute video shows how to effectively use fill flash from the camera combined with sunlight or shade in outdoor portraits.

This next video shows how to use Diffusers and Reflectors.

The following video shows how to use a budget umbrella off-camera flash for doing indoor portraits.


Videos About Portrait Photography

We have selected a series of videos that reinforce the posing rules we have listed previously, as well as give great tips on how to shoot female portraits.

This eight minute 10 Tips for Posing video is well presented with the Photographer working with a female model.

This next thirteen minute video from @caliallstaring from Instagram gives some good tips about how to run the Photo Shoot and communicate with the subject.

The next seven minute video from Tony and Chelsea Northrop shows some great lighting tips and techniques for shooting outdoor portraits.

This next five minute video has an older experienced guy talk through a shoot and discuss what is good and wat is bad, with the photo results showm each time.

In the following four minute video, the photographer shows how to start with the basic one hand on hip and ankles crossed over pose, and from there build up lots of other poses by continual repositioning. A great way to start off a shoot and get the subject comfortable and following directions.


Further Reading

The articles below are the hand picked best of what we found on the web about female portrait photography.

It was from these articles that many of our “Portrait Rules” have been either discovered or distilled.

We highly recommend that you read through all of these articles to reinforce and add to the information that we have already presented.

This first article is really good as it has seven fundamental tips for non-models to follow when doing portrait poses.

Seven Fundamental Posing Techniques for Non-Models

This next article shows sketches and real life examples of 15 great modelling poses to use for females.

Fifteen Great Modelling Poses

Digital Photography School has hand drawn digrams with suggested poses and comments about them.

Twenty One Standard Modeling Poses for Females

There is then a Part 2 with 21 more additional hand sketched poses:

Twenty One Additional Modeling Poses for Females

There are some interesting Posing tips in this article whcih is written by female photogapher Dianne Elizabeth.

Dianne Elizabeth Female Portrait Posing Tips

Check out Clay Cook’s Top 10 Female Posing Tips Article.

Clay Cook’s Top 10 Posing Tips

The following web page has an amazing photo gallery of before and after modelling photos.

(Scroll down the page to the gallery of thumbnails and then click on any photo to start the slideshow).

Gallery of Before and After Portrait Images

This next article has seven solid portrait taking tips.

Portrait Posing Tips By Dustin Olsen

Read the following article which has 101 pointers and tips about Portrait Photography.

101 Portrait Photography Tips

The following web page has 25 example female portraits covering a range of different looks and styles.

Twenty Five Example Female Portraits

This next article has 10 tricks women should know about posing for photos.

10 Tricks Women Should Know About Portrait Photos


Even if you are not a portrait photographer, many of the concepts presented in this article can be used for any photos involving people.

At Photos By Passy we are by no means fully experienced with portrait photography yet, but plan to steadily implement all of the rules in this article and see how this improves our results.

Like and Follow Photos By Passy on Facebook and Instagram.

We are always trying to do things that many photographers are not doing, and constantly trying to make incremental improvements to our photography and share our knowledge with others.

Check out our website “How To” page for many other articles about Photography as well as Photoshop, Camera Raw, Video Making, Adobe Premiere, Sony Cameras, and Lightroom.

Enjoy,
Passy

Using Minolta Prime Lenses

In this article we discuss the great success we have had with using vintage Minolta Prime Lenses on the Sony A99II camera.

(Also included is some limited testing of Minolta Primes on a 1980’s Sony A350 14MP APS-C camera).

Minolta Prime Lenses 01
We have also seen on the web, people using old Minolta Primes on the A7 and A7RII mirrorless cameras, (via LE-A4 adapters), and the results appear to be equally as good as what we have obtained on the Sony A99II.

Note that if viewed on a phone, images in this article might be distorted, (squashed in horizontally, or over streteched vertically). It is best to click on the image to view full size to see it accurately in its true perspective.


Lenses for Sony A99II

The Sony A99II is an incredible 42 megapixels full frame camera, and so it needs quality lenses mounted onto it.

In Australia we paid nearly $4000 AUD ($3100 US) for the A99II camera body shortly after it was released.
(We then spent some money taking out a world wide insurance policy on the camera).

Unfortunately this left no money in our budget to spend on Full Frame quality Sony Zeiss lenses.
(Sony Zeiss lenses are great quality but cost thousands of dollars here in Australia).

A good list of modern day lenses suitable for the A99II can be found at the link below.

List of Modern Lenses for the Sony A99II

Minolta Prime Lenses 02

However as mentioned previously many of these lenses are prohibitively expensive for our current part time photography endeavours here at Photos By Passy.

We already owned a Tamron 24-70 F2.8 zoom lens that we had been using on our Sony A55 camera, and so this lens got us started on the A99II. All of our other lenses are APS-C crop frame lenses that are not suitable for the A99II.

One of the best features of the A99II is the enormous 42MP image size, which means separate detailed images can be cropped out and made from original wide angle shots.

However, to do this effectively we need a good starting wide angle image, and therefore a great sharp prime lens to capture this initial shot.

This led us to look at getting a wide angle prime lens, and internet research showed that the Minolta 28mm F2 lens would provide a high quality economic solution.

On eBay we sourced a Mint Quality 28mm F2 lens for $500 AUD ($390 US) from Japan, and this was our first Minolta lens.
The 28mm F2 lens performed brilliantly on the A99II and this resulted in us progressively purchasing several more Minolta lenses.

Here is a cropped portrait made from a wide angle shot taken with the A99II and the Minolta 28MM F2 lens.

Minolta Prime Lenses 03
(Click Image to View Larger Size)


Sony A99II Cropping

The following example shows the amazing post production cropping capability of the 42 Megapixels on the Sony A99II.

This first image is already cropped moderately, and was captured using the Minolta 28mm F2 Lens.

Minolta Prime Lenses 04
(Click Image to View Larger Size)

The image below is a further Photoshop Crop to produce an image of the Champagne glasses the people are holding in their hands.

Minolta Prime Lenses 05
(Click Image to View Larger Size)

Here is another 42 megapixel cropping example which was shot in low light at a Music Concert.

Minolta Prime Lenses 06
(Click Image to View Larger Size)

There will be plenty more photos that have been taken using retro Minolta Prime Lenses later in this article.
If you cannot wait to see the images, then click on the Collage image below to go to our full Flickr Photo Gallery.

In this gallery, if you click onto an individual image and scroll down, the EXIF data can be viewed to see the Camera, Lens, Aperture, ISO, etc details.

Minolta Pics Collage


Minolta Lenses

Minolta was for years one of the finest lens making companies in the world.
It is rumored that several classic Minolta lenses were developed jointly with Leica.

Many Minolta lenses have exceptional build quality, with solid steel components rather than plastic.

They also have brilliant sharpness, great bokeh (out-of-focus areas), and gorgeous rich color that is like no other.

However our testing revealed that it’s not all butterflies and rainbows using old Minolta retro lenses from the 1980’s. The screw drive focussing is driven by the camera and the lenses are noisey when focussing and consume camera battery power.

Due to the continual focussing noise, these lenses would not be suitable for shooting video using auto focus. This does not really worry us at all, as we do all of our video work in full manual mode using manual focus and Sony’s excellent Focus Peaking.

Surface coatings on lenses have come a long way since the 1980’s, and the old Minolta lenses are prone to flare and purple discolorations when shooting into the sun.

We also found that when shooting music performances under coloured lights, the lenses can sometimes give a purple and blue colour cast, but this is easily corrected in Lightroom.

The Minolta Maxxum (or Dynax) AF lenses were first introduced in 1985, and these are the ones which are compatible with Sony A-Mount.

The older Minolta Rokkor lenses are not compatible, and require a lens adapter inorder to be used with modern cameras.

Minolta was purchased by Sony in 2006, and several Sony A-Mount lenses still use Minolta designs.

In our article we will be focussing on the Minolta A-mount “Maxxum” lenses, and not the older “Rokkor” lenses.

The following article discusses some of the great Minolta Lenses from the 1980’s.

Best A-Mount Minolta Lenses Article

The above article also has clickable links in the right hand column, where more detailed information about some of the lenses can be obtained.

Wikipedia has a full list of Minolta A-Mount Lenses in a summary table at the following link:

Wikipedia Table of Minolta Lenses

Many items in the table can be clicked on to get additional information for each particular lens.


Scope of Testing

The Minolta A-mount Prime Lenses we have purchased from Japan and fully tested include the following:

Minolta Prime Lenses Table 07

We also plan to purchase the Minolta 85mm F1.4 at a future date to complete our set of Primes for the Sony A99II. We might also purchase the 20mm F2.8 wide angle Prime lens for landscapes.

As well as the above Prime Lenses, we have also purchased and used several Minolta Zoom Lenses; however this will be the subject of a separate article at a later date.

We have found that it is well worth spending the extra money and buying “Mint”, “Near Mint” or “Excellent+++” rated lenses from Japanese sellers on eBay. You might pay $100 to $200 AUD extra, but the lenses are in immaculate condition, totally clean, and look and function like they were brand new.

In the remainder of this article we will discuss the positive and negative aspects of the three retro Minolta Prime lenses that we have tested.


Minolta 50mm F1.7 Lens

Minolta Prime Lenses 08

This is an excellent lens for portraits where the border sharpness is not really an issue and it can take nice clear images when stopped down.

There were two Minolta 50mm lenses produced in the 1980s, the 50mm F1.7 (a kit lens sold with Minolta cameras) and the 50mm F1.4.

The Minolta 50mm F1.4 AF lens is said to be a better quality lens, but the eBay prices were around $250 AUD for a mint copy, whereas our 50mm F1.7 only cost $100 AUD. As we are currently on a very tight budget, we went for the 50mm F1.7 lens.

Here is an image taken in low light at a live music performance at F2.8 and ISO 1600 with the 50mm F1.7 lens on the Sony A99II:

Minolta 50mm Prime Lens Mercy Kills 09
(Click Image to View Larger Size)

Here is a street photography portrait done at F3.5 with the 50mm lens mounted on an old Sony A350 camera.
The A350 is an APS-C cropped sensor, and so the effective focal length is actually 1.5 x 50 = 75mm which is nice for portraits.

Minolta 50mm Prime Lens Laptop Lady 10
(Click Image to View Larger Size)

And another Street Portrait done at F2.2 on the A350 camera with nice natural colour and good background blurring.

Minolta 50mm Prime Lens Skater Girls 11
(Click Image to View Larger Size)

Overall the sharpness seems to be sufficient for our needs, and we really like the colour and background blurring.

For the $100 AUD ($80 US) we paid for the lens we are delighted with the results so far.

Future plans are to try the 50mm out do some Street Photography on the A99II and see how it performs for casual portraits at its true 50mm focal length.

There is a detailed review of the Minolta 50mm F1.7 lens by Kurt Munger at the link below.

(Note that the F1.7 that we actually own is the red letters “AF” model, which is one model before the model in Kurt’s Review).

Kurt Munger Review of Minolta 50mm F1.7 Lens

If you have $250 AUD (US $190) to spend on a retro 50mm lens, then you might want to consider buying the F1.4 lens rather than the F1.7 that we have reviewed.

The following article by Ken Rockwell gives a great detailed review of the Minolta 50mm F1.4 lens.

Ken Rockwell review of Minolta 50mm F1.4 Lens


Minolta 35mm F2 Lens

Minolta 35mm F2 Prime Lens 12

As shown above, there were two models of this lens, the original one with AF written in red on the front of the lens and a metal focus ring, and a later “restyled” one that had a rubber focus ring.

The newer “restyled” version can be identified by its wider rubber focus ring and duller surface finish, and “AF” on the front of the lens written in white.

Both lenses have identical optical designs, but the “restyled” version has better coating on some of the lens glass surfaces to reduce flare and ghosting. The newer version also has a circular aperture installed in place of the old straight bladed design.

We purchased an original (Red AF lens). This was not easy to find and a rather expensive aquisition at $500 AUD, but we are quite happy with the lens.

When it grabs focus it is nice and sharp, but we found that getting a nice sharp shot is about an 85 to 90 percent rate, and sometimes it just does not pull sharp focus.

In comparison, the 28mm F2 always grabs focus and the results are always ultra sharp.

There are also 35mm F1.4 Minolta lenses for sale on eBay, but the prices are outrageously high averaging around $1100 AUD. This price is totally ridiculous for a used lens from the 1980’s.

Eg. A brand new Sigma 35mm F1.4 ART lens(which has an amazing DXOMARK rating of 42) can be purchased for $950 AUD as a modern state of the art brand new lens!

Various reviews on the Internet do rate the $1100 AUD ($840 US) Minolta 35mm F1.4 highly, but there is no way we are going to pay more than the cost of a brand new Sigma lens to obtain one.


We tried out our retro (Red AF) 35mm F2 lens on the Sony A99II camera for Street Photography, and we have been very happy with the results.

Here is a casual street portrait done at F4 and ISO 640:

Minolta 35mm F2 Prime Lenss Guy Eats with Dog 13
(Click Image to View Larger Size)

Here is a street scene at F9 and ISO 100:

Minolta 35mm F2 Prime Lens Ferrari 14
(Click Image to View Larger Size)

This is another casual street portrait at F4 and ISO 160:

Minolta 35mm F2 Prime Lens Cattle Dog Guy 15
(Click Image to View Larger Size)

Overall we found that the 35mm F2 lens is not always totally razor sharp, and performs best as a daylight street lens at apertures of F4 and above.

Future plans are to try out the 35mm F2 on the crop frame Sony A350 (which will therefore effectively be 52mm) for some Street Photography and then compare its performance against the Sony F1.8 35mm lens that we already own.

For the $500 AUD ($380 US) we paid on eBay it is a great lens for the A99II, but further down the track we will probably replace it with the Sigma ART F1.4 35mm lens which is around $900 AUD ($690 US) brand new.

There is a detailed review of the Minolta 35mm F2 lens by Ken Rockwell at the following link:

Ken Rockwell 35mm F2 Lens Review


Minolta 28mm F2 Lens

Minolta 28mm F2 Prime Lens 16

Like the 35mm lens, there was an original (Red AF) model, and then a restyled Rubber Focus Ring Model.

We purchased the original (Red AF) model which has the metal focus ring and the “AF” on the front of the lens painted in red.

The 28mm F2 wide angle lens from Minolta has great reviews on the web and is extremely reliable for sharp focussing. It consistently produces razor sharp images on the Sony A99II.

Minolta Prime Lenses A99II 17

We obtained our lens from Japan on eBay for $350 AUD, ($270 US) and it is the prime lens we are most happy with. It is great as a walk around lens on the A99II for photographing outdoors, but is not so great for Portraits.

If we shoot with the subject in the middle of the lens as a distance full or half body shot, and then crop in Photoshop to make a close up portrait the results are reasonable.

Minolta 28mm F2 Prime Lens Winery Ladies 18
(Click Image to View Larger Size)

However if we shoot closer to the subject initially, (like we would with a 50mm lens), the face gets horizontally distorted and rounded as in the image below.

Minolta 28mm F2 Prime Lens Face Distortion Nic Noo 19
(Click Image to View Larger Size)

But if we shoot the subject vertically, as shown below, then the results are greatly improved with less facial distortion.

Eg. Vertically shot portrait at F4 and ISO 1600

Minolta 28mm F2 Prime Lens Portrait Noo Chocs 20
(Click Image to View Larger Size)

Basically ANY 28mm wide angle lens is not very good for doing portraits. The 28mm viewing width is designed for landscapes and outdoor shots, and not for people pictures.

If we have the 28mm lens on our camera and we need to take a people shot, then it is best to be a fair distance away with the subject centred in the lens. We can then crop in Photoshop to get a portrait type shot.

Overall we have found that for general scenery and interior room shots, the Minolta 28mm F2 is an excellent sharp prime lens with really nice colour.

Eg. Grand Room at Yering Station at F4 and ISO 1600:

Minolta 28mm F2 Prime Lens Yering Room 21
(Click Image to View Larger Size)

Toyota GTS386 at F6.3 and ISO 100:

Minolta 28mm F2 Prime Lens GTS386 22
(Click Image to View Larger Size)

There is a detailed review of the Minolta 28mm F2 lens by Ken Rockwell at the following link:

Ken Rockwell 28mm F2 Lens Review


Gallery of Images

The following Flickr Gallery is continually being updated with images we have been taking with Minolta lenses on the Sony A99II.

Click on the Collage image below to go to our full Flickr Photo Gallery of Minolta Lens images.

In this gallery, if you click onto an individual image and scroll down, the EXIF data can be viewed to see the Camera, Lens, Aperture, ISO, etc details.

Minolta Pics Collage


Additional Reading

Article about using Minolta Lenses on Sony A7 series full frame cameras:

Using Minolta Lenses on Sony A7 Series Cameras

For photographers on a budget, or people wanting the beautiful colour and appearance produced by Minolta lenses, the 28mm, 35mm, 50mm, and 85mm Minolta Prime lenses from the 1980’s are an excellent option to have in your kit bag.

These Minolta lenses work equally well on Sony APS-C crop sensor cameras as they do on the full frame Sony A99II and A7 series cameras.

“PBP Photos By Passy” are on Flickr, Facebook and Instagram.
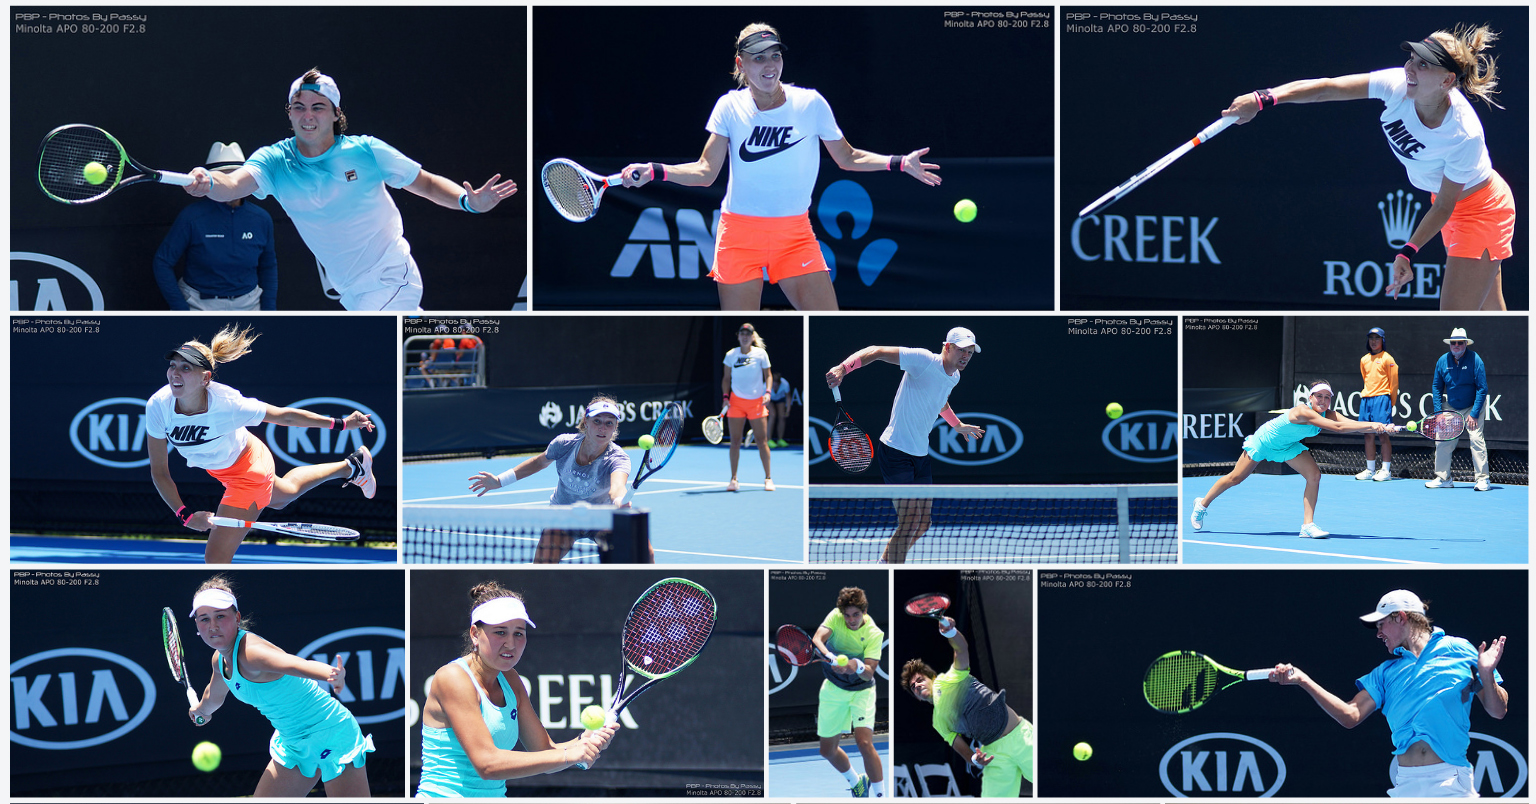
Follow us as we are always trying out plenty of interesting things that many other photographers are not bothering to do.

Enjoy,
Passy

How to Stabilize Video

Often when we film video there is not time or room to setup a tripod or monopod for our camera, and so the resultant footage is often wobbly and shakey.

This can easily be fixed afterwards in Adobe Premiere using the “Warp Stabilizer” effect.

Here is some music video footage that shows how the “Warp Stabilizer” can be applied to obtain stable and steady results.

In this “How To” Lesson we comprehensively show how to use the Warp Stabilizer in Adobe Premiere.


Warp Stabilizer Default Settings

The Warp Stabilizer can be found in the Video Effects Menu in Adobe Premiere, inside the “Distort” folder. You simply click on the Warp Stabiliser effect and drag it down onto your video clip in the Timeline, and it starts work on the clip straight away.

BUT …. If you have other active clips on the timeline above the clip you want to stabilise then it will not activate and work. What needs to be done is click on the eye icon for each of these above clips, and turn the eye off while you are stabilising.

After the “Warp Stabilizer” effect is added, analysis of the clip begins immediately in the background. As analysis begins, the first of two banners displays in the Project panel indicating that analysis is occurring. When analysis is complete, the second banner displays a message that stabilization is occurring.

The Warp Stabilizing effect processing when first added runs for a long time, eg. it can take 5 to 7 minutes to stabilise just 1 minute of video.

The default settings for Warp Stabilization are as follows:

How to Warp Stabilize 01
(Click Image to View Full Size)

The stabilization process zooms and crops the footage, and so you need to have some “headroom” above people in a clip, or else it can crop and chop their heads off….which does not look good!

How to Warp Stabilize 02
(Click Image to View Full Size)

The stabilized clip can still end up a bit wonky, as the process zooms in and out on background lights and background straight line geometries, so it is always best to shoot the original clip as steadily as possible (leaving space around people and the edges). Eg. It is best not to fully rely on the warp stabilizer fixing everything later in Adobe Premiere.

Later in this lesson we look in detail at ways to try and remove jelly blobbing from stabilized clips.


Warp Parameters – Result

We can set this value to either “Smooth Motion” or “No Motion”.

How to Warp Stabilize 03
(Click Image to View Full Size)

The default value is “Smooth Motion”.

The “No Motion” setting will replicate a Tripod shot.

We can try “No Motion” on a clip that has still objects, (like a close up of somebody standing fairly still singing at a microphone) if we were also filming just standing still and taking the video (and not walking along with the camera), but have some shaking because we had zoomed in a lot.

We have found that for some short clips that using the “No Motion” setting for doing the Stabilisation can produce excellent results, but other times it will go along okay for a while, but then we suddenly get a big jerky jelly blob.


Warp Parameters – Method and Smoothness

We can select four different types of “Method” :

“Position”, “Position, Scale, Rotation”, “Perspective” and “Subspace Warp”.

How to Warp Stabilize 04
(Click Image to View Full Size)

“Subspace Warp” is the most intensive, and the others down to “Position” become more and more basic in the corrections that they apply.

The “Perspective” type of stabilization corner-pins the entire frame. If there are not enough areas to track, Warp Stabilizer chooses the previous type (Position, Scale, Rotation). Watch for distortion along the corners when using this method.

Perspective can be used to stabilize in car driving footage as well as bush walking footage. Basically try it out on the clip and see if it works better than the default Subspace warp.

Apart from changing the method, which will trigger Premiere to redo the Stabilization, we can also change the Smoothness. Eg. If we have a wobbly and jelly type effects from Subspace Warp, we can drop the smoothness level down from the default 50% to say 20%, and Premiere will then automatically re-analyse and restabilize the clip.


Warp Parameters – Framing

We can set four different “Framing Options”
By default Framing is set to “Stabilize, Crop, and Auto Scale”.

How to Warp Stabilize 05
(Click Image to View Full Size)

If we set Framing to “Stabilize Only”, then we will see a whole lot of black cropping edges of different sizes randomly appearing on the clip, because the Stabilizing it is not zooming in and rescaling to compensate for the cropping. The resulting stabilized clip will be totally unusable, but this can be a way of seeing how much correction work Premiere needs to do on our clip, before going back to the default “Stabilize, Crop, Autoscale” setting.

We can also click on and off the fx icon (located up the top left corner next to “Warp Stabilizer” text) to turn the stabilize on and off. We can play our clip with fx on and off and see the effects of the stabilisation that we have applied.


Warp Parameters – Advanced Menu

On this menu we mainly adjust the “Crop Less – Smooth More” percentage and the “Detailed Analysis”.

How to Warp Stabilize 06
(Click Image to View Full Size)

If we lower the CL-SM percentage, then we get less Cropping, which will lower the amount of Stabilizing, or we can increase the Percentage which will do more cropping and zooming and make the clip smoother but can introduce more of the blobby jelly effect, especially on background objects like stage lights in the clip.

Later in this How To lesson we will discuss more about how to adjust all of the Warp Parameters one by one.

In the Advanced Options we can also tick the “Detailed Analysis” option which makes the whole stabilize process run a lot longer, but is supposed to go through all of the frames analysis in much greater detail.

How to Warp Stabilize 07
(Click Image to View Full Size)

We have not had much luck with using “Detailed Analysis” and found that it simply made any blobbly jelly effects become more jerky and worse than they were in the original stabilize.


Turn Stabilize On and Off

We can click on and off the fx icon (located up the top left corner next to “Warp Stabilizer” text) to turn the stabilize on and off. We can play our clip with fx on and off and see the effects of the stabilisation that we have applied.

How to Warp Stabilize 08
(Click Image to View Full Size)

If we change any Stabilizer settings, Premiere automatically starts the stabilization process. So we can change and try out different options one after each other. We can press cancel at any time to cancel the stabilizing. Adobe says the we can work on other parts of our Project while Stabilizing is running, but we have found that it is best to let the Stabilize run and not do anything else till it finishes.


Length of Video Clip

The warp stabiliser can run for a very long time of you are stabilising a few minutes of video. So make sure that you always cut down the clip to the final length that you want, before stabilising.


Stabilize First

Stabilize First, and then apply any effects like brightness, contrast, sharpening, gamma level. Always apply sharpening last. After applying these video effects, there will probably be a red mark on your clip in the timeline, press the enter key to “render” the clip (line will turn green) and then play it to see what it looks like.


Export Settings

It is best to check the “Maximum Render Quality” option under both “Sequence Settings” and “Export Settings”.
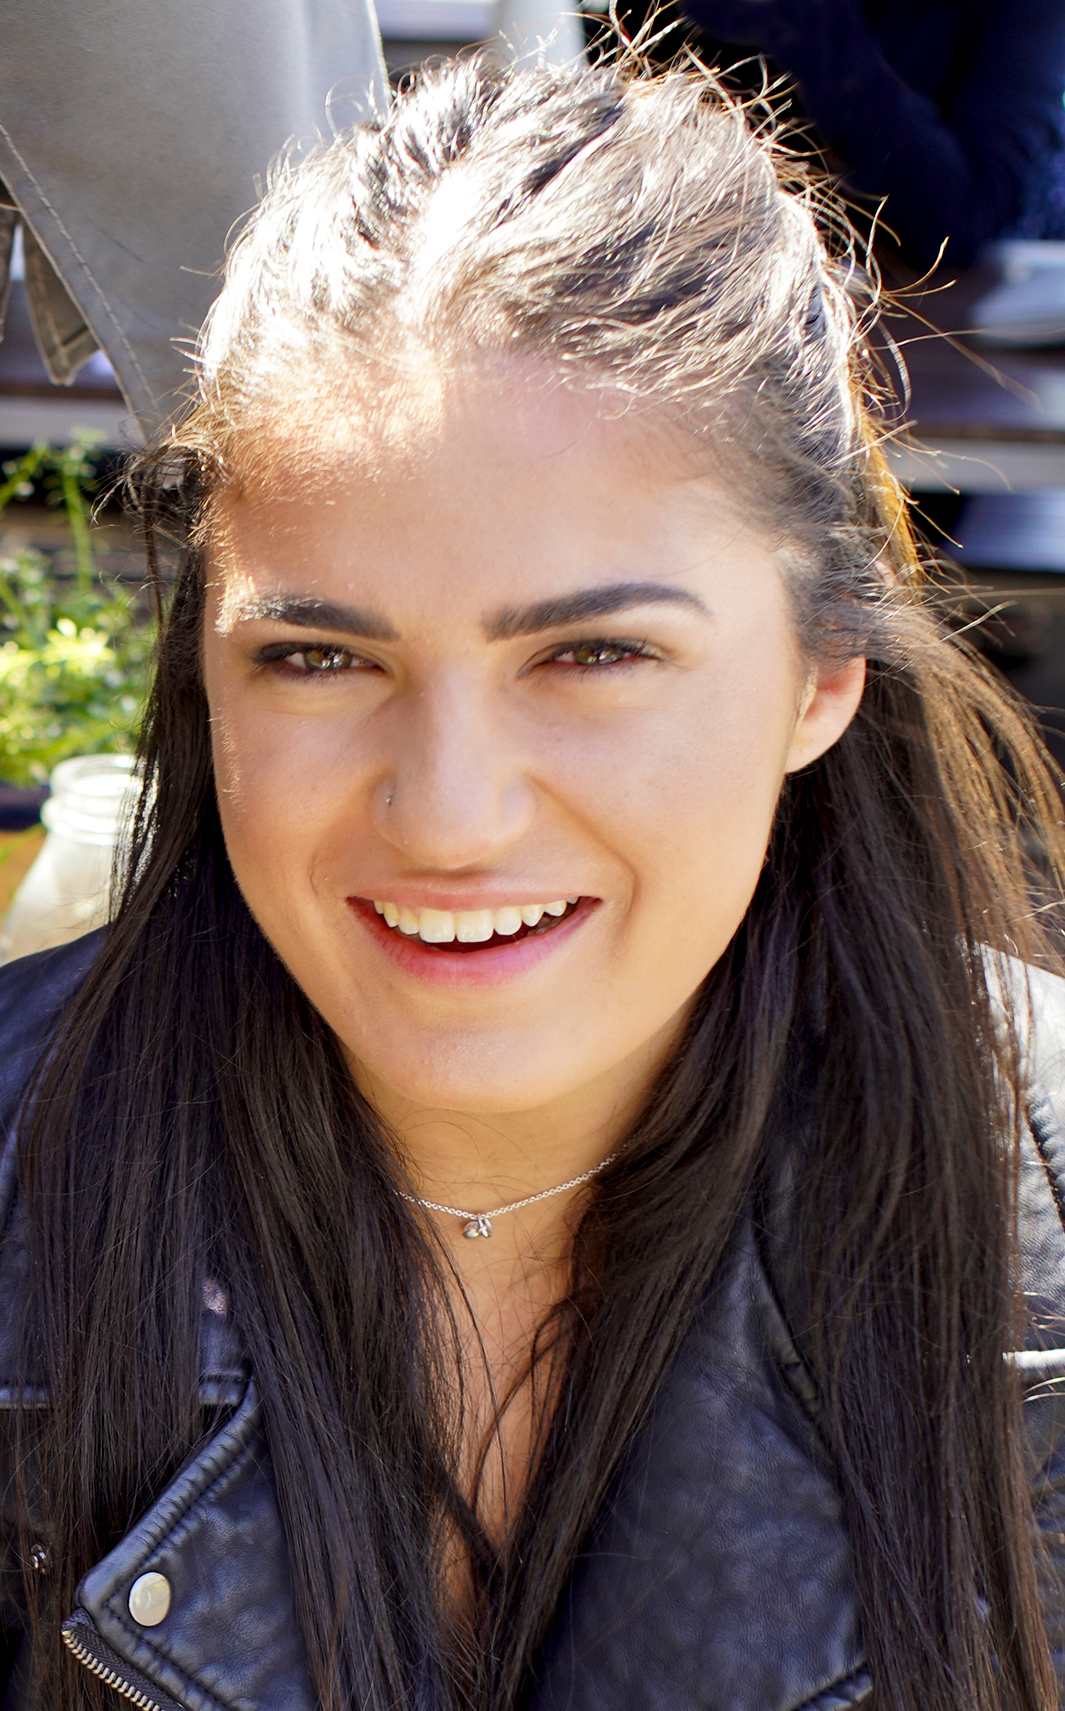
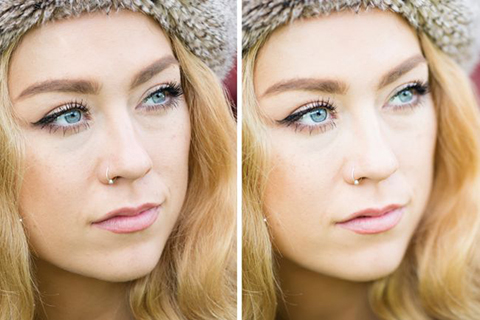
How to Warp Stabilize 09
(Click Image to View Full Size)

However, Adobe warns that we can only set Maximum Render Quality in Sequence Settings if we have a powerful computer with lots of memory, and so we usually leave it turned off.

We do however have Maximum Render Quality ticked whenever we Export to render out our final clip, even on our low performance laptop.

How to Warp Stabilize 10
(Click Image to View Full Size)


Stabilization on Nature Videos

The following is a video we made with a very basic compact camera while on a Bush Walk:

On this Sherbrooke Forest Waterfall video the stabilisation worked wonders, and removed all shakiness and made our video look like it was professionally shot using a tripod.

We did this on the laptop using Adobe premiere CS6, but we imagine everything is the same in Premiere CC.

Settings we used were: (Adobe CS6 chose these for us)

Stabilisation Result: Smooth Motion

Smoothness: 50%

Smoothness Method: Subspace Warp

Borders Framing: Stabilise,Crop,Auto-Scale

Auto-scale Maximum Scale: 150%

Auto-scale Action Safe margin: 0%

Additional Scale: 100%

Advanced Detailed Analysis: Unticked

Advanced Rolling Shutter Ripple: Automatic Reduction

Advanced Crop Less <-> Smooth More: 50%

These settings worked fine on all of our Nature Video shots, and so we did not change any of them.


Fixing Jelly Distortion Problems

The big drawback to Warp Stabilizing is the introduction of the jelly effect into the background of video clips.

We have found this can be really bad for video filmed indoors.

The worst problems we have ever had can be seen in the following video.

Eg. Watch the roof beams in the ceiling to see the jelly wobble wavey distortion side effects of stabilizing.

If the stabilized clip has a wobbly jelly look from all the zooming in, cropping, and resizing, that Stabilizing has done, then the following article from http://whoismatt.com/bestwarpstabilizersettings/ recommends to try do the following five “fixit” methods.
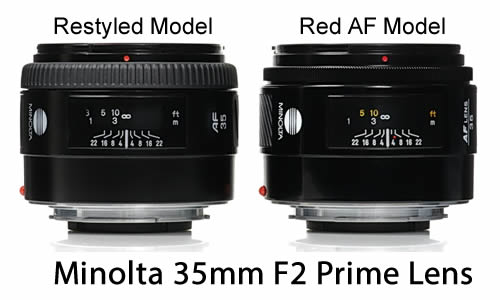
By default, Warp Stabilizer chooses “Smooth Motion” – 50%, with a method of “SubSpace Warp.” The video borders framing setting will show “Stabilize, Crop, Auto-scale”. If the clip ends up distorted and looking like wobbling Jelly, then try the following methods to clean it up.

Do the fixes below in the order they are numbered, and stop once you have a fix.

Eg. If method one (Detailed Analysis) does not work, then try method 2 and then the next method in the list below until you are satisfied with your clip.


1. Detailed Analysis

1. Click the “Advanced” arrow and check the “Detailed Analysis” box. Have premiere re-analyze the footage (which will take much longer than before), but sometimes this will work as a quick fix.

How to Warp Stabilize 12

If this has not fixed things, then try Method 2.


2. Crop Less <-> Smooth More

Click the “Advanced” arrow and adjust the “Crop Less <-> Smooth More” percentage from “50% down to 5%” going in steps of 10.

(Note this option is only available when using “Result = Smooth Motion” and is greyed out for “Result = No Motion”.

Eg. Start by changing it to 40%, click on “ANALYZE” and let it stabilize. Then check the footage to see if it has improved.

How to Warp Stabilize 13
(Click Image to View Full Size)

Each time we lower this percentage the video will become a bit more shaky, but it should progressively contain less jelly wobble in the clip.

It is helpful to use this Method 2 if we have just a slight amount of shakeyness (perhaps due to handholding the camera), and we want to smooth this out.

If this has not worked then try Method 3.


3. Reduce Smoothness

Click the “Stabilization” arrow and drop the “Smoothness” right down from 50% to only 5%.

How to Warp Stabilize 14
(Click Image to View Full Size)

This reduces the smoothing that Warp Stabilizer will attempt to apply to the clip.

This will result in a slightly more shakey shot, however clips often do not need much smoothing at all.

Method 3 should cut out a lot of the Distortion and Jelly Wobble effect.

(Remember it is always best to try and get the original shot as steady as possible, even if this means using a cheap lightweight monopod on your DSLR camera while filming the shot.

If this has not worked then try Method 4.


4. Rolling Shutter Ripple

Click the “Advanced” arrow and change “Rolling Shutter Ripple” from “Automatic Reduction” to “Enhanced Reduction.”

How to Warp Stabilize 15
(Click Image to View Full Size)

This setting is usually only helpful when dealing with Rolling Shutter introduced by the CMOS sensors used in DSLRS and other popular digital cameras, but it doesn’t hurt to try using it. “Rolling Shutter” is a jelly-like wobbling or blurring stuttering effect in recorded video when the camera is handheld or moves a lot, especially during panning across a scene.

Always try to limit panning if possible and pan as slow as possible when filming video.

If this has not worked then try Method 5.


5. Position Method Synthesize Edges

Click the “Stabilization” arrow and change “Method” to “Position.” Then click “Borders” and change “Framing” to “Stabilize, Synthesize Edges.”

How to Warp Stabilize 16
(Click Image to View Full Size)

With this setting, Warp Stabilizer will actually create new edges for your footage from existing pixels. As long as it isn’t being forced to make up too much information it usually does this very well. The tradeoff is that almost always you will have to render your stabilized clips (by pressing the enter key) before viewing them because of the enhanced processor power required. Try using Synthesize Edges while changing the Smoothness percentage. This usually fixes the Jello/distortion in clips when nothing else will.


Other Approaches

We can also try these approaches to doing Warp Stabilization.

1. Start with method as “Subspace Warp” at 50% and if there is weird zooming or jelly wobble, then try redoing it at only 10%. If there are still problems, leave it at 10% but switch the method to “Position, Scale, Rotation.

2. Start with the Default settings, and then try up the Smoothness from 50% to 70%. This worked okay on a still object for which the video footage was a little shaky due to zooming in.

3. If we get wobbly resizing that makes writing or objects go Jelly wavey and change size, (that looks like we are filming underwater) we can drop the smoothness down to 20% or even down to 5%.
Even as low as 5% smoothness will still get rid of a lot of shaking, but will not introduce nearly so much warping and wavey size changing distortion of objects.


Further Reading and Examples

This first article includes examples of the best settings to use to stabilise in car driving footage as well as drone footage:

Making the Most of Adobe’s Warp Stabilizer

There is another version of the above How To Guide, that includes settings screen shots at this link:

Comprehensive Guide to Warp Stabilizer

Adobe has a written document all about Warp Stabilization at the following link:

Adobe Dcoumentation on Warp Stabilizer


Videos About Stabilizing

This is a three minute demo video of the Warp Stabilizer, showing how you may have to also apply cropping.


The following three minute video shows the basics of the Warp Stabilizer, and then uses an example clip to apply many diferent combinations of settings and find out which one works best.


Here is a great seven minute video about how to shoot your clips with warp stabilization in mind: Tips and Do’s and Do Not’s.


This is another great video about how to shoot hand held, mimic slider effects, and then stabilize it all afterwards using Premiere.


This video shows the wavey Jello effect and how to fix it using Stablization.


Finally we have a 2 minute Adobe TV Video about Warp Stabilization on the following web page.

Adobe TV 2 minute Stabilizing Video


So that’s our comprehensive guide to Warp Stabilizing completed.

The most important things to remember are:

– Always film footage as steady as possible, by using a Monopod, or even a Tripod.

– Limit panning shots, but if we have to pan then do it very slowly to avoid rolling shutter stuttering effect

– Use Sony cameras that have inbuilt image stabilisation (and are also totally awesome cameras anyway)!

Enjoy,
Paul at PBP Photos By Passy

How To Film Underwater

In this lesson we look at what is required to get fantastic photos and videos while out on the water and under the water.

Let’s start with a How To Video we have made all about filming Underwater using the sensational Sony X1000V Action Cam.

The video is 15 minutes long but covers virtually everything that needs to be discussed in this comprehensive How To Lesson.

We commence with a couple of minutes of underwater footage we have made, and then proceed to do a full and detailed discussion of equipment, tips, and techniques for underwater filming.

Although this video gives specific details for using Sony Action Cams, most of the tips and techniques are equally applicable to GoPro, SJ5000, or any camera that is used for filming underwater.


Underwater Focusing

Any Action Cam that is used in the water must have a flat face screen on the front of its waterproof housing to be able to focus underwater.

Go Pro and SJ5000+ cameras already have a flat area on the front of the waterproof cases for their cameras.

But Sony has a rounded sphere on the front to the standard Sony waterproof case. This does not seem to make any sense, as although this might be useful for filming while on a boat, or while in the water filming Surfing, water does not run off the rounded front screen as well as a Flat front screen.

Furthermore a Flat Front Screen can be used to film above water and focuses fine, so the round screen is not needed for any use around a water environment.

With the rounded screen, images are not in focus underwater.

Sony sells a “Dive Door” which is a flat front screen for the case, which you must buy to be able to use their cameras underwater.
Eg. For the X1000V Action Cams that we have used, we had to buy the AKADDX1 Dive Door Flat front screen to fit onto the waterproof case that came with the camera.
This cost $69 Australian.

Film Underwater With Sony Dive Door 01

However the latest Sony X3000V is usually sold with the MPK-UWH1 waterproof housing that has a Flat Screen Dive Door on it.
It seems that the X3000V uses a different waterpoof housing case to the X1000V, as the X1000V is not listed on the Sony site as being compatible with the MPK-UWH1 housing.
The X1000V Action Cam uses the SPKX1 waterproof housing.

Using Sony Dive Door 02

With the flat screen on you can film both above water and underwater, and so you will find yourself not using the rounded front screen at all in most cases.
We did however use the rounded screen for filming while on a sailing boat, as we could easily wipe off any water splashes that got on it with our T-shirt.

For the X1000V, basically we removed the rounded lens screen front from the standard housing and replaced it with the Flat Screen Dive Door, whenever we were going to use it for Underwater filming.

The following one minute video shows how to remove the Round Screen and fit the Flat Screen Dive Door onto the Underwater Housing.


Sony Action Cam Settings

The videos we have made so far have all been 1080p HD at 50 fps. We have not tried out 4K filming yet.

The three main settings important for underwater filming are:

1) Use the “Color Mode” = NUTRL Natural colour setting rather than the usual Vivid Setting.

Menu Path: SETUP > COLOR > Use Prev Nxt Buttons to select NUTRL and then press the top of camera Record/Enter button.

2) Set the viewing angle at 120 degrees rather than 170 degrees.

Menu Path: SETUP > ANGLE > Use Prev Nxt Buttons to select 120 and then press the top of camera Record/Enter button.

3) Most importantly make sure the “Water” Scene setting is selected on rather than the Normal setting.

Menu Path: SETUP > SCENE > Use Prev Nxt Buttons to select WATER and then press the top of camera Record/Enter button.


Using the Sony Settings Menu on the Action Cam X1000V is slightly painful, because we go down through the menus to one setting, then when we push the top record enter button, we are taken out of the Menus back to the very top level every time.

Once you get used to this annoyance is it not too bad, and once a camera is set up for a shoot we don’t usually have to go back in and change values on the fly.

An alternative solution is to use the Sony Play Memories App on a Mobile Phone to adjust all settings by scrolling down a single screen.

The 3:52 to 5:10 section of the following YouTube video gives some explanation of how to use the Action Cam X1000V Menu System and Settings, including showing the Play Memories App:


Sony Action Cam Manual

Sony Action Cam Online Guide 03

There is a great Online Help Guide for the Sony FDR-X1000V Action Cam at the following link:

Sony Action Cam Online Help Guide

In particular the following section on settings is extremely useful:

Action Cam Settings Details

This Online help guide covers the Sony HDR-AS200V as well as the FDR-X1000V.


Minor Issues with Dive Door

We encountered three issues: Safe Mode Locking, Cleaning the Dive Door, and Dive Door Condensation.

All three of these are not show stoppers, but you need to be aware of them and know how to deal with them.

When out of the waterproof housing for normal on land filming, the Sony X1000V has a safety lock mode you can flick into safe mode to avoid recording accidentally. This locks the record button in the up position.

However it is essential that the camera is NOT in safe hold anti recording mode before going in the case, because the buttons on top of the case cannot put the camera back into Go Mode.
It is not much fun having to come back out of the water and take the camera out of the case to get the lock mode off!
This seems to be a Sony design flaw as we cannot see how to overcome it or where we are doing anything wrong. Basically there is no recording lock safe mode when using the dive housing.

When you wash the Dive Door out in fresh water after a dive, water gets inside and stuck all around the edges of the Square Dive Door. The water then stays there in tiny clumps and will not evaporate dry. The trick is to flick the dive door vigorously from side to side to move the water to the center where it can dry out. It might take a few repeats to get it all fully dry. Leaving the Dive Door on a table out in the sun certainly helps.

There can also be persistent salt spots that you need to remove after the first drying by repeatedly re-washing the dive door.

It is extremely important to thoroughly soak and wash the Dive Door, the Underwater Case and the Monopod Selfie Stick after using them in Salt Water. We would recommend washing and drying them two or three times before the next dive.

The third and final issue that only happened twice during our entire dive trip was inside the housing case water condensation. This was the trickiest problem where all of a sudden there was lots of condensation inside the dive door. All filmed video comes out very cloudy and blurred if these very small water condensation bubbles are not removed.

What we had to do was very carefully tread water with our flippers at the water surface and hold the Action cam well above the water. Then we carefully unclipped the Dive Door and pointed it at the sun for a minute or two which quickly evaporated away all of the water condensation. We then snapped the dive door back shut on the case and continued our filming.

If we wanted to be a bit more safer, we could return to the boat and do this all safely out of the water.


Swimming Pool Practice

Sony Monopod Stick 04

We highly recommend that you practice in a swimming pool before trying out your Action Camera out at sea.

Practice both above water and underwater shots, a great shot to practice is the slowly turning around 360 filming shot.

For your amusement here is a one minute Practice Video we made at our Hotel using the Swimming Pool.


The Selfie Stick

How to Use Sony Monopod 05

It is well worth getting a quality Selfie Stick, that is well made and fully waterproof and will not rust.

The best one to use is the Sony “Action Monopod”, and if you do not believe us then take a look at the following video from 6:15 onwards.

On the Sony Stick, the wrist strap fits well, and it is great having the thick padded rubber handle. The Sony Stick is thick and solid with a standard Tripod screw mount and so other cameras can also be used with it.

One important thing about the stick is that when it extends it is twisted to tighten it into position. Be very careful to just do a small gentle twist, as strong twisting will jam the stick and make it very difficult to undo again.

How to Film Panning with Action Cam 06

Filming Tip: When using the Selfie Stick to film video while moving in a circle, move and pan very slowly to avoid rolling shutter blurring.


Selfie Stick Angle

How to Film Underwater 07

When we first started filming underwater we held the Monopod stick with the Action Cam on the end of it at a fairly straight angle horizontal to the surface.

However, as shown in the image above, holding the stick straight captures a lot of distorted back reflection from the water surface.

So it is best not to hold the stick horizontal.

How to Film Underwater 08

Instead make sure the Monopod Stick is pointed downwards between 30 and 45 degrees to the water surface.

How to Film Underwater 09

Do not to worry when using a selfie stick about not having your hands available for swimming, as the flippers using stiff leg actions give you plenty of propulsion power, leaving your hands totally free for filming. It is best to look down at 45 degrees because if you tip too far forward water will flow straight down your snorkel.


How to Snorkel

Snorkeling is very easy if you can already swim and are confident in the water.

If you are not a great swimmer then use a floating pool noodle or a life preserver ring to float around and film with, although the results might not be quite as good as swimming and snorkeling. However your own water safety comes first and should be your greatest consideration.

How to Film Underwater 10

Check out the following seven minute video on How To Snorkel.

Finally don’t touch anything with the camera or your body on a coral reef! Firstly because touching coral can kill the coral, and also do you a serious coral cut injury.


How to Film Fish

How to Film Fish 11

Fish are easily frightened and often when we encounter them they swim off straight away and out of sight into deeper water.

The best shots have the fish with some coral, and so we need to slowly swim past and then sneak back to where there were lots of fish previously. The fish seem to often come back to where they were within a couple of minutes after we frightened them away. We can float around if the tide is suitable above the reef with our camera going and see what we encounter. The worst thing to do is to swim around quickly all over the place chasing fish.

The following four minute video gives some great tips about how to film fish underwater.


Water Depth and Tides

How to Film Underwater 12

First of all you need a bright sunny day for filming fish and coral, unless you are scuba diving and have underwater lights.

The tide and currents are very important for both filming and your personal safety.

The ideal is a medium tide where you can safely swim over the top of the reef coral, but also be able to go along the edge of the reef in the deeper water. The most important thing is that you do not want to get stranded on top of coral in shallow water where you might bump and damage the coral or get coral cuts which are very unhealthy for you. We found you can drift gently over coral in very shallow water that is only about 30cm or 1 foot deep but this was by accident and we do not recommend trying it.

In warm salt water you will find that you are naturally very buoyant and floating over the top of the coral will not be a problem. Just relax and gently flip your swim fins with smooth strong strokes using mostly straight legs.


Coral Cuts and Jelly Fish

As already mentioned don’t touch anything with the camera or your body on a coral reef! Firstly because touching coral can kill the coral, and also do you a serious coral cut injury.

The problem with Coral Cuts is that there are live organisms in the cut and a serious infection can result.

Advice from the Internet is to do the following:

– Clean vigorously (scrub as hard as the pain permits with a toothbrush, and then flush with fresh water as soon as possible after the coral cut.
– If it is stinging then you can rinse it with a form of acetic acid such as vinegar.
– Flush with 1/2 fresh water and 1/2 hydrogen peroxide, and/or treat with Betadine.
– See a Doctor and get Antibiotics.

For more information, check out this article:

How To Treat a Coral Cut

The other hazard that you might encounter snorkeling on the Barrier Reef in Australia is a Jellyfish Sting, especially during Jelly Fish Season.

The best prevention is to wear a light weight “Stinger Suit” that are provided free of charge on most day snorkeling trips.

How to Use a Stinger Suit 13

The suits are made of lightweight loose stretching material, and although they look like a wetsuit they are very comfortable and easy to swim in.

Here is a short two minute video on how to treat Jelly Fish Stings:

As Vinegar is used for treating both Coral Cuts and Jelly Fish Stings it could be very handy to have some with you when going on a snorkelling trip.


Capturing Still Photos

How to Get Stills from Video 14

We have found that it is far better to capture stills off HD Video, rather than put the Action Cam into camera mode and shoot underwater still shots. The same also applies for any other above water shots from the Action Cam.

The basic method is to simply play the Action Cam HD video on a Laptop Computer and push the Print Screen button to capture a still.

We then take this still into Photoshop, make some basic adjustments, and then save it as a JPG image.

There are often a lot of small dust type particles in the water that all reflect sunlight. This makes images overly bright, as well as making the water slightly cloudy.

Making a few basic Brightness, Contrast, and Saturation adjustments in Photoshop can fix all of these problems.

Check out the following set of Still Images which were all made from Video Print Screen Captures.

Underwater Stills Captured from Video


Sony Action Cam Videos

Here are some of our videos made with the Sony Action Cam that include underwater footage.

Make sure you click on the HD icon at the bottom right hand corner of the Video Player and watch these in 1080P resolution.


This next video contains underwater footage at a remote offshore lagoon, 200km offshore from the Australian Coast.


This third and final video was shot both above and below the water entirely on the Sony FDR-X1000V Action Cam.


Exploring the undersea world is a fantastic experience, and even better when it can be captured so easily and superbly using the Sony Action Cam!

Enjoy,
Passy