Tag Archives: How to video live music

Getting on the Same Page

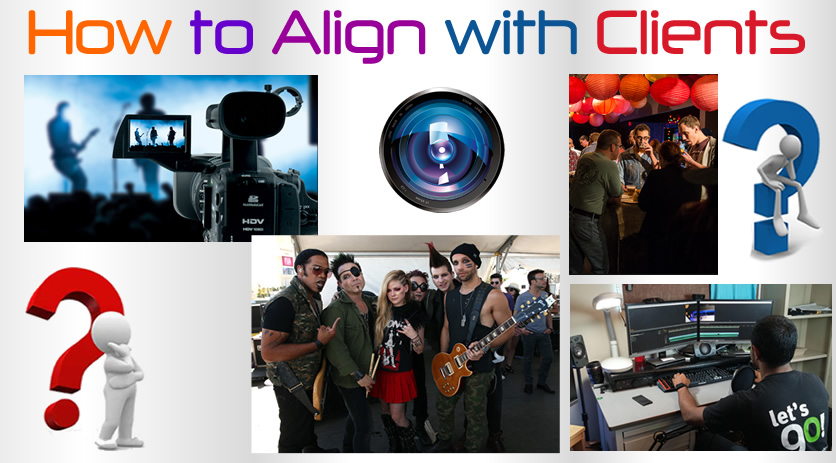
An essential part of producing photos and videos for clients is to understand their needs and expectations, so they end up with a Media Product they really love.

Communication and artistic vision is often a tough path to navigate, so making sure everyone is on the same page at the start of a Photo or Video Project is vitally important.


Clients and Photo Projects

Photo Projects do not seem to be nearly as troublesome as Live Video Projects. Often we can Photoshop individual images to improve them, or instantly remove them if the client is not happy with some of the images.

The only problems we have encountered thus far with Photos was one issue with a singer where he did not like his mouth open near the microphone in pictures because he thought it looked like he was about to perform a sex act on the microphone!

The only other issue we have had were on some Band Promo Shots, where we produced photos of Band Members smiling and having a good time, but they really wanted a far more serious look with nobody smiling.

To solve these “not on the same page” problems with Photos, we ask prospective clients to view similar themed Photo Galleries we have made for other clients.

We also often put together a Pinterest Board of Images so that they can look at it and tell us what they like.

For example this Pinterest Board:

Band Promo Shots on Pinterest


Clients and Live Video Projects

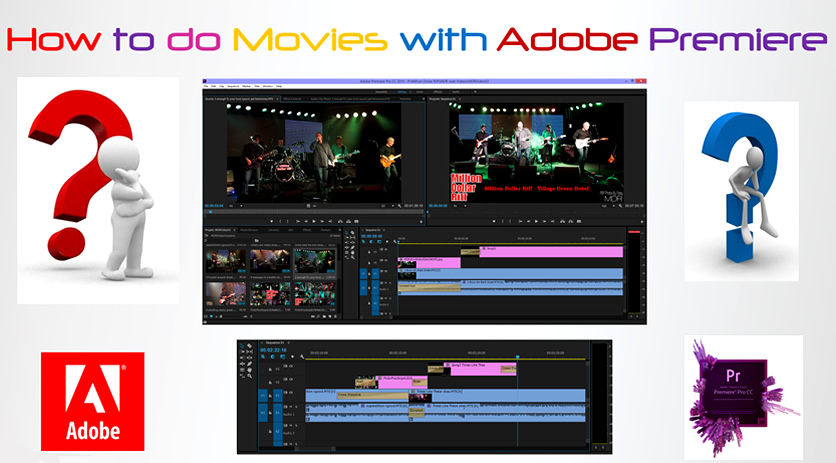
Making a Production Video is far more complicated and time consuming than taking some still photos of a show, or holding up an iphone and pressing record. There is no quick-fixing of Videos with Photoshop, and it is difficult to remove or crop many video sections.

It is vitally important to fully understand the Clients Needs and their Desired End Products before the Project commences.

For Example, here is a video we made for a Client which we thought was a really good product, and captured a typical live performance.

However, there were a number of aspects of this Production that the Band were not happy with.

These were as follows:

1) Video Soundtrack – They believe we “promised to get them a multi-track desk feed from the venue and remix it into the video soundtrack”. They felt cheated when this did not happen, and the sound track contained only live sound with crowd noise evident.

2) Fonts Used – They loved the font we used for the band member identification, but they hated the font we used for the “catch phrases” that displayed as the songs played. They said the font did not fit in with their branding, and was inconsistent with the rest of the video.

3) Breaks in the Set List between Video Recorded Songs – They were not happy that we could not record songs back to back, due to SD Card writing limitations.

4) Footage Quality Changes between Wide Angle, Drum Cam, and Close Ups – They did not like how the wide angle footage looks grainy and less sharp than the close up shots. They believed it interfered with flow and continuity. They also did not like that the Drum Cam footage was not as clear as full lighting shots of the singer.

5) Not Being Up Front about OUR NEEDS – They were annoyed that we were not up front from the beginning about our needs during the project: eg. one song break between targeted songs, one point of contact with the band, fast decision making and turn-around times.

6) Too Much Footage of Audience Singing – They were not happy with the “Rain” song that featured a lot of audience singing. In their opinion this made out like the band was too lazy or incompetent to sing the song themselves.

7) Release of Videos to the Internet – They were really annoyed that we uploaded what they believe were not finally approved videos to YouTube. A music venue also linked to one of these videos on the venue’s Facebook page. The band believed that the whole marketing image of the band was compromised by such activities.


All of the above issues resulted because there was not enough clear communication between the Team at PBP and the Band throughout all stages of the Project.


Video Production Check List

To overcome these types of issues in the future, Photos By Passy has developed a comprehensive Video Project “Check List” to make sure “everyone starts on the same page” and the project runs smoothly to a happy completion.

The Main parts of this checklist are as follows:

1) Establishing all Client Needs Before Starting the Project

2) Making Clients Aware of Product Limitations

3) Supplying a List of Our Needs to the Client

4) Agreement on Delivery and Distribution of Final Products


The full Check List ended up being 13 pages long, and it can be viewed at the link below:

Photos By Passy Video Project Checklist

By using this Video “Check List” for all of our upcoming Live Music Video Projects we are confident that Clients will only engage us if our type of Product is what they really want. Furthermore, when engaged for a Live Music Video Project, we will be able to meet all of their needs and expectations.

There will be no controversy, confusion, or misunderstandings, and the Project will be one where all stakeholders are happy with the final outcomes.

Enjoy,
Passy

How to use Adobe Premiere for Videos

WARNING: This article contains quite a few embedded how to videos, and may take a while to load in.

Recently we built a powerful Windows computer for Video Rendering, and learned how to use Adobe Premiere to combine a series of DSLR Camera video clips into a short movie.

You can watch two of our finished products here:

and

Takin' Cover Band – Live Covers from Paul Passy on Vimeo.

If the videos are loading too slowly, they are also uploaded to our Vimeo Channel at the following links:

Takin Cover Video on Vimeo

Appetite for Destruction Video on Vimeo

These were the first two videos we ever made using Adobe Premiere. Since then we have made several more videos which you can view on our Portfolio page at the following link:

Photos by Passy Videos Portfolio


The Takin Cover Video is also available on YouTube:

The filming for the Takin Cover Video was done completely hand held, and some up and down wobbling is visible in places.

For wide angle shots it is far better to do this type of filming with a Monopod, like was done for the Appetite for Destruction Video.

However close up shots really need to be done hand held, but I am investigating getting some kind of gimble rig to do this in the future. For now it is hand held for all close ups.

For the Monopod setup I had to make my own safety strap for the camera that was long enough to raise up the Monopod, but short enough so the camera would not hit the ground if dropped! Customising a standard sling strap did the trick.

Obviously a $3000 powered zoom lens would help too, but we just do not have that sort of money around at the moment.

Getting a proper Video DSLR setup (eg. Sony A7s II when it comes out, with a power zoom lens) is possibly further down the track in one or two years time. (Estimated Cost: $6000 to $7000 !) For now it is a matter of developing solid skills with our current equipment.


How to Use Adobe Premiere CC Document

Rather than write a very lengthy post here, we have written all about how to use Adobe Premiere Pro CC in a PDF document which can be downloaded at the following link:

Adobe Premiere How To Guide by PBP

In the document there is a step by step journal of how we learned Adobe Premiere and made a Live Music Video.

There are also links in the document to many YouTube videos and useful tutorials that we found on the Internet.


Getting Started in Premiere CC

Probably the most useful video for getting started in Adobe Premiere, for complete beginners, was this one by Gary Fong:

The following video shows how to use the effect controls panel to modify Video transitions:

For Audio transitions, watch this video:


Creating Black and White Video

For Colour Correction of Clips, including making clips Black and White or Sepia, watch these videos:

and


High Contrast Black and White

The standard B&W conversions in Adobe Premiere using Desaturation or B&W effects can sometimes produce very ordinary grey looking videos.

HOWEVER

Hidden away in Effects: Video > Channels > Calculations

is a two layer blending technique where we can set one up as say green, and the other as red (blue is very noisy), and then on this same panel set up the blending mode as
Multiply, or Hard Light, or Color Burn and we get great high contrast B&W effects.

This following YouTube “How To” video shows how to do this:

Here is a short video we made trying out these techniques.

Our objective was to make a grungey black and white video in bad lighting conditions and test out the Sony A57 DSLR for run and gun video. The final result is a bit “rough and ready” but we think it captures the essence of live rock in a small venue.

This video had focusing issues, and the lighting in the venue was awful, but we believe we could use these Premiere techniques to make some better quality High Contrast Black and White clips in the future.


Creating Selective Colouring

For Selective Colouring (also known as Pleasantville and Sin City Movie Effect), watch these videos:

and


Speeding Up and Slowing Down Video Clips

Sometimes we have scenes like walking along a street, or riding a bike along the road, a crowd filling up a venue, a band setting up the stage, etc where having the footage play at normal speed will be a bit long and boring in a Video we are making.
What people usually do is make this footage run in high speed, almost like a time lapse sequence.
Speeding up a Video like this using Adobe Premiere is very easy.

We may also have some footage that we want to make into slow motion, by decreasing the speed, and we can use the same tools in Adobe Premiere to do this as well.

Here is the first video we ever made trying out these effects:

There are two ways of changing the speed of clips in Premiere.

The following Tutorial video shows both ways, and in both of them click on your clip to have it selected.


To Summarise:

First Method is Window > Tools > then in the pop up tools use the 5th one down: “Rate Stretch Tool” or press the letter “X”
Then on timeline shorten back the clip and it does not lose any footage but just speeds it up to fill the shorter length.
Stretch the clip if you want to make slow mo.

Second Method is click onto the clip to have it active and then right click on the clip and pick “Speed/Duration”
or up on the top menu click “Clip” and then Speed/Duration
If you make speed in pop up box 200% it plays twice as fast, 50% makes half speed, 400% = 4X faster etc.

For our Bike Riding Video we found that the ultra fast speed for boring riding segments to use is 800% (or 8x normal speed).

For the slower section near the boats we used 200%, but as it is a long segment riding past all the boats, maybe we should have used 400%.

The Right Click Speed/Duration % method for speeding up video in Premiere seems to work really well.
We have not investigated “Speed Ramping”, because if you have a clip that is going faster, and then the next clip is normal speed, Premiere seemed to automatically do the gradient slowing down okay.

If you want to do very smooth fast then sudden slow motion, then try out “Speed Ramping” with Keyframes, as in this Tutorial:


Watermarking Your Video

For making a Watermark on your video, from a transparent PNG file that you have made previously, watch this video:


Multi-Camera Shoots

Using one Camera on a Monopod to do the wide angle view and capture the main soundtrack (eg. A Sony A77 with ECM-ALST1 stereo microphone), and then having other people operating basic handheld fully automatic cameras (like the Sony RX100 or the Lumix LX100), enables much more sophisticated Videos to be produced in Adobe Premiere.

This was the approach we used for making our “Appetite for Destruction” Guns and Roses show band Video Montage.

The following YouTube video has good suggestions about doing multi-camera shooting:

This is an example of a finished product, which shows to change the cuts on either a beat, or the end of a phrase or verse:

This is another good music video shooting type video how to tutorial:


Synchronizing Multi-Camera Clips

For our multi-camera “Appetite for Destruction” Video we used a wide angle camera and a close up camera.

Basically the wide angle shot was laid down as Video/Audio 1, and then the close up shots were pre-trimmed and laid down as Video/Audio 2.

Then comes the challenge of getting all the pairs of clips in sync, one at a time, using Premiere’s audio track matching function.

Unfortunately, on our main wide angle video, and the close ups videos, Premiere’s automated matching on Audio track wave forms only worked about 50% of the time.

When it did work it was pure magic, but when it did not work it was very long and tedious getting the close up cut in video manually shifted along the timeline to sync up with the main wide angle video.

Once the two clips are synched, we then unlinked the audio on the Video 2 cut in clip, and muted it in Premiere. We successfully rendered the final video without removing the muted clips at all. We also found for Audio transitions that using keyframes and our own custom fade in and outs was extremely useful.

It ended up taking about 12 hours of work, from camera unloads all the way to final uploaded web video. With experience this time could be reduced, but we reckon it would take at best 8 hours to make a 10 minute video featuring between 3 and 4 songs. Therefore Video is far more costly to produce in terms of labour time compared to a set of around 50 still images.

The following six minute YouTube video shows the basics of editing multiple Audio tracks in Premiere Pro CC:

Here is another video which also shows how to sync multicam clips:

This next video is rather long and is all about editing people dancing to Dance Beats:

This next video covers doing multicam editing for a music video.
The guy who did this video has quite a few other videos on YouTube that are worth watching.


Rendering Output for YouTube and Vimeo

And finally, to get to grips with all of the intricacies of Exporting Video to YouTube and Vimeo, this video is the one to watch:

So if you are interested in making movies with Adobe Premiere, using DSLR footage, then read our PDF document, and watch all the Tutorial Videos that are in it.

Enjoy,
Passy


If you found this article useful, then make sure you give our
“PBP Photos By Passy” Facebook Page a Like.

Photos By Passy Facebook Page