In this “How To” article we look at some basic Photoshopping which can be used to improve photos of animals taken outdoors
in bright sunlight. We also look at enhancing Photos that have been taken of Animals in Glass Cages.
If you do not have Photoshop, then the same enhancements can easily be made in either Photoshop Elements, or the great
free image editor called “GIMP” which is available for download here:
Click to Download Free GIMP Photo Editor
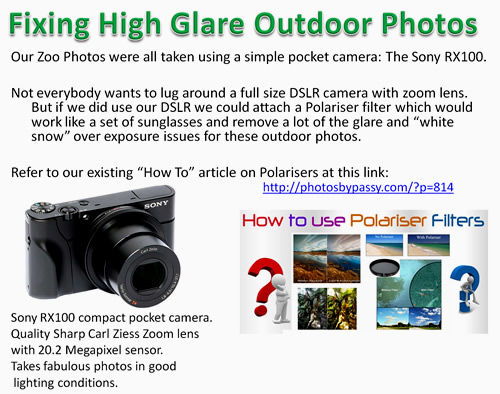
Recently we did a day trip to the Melbourne Zoo in Australia, and not wanting to lug around a lot of camera equipment, we took
along a small powerful pocket camera made by Sony: the RX100 Mark 2.
The Sony RX100 series is currently up to the RX100 M4 for around $1000 in Australia, but the camera we used for our Zoo photos
was the RX100 M2 which can be purchased new off eBay for around $500.
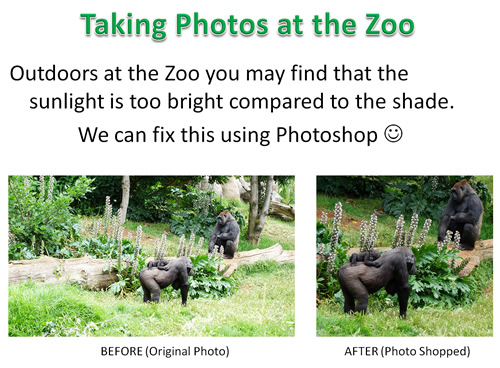
It was a cloudy day, with the sun occassionally breaking through very brightly, and so we had issues with over exposure
where the pictures came out too bright, with a white snow effect on grass and animals backs.
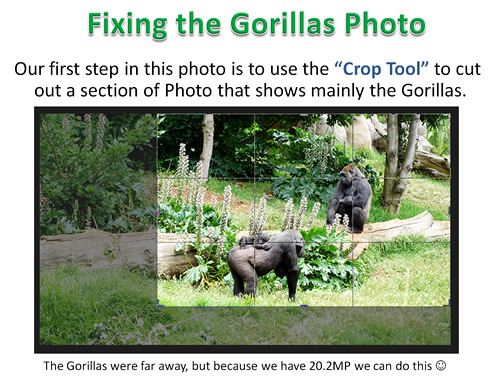
Also many of the photos were taken from a distance using the superb Carl Zeiss zoom lens, and due to this great lens, and because we have 20.2 Megapixels to play with on the RX100, we could easily crop the photos to make them look a lot closer, and still have plenty of quality pixels remaining when we resized the pictures to 2048 pixels wide for Facebook.
In this article we look at using Basic Photo Editing Techniques to enhance Photos of Animals.
It is basically a beginner’s lesson in Photoshop.
Photos can always greatly benefit from some simple Photoshopping.
Advanced Methods
If you want to try something a bit more advanced to enhance the example photos, then use “Colour Curves” to reduce the
high tones as shown in the following tutorial for Gimp, (but works equally well in Photoshop):
Download Photos for Practice
If you want to download the starting versions of the Photos shown in this article, then bring up the following folder in a web browser, click to display the images, and then Save each photo using your Browser right click on photo Mouse options.
You can then try out the techniques we show in this article.
Click Here to Download Practice Images
Fixing Bright Pictures
Over Exposure can easily be dealt with using basic photo editing tools.
If we had used a full size DSLR camera, we could have fitted an Adjustable Polariser Filter, which works like a pair of sunglasses,
and reduces glare and brightness.
See our previous “How To” article about Polariser Filters at this link:
The first thing we do is crop our Photo to better frame the action, and make the animals appear closer.
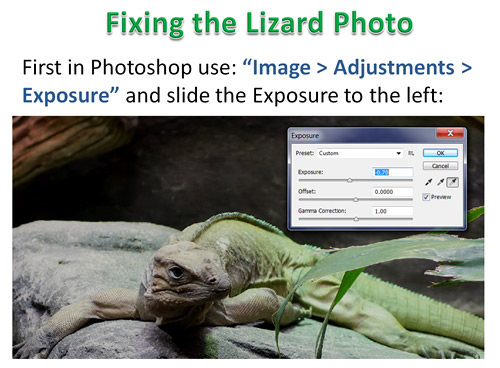
Next we adjust the Exposure down a small amount to darken the picture slightly:

Note that if you have Used Photoshop CS5 or earlier, the “Offset” adjustment used to be brilliant for fixing overexposed bright and washed out Photos.
However in CS6 and the Creative Cloud versions of Photoshop, “Offset” has been changed to be very harsh, and appears to be virtually unusable:
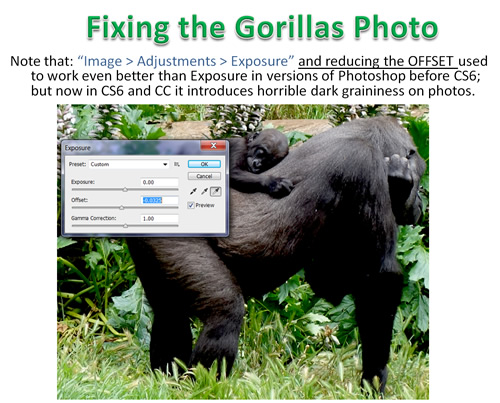
So do NOT use Image > Adjustments > Exposure and Offset.
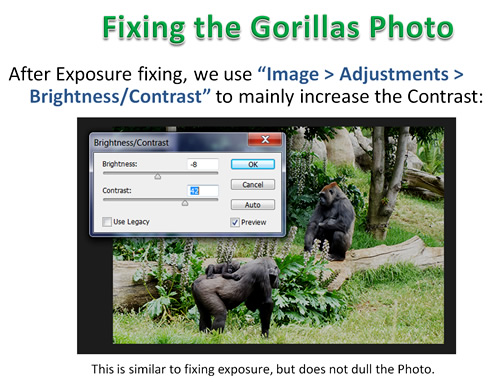
We now use Brightness/Contrast to introduce some “punch” into the photo:
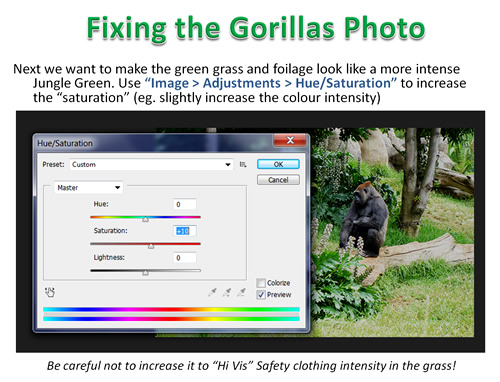
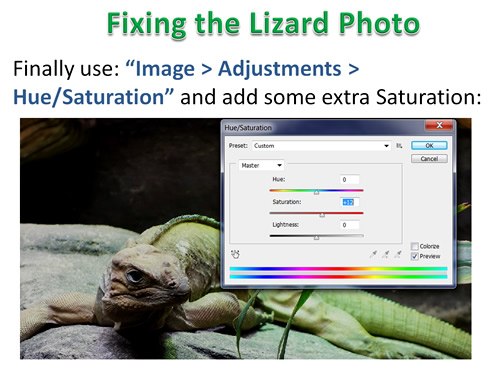
The next thing is to make the colours more intense using Saturation:
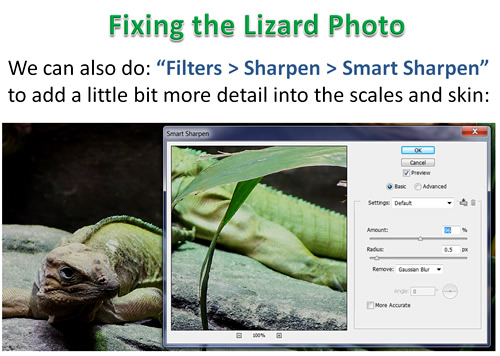
The last thing to do is to “Sharpen” the picture, to make the fur look its very best.
Note that Sharpening should always be done as the last step when enhancing photos.
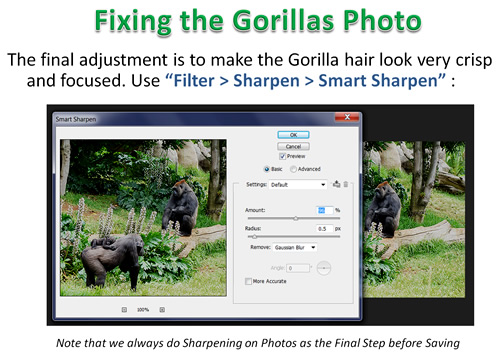
Note that the settings used on the above Sharpening are percent values between 90% and 98%, and a Radius Value between 0.2 and 0.7 (we used 0.5).
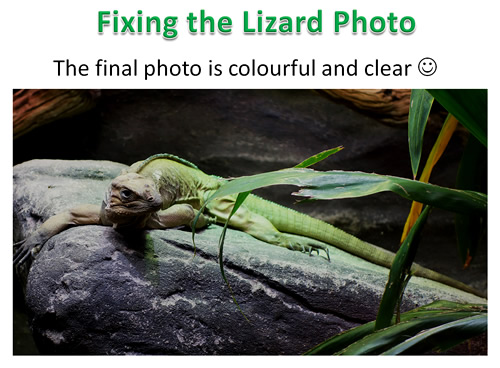
Our Photo is now finished and ready to Resize and Save.

Advanced Technique – Curves
A Quicker way to fix our Original overexposed Photo with “white snow” on the green grass, is to use “Curves”.
Using Curves we can fix our Photo in one go, without having to do Exposure then Contrast then Saturation.
We need to understand that the brightest parts and the whites form part of the top section of our colour line.
If we click to make a dot on this top part of the line, and hold our mouse button and pull the line down to make a curve, we can remove the bright whites.
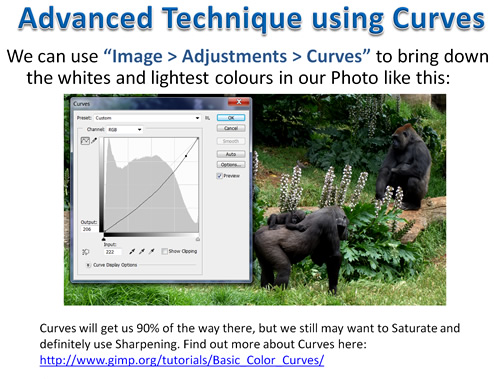
Find out more about using Curves in the following Web Tutorial:
Photos Taken Through Glass
For taking photos through glass, hold the camera as close as possible to the glass, and check there are not any people reflections visible and take the photo.
The resulting photo might look too bright, grey and a little foggy, but we can easily fix this in Photoshop as follows:
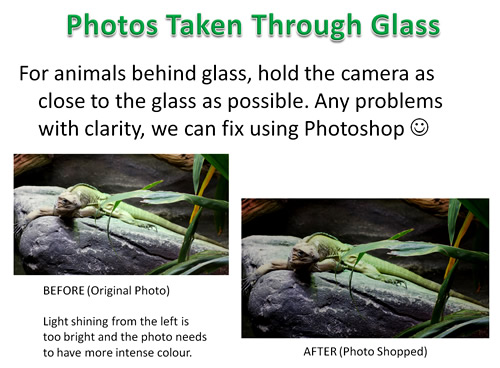

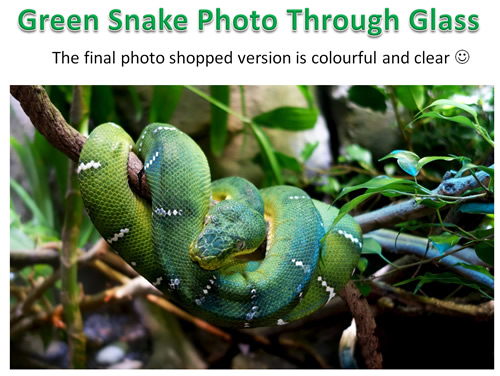
This produces the final photoshooped image, which is crisp and clear with nice colour.
Here is a photo taken of a green jungle snake in a glass cage that now looks like a photo taken in the Amazon Jungle.
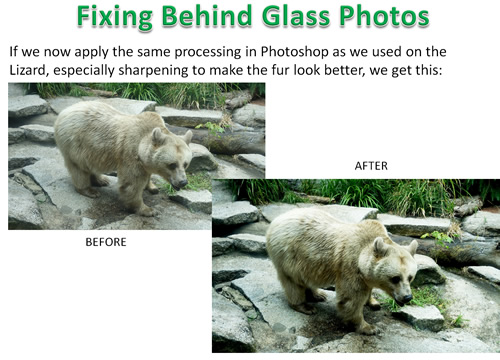
Finally here is a photo we took of a bear through Glass in vertical Portrait mode.
But because we have 20.2 Megapixels to work with we can easily crop it to be a Landscape Horizontal image.
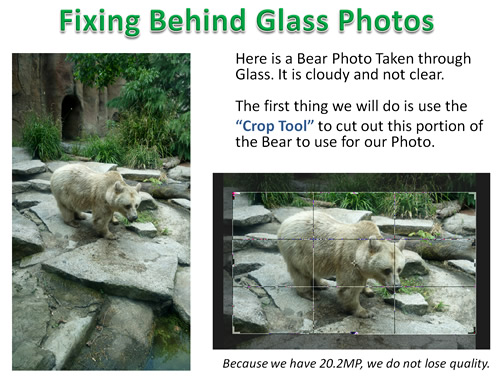
Working through the usual steps, we can transform the photo into the final enhanced image.
Summary
Animal Photos and Photos through glass can be greatly enhanced using a photo editor like Photoshop or Gimp.

Our Zoo Photos
You can check out all of our photoshopped Zoo Animal pictures at the following link:
Download Photos for Practice
If you want to download the starting versions of the Photos shown in this article, then bring up the following folder in a web browser, click to display the images, and then Save each photo using your Browser right click on photo Mouse options.
You can then try out the techniques we show in this article.
Click Here to Download Practice Images
We hope you have enjoyed this article about Basic Photoshopping Techniques for Photos of Animals.
We have plenty more “How To” articles on our Website at the following link, and constantly add new ones.
Photos By Passy How To Articles
If you liked this article, then go Like our “PBP Photos By Passy” Facebook page.
Subscribe
If you enjoy visiting Photos By Passy, why not get a free subscription to the website.
You can then receive notifications of new items and updates directly to your email address.
Go to the subscribe area on the left hand sidebar, (or down the bottom of the page if using a mobile phone), fill in your email address and then click the “Subscribe” button.
Enjoy,
Passy
If you found this article useful, then make sure you give our
“PBP Photos By Passy” Facebook Page a Like.