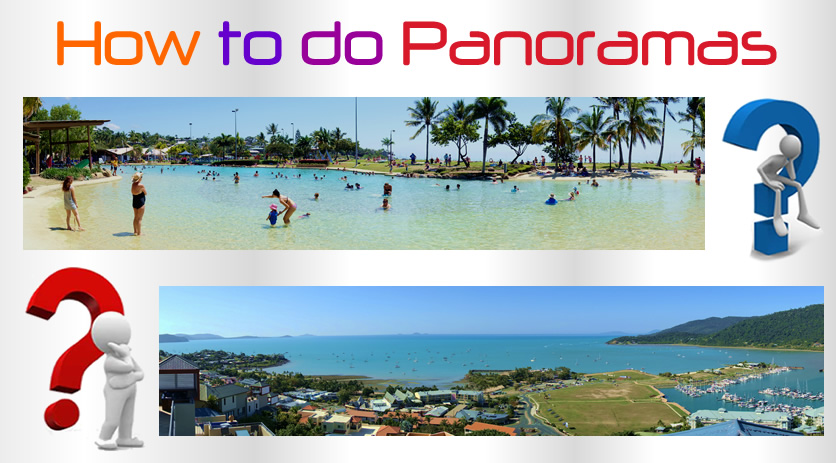
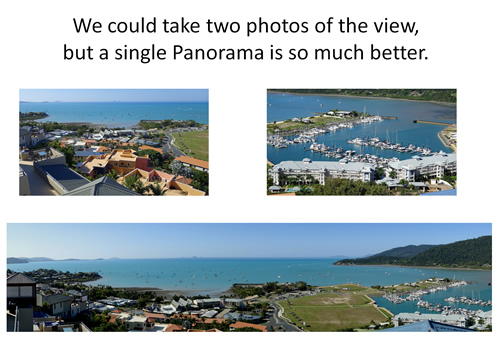
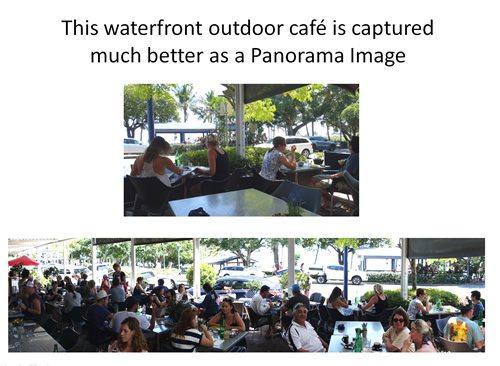
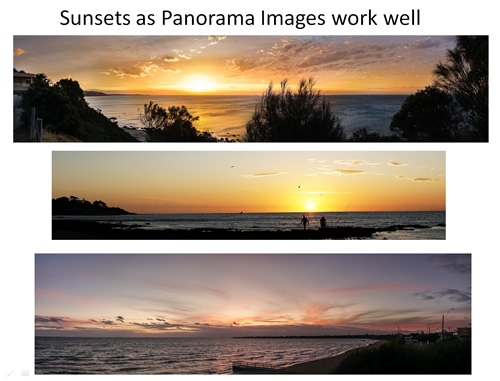
A Panorama image is basically several photos stitched together to create one big wide angle scene.
It is best to pan the camera from left to right while holding it level, or using a tripod, and take between 3 and 5 separate photos,
eg. a Left, a Center, and a Right Photo for the most basic Panorama. Also make sure you do about 30% overlap on the photos.
In fact all Photo stitching software works left to right, and so always pan from left to right.
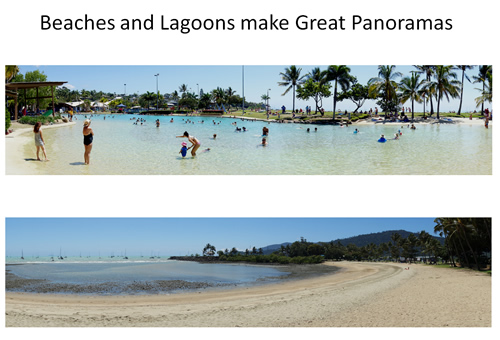
Panoramas are great for Landscape shots, Beach shots, City Shots, Sunsets, or anywhere that you need to take a big wide view into a single image.
We could buy an expensive wide angle lens to get Panorama shots, or a 360 camera, but all of this is totally unnecessary, as we shall see in this lesson on how to make Panoramic Images.
Example Panorama Photos
Taking a Panorama shot captures the whole view so that the image is a lot more like actually being there.
Often a sweeping Panorama image can capture the look and feel of a location far better than just a single image.
Taking a Panorama often produces a semi circular type view, and this is great for images of Beaches.
Panoramic Views are great for capturing Sunsets.
If you are on a PC and want to take a look at the previously shown examples full size, then click on the link below:
Sony Camera Auto Panorama
Many compact cameras and even DSLRs have Panorama Modes on them that will automatically stitch a series of photos together.
Here at Photos By Passy we use Sony cameras and have found their Panoramic Mode to be brilliant.
In particular the very compact Sony RX100 pocket camera has a great Panorama function which is excellent for travel photos.
The following video shows just how fast and easy it is to use the Sony RX100 for making Panorama Images.
The camera instructs you to move the camera left to right, but it takes a little bit of practice to get used to the speed at which you need to rotate. If you rotate too slow or too fast, the camera does not build the Panorama and tells you to try again.
We have also found that a tripod is not necessary, and as long as you follow reasonably well along the line of the horizon, it stitches together the image really well.
Eg. Just find a horizontal line, like the horizon of the land or sea meeting sky, and try your best to stay horizontally steady and locked on while rotating your body.
A problem can arise if we are facing into the sun anywhere in the Panorama. In this case we simply point at the sunny area and lock the exposure using the AEL button on Sony DSLR Cameras.
Eg. What we need to do is get a consistent exposure throughout the Panorama. Often, one part of the landscape is brighter than others. Make sure we set up for this brightest scene. We want the final image to look like what we see through the camera, as if we had made the Panorama from one single photograph.
Panoramics are great for Sunset Photos, see our lesson on Sunset Photography for more information:
Even if you do not have an auto Panorama function on your camera, sets of individual photos can still be taken and stitched together in Adobe Photoshop. In fact, sometimes we get better results from individual images stitched together than we do from using in-camera auto panorama.
In fact we suggest for important shots that you do a an auto camera panorama, as well as taking a set of overlapping still shots for back up.
Adobe Photoshop and Bridge
If you do not have a Sony Camera with auto panorama function, then you can get Adobe Creative Cloud to stitch together three to five individual
photos into a Panorama very easily, as shown in the following video.
You have to start off by bringing your three photos into Adobe Bridge. (Bridge is a simple windows explorer type application that is customised for images. Once the three to five images are all selected in Bridge, it is simply a matter of going to the top menu bar in Bridge and doing Tools > Photoshop > Photo Merge as shown in the video.
Adobe Photoshop
The following fifteen minute video shows how to create a Panorama in Photoshop, as well as providing some expert tips on shooting Panoramic images.
In this method we do not have to use Adobe Bridge, and start straight away in Photoshop and do File > Automate > Photo Merge as shown in the video.
Note that you “Browse” to select your images after opening the Photo Merge function. Also it might take 2 or 3 minutes for the merge process to run.
After doing the merge there will be 3 to 5 separate layers, right click in the bottom right hand side layers panel and do “Merge” to create one layer to work with for doing touch ups and adjustments.
The Photoshop Auto Merge function works really well, even for hand held non-tripod sets of 3 to 5 photos.
We have found that some Panoramas turn out better by doing individual overlapping shots in Photoshop Merge, rather than using the camera’s auto panorama function. Therefore we recommend for inmportant shots to do both: use the camera auto panorama as well as taking some overlapping still shots as back up.
After Photoshop merging we often get some checkered flag blank areas around the outside edges of the merged image.
This can be fixed by cropping, but it is better to try “Content Aware Filling” so that we do not lose any vertical size.
Content Aware Fill Empty Edges
Rather than crop down to remove checkered flag edges on a merged image, we can select these edges all together (hold down shift) with the magic wand and contiguous off. It is important to select all the blank transparent checkered flag areas together at once.
Next we do Select > Modify > Expand and expand the selection by 20 pixels, (which is needed for the next “content aware” step).
Finally we do Edit > Fill > Content Aware and click OK. We wait a few minutes and Photoshop miraculously fills in all the blank areas by smart copying in some of the surrounding scenery.
Eg. If we merge four images, it is likely that our image will be about 15,000 pixels, or 110cm (about 3 feet) wide, and so processing takes a while. (Eg. up to several minutes).
This whole process is shown around the 10:34 mark of the video below, it shows the selection, expansion, and content aware filling.
Adobe Lightroom
The following video shows how Adobe Lightroom CC can be used to stitch together a Panoramic Image.
The final panorama image created from the dull original raw images is superbly amazing!
Simple Panorama Tutorial
The link below has a nice simple written Tutorial about Panoramas.
Click to View Simple Tutorial on Panoramas
Important tips from the Simple Tutorial are these:
Overlap the images – according to Adobe, the images should overlap by at least 40%, but no more than 70%. Outside of this range, Photomerge may not be able to align the files correctly. Shoot around 7 to 10 overlapping images to get around a 150 to 180 degree Panorama.
Keep the camera settings constant – we need to keep focal length, focus point, and exposure constant throughout the series of images so that Photoshop can combine them later on. The easiest way to do this is to take one shot on P, look at the camera settings, and then dial those settings in on manual mode. Also focus on a suitable object about 1/3 of the way into the scene, and then change the camera to manual focus so that the focus will be constant. (Or just use manual focus with peaking to focus on an object about one third of the way into the center of the scene).
Shoot vertical – this is a little counter-intuitive since we are making wide panoramas. It’s usually best to shoot vertical (portrait orientation). Since we will “Photoshop Merge” multiple frames together later on to get as wide as we need, shooting vertical will give a taller overall panorama. Also, we will probably need this vertical space for cropping, and for using a 6000×3000 type Template to make a 360 Sphere image to load to Facebook. (Facebook 360 Spheres are explained later on near the end of this lesson).
Panorama Shooting Tips
These tips are for if you are taking a set of individual shots that you plan to stitch together in Photoshop.
If you are using a Sony (or other brand) Camera set in Panorama Mode, then the camera should do all of its own settings automatically.
With a bit of practice you should be able to shoot basic Panoramas in Panorama mode without even using a Tripod.
However, if you want to get a high definition photo to make a wall hanging print from, then the individual shots method is probably better.
1. Use a sturdy tripod and try to stay level when panning the camera and taking your 3 to 5 shots.
2. Make sure you have plenty of overlap of the sceneray inbetween Photos, eg. about one third or 30%, and an absolute minimum of 25%.
3. Do not shoot in auto mode (or some images might be dark and some bright and they will not stitch so well. Use Manual Mode so that the exposure stays the same in each image you take, (or hold down the AEL button on Sony cameras).
4. Overshoot the length and height of the Panorama so you will have room to crop later on.
5. Try not to have your camera lens set at wide angle for each shot, use a middle zoom setting to avoid image distortion.
6. Shoot with an aperture between f8 and f11 to f16, (which might mean using a 1 to 3 second shutter speed) with ISO as low as possible around ISO 100. This should give the sharpest most detailed images.
7. Focus could shift from image to image, and so set up the first image with the area most important to be in focus, using Manual mode focusing on the camera.
8. Use slow shutter speeds which will blur moving objects like cars, people, and animals. Try to avoid moving objects if possible.
9. At slow shutter speeds the images might be too bright, (like at the beach) and so you may need to use light reducing ND Filters.
10. Do not use Polariser Filters at all because as you pan the camera the light angle changes which shifts the Polarising.
11. Make sure your lens and sensor are perfectly clean. One dot will make a machine gun line of annoying dots across the photo in auto Panorama Mode! (These dots can be removed with the clone stamp tool in Photoshop but it is best to avoid them if possible).
If any of your Panorama faces into the sun (like a beach or sunset photo), it will be hard to get the exposure to be uniform.
The basic rule is to set the exposure for the brightest part of the sky, and shoot in Raw + JPG. If we do not do this and let the brightest part burn out and have whites, we cannot fix these in Lightroom or Photoshop; but we can fix dark areas where the sun was not shining.
Getting great images is a combination of manually setting your camera exposure for the sky (and then holding down the AEL Auto Exposure Lock button on the camera while framing and taking the shot, especially on Panoramic shots).
This definitely applies when using a Sony DSLR like the A77, which has a brilliant in camera Panoramic function, as well as an AEL button.
Manually pre-focussing with focus peaking turned on is also vitally important.
Making a Facebook 360 Sphere
It is possible to make your own Panorama Photos do the “360 viewing thing” in Facebook, but you need to use special Photoshop Templates to do this. Read on for details.
First up go to the following link:
bit.ly/360meta
which is a shortcut to the FB info page about Panoramas and 360 images:
https://facebook360.fb.com/editing-360-photos-injecting-metadata/
In that document there is information and a link to this dropbox account folder of Photoshop Templates:
https://www.dropbox.com/sh/70mwlh8k0y4rg0g/AACVNV7hvRZtjEKj4DoJMhCba?dl=0
Inside this folder, there are a whole bunch of Photoshop FB Templates that you can download, such as 360 degrees, 180 degrees, 120 degrees, etc.
These all have EXIF data pre-built into them to make sure you get an FB rotatable Panorama.
We can use these Templates for putting old Panorama photos we have lying around from a normal camera into FB.
All of the templates seem to be very square shaped and are 6000 pixels wide.
It is hard to see what template file is what in the dropbox folder, so click on each one read what it says, download it, then back button to the main folder, then just keep downloading these templates until you have a few of them: 360, 240, 180, 120, etc.
There seems to be a mixture of PSD and JPG type files in the Templates. Copy all of these downloaded templates into a folder that you can keep forever on your PC.
Once we had the Templates downloaded, we then opened the 180 degree PSD Template file that is a 6000×3562 Template.
Then we did File > Place to bring in one of our Beach Panoramas.
The problem is our camera panorama photos are too skinny and only fill the middle horizontal one third of our Panorama, we would have needed to shoot some of the sky, and the scenery right down to our feet as well to fully fill this FB Template.
Next we saved the image as JPG with the extra white space at the top and bottom.
When we added it to a Post as a Photo the 360 Sphere Panorama load to FB worked okay; however the image displayed all curvy on the top and bottom. However we could hand rotate it through 180 degrees okay. So it was a usable result.
We also tried the 120 degree template, but this left weird blank ends at the end of it when rotating on the phone.
It seems that for our Sony Panorama Mode images, the 180 degree template works best.
So the trick to converting your Panoramas is to get one of the download Photoshop Templates and paste into that, then save the result as a JPG (not a PSD and not a JPG for WEB, but a full high quality JPG). When we load this image to FB, Facebook will load it as a rotatable sphere photo and all will be good.
Further Reading
Here are a couple of web lessons with tips and tricks in them to help with Panorama Photography.
Videos About Panorama Photography
The following is a great Video about manually shooting a night Panorama and then adjusting it all in Adobe Lightroom.
This next 25 minute video shows how to fix a dull sunset photo Panorama into something really spectacular using Adobe Lightroom.
Gallery of Panorama Images
The following link is to a Flickr Photo Gallery of Panoramic shots that we will be adding to as we do more Panoramas.
So if you are out and about, take a few Panoramic Images.
One of our future goals is to go into the city one evening with a tripod and do some night panoramas. We will let you know how it goes.
Enjoy,
Passy
