How To Do ISO Settings

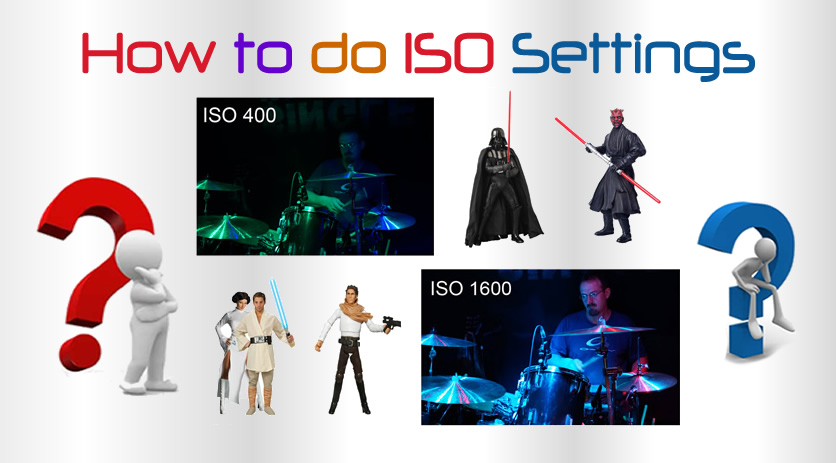
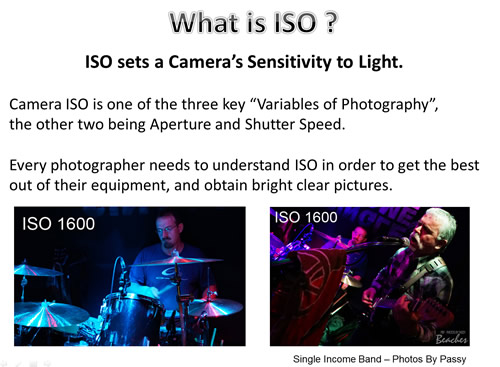
ISO sets a Camera’s sensitivity to light.

Effectively it works like a Brightness Control on your camera, and you can turn it up higher if you are in a dark room, or in a shady forest.

However, if you are outdoors in Bright Sunlight, then you need to turn the ISO down to a low value, or else your photo will come out all white and washed out with too much brightness.

Camera ISO is one of the three Variables of Photography, the other two being Aperture and Shutter Speed.

Every photographer needs to understand ISO in order to get bright and clear pictures from their equipment.

Photos by Passy ISO Settings 02


Definition of ISO

Photos by Passy ISO Settings 03

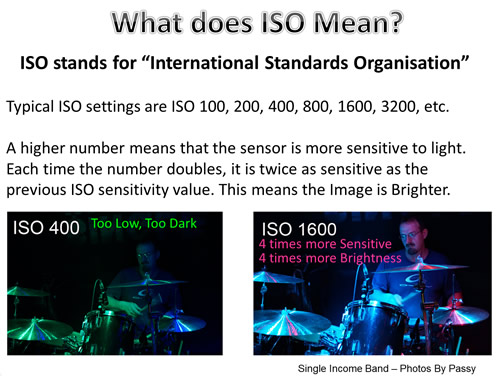
ISO stands for International Standards Organization, but in Photography it refers to the sensitivity of the camera’s digital sensor to light.

Typical settings are ISO 100, 200, 400, 800, 1600, 3200, etc.

A higher number means that the sensor is more sensitive to light, and each time the number doubles, it is twice as sensitive as the previous ISO sensitivity.


ISO Geometric Progression

Photos by Passy ISO Settings 04

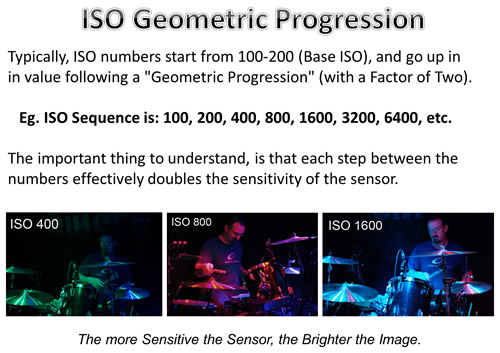
Typically, ISO numbers start from 50, 100 or 200, which is called the “Base ISO” of the Camera.

The values then go up in a “Geometric Progression” or a “Geometric Sequence” (Factor of Two, which results in Doubling).

This ISO sequence is: 100, 200, 400, 800, 1600, 3200, 6400 and etc.

The important thing to understand, is that each step between the numbers effectively doubles the sensitivity of the sensor.

ISO 800 is twice as more sensitive than ISO 400, while ISO 1600 is twice as more sensitive than ISO 800.

This makes ISO 1600 four times more sensitive to light than ISO 400,

and ISO 1600 sixteen times more sensitive to light than ISO 100, so on and so forth.

What does it mean when a sensor is sixteen times more sensitive to light?

It means that it needs sixteen times less time to capture an image, because there is 16 times more light.


Note that modern Digital Cameras also have in between ISO values which can be used.

EG. ISO values such as 1000 and 1250 which occur in between the standard ISO 800 and 1600 values.

The higher the number, the less light is needed to take a photo that is correctly exposed (not too dark or too light).


Typical ISO Values

Photos by Passy ISO Settings 05

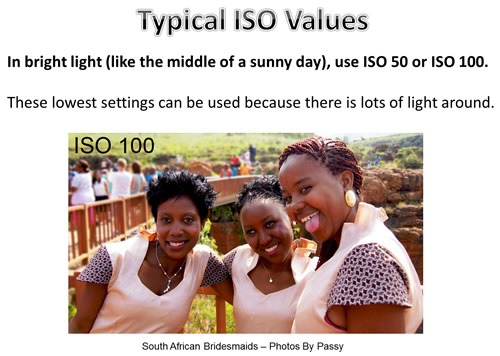
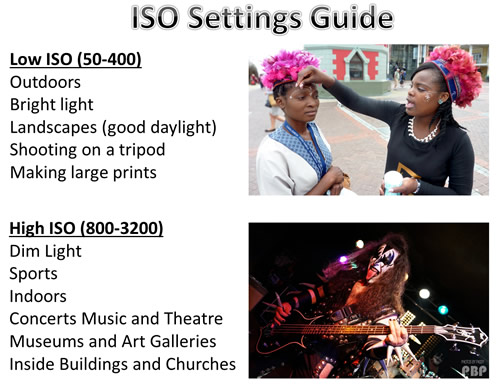
In bright light (like the middle of a sunny day), you’ll normally use ISO 50 or ISO 100.

These lowest settings can be used because there is lots of light around.

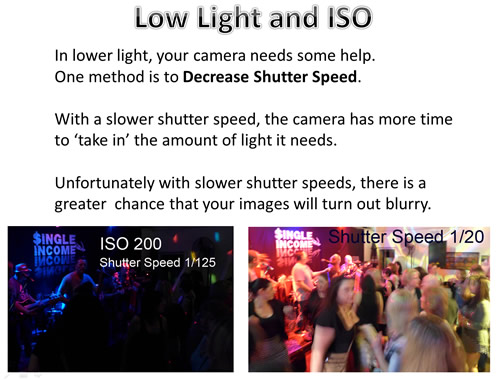
However, in lower light, your camera needs some help.

There are two ways of doing this: Decrease the Shutter Speed or Increase the ISO Value.

Decrease Shutter Speed

With a slower shutter speed, the camera has more time to ‘take in’ the amount of light it needs.

Unfortunately with slower shutter speed, Images can become motion blurred.

Photos by Passy ISO Settings 06

Increase ISO Setting

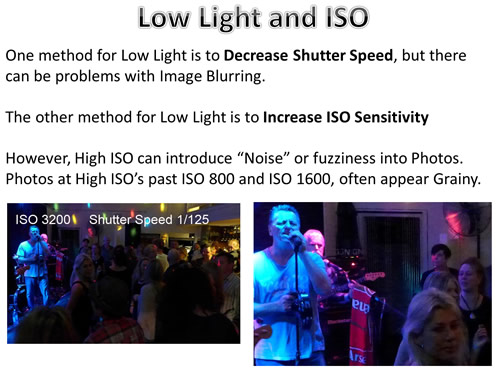
Rather than decrease the shutter speed, we can increase the ISO.

This will increase the sensitivity of the camera which means you can get the same shot with less light entering the camera.

As a result the shutter speed can be set at a value which will avoid blurry images.

Photos by Passy ISO Settings 07

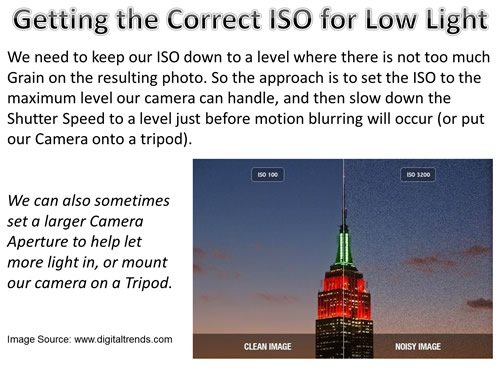
The side affect of increasing ISO to values past ISO 1600 on most Digital SLR Cameras, is fuzziness, with old style movie fuzzy dots, due to sensor signal “noise”.


What Causes Noise ?

Photos by Passy ISO Settings 08

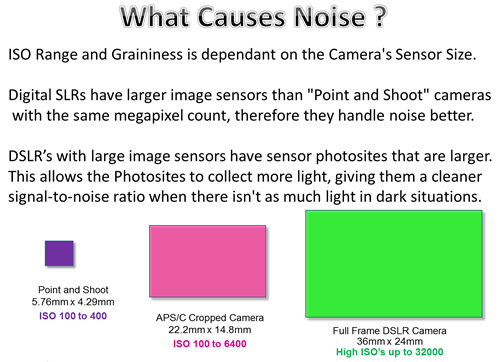
Available ISO Range and Graininess is dependant on the Camera’s Sensor Size.

Digital SLRs have larger image sensors than “Point and Shoot” cameras with the same megapixel count, therefore they handle noise better.

DSLR cameras have physically large image sensors and this means that the photosites are larger on a digital SLR’s sensor.

This allows the photosites to collect more light, giving them a cleaner signal-to-noise ratio when there isn’t as much light.

As a result, smaller cameras with small sensors tend to have a lower ISO range (typically 100-400) and there is more noise in their pictures throughout their ISO range.


Using Flash to Help

Photos by Passy ISO Settings 09

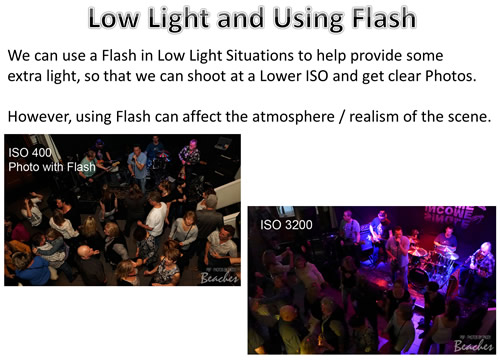
Using Flash will enable indoors shots to be taken at lower ISO’s and therefore be clear without fuzzy noise in the images.

However, this often detracts from the realism or ambience of the sitution being photographed.

Photos by Passy ISO Settings 10

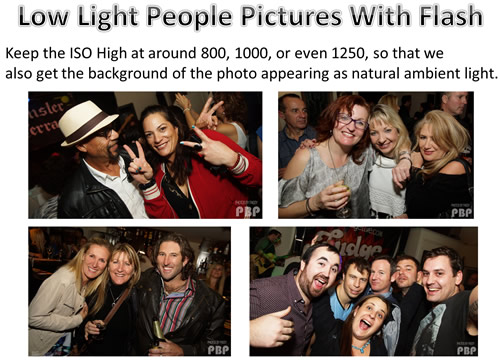
When we are using Flash for Indoor Photos of People, it is a good idea to actually keep the ISO High at around 800, 1000, or even 1250, so that we also have the background of the photo appearing as natural light, and not darkness.


Getting The Correct ISO

Photos by Passy ISO Settings 11

When we do not have bright natural daylight, we will probably have to increase the ISO so that we can get a sufficiently bright image.

However, higher ISO typically translates to a noisy or “grainy” image, and so as a general rule we should use the lowest ISO setting possible for our photos.

The general approach is to set up to the maximum ISO where our camera can take non-grainy pictures.

We then need to adjust the shutter speed to a slower setting, but not so slow that we get motion blurring.

We can also use a wide open aperture like F2.8 which will let more light into the lens.


Recommended ISO Values

Photos by Passy ISO Settings 12

Here are some ISO Tips from the Digital Trends Website:

– If your subject is moving and we are trying freeze the motion for a still, we may need a higher ISO setting to compensate for the high shutter speed, and to ensure that the image gets enough light.

– If we want to get a vintage aesthetic look, by adding a little bit of grain to our photos, then we should try bumping up the ISO.

– If we are using a tripod to stabilize our camera we can usually get away with a slower shutter speed, which in turn allows us to use a lower ISO.

– If we are shooting an image and don’t mind having a blurred background, we can increase the camera’s Aperture (thus allowing more light into the lens) and use a lower ISO.

– If we are shooting with artificial light by using a Flash we can use a lower ISO setting and get a very clear picture.


When To Increase ISO

We should always increase the ISO when there is not enough light for the camera to be able to quickly capture a clear image.

Eg. When shooting indoors without a flash, set the ISO to a higher number to be able to freeze motion and obtain a bright viewable image.

Other cases where you might want to increase ISO are when you need to get ultra-fast shots, like bird pictures or fast moving action sports.

However, when increasing the ISO, you need to watch out for the amount of fuzzy noise which is added to the image.

Situations where you might need to push ISO to higher settings include:

– Indoor Sports Events where players are moving fast and there is limited light available due to the fast shutter speed we are using to freeze the action.

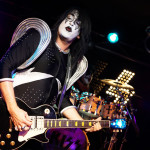
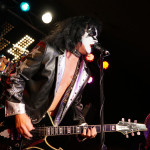
– Musical Concerts and Theatre hows which are performed in low light and often have ‘no-flash’ rules.

– Art Galleries, Churches, and Museums, because they have rules against using a flash and of course being indoors it is not well lit.

– Birthday Parties where blowing out the candles in a dark room can produce a nice moody shot which would be ruined by a bright flash.

– You are taking Photos at a Party or Function and want to shoot unonbtrusively using a large zoom lens to capture natural candid pictures.

– You are taking a Photo in Low Light which is not going to be Enlarged or Printed, and so a small amount of graininess in the image will not matter.


Auto Settings

On many of the newer DSLRs, there is a setting for “Auto ISO”, which can help get better results in low-light environments.

The beauty of this setting, is that you can set the maximum ISO to a certain number, so when the ISO is automatically increased based on the amount of light, it does not cross the set barrier. So, if I want to limit the amount of grain in my pictures, I typically set the maximum ISO to 1600.

DSLR’s also have Auto “Scene Modes” which can be used, such as “Sports”, “Night Portrait”, “Landscape”, “Night Scene”, “Daylight Portrait”, “Food”, and so on.

These presets contain ISO values which are suitable for these situations.


Low Light Cameras

Photos by Passy ISO Settings 13

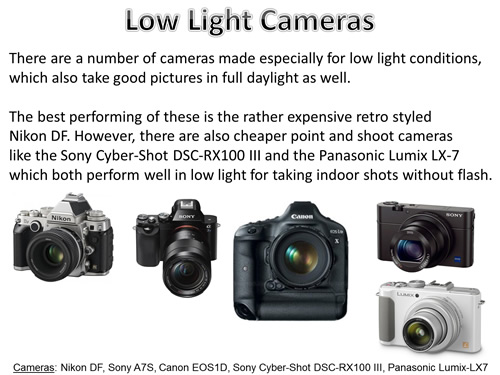
There are a number of cameras made especially for low light conditions, which also take good pictures in full daylight as well.

The best performing of these is the rather expensive retro styled Nikon DF, but there are also cheaper point and shoot cameras like the Sony Cyber-Shot DSC-RX100 III and the Panasonic Lumix LX-7 which perform well in low light.

The Sony A7s is a remarkable camera, capable of extremely High ISO’s with images obtianed which are of good quality.

The following one and a half minute video shows how the A7s is able to turn darkness into daylight.

However this amazing camera does not come cheap, and has a current Australian Retail Price of around $2500 just for the camera body with no lenses.

For further information on the best cameras to use in low light situations, see the following aticle:

17 Best Cameras For Digital Low-Light Photography


Videos About ISO

This first video is seven minutes long, and shows examples about ISO Settings and Noise. It also shows the relationship between ISO and Shutter Speed.


The following five minute video discusses ISO values and the importance of buying a good F2.8 wide aperture lens for low light.


This next vidoe discusses using ISO in Night Club Photography, and includes real life examples. The video is in two parts:

Part 1:


Part 2:


This next five and a half minute video includes examples and shows how to do an “ISO Lens Cap Test” on your camera.


Finally for those who love all things super technical, here is a nine and a half minute video which goes into the technical details of how ISO actually works in a Digital Camera, and how at High ISO’s we get noise introduced into the electrical signal which is what causes blurry noise dots on low light photos.


ISO Settings – Summary

Most of the time in good lighting conditions, your camera’s Auto or Scene settings will deal with ISO correctly and nice clear bright photos will result.

However in Low Light situations, there are a number of things to be aware of regarding ISO. We have tried our best to cover these in this “How To” article.

All of this might be a bit of information overload at the moment, but by gradually working through all of our “How To” articles, and trying out different settings on your own camera, we are sure that you will become a much better photographer who is able to problem solve situations quickly when your photos are not turning out exactly how you would like them to.

Good Luck, and keep taking pictures!

Passy


References and Further Reading

http://www.digital-photo-secrets.com/tip/136/iso-explained/

http://digital-photography-school.com/iso-settings/

http://photographylife.com/what-is-iso-in-photography

http://www.digitaltrends.com/photography/what-is-iso-camera-settings-explained/

http://www.facethelight.com/iso.php

http://www.steves-digicams.com/knowledge-center/iso-explained.html#b

http://digital-photography-school.com/iso-settings/

http://www.digital-photo-secrets.com/tip/136/iso-explained/#sthash.XYWWXhv6.dpuf

http://www.facethelight.com/iso.php

http://www.adorama.com/alc/0012810/article/15-Low-Light-High-ISO-All-Stars


Subscribe

If you enjoy visiting Photos By Passy, why not get a free subscription to the website.

You can then receive notifications of new items and updates directly to your email address.

Go to the subscribe area on the left hand sidebar, (or down the bottom of the page if using a mobile phone), fill in your email address and then click the “Subscribe” button.

Enjoy,
Passy
Rozzie’s Karaoke Party

This was a great fun party for Rozzie Vox’s Birthday with lots of singing and plenty of laughs.

A brilliant Karaoke system searchable on ipad provided over 6000 songs to choose from…. Totally Awesome!

I had hoped to do some “Photo Booth” shots at this Party, but people I asked were not interested in using the Props on Sticks which were available.

Next time I need to set up Photo Booth Props, in a specific area before the Party starts, and then assertively get people to have a “Photo Booth” Dress-Up picture taken as they arrive at the Party.

I have a Party coming up in the near future, where they have requested Photo Booth type pictures and I plan to get some good pictures at this event.

The plan is to use real dress up Props, as well as simple Props on sticks, and ask people to dress up, but if they do not want to do that, just say to them, “Okay, here grab some stick props and let’s do it”!

We will see how it goes, and it will be 100% up to me to make sure it goes well!

A full Flickr Gallery of Photos can be viewed here:

Flickr Photo Gallery of Rozzie’s Karaoke Party


EQUIPMENT:

Sony Alpha A-77 Mk II Camera
Sony 16-50mm F2.8 Kit Lens

Sony HVL-F43M Flash
Gary Fong Gamma Blade Diffuser

This shoot was a fairly straight forward “Party People” affair, with an emphasis on getting plenty of Family shots, as well as action Karaoke shots.

This meant that I had to shoot plently of pictures. Just as well I did, because intoxicated Karaoke singers pull some horrific faces while trying to get the words out!

It was not uncommon to have eight pictures of a group of people singing, and only get one or two usable shots from the eight.

Of course I got up and sang some songs, but unfortunately there was nobody I knew there that I could trust with the camera equipment to take a photo of yours truly.

Another lesson learned: Always talk to everyone at the Party while mingling, and see if anyone there knows how to use a DSLR Camera!


Subscribe

If you enjoy visiting Photos By Passy, why not get a free subscription to the website.

You can then receive notifications of new items and updates directly to your email address.

Go to the subscribe area on the left hand sidebar, (or down the bottom of the page if using a mobile phone), fill in your email address and then click the “Subscribe” button.

Enjoy,
Passy
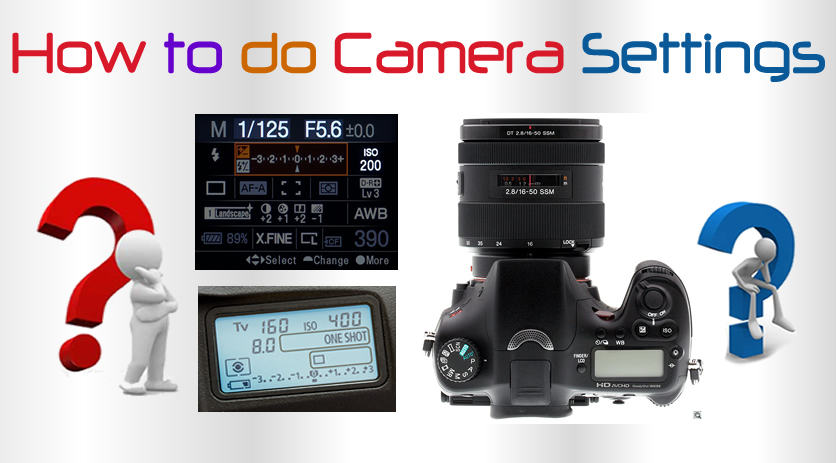
Using Camera Settings

Most people use their camera on “Auto” mode, and get plenty of good pictures.

However, there are many items on a camera which can be adjusted manually to get even better pictures!

In this “How To” article we introduce several of these camera settings, and show how they can be used to create quality photos.


Camera Variables

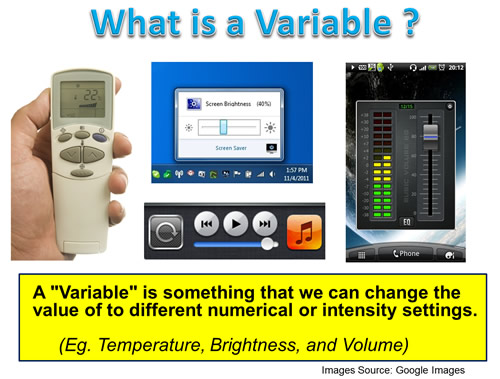
A “Variable” is something which we can change the value of to different numerical settings.

Eg. The Temperature Setting on an Air Conditioner, the Volume on a Music Player, or the Brightness on a Mobile Phone.

Photos by Passy Camera Settings 01

On Digital Cameras there are several items (or “Variables”) which we can change the value of before clicking the button which takes the photo.

In this “How To” Guide we provide an introduction and overview about these Digital Camera Variables.

Separate detailed “How To” Guides, (which are not part of this particular article), examine each of these variables in detail.

The Guide on “How to Do Exposure” is all about how we combine all the Variables to get the best possible photo for a given set of lighting and subject matter conditions.

See the “Related Items” section at the end of this article for links to these detailed “How To” Guides.


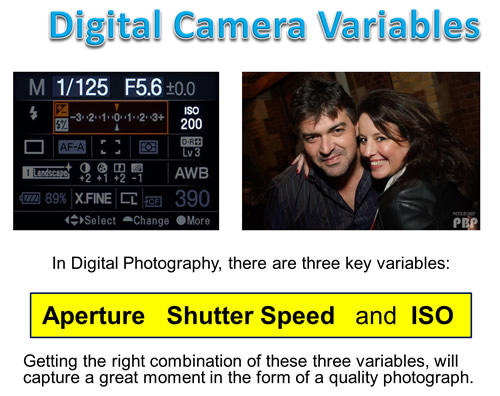
Digital Camera Variables

In Digital Photography, there are three key variables:

“Aperture”, “Shutter Speed”, and “ISO”

Getting the right combination of these three variables is how we can capture a moment in the form of a great photograph.

Photos by Passy Camera Settings 02

When we take a shot with a Camera:

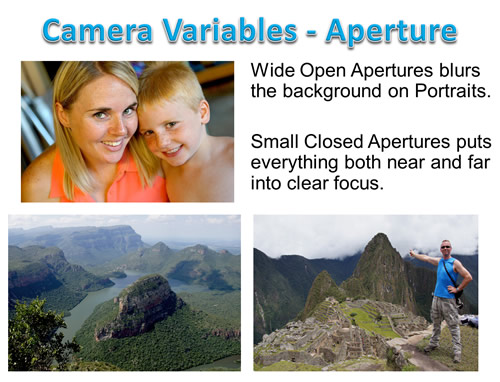
Aperture is how wide the “tunnel” or “hole” leading from the lens to the sensor is set at

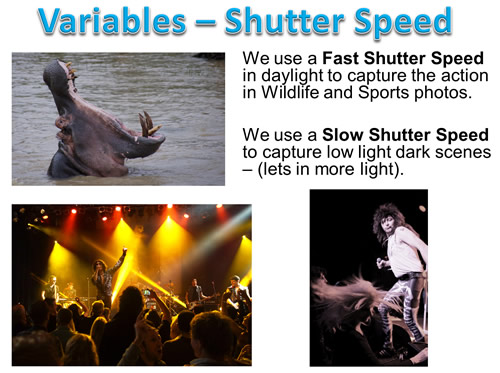
Shutter Speed is how quickly the inside of the camera opens and closes to let light through to the sensor

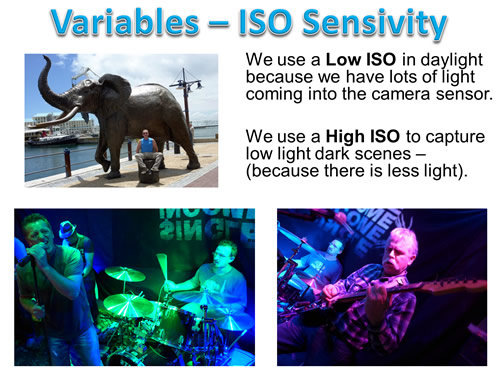
ISO is the sensitivity to light that the pixel sensor is set to.


Aperture

Photos by Passy Camera Settings 03B

Aperture affects how much light enters the camera, and creates blurred backgrounds for Portraits and full details for Landscapes.

For Portraits we set a wide open Aperture to let in plenty of light, and this also blurs the background. This makes attention focussed on the person.

For Landscape shots we want the foreground as well as everything in the background to all be in focus. Using a small narrow Aperture makes this happen.

There is a detailed “How To” article on Aperture at the following link:

How To Do Aperture Settings


Shutter Speed

Photos by Passy Camera Settings 04

Shutter Speed needs to be set to a fast value to capture wildlife or sports action, but needs to be set very slow to let enough light in for sunsets or night scenes.

There is a detailed “How To” article on Shutter Speed at the following link:

How To Do Shutter Speed


ISO Light Sensitivity

Photos by Passy Camera Settings 05

For ISO Light Sensitivity – In bright daylight, the sensitivity or “ISO” can be at a low value.

Eg. In daylight conditions there is plenty of light coming through the camera lens to the sensor, and so the sensor does not need to be made to catch any extra light.

However for sunsets, shade, indoor, and night scenes, the light sensitivity ISO needs to be increased; otherwise we get a very dark picture with no detail.

There is also the low light solution of using a Flash to provide the equivalent of Daylight; however sometimes indoor scenes, especially those capturing musical or theater performers, look a lot more natural without Flash.

There is a detailed “How To” article on ISO Light Sensitivity at the following link:

How To Do ISO Settings


White Balance and Colour Temperature

Photos by Passy Camera Settings 06

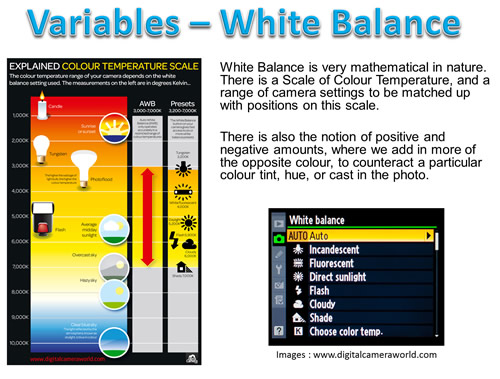
There is a Fourth Variable associated with Digital Photography known as “White Balance Colour Temperature”.

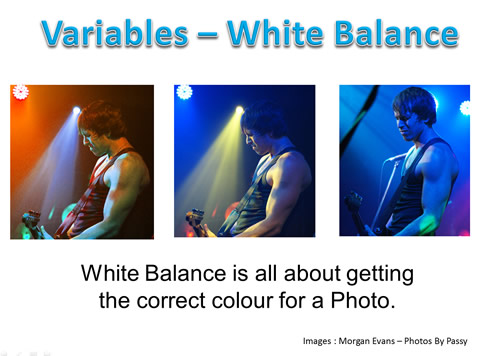
White Balance (or “WB”) involves having the colour white turn out correctly in photographs that are taken outside of normal daylight conditions.

These types of conditions include Shade, where photos turn out blueish in color, indoors where orange/yellow light often dominates, and musicians performing under coloured stage lights.

Photos by Passy Camera Settings 07

White Balance is covered in full detail in our “How to Do Camera White Balance” article, which can be found at the following link:

How To Do Camera White Balance


Preset Modes on Cameras

Photos by Passy Camera Settings 08

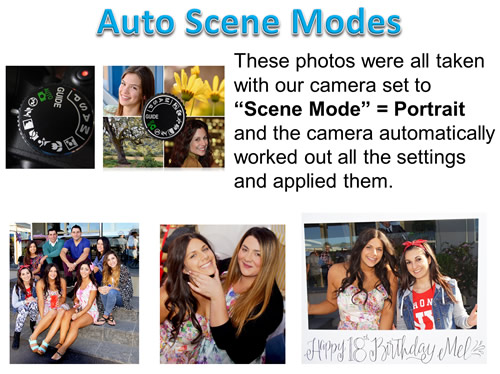
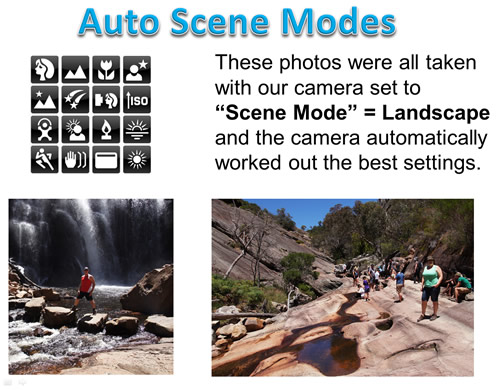
Modern Digital Cameras have one or more fully “Automatic” modes, as well as special preset or “Scene” modes.

These generally do a great job of setting up the Aperture, Speed, and ISO variable values for us.

All we have to do is “shoot” or “snap” the picture, and the results look fantastic.

For example, if we set our camera to “Portrait” and take a picture of a person outdoors, it will turn out nicely with “bokei” (Background Blurring).

The Birthday Party pictures shown above were all taken using daylight portrait mode, which set our variables well, and also softened skin tones to make nice looking people photos.


However, if we set our camera to “Landscape”, the camera will make a nice bright picture where things both near and far from us are all in detailed focus.

Photos by Passy Camera Settings 09


Here is a great three minute video all about using Preset “Scene” Modes.


Auto and Scene Mode Limitations

Photos by Passy Camera Settings 10

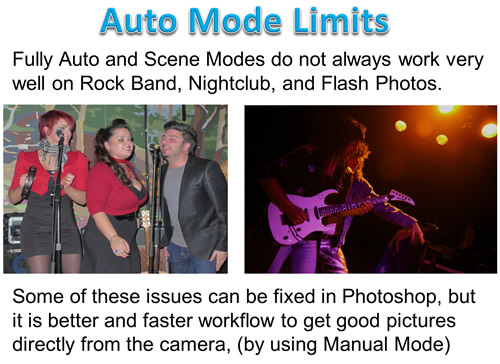
Problems arise when we venture outside of normal daylight conditions, and attempt taking indoor shots without Flash, or we take portrait or party pictures with flash.

These “low light” and “Flash” photos often do not turn out as nicely as we would like them to.

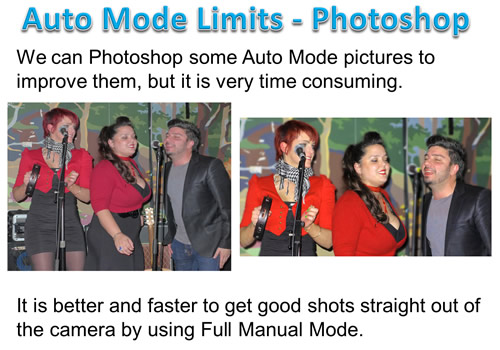
We can Photoshop some of these pictures to improve them, but it is very time consuming.

It is better and faster to get good shots straight out of the camera by using Full Manual Mode, which will be discussed shortly.

Photos by Passy Camera Settings 11

Special areas of difficulty are photographing Rock Bands, Indoor Sports events, and Night Clubs, where there is not full daylight, and people are moving around.

On some Sony cameras, using “Sports” mode will sometimes produce reasonable shots in these conditions, and Canon cameras have a “Television” mode which sometimes works.

However, the best results for “low light” photography can be obtained by setting your camera to full “Manual” mode, and adjusting the variables yourself – fast enough shutter speeds to freeze action, wide open apertures to let as much light in as possible, and high ISO sensitivity so the camera sensor will work like “night vision” to pick up as much light as possible.


Full Manual Mode

Photos by Passy Camera Settings 12

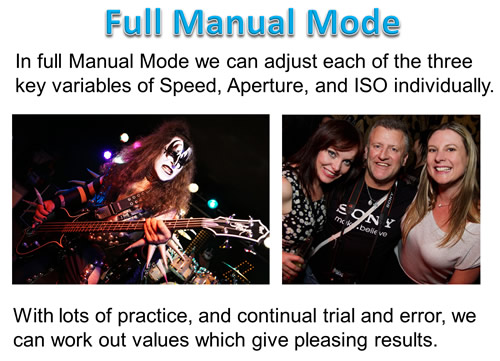
In full Manual Mode we can adjust each of the three key variables of Speed, Aperture, and ISO individually.

It takes a lot of practice, and continual trial and error, to work out sets of variable values which work well in different lighting conditions.

However, we can generally get better looking pictures in “low light” doing it all ourselves, rather than leaving it to the “best fit” computer program that is in our camera’s processor chip.

Really it is a matter of getting to know the particular Camera we are using – Taking lots of pictures set on different Variable Values and seeing what happens is the only way to do this.

Whenever a picture taken using Preset or Auto Modes is not to our liking, then it is very useful to be able to change to Full Manual Mode and try and figure out the best variable settings for ourselves.


Here are some Manual Mode settings which we regularly use on the Sony A77 camera with a 16mm to 50mm f2.8 Sony Lens mounted on it:

Music Bands in local venue with Colored Lights:

– ISO 1600, Speed 1/60 and 1/125, Aperture F2.8, Incandescent or Manually adjusted White Balance

Music Bands with Professional Stage Lighting:

– ISO 400 to 800, Speed 1/125th, Aperture F2.8, F3.2, F3.5, Auto White Balance

Music Bands Using Sony f1.8 35mm Lens:

– ISO 400 to 800, Speed 1/125th, Aperture F1.8, Auto White Balance

Flash Shots People Pictures:

– ISO 1000, Speed 1/125, Flash Width Manually set on 50mmm width and 1/16 to 1/8 Power (Manual with No TTL) using Sony HVL-43M Flash unit.


Videos About Camera Settings

The following video is fifteen minutes long, but well worth watching, as it does many practical photo examples showing exactly what happens as camera variables are altered:


This next video is also fifteen minutes long and shows directly how changing variables affects the brightness and contrast of a given sample picture.

Here is Part 2 of the above video:


Camera Settings – Summary

All of this might be a bit of information overload at the moment, but by gradually working through all of our “How To” articles, and trying out different settings on your own camera, we are sure that you will become a much better photographer who is able ot problem solve situations quickly when your photos are not turning out exactly how you would like them to.

This article was an introduction to using Manual Camera Settings, there are far more detailed guides all about shooting in Manual Mode in the “Related items” section below.

Good Luck, and keep taking pictures!

Passy


Related Items

How To Do ISO Settings

How To Do Aperture Settings

How To Do Shutter Speed

How To Do Exposure and Shoot in Manual Mode

How To Do Photo Composition


Subscribe

If you enjoy visiting Photos By Passy, why not get a free subscription to the website.

You can then receive notifications of new items and updates directly to your email address.

Go to the subscribe area on the left hand sidebar, (or down the bottom of the page if using a mobile phone), fill in your email address and then click the “Subscribe” button.

Enjoy,
Passy
Kisstroyer – July 2014

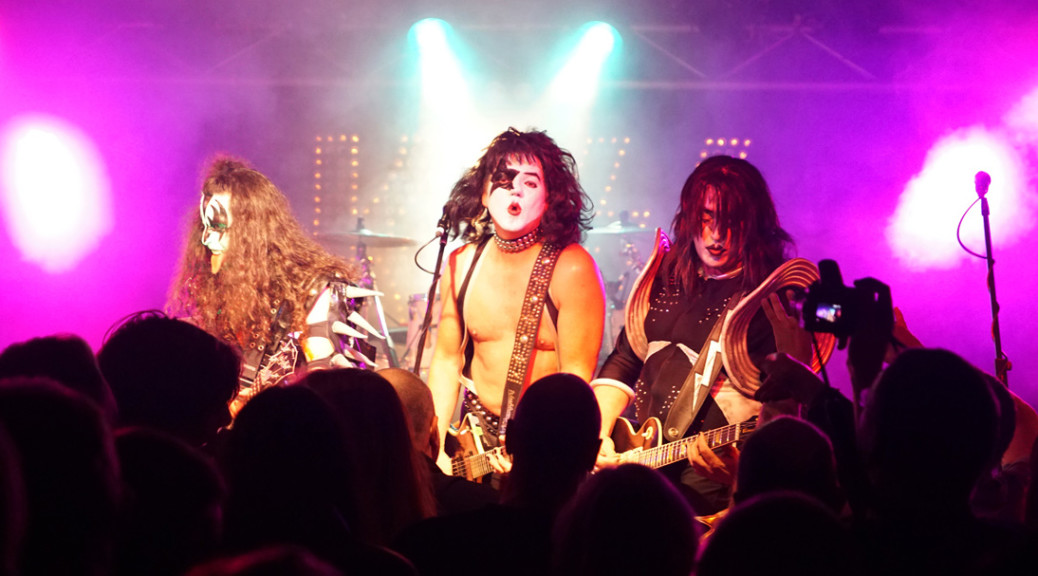
These guys are so much like Kiss that it is spooky!

They are one of the best Kiss Tribute bands going around, but be prepared because they are very Loud.

A great 110 percent show of Kiss Songs, delivered by the Kisstroyer band at the Sandbelt Hotel, to a very large and appreciative crowd.

A full Flickr Gallery of Band Photos can be viewed here:

Flickr Photo Gallery of Kisstroyer July 19th 2014


A full Flickr Gallery of “Meet and Greet” Photos can be viewed here:

Flickr Photo Gallery of Kisstroyer Post-Show Meet and Greet

Further information about Kisstroyer can be found at their Facebook Page:

Kisstroyer Facebook Page

Kisstroyer also has a website at the following link:

Kisstroyer Website


EQUIPMENT:

Sony Alpha A-77 Mk II Camera
Sony 18-50mm F2.8 kit lens

Sony Alpha A-55 Camera
Tamron 24-70mm F2.8

Sony HVL-F43M Flash
Gary Fong Gamma Blade Diffuser

Panasonic Lumix LX7 Compact Camera

This shoot was a two camera shoot with myself using the Sony A77, and my assistant Julie using the Sony A55.

Some distant large size crowd shots were also taken using the Lumix LX7 Compact Camera.

All of the post-show “Meet and Greet” photos were taken with the A-77 and the Sony Flash and Gary Fong Diffuser.

This was the first shoot I have done using the upgraded Sony A-77 Mk II camera teamed with the Sony 18-50mm lens, rather than the original A-77 with the Tamron 17-50mm that I have been using previously.

It is still to early to tell if the new A-77 MK II setup with the Sony lens is superior to the original A-77 with the Tamron, but it certainly produced some good shots at this gig. It also seemed to focus a lot quicker.

The challenge at this shoot was the rapidly changing lighting conditions. These quickly went from full on bright light, to colored lights, to smoke machine, and to very bright lights shining straight out from behind the band. I found myself continually adjusting the ISO up and down between ISO 200 and ISO 1600.

It was a case of shoot, check the shot quickly, adjust the ISO and shoot again, and then keep repeating until it looked best. Then as soon as the lighting changed, repeat the whole process again.

All A-77 Band shots were all done in full manual “M” mode, with shutter speeds between 1/80 and 1/125 and Aperture kept at f2.8 .

The ever faithful Sony A-55 continues to get good shots when teamed with the Tamron 24-70mm F2.8 lens. This seems to be a great combination, and the camera is left set on “SCN” and “Sports” mode and was used by my assistant Julie as if it was a simple Point and Shoot camera. Even though it is several years old, I am not going to sell off this camera anytime soon! It just goes to prove the old saying: “It is all in the glass”. (The glass being the lens that you are using).

The Lumix LX7 did not get many good shots, but was okay for the occasional wide angle crowd shot.

Sony are not known as great low light cameras compared to Nikon and Canon, but I am quite happy with the shots I am getting, although they are slightly darker than I would like sometimes.

They seem to be reasonably sharp, and I love the colours that come out of Sony cameras.

For now I am remaining a Sony Fan Boy!


Subscribe

If you enjoy visiting Photos By Passy, why not get a free subscription to the website.

You can then receive notifications of new items and updates directly to your email address.

Go to the subscribe area on the left hand sidebar, (or down the bottom of the page if using a mobile phone), fill in your email address and then click the “Subscribe” button.

Enjoy,
Passy
Aarons 30th Birthday

This was a great fun 80’s Theme Fancy Dress Party at a really nice venue called “Smiles” in Warranwood.

Plenty of colourful costumes and fun times made this a great photoshoot.

A full Flickr Gallery of Photos can be viewed here:

Flickr Photo Gallery of Aaron’s 30th Birthday


EQUIPMENT:

Sony Alpha A-77 Camera
Tamron 17-50mm F2.8

Sony HVL-F43M Flash
Gary Fong Gamma Blade Diffuser

This shoot was reasonably straight forward, and was done entirely with Flash.

The only issue was that some of the background walls were a light grey colour, which did cause a lot of light reflection when the flash went off.

The venue also contained two huge mirrrors, and so people had to be positioned so that the mirrors would not pick up any of the flash in them.

The Sony A77 revelled in these conditions, as Sony photos love bright colours and capture them beautifully.

The Flash unit was set to Manual, and a width of 50mm used for most shots, and the power varied and shots repeated if they were too dull. This was especially the case on larger group shots which were shot at an aperture of F5.0 to get everyone in focus.

The camera was also set to full Manual Mode, “M” with ISO set at 1000, shutter speed at 1/125, and Aperture varied from 2.8 to 5.0 depending on how many people were in the Group.

Overall a great fun shoot, and the resulting photos really pleased the Client.


Subscribe

If you enjoy visiting Photos By Passy, why not get a free subscription to the website.

You can then receive notifications of new items and updates directly to your email address.

Go to the subscribe area on the left hand sidebar, (or down the bottom of the page if using a mobile phone), fill in your email address and then click the “Subscribe” button.

Enjoy,
Passy