Category Archives: How To

Using Camera Settings

Most people use their camera on “Auto” mode, and get plenty of good pictures.

However, there are many items on a camera which can be adjusted manually to get even better pictures!

In this “How To” article we introduce several of these camera settings, and show how they can be used to create quality photos.


Camera Variables

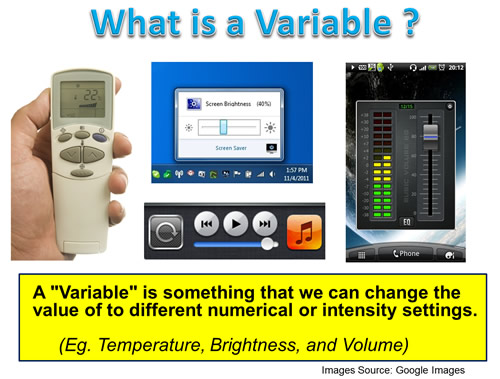
A “Variable” is something which we can change the value of to different numerical settings.

Eg. The Temperature Setting on an Air Conditioner, the Volume on a Music Player, or the Brightness on a Mobile Phone.

Photos by Passy Camera Settings 01

On Digital Cameras there are several items (or “Variables”) which we can change the value of before clicking the button which takes the photo.

In this “How To” Guide we provide an introduction and overview about these Digital Camera Variables.

Separate detailed “How To” Guides, (which are not part of this particular article), examine each of these variables in detail.

The Guide on “How to Do Exposure” is all about how we combine all the Variables to get the best possible photo for a given set of lighting and subject matter conditions.

See the “Related Items” section at the end of this article for links to these detailed “How To” Guides.


Digital Camera Variables

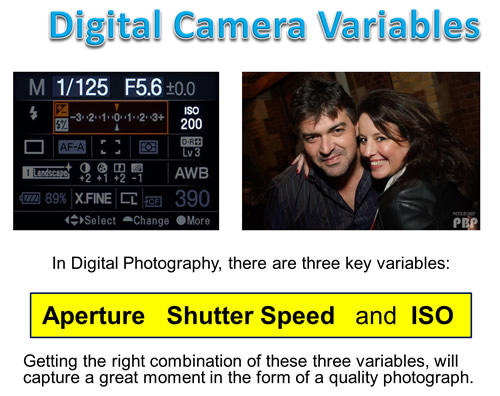
In Digital Photography, there are three key variables:

“Aperture”, “Shutter Speed”, and “ISO”

Getting the right combination of these three variables is how we can capture a moment in the form of a great photograph.

Photos by Passy Camera Settings 02

When we take a shot with a Camera:

Aperture is how wide the “tunnel” or “hole” leading from the lens to the sensor is set at

Shutter Speed is how quickly the inside of the camera opens and closes to let light through to the sensor

ISO is the sensitivity to light that the pixel sensor is set to.


Aperture

Photos by Passy Camera Settings 03B

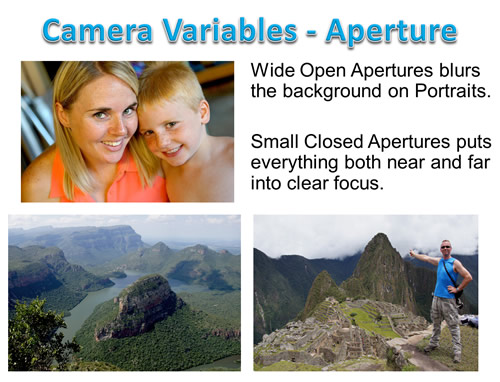
Aperture affects how much light enters the camera, and creates blurred backgrounds for Portraits and full details for Landscapes.

For Portraits we set a wide open Aperture to let in plenty of light, and this also blurs the background. This makes attention focussed on the person.

For Landscape shots we want the foreground as well as everything in the background to all be in focus. Using a small narrow Aperture makes this happen.

There is a detailed “How To” article on Aperture at the following link:

How To Do Aperture Settings


Shutter Speed

Photos by Passy Camera Settings 04

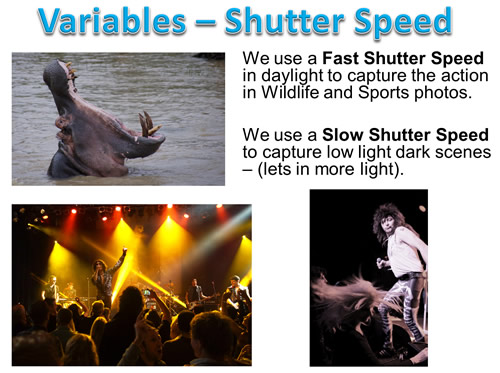
Shutter Speed needs to be set to a fast value to capture wildlife or sports action, but needs to be set very slow to let enough light in for sunsets or night scenes.

There is a detailed “How To” article on Shutter Speed at the following link:

How To Do Shutter Speed


ISO Light Sensitivity

Photos by Passy Camera Settings 05

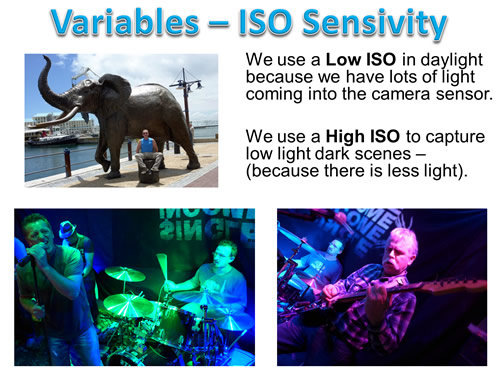
For ISO Light Sensitivity – In bright daylight, the sensitivity or “ISO” can be at a low value.

Eg. In daylight conditions there is plenty of light coming through the camera lens to the sensor, and so the sensor does not need to be made to catch any extra light.

However for sunsets, shade, indoor, and night scenes, the light sensitivity ISO needs to be increased; otherwise we get a very dark picture with no detail.

There is also the low light solution of using a Flash to provide the equivalent of Daylight; however sometimes indoor scenes, especially those capturing musical or theater performers, look a lot more natural without Flash.

There is a detailed “How To” article on ISO Light Sensitivity at the following link:

How To Do ISO Settings


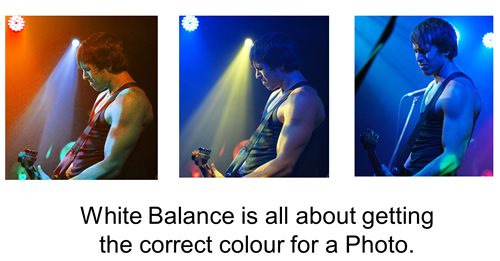
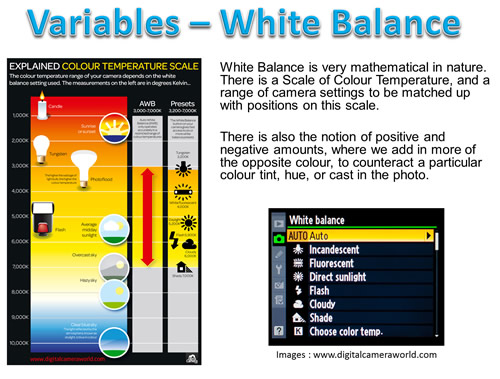
White Balance and Colour Temperature

Photos by Passy Camera Settings 06

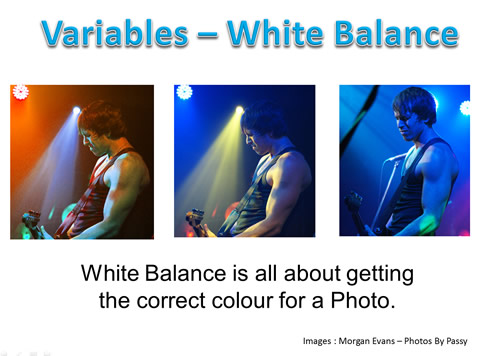
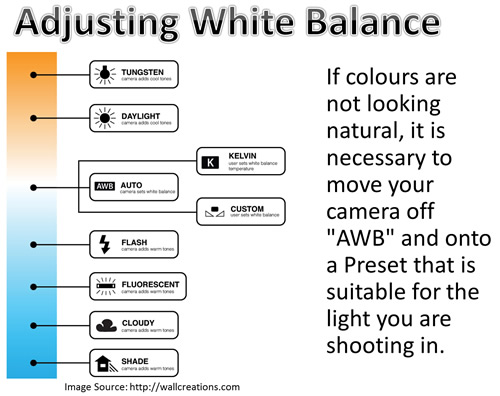
There is a Fourth Variable associated with Digital Photography known as “White Balance Colour Temperature”.

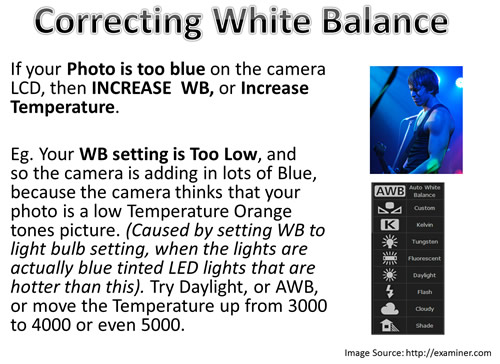
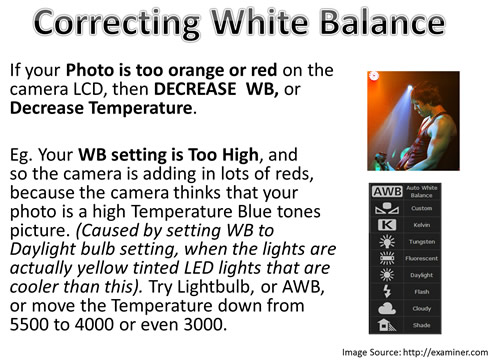
White Balance (or “WB”) involves having the colour white turn out correctly in photographs that are taken outside of normal daylight conditions.

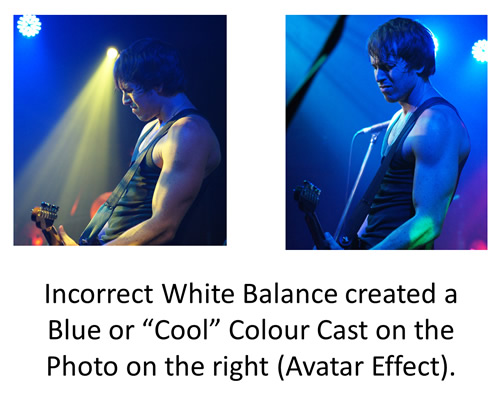
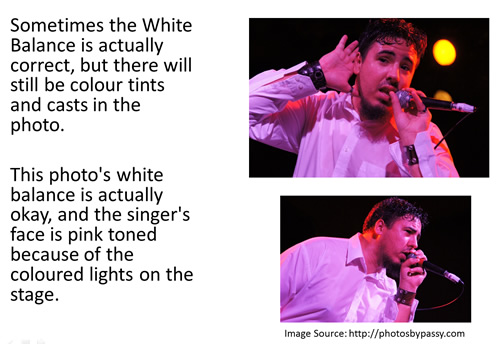
These types of conditions include Shade, where photos turn out blueish in color, indoors where orange/yellow light often dominates, and musicians performing under coloured stage lights.

Photos by Passy Camera Settings 07

White Balance is covered in full detail in our “How to Do Camera White Balance” article, which can be found at the following link:

How To Do Camera White Balance


Preset Modes on Cameras

Photos by Passy Camera Settings 08

Modern Digital Cameras have one or more fully “Automatic” modes, as well as special preset or “Scene” modes.

These generally do a great job of setting up the Aperture, Speed, and ISO variable values for us.

All we have to do is “shoot” or “snap” the picture, and the results look fantastic.

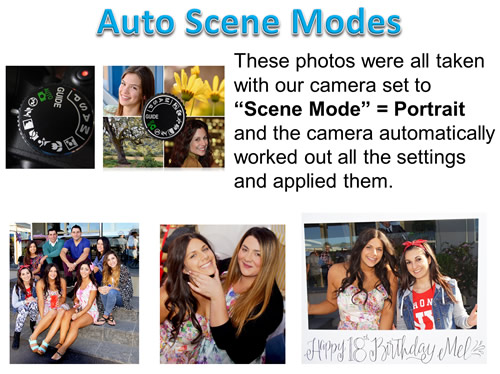
For example, if we set our camera to “Portrait” and take a picture of a person outdoors, it will turn out nicely with “bokei” (Background Blurring).

The Birthday Party pictures shown above were all taken using daylight portrait mode, which set our variables well, and also softened skin tones to make nice looking people photos.


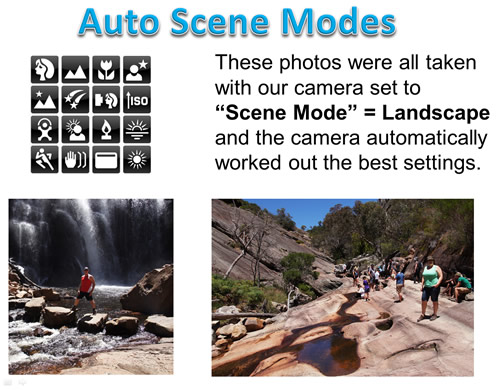
However, if we set our camera to “Landscape”, the camera will make a nice bright picture where things both near and far from us are all in detailed focus.

Photos by Passy Camera Settings 09


Here is a great three minute video all about using Preset “Scene” Modes.


Auto and Scene Mode Limitations

Photos by Passy Camera Settings 10

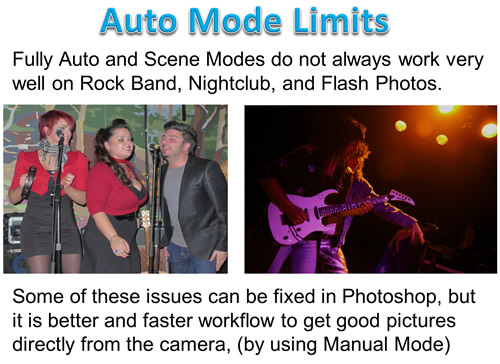
Problems arise when we venture outside of normal daylight conditions, and attempt taking indoor shots without Flash, or we take portrait or party pictures with flash.

These “low light” and “Flash” photos often do not turn out as nicely as we would like them to.

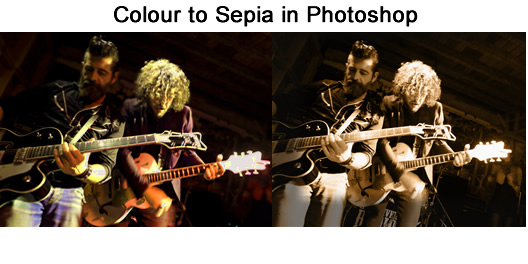
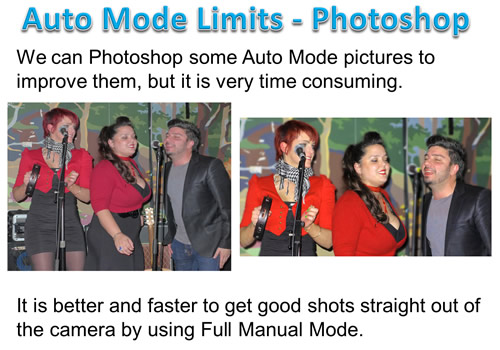
We can Photoshop some of these pictures to improve them, but it is very time consuming.

It is better and faster to get good shots straight out of the camera by using Full Manual Mode, which will be discussed shortly.

Photos by Passy Camera Settings 11

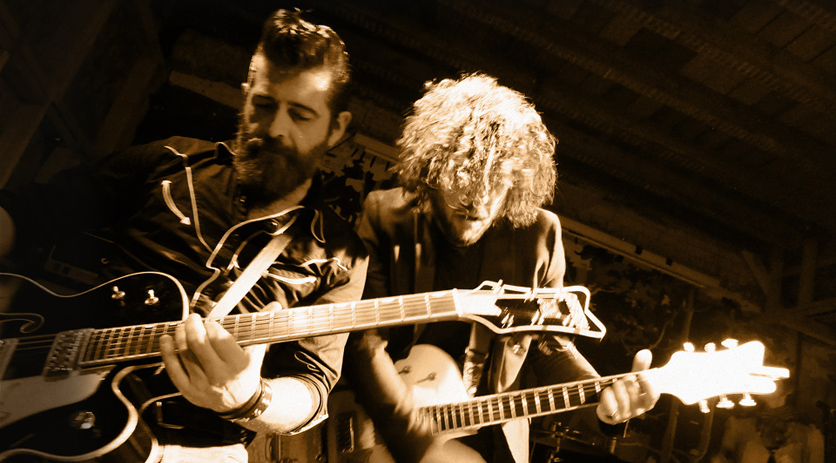
Special areas of difficulty are photographing Rock Bands, Indoor Sports events, and Night Clubs, where there is not full daylight, and people are moving around.

On some Sony cameras, using “Sports” mode will sometimes produce reasonable shots in these conditions, and Canon cameras have a “Television” mode which sometimes works.

However, the best results for “low light” photography can be obtained by setting your camera to full “Manual” mode, and adjusting the variables yourself – fast enough shutter speeds to freeze action, wide open apertures to let as much light in as possible, and high ISO sensitivity so the camera sensor will work like “night vision” to pick up as much light as possible.


Full Manual Mode

Photos by Passy Camera Settings 12

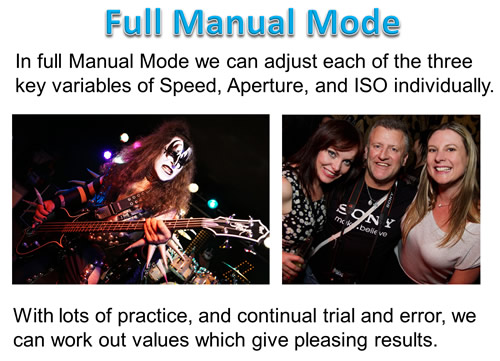
In full Manual Mode we can adjust each of the three key variables of Speed, Aperture, and ISO individually.

It takes a lot of practice, and continual trial and error, to work out sets of variable values which work well in different lighting conditions.

However, we can generally get better looking pictures in “low light” doing it all ourselves, rather than leaving it to the “best fit” computer program that is in our camera’s processor chip.

Really it is a matter of getting to know the particular Camera we are using – Taking lots of pictures set on different Variable Values and seeing what happens is the only way to do this.

Whenever a picture taken using Preset or Auto Modes is not to our liking, then it is very useful to be able to change to Full Manual Mode and try and figure out the best variable settings for ourselves.


Here are some Manual Mode settings which we regularly use on the Sony A77 camera with a 16mm to 50mm f2.8 Sony Lens mounted on it:

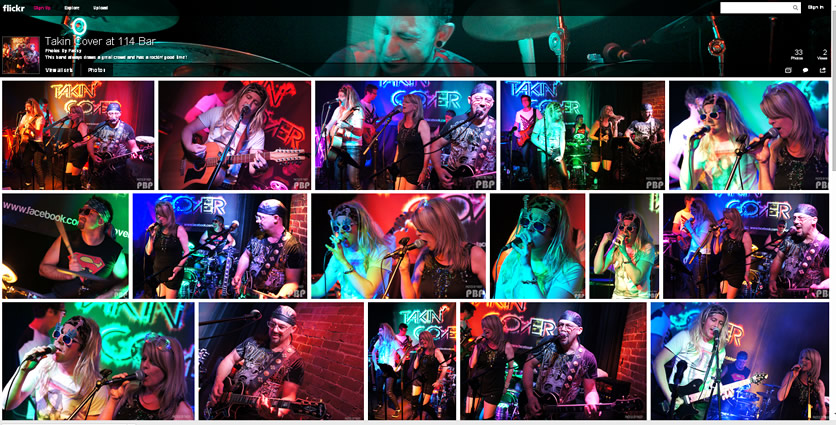
Music Bands in local venue with Colored Lights:

– ISO 1600, Speed 1/60 and 1/125, Aperture F2.8, Incandescent or Manually adjusted White Balance

Music Bands with Professional Stage Lighting:

– ISO 400 to 800, Speed 1/125th, Aperture F2.8, F3.2, F3.5, Auto White Balance

Music Bands Using Sony f1.8 35mm Lens:

– ISO 400 to 800, Speed 1/125th, Aperture F1.8, Auto White Balance

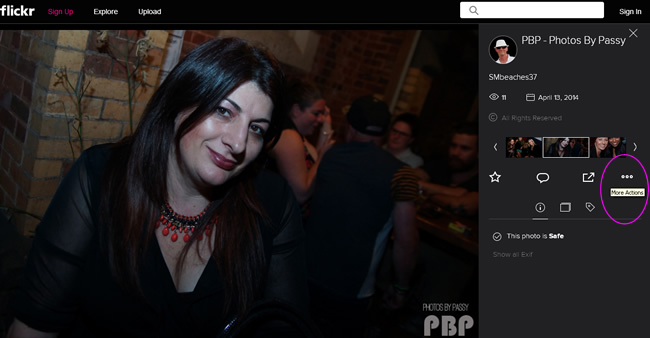
Flash Shots People Pictures:

– ISO 1000, Speed 1/125, Flash Width Manually set on 50mmm width and 1/16 to 1/8 Power (Manual with No TTL) using Sony HVL-43M Flash unit.


Videos About Camera Settings

The following video is fifteen minutes long, but well worth watching, as it does many practical photo examples showing exactly what happens as camera variables are altered:


This next video is also fifteen minutes long and shows directly how changing variables affects the brightness and contrast of a given sample picture.

Here is Part 2 of the above video:


Camera Settings – Summary

All of this might be a bit of information overload at the moment, but by gradually working through all of our “How To” articles, and trying out different settings on your own camera, we are sure that you will become a much better photographer who is able ot problem solve situations quickly when your photos are not turning out exactly how you would like them to.

This article was an introduction to using Manual Camera Settings, there are far more detailed guides all about shooting in Manual Mode in the “Related items” section below.

Good Luck, and keep taking pictures!

Passy


Related Items

How To Do ISO Settings

How To Do Aperture Settings

How To Do Shutter Speed

How To Do Exposure and Shoot in Manual Mode

How To Do Photo Composition


Subscribe

If you enjoy visiting Photos By Passy, why not get a free subscription to the website.

You can then receive notifications of new items and updates directly to your email address.

Go to the subscribe area on the left hand sidebar, (or down the bottom of the page if using a mobile phone), fill in your email address and then click the “Subscribe” button.

Enjoy,
Passy

How To Do White Balance

Photos by Passy White Balance 01

Different light sources produce light with slightly different colour tints, but our eyes do a great job correcting these variations.

Humans do not see a shift in colour as we move from a sunny garden into a shaded area, or go into a room and turn a light on.

Generally wherever we are, a piece of plain white paper always looks white.

However Digital Cameras DO detect light source differences, and sometimes create pictures with incorrect looking colours in them.

We need to know how to perform “white balance” adjustments, so that we can obtain pictures with realistic colours in them.


Here is a great five minute introductory video about White Balance.

White Balance is very mathematical in nature. There is a Scale of Colour Temperature, and a range of camera settings to be matched up with positions on this scale.

There is also the notion of positive and negative amounts, where we add in more of the opposite colour, to counteract a particular colour tint, hue, or cast in the photo.


White Balance Problems

If we do not set the White balance correctly, we get photos with unpleasant colouring in them.

Here is an example of a Photo with Incorrect White Balance.

Photos by Passy White Balance 02

In the above picture on the right, the White balance was set Too Low, and so the Camera removed orange and yellow light, and also added in extra Blue Colour to help compensate, resulting in an unpleasant blue “colour cast” throughout the photo.

Here is another example of a Photo with Incorrect White Balance.

Photos by Passy White Balance 03

In the above picture on the right, the White balance was set Too High, and so the Camera removed blue light, and also added in extra red and orange colours to help compensate, resulting in an unpleasant red-orange “colour cast” throughout the photo.

We will look at some more White Balance Problems later on, but first we need to learn more about White Balance and “Colour Temperature”.


Colour Temperature

Each light source (Candles, Light Bulbs, Flourescents, Daylight, Shade, etc) has its own individual color, or “color temperature”, which varies from red to blue.

Candles, sunsets and tungsten bulbs give off light that’s close to red (hence the ‘warm’ yellow/orange look they create in digital photos).

But clear blue skies, shade, and twilight all give off a ‘cool’ blue light.

Colour temperature is recorded in Kelvin, “K”, the unit of absolute temperature.

Photos by Passy White Balance 04
Image by Photos By Passy – For Educational Use Only


Cool colors like blue and violet generally have color temperatures over 7000K, while warmer colors like red and orange are around the 2000K mark.

Cameras have “Auto White Balance” or “AWB” which works for most conditions, but may give blue looking pictures in shade, and very yellow or orange pictures in indoor lighting.

Flourescent lights often create a Green color cast in photos.

Photos by Passy White Balance 05
Image by Photos By Passy – For Educational Use Only


Adjusting White Balance

White Balance is the process of making objects which appear white with our eyes, actually turn out white in a Digital Photo.

If the white colour is correct, then the other colours should all appear natural as well.

Photos by Passy White Balance 06
Image by Photos By Passy – For Educational Use Only


Auto White Balance “AWB” often only works well in a limited range of Colour Temperatures, ranging from Bright Indoor Lighting (3000K) to Average Midday Sunlight (5200K).

Photos by Passy White Balance 07
Image by Photos By Passy – For Educational Use Only

Here is a full size version of the diagram shown above: the double red arrow shows the range in which Auto White Balance “AWB” works effectively.

Free_colour_temperature_scale_photography_cheat_sheet by Camera World

The important thing to realise is that AWB only covers a sub range of the colour spectrum, and AWB does not work well in all lighting conditions.

Outside of this “AWB” Range, we will see colour casts of Orange for Low Temperatures and Blue for High Temperatures.


If colours are not looking natural, it is necessary to move your camera off “AWB” and onto a preset that is suitable for the light you are shooting in.

When you set your camera’s white balance manually like this, you can choose from a number of pre-set color temperature options like Tungsten, Daylight, Cloudy and Shade, or even customize your own setting.

Photos by Passy White Balance 08
Image by Photos By Passy – For Educational Use Only

There is usually a WB button, or a submenu on a Camera, where you can go in and choose a the specific WB Preset that you need.

Photos by Passy White Balance 09
Image by Photos By Passy – For Educational Use Only


White Balance Examples

Here are some examples which show how Preset White Balance settings affect the colours in a photo.

Photos by Passy White Balance 10
Image by Photos By Passy – For Educational Use Only

In these Photos the actual lighting conditions were those of full daylight.

We can see in the WB Presets, what they are actually doing to the colour.

Photos by Passy White Balance 11
Image by Photos By Passy – For Educational Use Only


Correcting White Balance

If your Photo is too blue on the camera LCD, then INCREASE WB, or Increase Temperature.

Photos by Passy White Balance 12
Image by Photos By Passy – For Educational Use Only

If your Photo is too orange or red on the camera LCD, then DECREASE WB, or Decrease Temperature.

Photos by Passy White Balance 13
Image by Photos By Passy – For Educational Use Only

Sometimes the White Balance is actually correct, but there will still be colour tints and casts in the photo.

Photos by Passy White Balance 14
Image by Photos By Passy – For Educational Use Only

Sometimes having the incorrect White Balance is actually a good thing.

If we are taking a photo in low light, using a setting of AWB or Daylight can be better than using the Light Bulb setting.

Photos by Passy White Balance 15
Image by Photos By Passy – For Educational Use Only


Custom White Balance

For wedding photography, the white colour of the dress, and having natural colours is vitally important.

Wedding Photographers use standard white and grey sheets of cardboard to set their White Balance exactly.

Photos by Passy White Balance 16
Image by Photos By Passy – For Educational Use Only

The idea is to take a photo of the card and use your camera’s custom white balance to set a WB to use for the given lighting conditions.

Here is a simple two minute video on how to do this.

If you don’t have a standard black/grey/white board or cards to photograph, then an approximation is to find an item which is white or light grey and use that.

Eg. When shooting a band, you could try and custom white balance using the band’s song list which you could find somewhere on the stage written on white paper.


Here is a Gary Fong Video on how to custom white balance on a Sony camera using one of his Grey Domes:


Adjusting White Balance in Post Processing

If we take a picture in “Raw format” with somebody holding the white balance card, then later on in post processing in a program like Adobe Lightroom, we can adjust a whole group of photos to have the correct white balance.

The following video shows how to do this.


Videos About White Balance

Here is a great 10 minute video all about white balance, which has real life examples being done by the Photographer.

It also shows how to do Custom White Balance.


Here is another 11 minute video all about white balance.


References and Further Reading

The following articles contain useful information about White Balance:

Cambridge In Colour White Balance Tutorial

Digital Camera World White Balance Articles Index


Subscribe

If you enjoy visiting Photos By Passy, why not get a free subscription to the website.

You can then receive notifications of new items and updates directly to your email address.

Go to the subscribe area on the left hand sidebar, (or down the bottom of the page if using a mobile phone), fill in your email address and then click the “Subscribe” button.

Enjoy,
Passy

DRRsepia836x463JPG

How to Make Old Style Photos

We can turn color photos into old style brown photos (“sepia effect”) by using layers in Photoshop.

This turns our color photo into an old style picture, like the ones taken in the early days of photography.

ColortoSepiaJPG528wide

The following YouTube video explains how to do this step by step using Adobe Photoshop.


Subscribe

If you enjoy visiting Photos By Passy, why not get a free subscription to the website.
You can then receive notifications of new items and updates directly to your email address.

Go to the subscribe area on the left hand sidebar, (or down the bottom of the page if using a mobile phone), fill in your email address and then click the “Subscribe” button.

Enjoy,
Passy

How to Find Your Photo

If your picture has been taken by PBP, there are three ways to find the photo:

1) Check through our Facebook Page
2) Check through our Flickr Photo Albums
3) Check on our Index Page

These three methods are detailed below.

If you want to save a copy of your photo onto a PC, Laptop, or Mobile device, then finding the photo in Flickr Album Galleries is the recommended approach. Once you have found your photo, see our separate “How To Guide” about saving copies of Flickr photos at the following link: How to Download and Save Flickr Photos

If you want to tag yourself or other people in the photo, or share the photo on Facebook, then you will need to find the photo in one of the albums posted in our timeline updates on our FB page.

The photos we upload to the Web are usually optimised to a Facebook width of 960 pixels, a resolution of 72 dpi, and include a watermark containing our logo. These photos are not suitable quality for Printing or Photoshopping. If you require larger higher resolution photos, then message us using our website “Contact” Page.

Note that as the photographer, we legally own all copyright to our photos. You are not permitted to alter our photo in anyway, or to remove the watermark. However, you are allowed to download copies of our photos and upload them to the Web and share them on Social Media sites with the watermark still visible.


Finding Your Photo on Facebook

The “PBP – Photos by Passy” Facebook page is located at the following link:

Photos by Passy Facebook Page

If you browse through our timeline you will find albums that we have posted to Facebook.These albums are set to “Public” and so you should be able to find your photo in one of our recent albums.


Finding Your Photo on Flickr

The photos in our Facebook albums are also uploaded into “Albums” on the online photo sharing application called “Flickr”.

To find your photo on Flickr, go to the following page, and start looking through the photo album galleries. The most recent photo galleries are usually first in the list of Flickr Albums.

Use the following link to get to the PBP Photo Galleries on Flickr:

PBP Photos by Passy Flickr Albums

If you want to save a copy of your Flickr photo onto a PC, Laptop, or Mobile device, then read through the “How To Guide” about saving Flickr photos at the following link: How to Download and Save Flickr Photos


Finding Your Photo on the PBP Index Page

There is an Index Page for our website, which lists all of the items and photo collections which we have created. Check through the index and find the entry which is most likely to contain your photo and click the link.

Use the following link to get to the PBP Index Page:

Photos by Passy Index Page


Contacting Us

If all else fails, and you cannot find your photo on Facebook, Flickr, or our Website; then use the “Contact” page on our website to send us a message. In your message include: The Date the photo was taken, the Location where the photo was taken, and the Event being attended, as well as a photo of yourself so that we know who to look for in the images.

Our Contact page is on our Website and also at the following link:

Photos by Passy Contact Page

Sometimes a photo might be taken by us which is out of focus, or was photo-bombed by somebody, or has inappropriate content in the photo or its background. This is a rare occurence, but it may have turned out that your photo did not end up being published to the Web by PBP.


Important Note About Venue Photos

When we took your photo, we may have mentioned to you that it would be used on a Band, Business, Venue, or Person’s Facebook Page, Website, or other Internet Location. However not all photos end up on these pages.

It is at the discretion of the Band, Business, Venue, or Individual who engaged PBP to be at the event taking photos, as to whether or not they decide to use these photos, and where they upload them to on the Web.


Issues and Concerns

If you have any concerns, or need to request that a photo be removed from our Website or Galleries, then please message us using the website Contact Page.

Enjoy,
Passy

FlickrSaveFeaturePic836x425

How to Save Pictures from Flickr

All PBP Photos are loaded onto Flickr, and copies can be obtained from Flickr using a web browser on either a PC, Laptop, or Mobile Phone.

First we have some videos on how to Save (or Download) photos to a Computer or Laptop.

Following this there are some step by step written instructions on how to save copies of photos for PC, Samsung Galaxy, and iPad.


How to Save Photos – Step by Step Videos

Video about Saving Flickr Photos using a Windows PC


Video about How to Save a Photo using a Mac


Written Instructions

The first thing to do is get into the Flickr Photo Gallery (or “Album”) which contains the picture we want to save a copy of.

(Note that we can save pictures which are on Facebook; however the resulting quality is not as good as a Flickr Save or Download).

Next step is to mouse over and click or tap the photo we are interested in.

How to Download Flickr 1

This will take us to a large size preview of that particular photo:

How to Download Flickr 2


Note that the screenshots shown here are for doing this process on a PC or Laptop, using Google Chrome as the browser.


Mobile devices behave slightly differently.

For example on a Samsung Galaxy the process steps are :

1) Tap on the desired photo

2) Click on “View More Info about this photo”

3) Click on “View all Sizes”

4) Tap on what size you would like: Medium, Large, or Original

5) Hold down finger on the picture, until a pop up menu appears

6) Tap “Save image” on this pop up menu.

– Note there are iPad saving/download instructions near the end of this page.


Let’s return to the process steps for a PC or Laptop:

Here is where we have clicked on the image in Flickr, and it is now opened up on the Display Screen:

How to Download Flickr 2

On the very right hand side of this screen, half way down, there is a three dots “…” icon,(called “More Actions”), as circled in the screen capture shown above.

The next step is to click or tap on this three dots icon.


This should open up a dialogue box, where the “Download Option” can be clicked or tapped, as shown below:

How to Download Flickr 3

Click or tap on the “Download / All Sizes” option.


There will now be a pop up box, where you can click to select the required size, and then click the “Download” button.

How to Download Flickr 4

The file should then go to the “Downloads” folder on your PC or device.


Saving a Flickr Photo to an iPad

The following steps should make this happen.

1. Go to the all sizes page for a given photo, accessible from the “…” menu.

2. Choose a size.

3. Tap on the “Download the XXX size of this photo” link.

4. Tap and hold on the image, and then tap “Save image”. The image will be saved to your camera roll.


Subscribe

If you enjoy visiting Photos By Passy, why not get a free subscription to the website.
You can then receive notifications of new items and updates directly to your email address.

Go to the subscribe area on the left hand sidebar, (or down the bottom of the page if using a mobile phone), fill in your email address and then click the “Subscribe” button.

Enjoy,
Passy